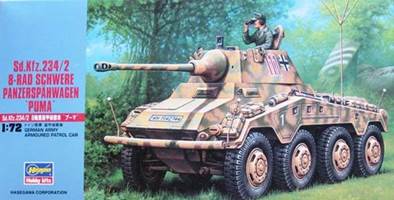
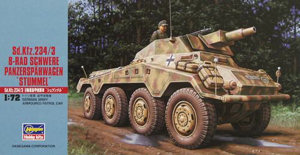
| 1.
Introduction
While
1/72 scale modelers have had to wait for a long time for an injection
molded Sd.Kfz.234, the waiting was worth it and we now have ample
choice. Doug Chaltry has written a comprehensive article
that sums this all up very nicely. Hasegawa is one of the brands that
jumped on the bandwagon and while Hasegawa's kits aren't always the
best on the market, the Sd.Kfz.234 series they released is one of
my all-round favorites. So far Hasegawa has released the /1, /2 and
/3. I had hoped they would have followed up with the /4, as they basically
have all the parts needed (combining these kits with their Sd.Kfz.251/22),
but this possibility now seems very remote.
As I am not the only one who has high esteem of these kits quite a
number of previews and reviews have already been written of these
kits, links to which can be found in the abovementioned article.
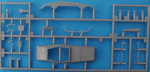
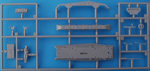
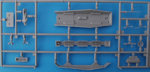
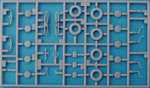
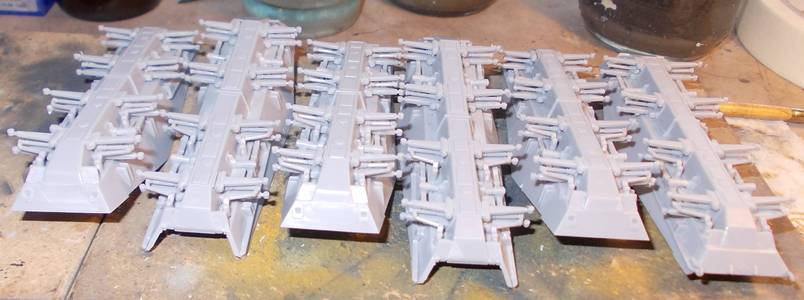
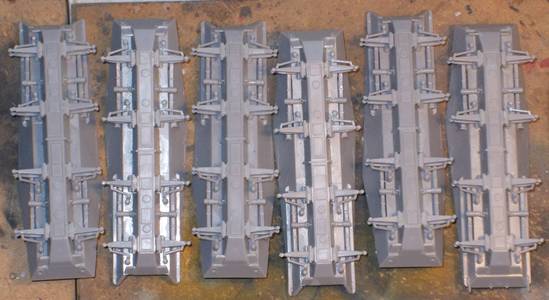
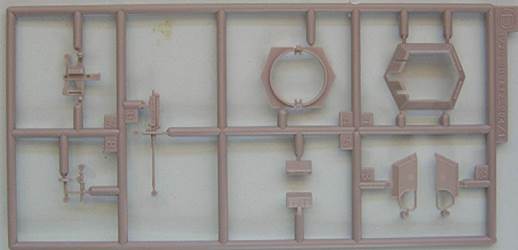
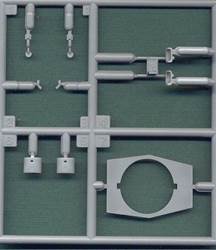
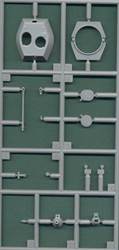
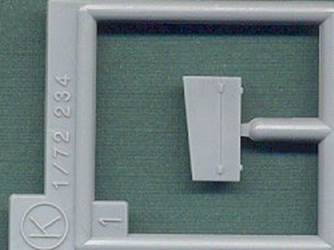
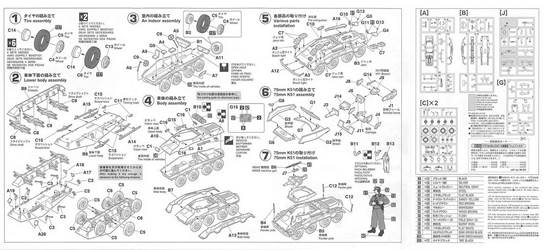
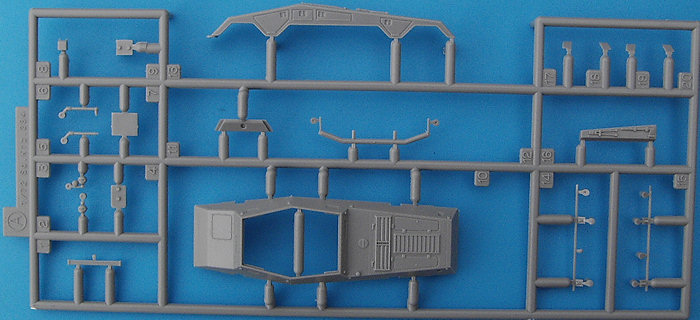
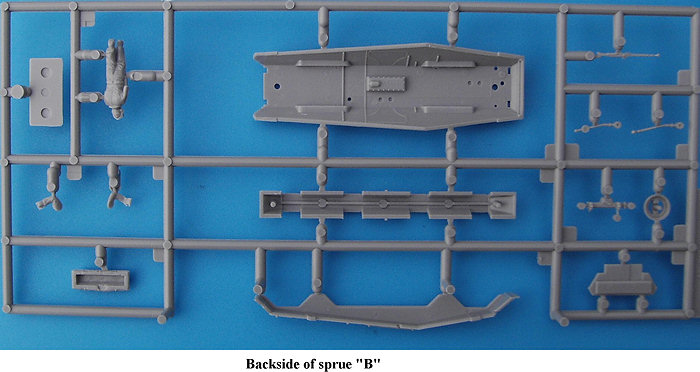
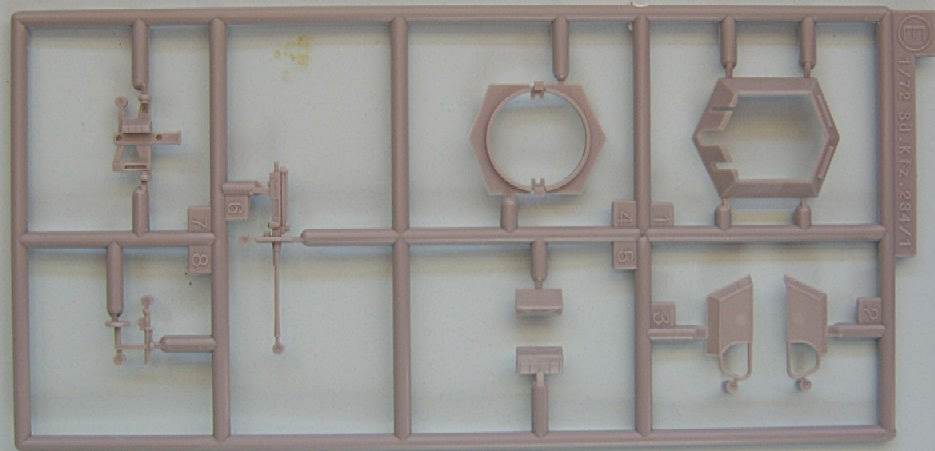
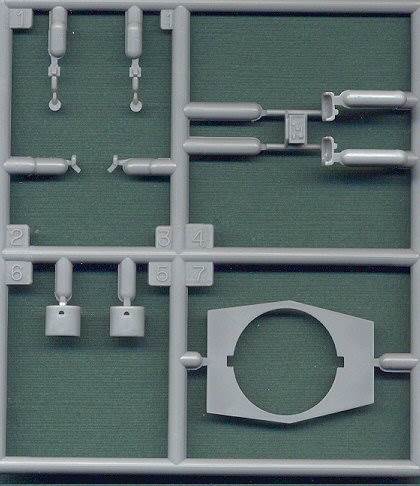
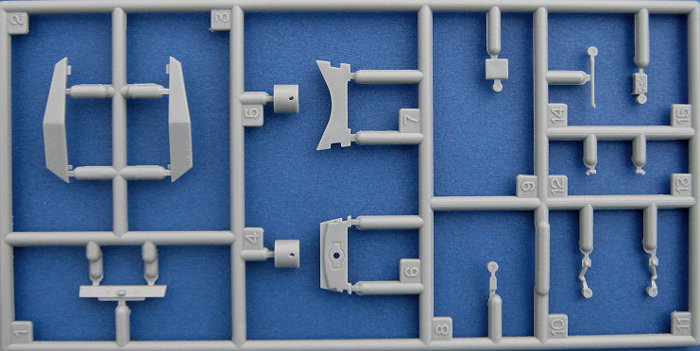
The three
kits have most of their sprues in common; these are shown below. (Note
that the sprue with the wheels is included twice.)
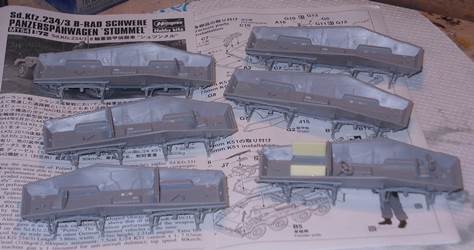
As I
have a sweet spot for the "234", I decided to build all
known variants (6 in total) based on the Hasegawa kits.
2.
Comments applicable to all the variants
Prelminary
note: for an overview of the production and evolution of the 234 series,
this short article
might be interesting.
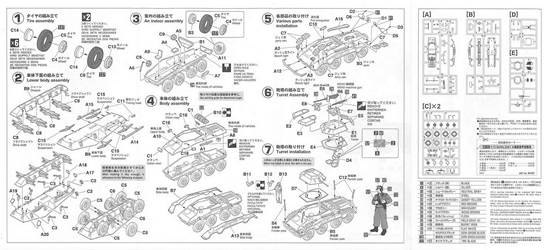
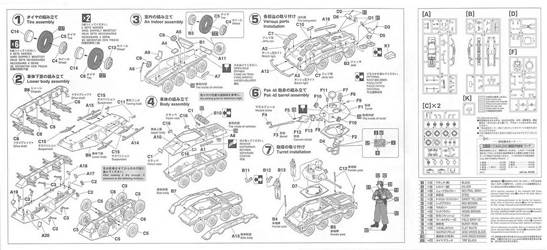
- In
my opinion the manual is extremely good. Some parts are named and
attention is drawn to possible mistakes, like the possibility to
install the transmission cover on the lower hull the wrong way around.
The English used is sometimes a bit, well, say "unorthodox",
though.
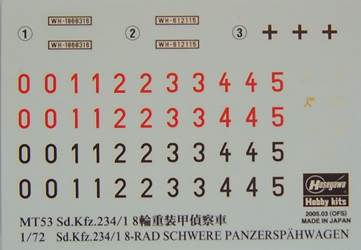
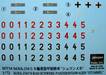
- The
decals appear rather thick on the sheet, although they are actually
not that bad when applied and given a coat of setting solution.
Hasegawa sometimes allows some to be used "freely", whatever
that may mean.
- The
lower hull is common to all kits and is very well detailed, with
good fit, even though (as I discovered) installing the lower rear
hull plate before mating the top and bottom hull is not necessarily
the best idea, as it can (and invariably will) result in a small
gap. There is also an overhang between the upper and lower rear
hull in the kit which I believe should not be present.
- The
way the kit is engineered, the wheels can easily be installed at
an angle to represent a turning vehicle. (The Sd.Kfz.234 had 8-wheel
steering, by the way.) Seen from the front or the rear the wheels
should have a slight V-stance, which Hasegawa didn't readily provide.
Most judges will interpret the V-stance as a construction error
anyway, trust me.
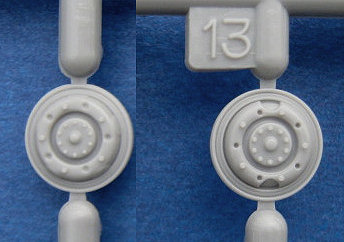
The two sprue "C"s contain a total of 12 wheels/tyres
with 2 different types of thread and 2 types of hubcaps. So, although
you only have enough of one type to completely outfit the kit, you
can choose to have some variation for some of the wheels. The manual
has different wheel-types installed on station 3 (L&R), although
I fail to see why you couldn't just use them anywhere, representing
a field replacement, or use the same wheels as on the other stations.
As I was building 6 kits at the same time, I had some better possibilities
to play with those hubcaps (even though I replaced the wheels with
aftermarket parts in some of my kits).
Note that the wheels are perhaps the most disappointing part of
the kit with a rather soft thread pattern, while the hubcaps might
have been better detailed as well.
- The
fenders are of the intermediate (most common) type and (unfortunately)
are hollow underneath, but normally you won't be able to see too
much due to the presence of the wheels. (I have no idea how the
fenders looked like on the underside anyway.) Opening up the bins
requires some delicate surgery.
Installing the fenders is made easy due to the shape of the hull
and locating pegs, even though some care is needed to ensure a snug
fit. The fenders also hide any seam that might exist between the
upper and the lower hull. There is a molding seam on the top of
these fenders, which I took for a welding seam at first. I now believe
that the fenders should be smooth in that area. I discovered this
too late for one of my models.
Most tools are molded on the fenders but are decent nevertheless.
- If
you like to show a bit of the interior (which is mostly the case
for the open topped vehicles), then the awkwardly positioned ejector
marks on the inside of the hull might be a challenge to remove.
Speaking of the interior, some equipment (like gas masks) is missing,
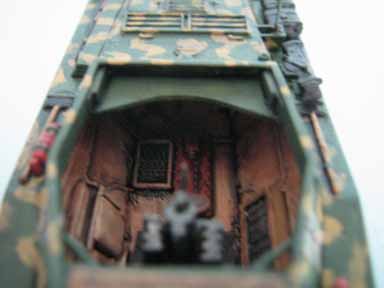
but some eye candy is provided in the kit nevertheless.
One thing that I didn't immediately catch is that Hasegawa has modeled
the rear seat in the folded down position (as it would be when not
in use), thus showing the springs in the backrest.
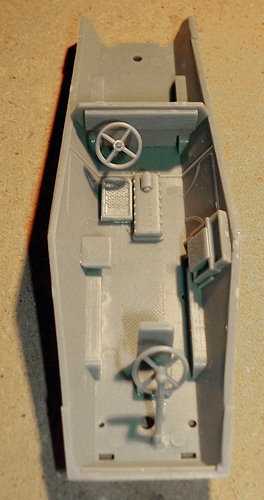
I found the front seat rather poor. On the other hand, it must be
said that it will be hard to see, even in the open-topped vehicles.
As far as I can tell part A7 is an ammo rack. If so, then I doubt
whether it would be the same for all the three variants that Hasegawa
offers. As far as I can tell the /3 had a rack that best resembles
this part. As this variant will show most of its interior to the
public, this seems ok. I am not 100% sure which side is up (the
instructions are exceptionally vague here), but I think the way
I've fitted it in the vehicle shown above is correct.
- The
instructions seem to tell you to install and remove part A1. It
might be that only the small tab below the part needs to be removed,
which would actually make sense. Note that this part represents
the gun cleaning rods and as such is only accurate for the /2 (and
perhaps the /4).
- It
is nice that width indicators are given, even though they are a
wee bit overscale. The rear view mirror on the left front width
indicator might also be positioned a bit higher.
- The
visors have recesses behind them, but opening them will require
surgery to open up the hull behind.
- The
horn is included. This is a part often forgotten in kits in general.
- Hasegawa
has you install headlights on the left and right fender for all
variants, which is only correct for the /2 as far as my references
teach me.
- A
weak part of the kit are the lifting hooks. These are represented
as miniscule tabs and might do with replacement.
- The
MG42 (needed for the /1 and /3) is mediocre.
- The
instructions let you choose to install part A8. This is the armored
base for the extra star antenna of the command version. It seems
that a lot of non-command vehicles had the pot pre-installed so
they could be turned into command vehicles in the field more easily.
For my kits I used the PE star
from Modell Trans, which at the time of writing is sadly out
of production.
- If
you would like to use the hub of the spare tyre without a tyre,
you can get by just omitting the tyre, but then you should either
accept that the rim is not fully correct, or modify it. Note that
you need to drill out a hole in the rear plate if you want to install
a spare tyre, which means the hull will stay "clean" if
you just leave it off.
- The
jerry cans lack the detail showing the three handles. Careful scribing
will handle this.
- Installing
the tarp (B10) will block the view from the rear visor. I have not
yet seen a similar tarp in photographs of the real vehicle.
- According
to Doug Chaltry the
dimensions of the kit(s) are mostly accurate.
- The
front bumper is a difficult fit as the angles of the different attachments
just don't add up. After much trial and error, the only solution
that worked for me was to drill out the attachments in the nose
(giving a sturdier attachment), removing the lateral braces (that
go to the fenders) and replacing them with strips of plastic.
- Only
the /3 comes with the late style exhaust, although the /3 also used
early types and the /1 also used late types. I discovered that the
mufflers and exhausts in the kit are actually indistinguishable
between types; only the pipe between the hull and the muffler is
distinct. It is thus rather easy to convert any kit from one type
to another.
- A
figure is provided, which is nice, even though it is not the best
I've seen. It has an optional arm holding binoculars.
3.
Comments specific to the different variants
3.1.
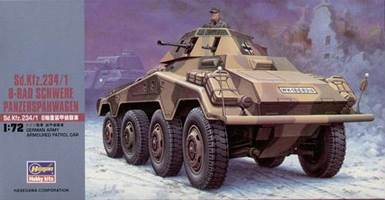
Sd.Kfz.234/1
Kit
MT53 has two specific sprues, for the top of the hull (shared with
the /2) and the turret. One's attention is immediately drawn to
the solid mesh, which is - by far - the weakest point of this kit.
I replaced mine with the Modell Trans PE set (MTX7201).
A few
changes need to be made compared with the instructions:
- The
/1 only had one headlight (on the left, together with the horn).
- It
did not carry the cleaning rod (part A1) on the left side of the
hull.
- It
probably did not have the same ammo rack as the /3 (which I guess
is what part A7 represents).
- I
added an antenna made from the remains of a setting pin to the
turret.
What
is not necessary, but what I chose to do is:
- Thin
down the edges of the small shield that is attached to the main
gun.
- Replace
the barrel with a metal part (which I think came from RB Model).
-
Install a late type exhaust.
- Replace
the exhausts by short sections of brass tubing.
- Replace
the wheels with Attack
resin wheels.
- Replace
the width indicators with the ends of setting
pins.
- Add
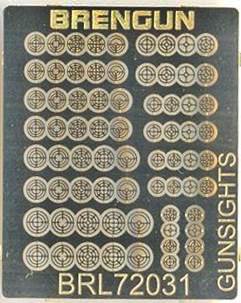
a ring sight from Brengun.
Some
other notes:
- The
gun can be positioned at an elevation.
- The
ejector marks of the roof plate (part D7) are on the same side
as the rivet detail, which could easily have been avoided when
designing the kit and now requires filling and sanding.
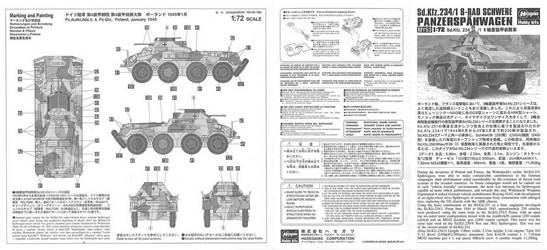
- The
marking option offered by the kit for a vehicle of 4 Pz.Div. has
a hard edge camo and is (most likely) equipped with the late fenders
with only two bins. It happens to be the same marking option as
Kagero gives in its Photosniper book. A picture of the vehicle
also shows it without the cover of the (single) headlight and
without a horn. I decided that my vehicle would be a sister vehicle
to that one as I didn't fancy modifying the fenders.
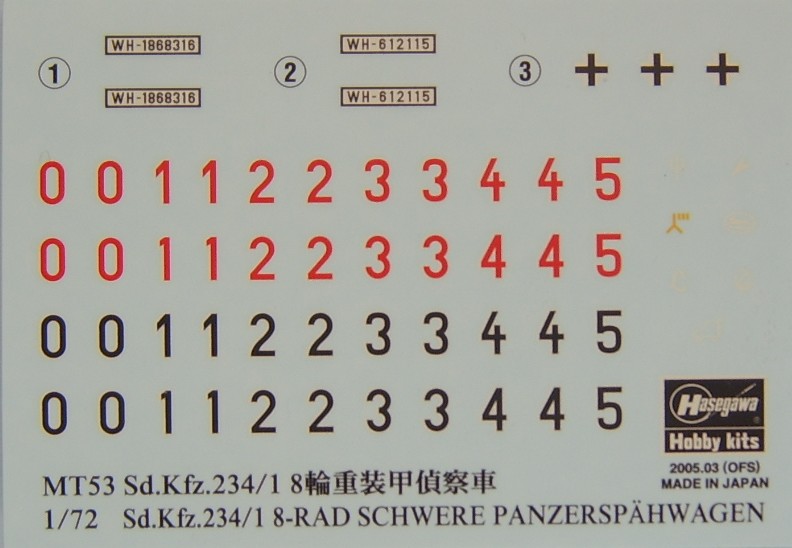
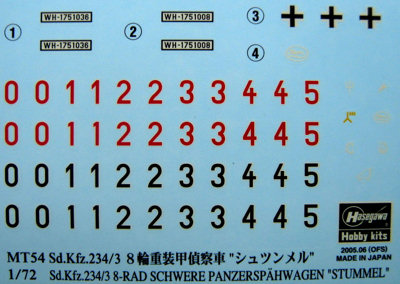
- Spare
decals are given for
- 2
Pz. Div. (trident)
- 4
Pz.Div. Kursk marking (arrow). The Sd.Kfz.234 was not yet
operational during the Kursk battles.
- 10
Pz. Div. (inverted Y with three ticks). The latter is a bit
surprising as according to my references this unit never used
the Sd.Kfz. 234. (10 Pz.Div. was destroyed in North Africa
well before the service entry of the Sd.Kfz.234 and never
reformed.)
- 116
Pz.Div. (greyhound).
- 130
Pz.Div. / Pz. Lehr (L).
-
LSSAH (key in shield).
- an
armoured recce unit (which can be used on this vehicle I guess)
- spare
black/white and red/white numbers in different styles.
- I
used decals from Almark (set T3 for the black crosses) and Aleran
(GE-2 for the licence plates). The resulting markings and camo
are purely speculative but similar to a known vehicle.
About
the decals, Tim Lau adds:
- WH-612115
is for a yellow
vehicle captured and studied by the British.
(Tamiya offers marking instructions in its 1/35 kit.)
-
WH-1868316 is correct for the 4.Pz.Div. vehicle. It has the late
fenders.
These late Sd.Kfz. 234/1 vehicles had a factory scheme, practically
identical to the SdKfz234/4.
Hasegawa's
painting instructions were good for its time but cannot be considered
good enough in view of recent research.
Pictures
from Henk
of Holland, used with permission
_t.JPG) _t.JPG)
 _t.JPG) _t.JPG)
Post
contruction edit:
A very easy and worthwile addition might have been the levers for
the rear driver's position which are quite prominent in an open
topped vehicle.
Tim
Lau adds: "As
for your model, you may want to add a 1 in the license plate to
put it in the 1.4 M range. I do not think license plates for the
SdKfz234/1 get so low to be in the 400 K range."
3.2.
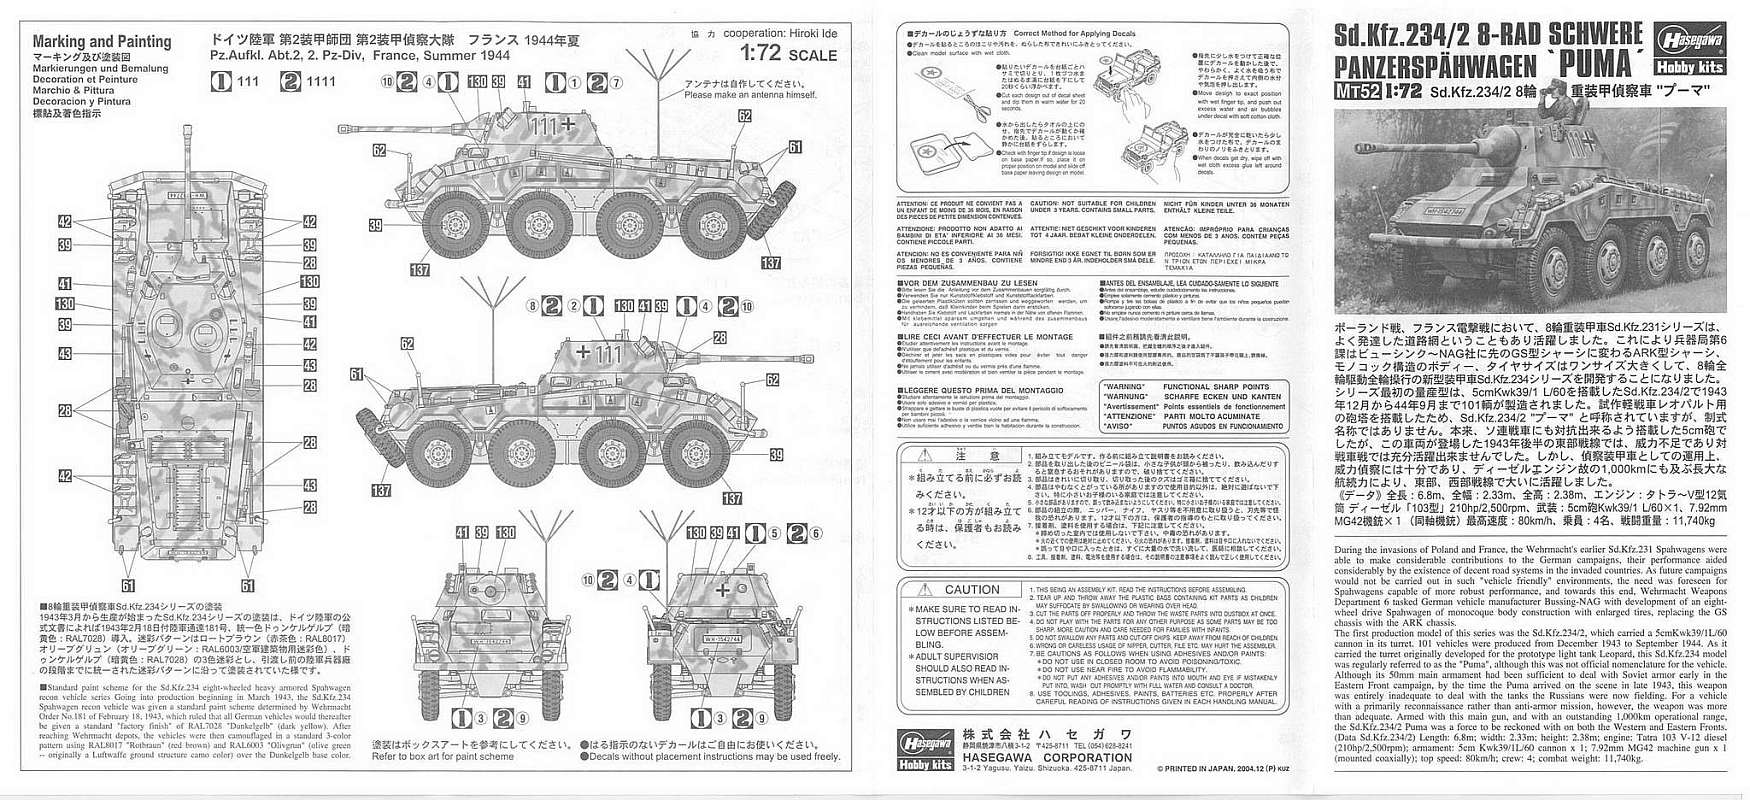
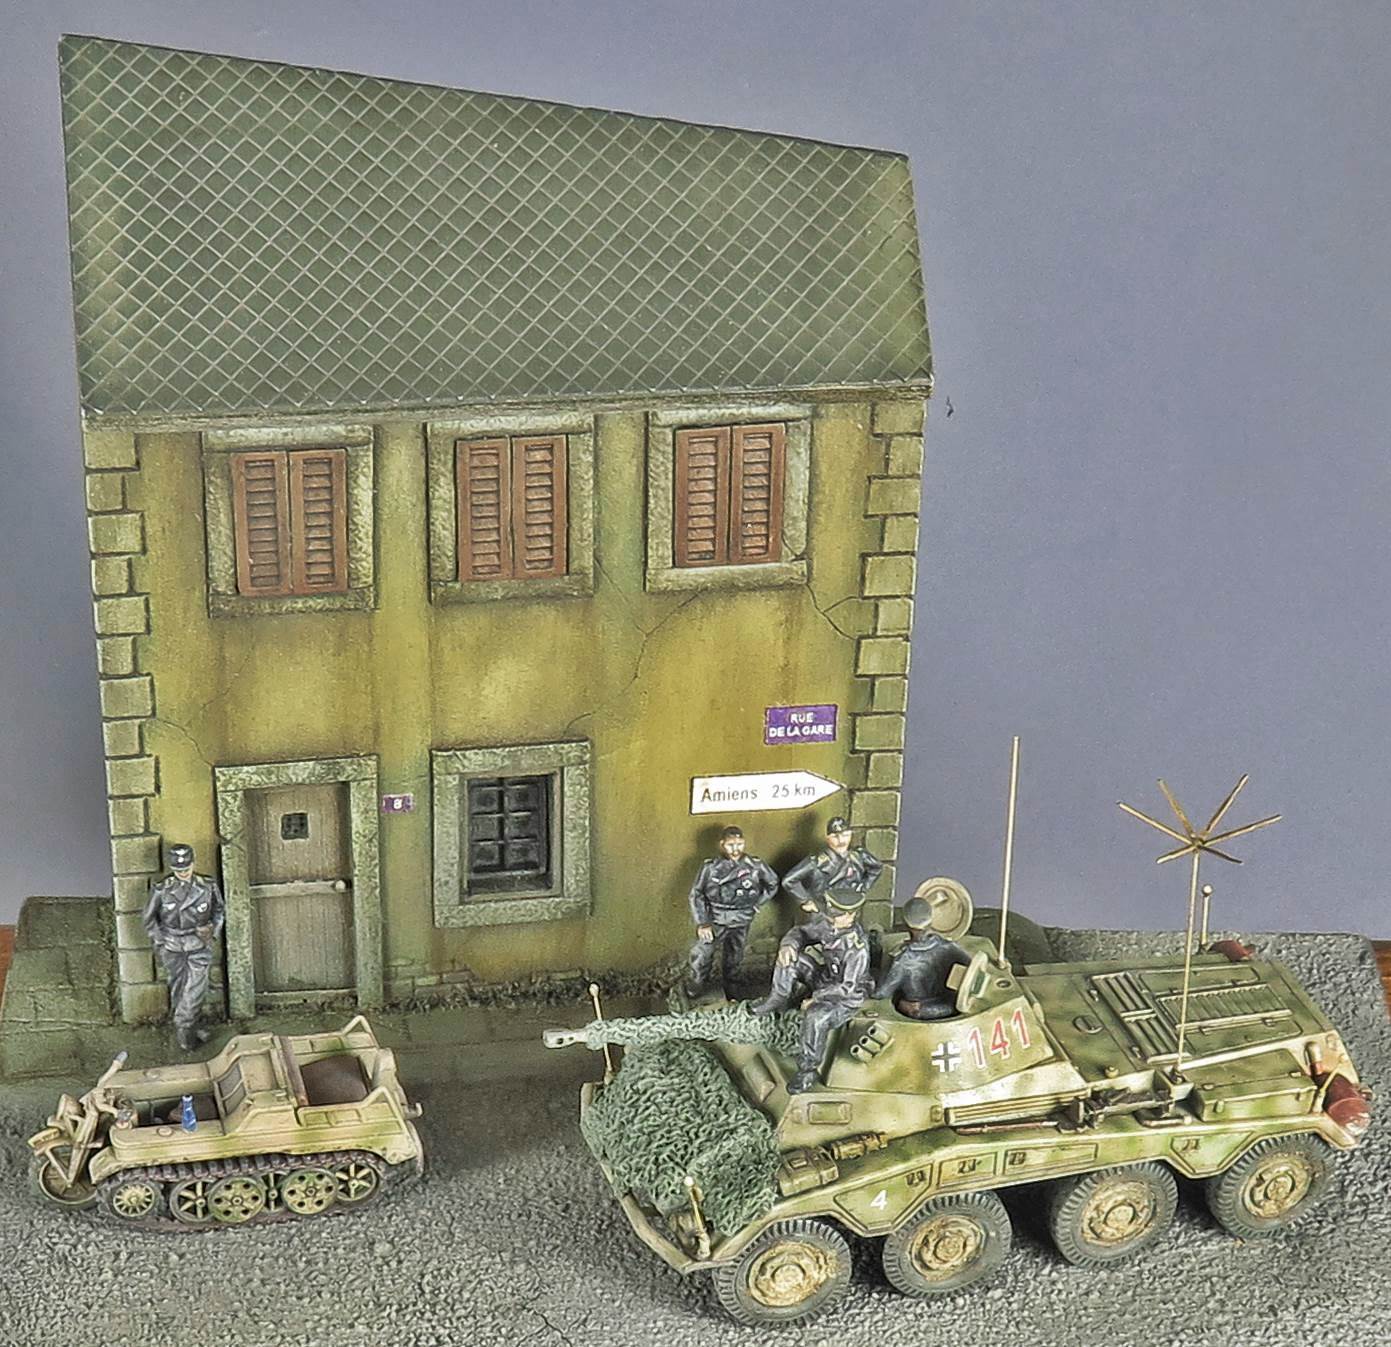
Sd.Kfz.234/2
Kit
MT53 has three specific sprues:
- for
the top of the hull exhausts and seats (shared with the /1),
-
the turret and
-
an optional box.
What
is not necessary, but what I chose to do is:
- Use
the Goffy set. While
the set is nicely done, I am not really convinced of its value.
Still, it allowed me to avoid using the gun barrel which comes
with the kit and which is too narrow.
- Replace
the width indicators with the ends of setting
pins.
- I
added a star antenna from Modell Trans atop the shaft of a setting
pin.
- Hollowed
out the smoke grenade launchers. If you want them loaded, filling
them in might be an even better idea.
- Make
a spare tyre mount, used without spare tyre.
- Add
episcopes to the inside of the hatches and add some extra detail
to the inside. I built a second, destroyed vehicle, and this one
got even more interior detail added.
Some
other notes:
- Unless
you open the hatches, the interior that Hasegawa gives you can
be left out and used for other projects. If you open the turret
hatches, adding the MG and KwK breech (with recuperators and spent
cartridge bag) might be a good idea. I made mine from scratch,
even though I used the Goffy set which contains a breech. I also
added a couple of rounds and MG ammo bags. Note that my representation
of the interior is speculative.
- The
ejector marks of the roof plate (part D7) are on the same side
as the rivet detail, which could easily have been avoided when
designing the kit and now requires filling and sanding.
- You
can choose between the extra box or jerrycans on the left rear
fender. Check your references to see what you need. ("1111"
needs the box for instance.) Note that the box doesn't fit too
snugly.
- The
Topfblende (aka "Saukopf") might benefit from a rougher
texture.
- If
you choose to install the hatches in the closed position, you
need to remove the pegs.
- The
marking options are for well-known vehicles of 2 Pz.Div. One of
them happens to be the same marking option as Kagero gives in
its Photosniper book. I decided that my vehicle would be a sister
vehicle to those.
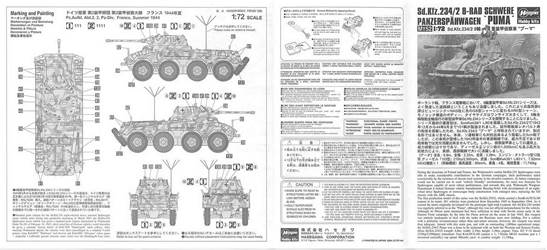
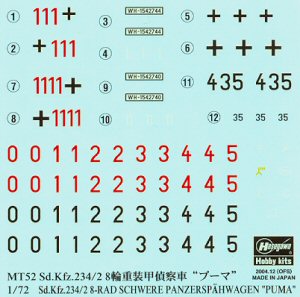
- Spare
decals are given for
- 2
Pz. Div. (trident)
- 4
Pz.Div. Kursk marking (arrow). The Sd.Kfz.234 was not yet
operational during the Kursk battles and 4 Pz.Dv. never had
any Sd.Kfz.234/2 anyway.
- 10
Pz. Div. (inverted Y with three ticks). The latter is a bit
surprising as according to my references this unit never used
the Sd.Kfz. 234. (10PD was destroyed in North Africa well
before the service entry of the Sd.Kfz.234 and never reformed.)
- 116
Pz.Div. (greyhound). 116 Pz.Div. did not have any Sd.Kfz234/2
as far as historians
can tell.
- 130
Pz.Div. / Pz. Lehr (L).
-
LSSAH (key in shield).
- an
armoured recce unit (which can be used on this vehicle I guess).
- spare
black/white and red/white numbers in different styles.
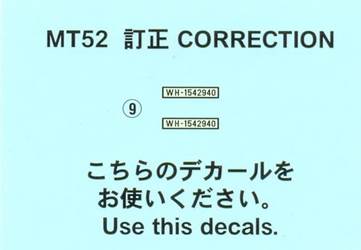
- Earlier
releases of this kit had a decal sheet with a wrong licence plate
number and a corrective sheet. Later issues had a new decal sheet
with the correct number but also somewhat brighter red colors
which look a bit off.
- I
mostly used decals from the kit to make a speculative vehicle
of 2 Pz.Div. The small white "4" on the fender were
found on a sheet that came with a Minitracks issue. A black tactical
sign from Peddinghaus was also added. While no pictures of the
real vehicle are available, the markings are consistent with that
of 2Pz.Div. Furthermore "141" should have been the command
vehicle in the "141-142" pair. (Just for the record,
"142" would have had a black "4" on the fender.)
Tim
Lau adds: "WH-1542940 is indeed correct for 1111."
Pictures
from Henk
of Holland, used with permission
_t.JPG) _t.JPG) _t.JPG)
The
turret with extra detailing.
_t.JPG) _t.JPG)
Left: another turret (for a destroyed vehicle)
using the RB Models brass
barrel (shortened at the muzzle side); right: both turrets together.
_t.JPG) _t.JPG)
 _t.JPG)
_t.JPG)
This
is where one of the vehicles ended up.

A second
one was built as a wreck.
_t.JPG) _t.JPG)
 _t.JPG)
3.3.
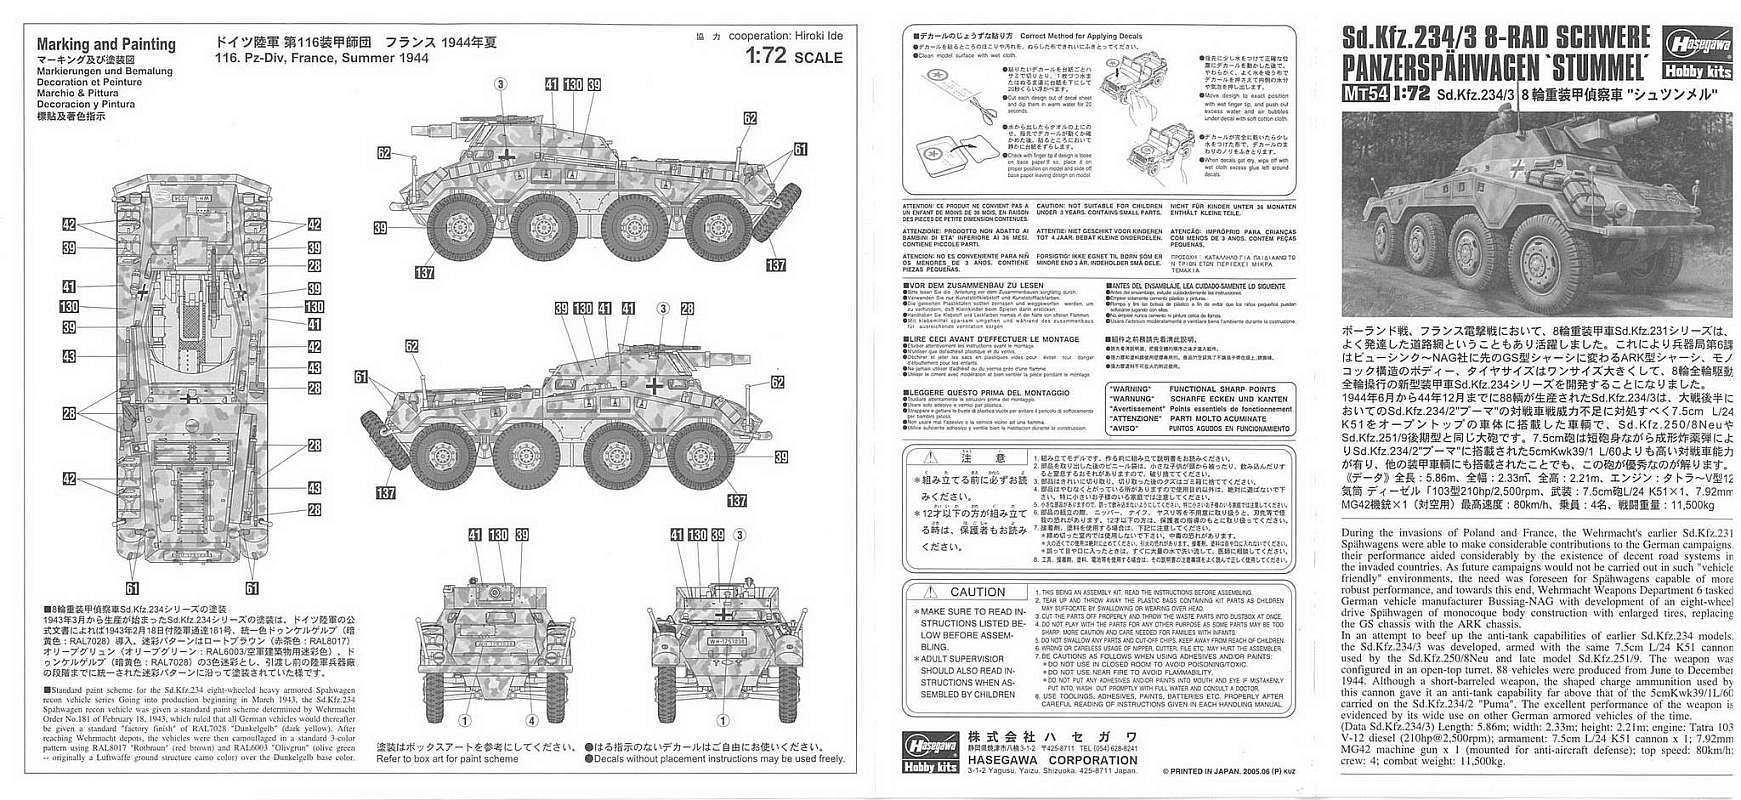
Sd.Kfz.234/3
Kit
MT53 has two specific sprues. The "G" sprue contains the
gun cradle and armored side walls. It also contains a late type
exhaust. Historians are apparently still debating whether this exhaust
was actually fitted during the war, or was only fitted on some vehicles
after capture by the Allies.
Picture by Elliott Winthrop
Sprue
"J" is also for the Stummel variant, although this one
is shared with Hasegawa's Sd.Kfz.251/9; as a consequence the sidewalls
and other parts on this sprue are not to be used.

Picture by Elliott Winthrop
A few
changes need to be made compared with the instructions:
- The
/3 only had one headlight (on the left, together with the horn).
- It
did not carry the cleaning rod (part A1) on the left side of the
hull.
What
is not necessary, but what I chose to do is:
- I
replaced the width indicators with the ends of setting
pins.
- I
added an antenna made from the remains of a setting pin to the
side of the crew compartment.
- I
added a spent cartridge bag, periscope and handwheels from a TnT
Sd.Kfz.250/8. The cartridge bag was given some texture by covering
it with a piece of paper towel.
- I
added a swivel mount to the rear of the fighting compartment for
an extra MG42. The stub to support the mount is already present
in the kit
- I
hollowed out the muzzle a bit more.
- I
omitted two jerry cans and installed empty holders from the Eduard
PE set for the /2.
Some
other notes:
- The
gun mount can be installed without glue, which allows you to reposition
it at will.
- The
kit comes with the late type exhaust. (It's the only one of the
three kits that Hasegawa offers to do so.) I used an early type
from another kit.
- While
a bit more rare, the Sd.Kfz.234/3 could also be fitted with an
extra star antenna.
-
It is not entirely clear how to install the radio set in the crew
compartment.
- In
hindsight, I should have thinned the walls of the additional armor
on top of the fighting compartment.
- You
are only offered one paint scheme (for 116 Pz.Div., i.e. the greyhound),
but you get a second licence plate and a fair amount of spare
decals:
- 2
Pz. Div. (trident)
- 4
Pz.Div. Kursk marking (arrow). The Sd.Kfz.234 was not yet
operational during the Kursk battles.
- 10
Pz. Div. (inverted Y with three ticks). The latter is a bit
surprising as according to my references this unit never used
the Sd.Kfz. 234. (10 Pz.Div. was destroyed in North Africa
well before the service entry of the Sd.Kfz.234 and never
reformed.)
- 130
Pz.Div. / Pz. Lehr (L).
-
LSSAH (key in shield).
- an
armoured recce unit (which can be used on this vehicle I guess)
- spare
black/white and red/white numbers in different styles.
- I
used the decals and marking options from the Kagero Photosniper
book.
About
the decals, Tim Lau adds:
Pictures
from Henk
of Holland, used with permission
Picture by Elliott Winthrop
_t.JPG) _t.JPG)
 _t.JPG)
_t.JPG)
 _t.JPG)
Post
contruction edit:
After finishing the Sd.Kfz.234 with Schwebelafette,
I noticed that the structure that I added to the inside of the supplementary
armor (at the rear) should have been added to the /3 as well. (It
makes sense, as I suppose the vehicle with the Schwebelafette was
a field conversion of the /3.)
A very easy and worthwile addition might have been the levers for
the rear driver's position which are quite prominent in an open
topped vehicle.
3.4.
Sd.Kfz.234/4
Sadly,
Hasegawa didn't follow up on its Sd.Kfz. 234 series with a /4, which
is surprising as they already have three Sd.Kfz. 234 variants and
the Sd.Kfz. 251/22 in their catalogue. It wouldn't have required
much to produce an Sd.Kfz. 234/4. As I wanted some consistency in
my series of 8-rads, I decided to convert a Hasegawa hull to the
/4 configuration. I am not the first to attempt this conversion;
previously, Dave
Showell used four kits for his conversion: Hasegawa, Italeri,
Roden and Dragon. I decided to use only two: a stock Hasegawa kit
(I don't remember which variant I started from, but the /3 would
have been the best choice, in my opinion) and a Roden Sd.Kfz. 234/4,
in order to keep costs down.
I used Hasegawa parts for everything but the gun and additional
armor. Roden then, logically, supplied the gun and said armor. The
lower gun mount that the Roden kit provides isn't correct at all
(cf. marked area in the scan of the instructions below), which meant
that I needed to scratchbuild this area. As the vehicle is open-topped,
a lot of the inside will be seen, and as the Hasegawa kit has no
/4 interior and the Roden Sd.Kfz. 234/4 kit leaves a lot of interior
to be desired, clearly, more scratchbuilding was required.
_t.JPG)
The
upper hull of the Hasegawa kit was adapted to its new role by cutting
out parts of the armor for the fighting compartment, using the Roden
kit as a guide. To this were added the additional armor plates that
came straight from the Roden kit. The adaptation went remarkably
smooth, with only the roof above the driver needing a bit more work
as the Roden kit is slightly wider. I found that removing a section
in the middle of the roof and gluing the remaining parts back together
solved the problem without too much of a headache. (Later on I would
discover that this made the Roden Pak gun shield a very tight fit,
even after widening the opening a little bit.)
_t.JPG) _t.JPG)
 _t.JPG)
In
the pictures below you will see just how much scratchbuilding went
into the lower hull. Grey parts are from Hasegawa, black from Roden
and all other colors (mainly white) are scratchbuilt items. Almost
invisible is the enhanced backrest of the front driver's position.
I had a spare (folded) rear driver's seat, which has a nice spring
pattern to it. I used this spare part to create the same effect
for the upright front driver's seat. At that point I was quite sure,
though, that it would be invisible with the hull assembled. As we
will see, I was proven right and could have thus saved this part
to enhance a kit where it would have actually mattered.
Note that my interior is not 100% correct, due to limitations of
the Hasegawa parts, lack of references and the use of secondary
sources (in casu the Dragon 1/35 Sd.Kfz. 234/4 kit). Also note that
the final interior differs a little from the end result, due to
necessary adaptations when mating both halves of the hull.
_t.JPG) _t.JPG)
First dry fit of some parts
Some
sources claim that the rear steering station in the /4 was removed
or deleted, e.g. the article in the IPMS/USA Journal with walkaround
photos of an d.Kfz.234/4 in England (since returned to Germany).
That article states that there was no evidence in that vehicle of
the gear being fitted in the first place; neither did it appear
that it hadn't just been stripped out of the vehicle at some point.
The inside of the Sd.Kfz. 234/4 was crammed enough without an extra,
redundant steering wheel and seat in the middle of the fighting
compartment, so this would make some sense.
On the other hand, the Sd.Kfz. 234/4 in the Patton Museum definitely
has a rear driving station.
As the /4 replaced the /3 on the production line somewhat hurriedly
after orders from the head of state, it might be that the first
vehicles produced still had the rear driver's station until the
stock of /3 hulls ran out. This is personal speculation, however.
_t.JPG) _t.JPG)
 _t.JPG)
Final configuration of the lower hull interior...
well, at least until I could dry fit the gun.
_t.JPG) _t.JPG)
 _t.JPG)
The new final configuration of the lower hull
interior... well, at least until I mated the fuselage halves.
Adding
the gun cradle to the diagonal U-beams took me almost two hours,
as the cradle has to sit just right in all dimensions, reach the
upper hull in the right place and has to be partially scratchbuilt.
Only then could I dry-fit the gun. This showed that, as far as my
AMS is concerned, it hid enough of the interior to avoid the need
to add any detail to the inside of the upper hull. Unfortunately,
it also showed that the radio (on the left) and the ammo box (on
the right) interfered with the gun shield; their profile was lowered
in situ.
At this point I noticed that the Roden Pak shield doesn't have the
cutouts at the rear. These were easily added.
_t.JPG) _t.JPG)
Cutouts added.
_t.JPG) _t.JPG)
 _t.JPG)
With the hull closed, even less of the interior
could be seen. It would only be getting worse with the gun added.
The
gun assembly of the Roden kit is a fiddly affair and a bit crudely
detailed. To complicate matters, the instructions are not the best
either. The one thing going for the Roden gun is that it can be
put in any recoil position (and can even move as no glue is required).
Careful gluing will also allow movement in elevation and azimut.
I decided to replace the gun barrel with a metal item from RB (72B05).
It was at this point that I realized that I had kept very little
from the Roden kit and that a far cheaper (and better detailed option)
would have been to scratchbuild the hull roof and additional armor
and use a Zvezda Pak 40,
perhaps with the RB barrel.
While mating the gun assembly to the lower hull I noticed that it
wouldn't fit because it interfered with the roof. The reason for
this was that the roof had been made narrower to fit the Hasegawa
hull. Widening the rear cutouts solved this, barely. Note that the
shape of the cutouts in the roof is not entirely accurate and neither
is the angle of the Pak shield.
A flakmount was added to the gun, sourced from the scratchbox.
Having
hesitated for a long time, I finally decided to go for the late
style of fenders, as I only could find a single photograph of a
/4 with early fenders. This required removal of the middle toolboxes
(easily filled in), repositioning of the hinges of the remaining
toolboxes from the bottom to the top (relatively easy as well) and
move the recess for the padlock from top to bottom (rather stressful).
Padlocks
from Hauler were added to hide the lack of smoothness inside
the recess. The whole affair took quite some time before it looked
acceptable to me.
The fenders of the /4 also had a completely different tool lay-out.
As half of the tools in the Hasegawa kit are molded on, the sanding
stick and spares box (MR, Mars
and others) were required to complete the task.
The big box on the right fender, which sould have came from Roden,
was scratchbuilt as the Roden part was far too big to fit the Hasegawa
hull.
Late in the construction I decided to add the walls for the fender
stowage compartments.
_t.jpg) _t.jpg)
The
wheels are stock Hasegawa items, mixing between the two types of
hub and tyre that are provided. I could have used Roden hubs (which
are better detailed), but shied away. Only one headlight was fitted,
as standard for the /4. Late exhaust (i.e. vertical cylinder) were
also fitted. These come with the /3 kit and are very much conjectura,
as these might have been a post-war featurel.
An antenna
mount from BP resin and lift hooks left over from the CMK
set for the Sd.Kfz.251/21 were also used.
_t.jpg) _t.jpg)
 _t.jpg)
 _t.jpg) _t.jpg)
Tim Lau
adds: "All SdKfz 234/4 were probably painted in the factory
scheme. Barry Crook assembled a nice collection
of pictures of factory scheme 234/4 vehicles, and it is well worth
a study."
3.5.
Sd.Kfz.234 with Schwebelafette
Based
on information in [9] and [11], one of these vehicles was captured
together with a number of 234/2s and 234/3s in Pilsen on the May
9th, 1945. It seems to have been with Stabskp./Pz.Aufkl.Abt.20 of
20.Pz.Div. As far as I know, there are three pictures of this vehicle,
all taken after capture.
One
of these vehicles, using the Modell Trans conversion set, was already
built by Tony Ivey.
For my vehicle I followed the same approach as Tony, also using
the Modell Trans set, even though I started from an Sd.Kfz.243/3.
Basic
construction
Apart
from the work needed for the Schwebelafette and the engine I did
the following:
- I
replaced the wheels with those from Attack.
It's a shame that the casting blocks weren't put exactly at
the bottom of the wheels (with respect to their attachments).
It would have allowed to easily hide the section with damaged
thread detail. Now the modeler can either restore the detail
carefully, or hide that part with some natural terrain features,
also known as "mud".
- I
accentuated the welding seams on the nose. In the kit they are
recessed, while on the real vehicle they seem to stand somewhat
proud. (I did not do this with the other kits I built in this
series.)
- I
replaced two jerry cans with empty racks from the Eduard
PE set for the Sd.Kfz. 234/2.
- I
also replaced the lifting hooks with those from the Eduard
PE set for the Sd.Kfz. 234/2.
- I
modified the lateral attachments of the front bumper, by removing
some material from the corners of the fenders. Even though this
is the fifth Hasegawa Sd.Kfz. 234 that I built, I feel this
is the first time that this piece actually went on well.
- I
replaced the width indicators with butterfly
pins. For the sake of completeness, none were seen on the
captured vehicle, but I noticed this too late.
- I
removed some tools and scratchbuilt the attachments. (The vehicle
will hopefully end up in a diorama. Figures for this will come
from Milicast set 62, with minor modifications, while the tools
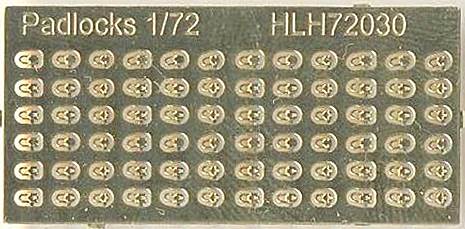
will come from Brengun.)
- I
decided to use the early exhausts, as these were the most common
type and I do not have any pictures of those on the real vehicle.
- I
placed the antenna in the Befehlswagen mount (just as Tony did),
even though the pictures of the real vehicle show an antenna
mount on the front right of the fighting compartment. I have
difficulties believing that this was the original position of
this item as it would have hindered operation of the gun enormously.
- I
opened up the driver's visor. The visors are separate parts,
but the opening in the hull needs to be done by the modeler.
- I
only mounted one headlight, according to the pictures. Only
if the vehicle were converted from a /2 would two headlights
have been fitted.
- I
didn't mount the cleaning rods, as I didn't see them on the
picture and I don't think the 2cm gun would have used the type
given in the kit.
-
I don't think the extra toolbox on the left rear fender (as
fitted to some Sd.Kfz.234/2s) was fitted either.
Schwebelafette
conversion
As
mentioned, I used the Modell Trans conversion set for the Schwebelafette.
I found the parts to be rather brittle. They had a number of air
bubbles and excess resin (probably because of damaged molds),
while detail wasn't extremely sharp, except for the metal gun
barrel. Locating pegs are not given. The set comes without instructions;
only some pictures of the assembled gun assembly are given.
_t.JPG)
Some
additional remarks:
- I
didn't quite manage to figure out how to fit the ammo clips
in the interior as they seemed to foul the operation of the
gun. As pictures of the interior of the real vehicle are not
available, I was left to my own devices to figure out a way.
I ended up slicing the part with the ammo boxes in half and
fitting them on both sides of the hull.
- As
far as I can tell, the second seat should go to the front of
the gun (probably for the loader), but I decided to leave it
off.
- I
beveled the edges of the extra armor plates to make them appear
thinner. I found these plates rather difficult to fit to the
upper hull. Being resin, the necessity of using superglue didn't
help. Next time I might scratchbuild these plates from plasticard,
to get an easier fit. I actually ended up scratchbuilding some
plates after all, as very late in the construction sequence
I discovered that there was some extra structure inside the
added armor plates, both at the rear (forming some kind of compartments)
and in the front (where they seem the reinforce the corners
of the upper hull). From the few pictures I have, it seems that
the fighting compartment is open at the front up until the very
edge of the armor plate. Modell Trans gives a shelf both at
the front and the
rear. I believe only the shelf at the rear is correct.
- The
two handrails on the small "turret" armor appear to
be higher up in the pictures. I didn't bother. The rear lower
corners of the "turret" also need to be slightly beveled.
To Modell Trans' credit, they did capture the small offset plate
at the top left, which Dragon didn't notice in their 1/35 kit.
_t.JPG)
Picture from Dragon's 1/35 Sd.Kfz.234/3 w/2cm
Schwebelafette (kit 6296) taken from Super-Hobby
site.
-
The manual asks to add two rods on top of gun: I am not sure
if I installed them correctly.
-
A small support for an AA MG (?) needs to be added to the additional
armor plate at the rear.
- I
first thought that I would need to add an aiming reticle, but
it seems none was fitted to the real vehicle.
- In
my opinion, the item seen in the pictures and that appears to
be a wooden beam below the gun barrel was added after capture,
but I might be mistaken. It is not given in the kit and I decided
not to add it.
Apart
from these minor gripes, I believe the conversion set is accurate
[9,10].
_t.JPG) _t.JPG) _t.JPG)
Engine
set
I
decided to use the CMK engine set
on this vehicle. The CMK instructions would only have you open
the small upper hatches, but this would leave most of the nicely
rendered engine invisible, especially the part to the rear.
Instead, I decided to take off the whole of the engine deck and
open the rear hatch as well. This made the upper hull rather flimsy,
as not much plastic remained around the engine. I felt that the
sides of the hull needed to be thinned down to scale, further
weakening the structure.
Comparing the instructions to pictures of the real thing, I noticed
that the engine needed to be moved more to the rear (so the cylinders
line up with the hatches) and the fuel tanks moved forward. This
obliged me to add an extra section of engine shaft to link the
engine to the bulkhead that separates the engine and fighting
compartment. CMK asks to add tubing for the exhaust collectors.
With the whole of the engine deck removed, these needed to go
all the way to the mufflers.
With the rear hatch open, I decided to remove the spare wheel
(without tyre), as I think this would have been done to ease access
to the engine. Late in the construction I also noticed that I
needed to add some (as yet unidentified) detail to the inside
of the rear hatch.
People
who prefer to keep the engine deck on, might give the use of the
PART PE set a
thought, as this would provide see-through louvers that would
allow to peek into the engine compartment. Still, I don't understand
why CMK gives so much detail, but only allows for two open hatches;
adding the rear hatch would have been a real bonus.
_t.JPG) _t.JPG)
 _t.JPG) _t.JPG)
Painting
I
don't know if my paint scheme is correct for this particular vehicle,
and it most likely isn’t, but I painted it according to
my research for a
late-war vehicle: green-grey floor, white hull sides, exterior
color on the visible parts of the interior. My floor and transmission
box should probably have to be red primer (like the engine compartment),
but as earlier in the war the crew complained that an overall
red oxide interior was too dark, it might be that some manufacturers
went back to the original scheme when they re-instated Elfenbein
for the sides.
The
camouflage scheme and markings were based on the pictures of the
sole known vehicle. The paintjob of the vehicle seems very worn,
which I'd try to replicate by using Agama Patinators for the splotches
and a lot of scratching and chipping.
Balkenkreuze were sourced from Archer (for the hull) and Minitracks
(for the turret). Licence plates were created with some spare
black and white decal
and with numerals from Dragon's Sd.Kfz.251/1 Ausf.D. While
a real pain, these separate numerals allow the modeler to replicate
any licence plate code, which comes in handy when building after
historical references.
_t.JPG) _t.JPG) _t.JPG)
 _t.JPG)
 _t.JPG) _t.JPG)
 _t.JPG) _t.JPG)
 _t.JPG) _t.JPG)
 _t.JPG) _t.JPG)
 _t.JPG)
Post
contruction edit:
A very easy and worthwile addition might have been the levers for
the rear driver's position which are quite prominent in an open
topped vehicle.
3.6.
Sd.Kfz.234 with Luchs turret
This
is a very elusive vehicle, with only a couple of pictures known
of one vehicle most likely in Czechoslovakia in May 1945, possibly
belonging to 17 Pz Div [9]. It is not clear from the available information
if the turret could turn.
The pictures
show two headlights, so it is most likely based on the Sd.Kfz.234/2.
As word has it that more than one vehicle was so converted, I took
the artistic licence not to faithfully replicate the vehicle in
the pictures.
I used
an Hasegawa Sd.Kfz.234/2 for the body and just added the Modell
Trans Luchs conversion turret to it. It is not clear if the
turret in the picture is an early or late type. I replaced the hatch
on the turret (which was badly cast) with the corresponding part
of the Hasegawa kit and added a periscope base to the inside. The
gun barrel was replaced with a brass item, which I believe came
from Aber, but it is difficult to tell as I have a large stock of
2cm KwK barrels and they come from different sources, all thrown
together. The turret MG came from Aber.
An antenna made from an insect pin and handholds made from copper
wire were also added to the turret. The turret is solid, with a
recess for a commander figure, which will be added later.
Normally, in this configuration, nothing can be seen of the interior.
I did open up the front visor, but this will change little. Consequently,
I left out all of the interior bits for further use on other projects.
The cleaning rod on the left side of the hull (as per the /2) was
left off and a star antenna from
Modell Trans added, making this a (hypothetical) command vehicle.
I also chose to use the extra box on the left rear fender instead
of the jerrycans, which is purely speculative. The picture of the
real vehicle also shows some non-standard boxes fitted to the fenders.
I used the kit wheels, but mixed tyres and hubcaps. The spare wheel
was left off.
Note
that the Modell Trans turret slightly overhangs the hull, which
is not the case in the picture of the real vehicle. So either the
turret is a bit too wide, the hull a bit too narrow at the top,
or both.
.JPG) _t.JPG)
.JPG) .JPG)
_t.JPG) _t.JPG)
 _t.JPG)
_t.JPG)
_t.JPG)
_t.JPG)
Family
portrait (with one illegitimate sibling)
_t.JPG)
References
[1] Die Gepanzerte
Radfahrzeuge des Deutschen Heeres 1909-1945, W.J. Spielberger. Band
4 der Reihe "Militärgahrzeuge" , Motorbuch Verlag
[2] Panzer
Tracts No. 13 - Panzerspähwagen, by Jentz and Doyle
[3] Sd.Kfz.234,
Kagero Photosniper 2
- [4]
German Armoured Cars and Reconnaissance Half-tracks 1939-1945, B.
Perret, New Vanguard 29, Osprey Publishing
-
- [5]
Schwerer Panzerspaehwagen (Sd.Kfz.234), T.L. Jentz, Darlington Productions.
-
- [6]
Sd.Kfz.
234/2, Francisco Javier Cabeza & Carlos Martín, Panzernet
-
- [7]
Schwere Panzerspahwagen (7.5cm), Sd.Kfz. 234/4, AFV interiors. The
site is long gone, or perhaps turned itself into a part of this
commercial site. It can still be retrieved with the "Wayback
Machine" though".
-
- [9]
Panzerwrecks 4, L. Archer & W. Auerbach.
[10]
Archive
1944-45
[11]
Panzerwrecks 15, L. Archer & W. Auerbach. |


.JPG)
.JPG)
.JPG)
.JPG)
.JPG)


.JPG)
.JPG)
.JPG)
.JPG)
.JPG)
.JPG)
.JPG)
.JPG)
.JPG)
.JPG)
.JPG)
.JPG)
.JPG)
.JPG)


.JPG)
.JPG)
.JPG)
.JPG)
.JPG)
.JPG)
.JPG)

.JPG)
.JPG)
.JPG)
.JPG)
.JPG)
.JPG)
.JPG)
.JPG)
.JPG)
.JPG)
.JPG)
.JPG)
.JPG)
.JPG)
.JPG)
.JPG)
.JPG)
.JPG)
.JPG)
.JPG)
.JPG)
.JPG)
.JPG)
.JPG)
.JPG)
.JPG)
.JPG)
.JPG)
.JPG)
.JPG)
.JPG)
.JPG)
.JPG)
.JPG)
.JPG)
.JPG)
.JPG)
.JPG)
.JPG)
.JPG)
.JPG)
.JPG)
.JPG)
.JPG)
.JPG)
.JPG)
.JPG)
.JPG)
.JPG)
.JPG)
.JPG)
.JPG)
.JPG)
.JPG)
.JPG)
.JPG)
.JPG)
.JPG)
.JPG)
.JPG)
.JPG)
.JPG)
.JPG)
.JPG)
.JPG)
.JPG)
.JPG)