|
An edited for length version of this article has previously appeared in the  magazine, "Random Thoughts", Volume 37, Number 2, Summer 2015. magazine, "Random Thoughts", Volume 37, Number 2, Summer 2015.
A Very Brief History
The Aggregat-4 (A4) was a liquid propelled rocket that became the world's first long range ballistic missile. Development started in the 1930's with a team lead by
the German rocket scientist Wernher von Braun. Following testing with smaller scale rockets the final A4 design was started circa 1938-1939. Testing & development
continued through the early war years at Peenemünde, and it wasn't until late 1944 that the rocket became operational. The V2 (Vergeltungswaffe 2 or Vengeance Weapon 2)
designation was adopted for military operations. Over 3,000 rockets were launched before war's end, mostly at London, Antwerp and Liège.
Post-war both the Allies and Soviets scoured Europe for A4 rockets and the scientists that worked on them, with the Americans and the Russians rapidly developing
their rocket and space programs from the knowledge gained from their former German foes.
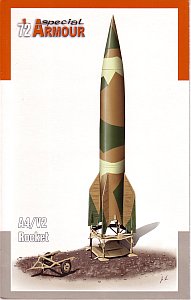
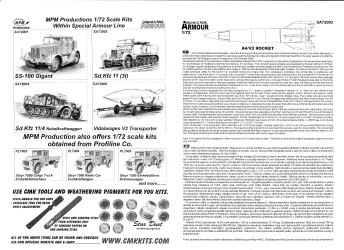
The Kit
Parts come on two sprues of tan coloured, fairly hard styrene plastic. The parts are well cast and there is little for flash or seams, though I did find a few annoyingly
placed ejector pin marks.
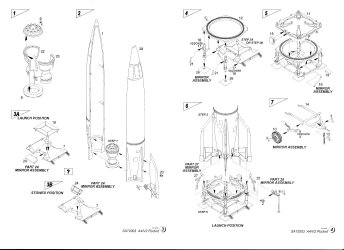
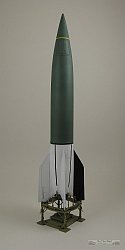
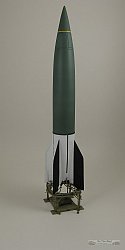
Parts count is 46 - enough to build the rocket, its turntable and the table's transport trailer. The build sequence is quite logically presented and for the most part easy
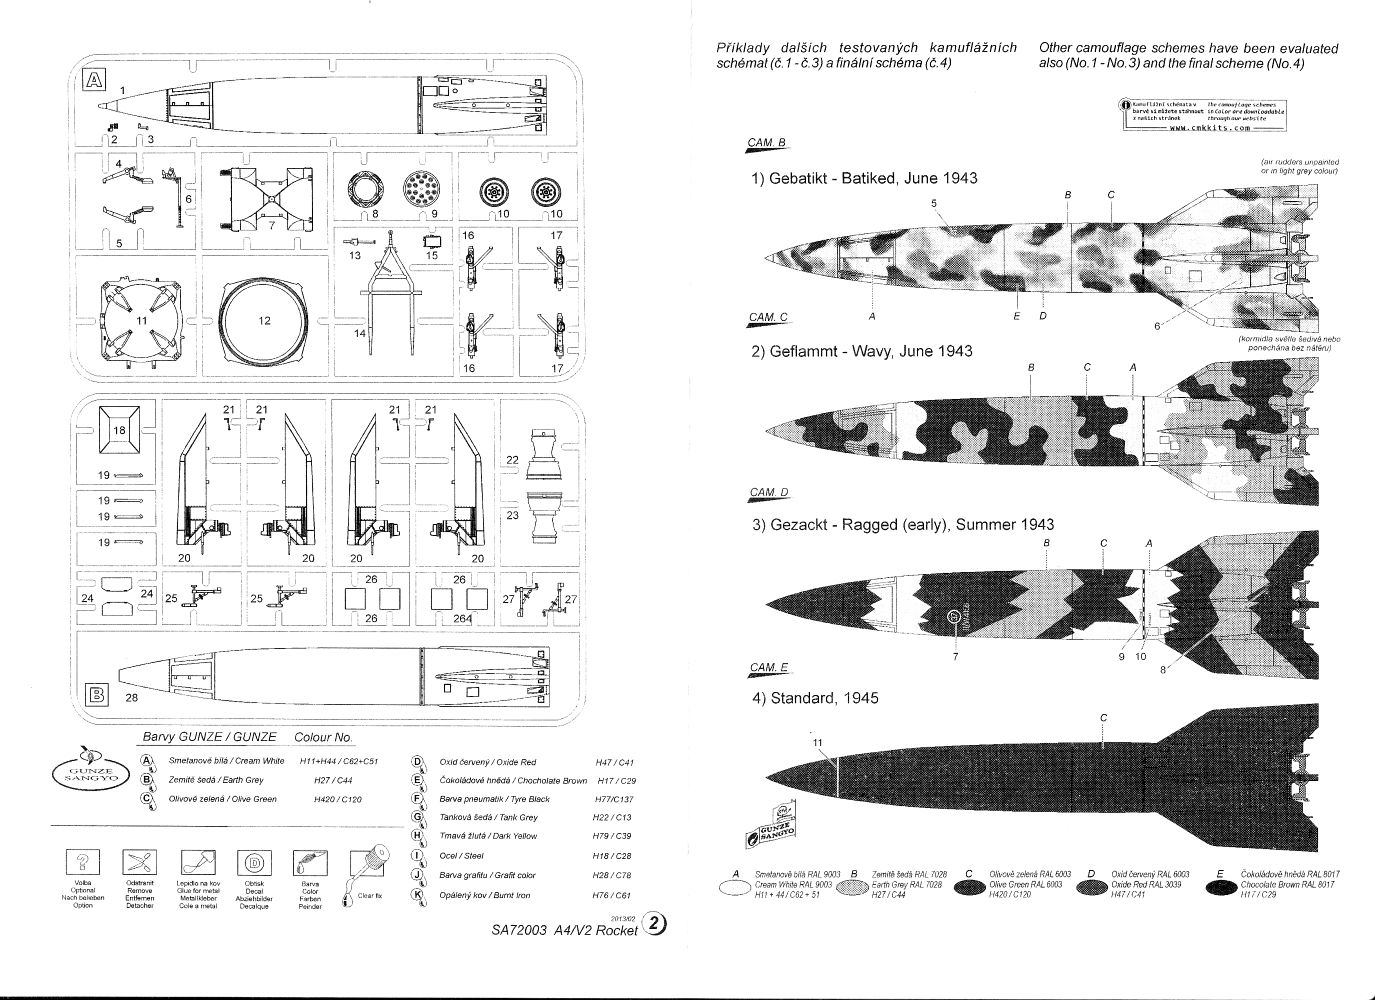
to follow. A small decal sheet is
included, and an 8 page instruction sheet outlining the build over
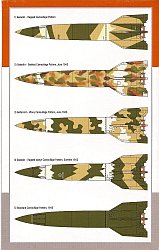
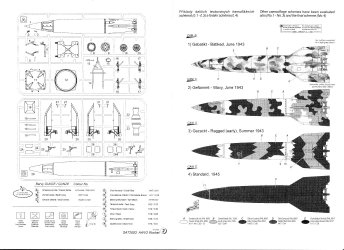
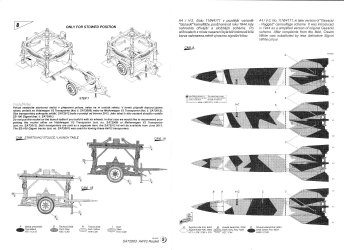
8 steps. Paint call-outs are for Gunze Sangyo only. A colouring guide is provided for these options:
- A4, white 11/W4171, in late version of the ragged/splinter camouflage
- A4, white 10/W4132, in early batiked/mottled camouflage
- A4 in wavy camouflage
- A4, white 11/W4156, in early version of the ragged/splinter camouflage
- A4 in late war standard overall olive green camouflage
The launch table/trailer combination can be in either panzer grey or panzer yellow. As far as I know this kit is the same as Special Armour's other A4
release (kit no. 72014), save the decals, so this kit can be painted in any of the white/black markings for these experimental rockets as well.
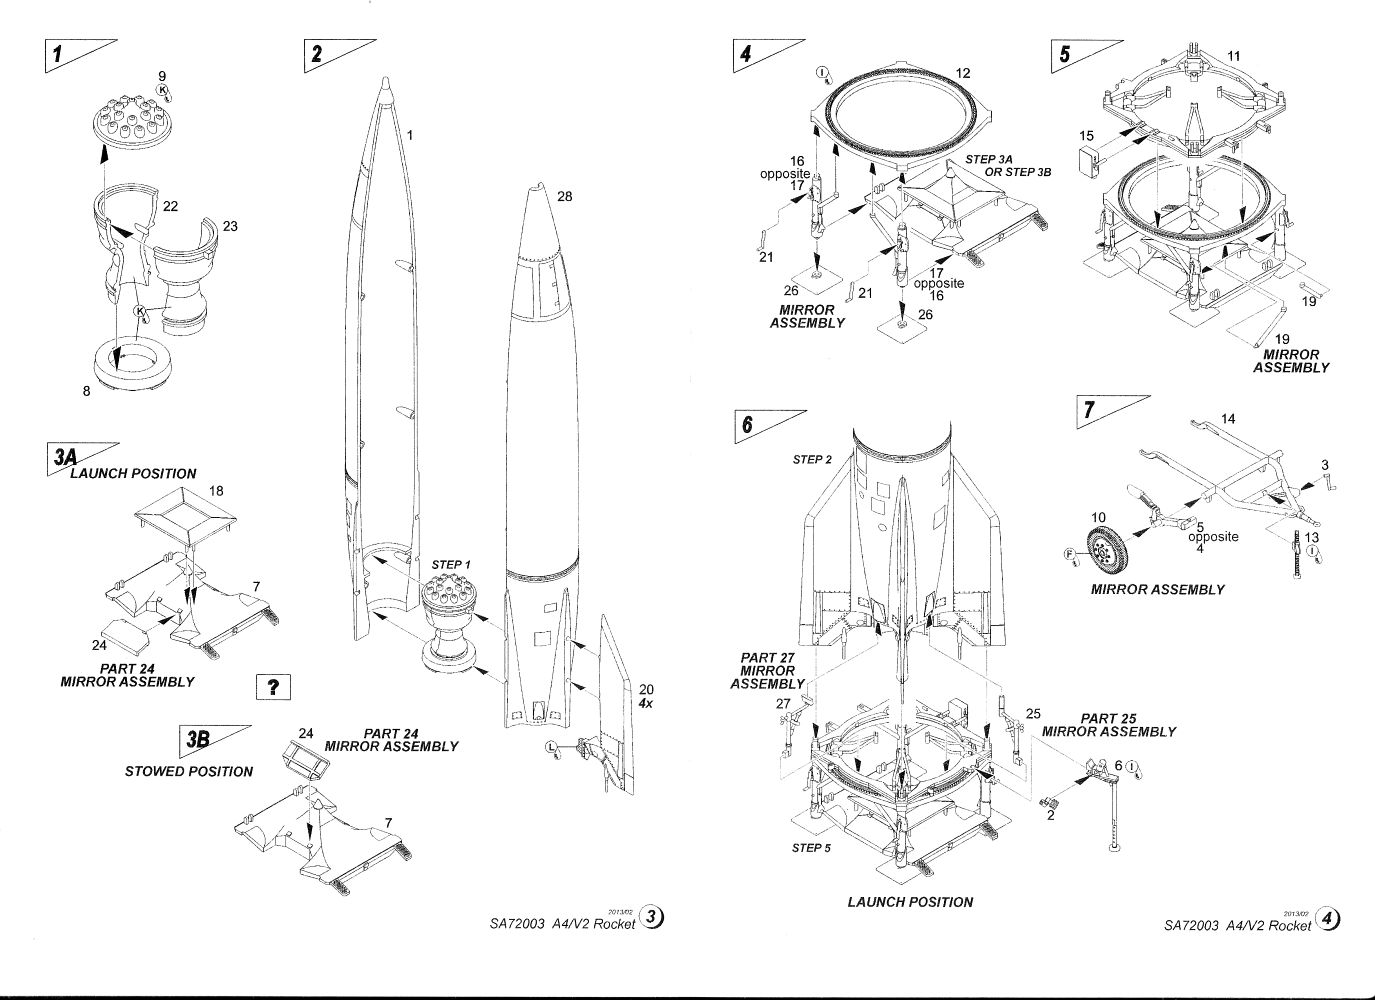
Construction
I built this kit out-of-the-box. Construction is for the most part quite effortless. Detail and parts fit is quite good and I found the plastic easy to work with.
The combustion chamber is nicely done with the injector positions molded to the top of part 9, but the only way you're going to see these once the kit is built is if you
modify the kit
to show the interior. Closer inspection of the instructions identified three possible areas of concern: the long seam where the two body halves join, the joining of
the fins to
the body, and maintaining the alignment of said fins.
Construction started with the turntable, which makes up the majority of the kit parts, and was the most difficult part of the build.
The top flat panel of the exhaust deflector (part 18) had some short shot
supports.
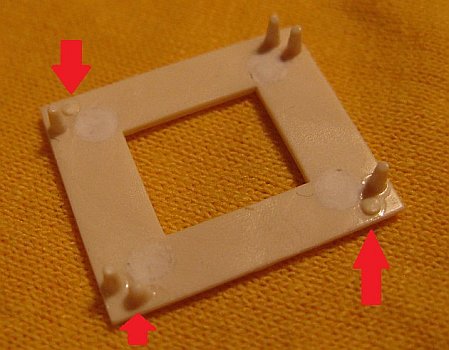
These
were repaired using some short sections of plastic rod and shaped as best as I could to match the other supports. The support legs don't attach well
and the method the turntable parts attach to each other pretty much forced me to build most of it simultaneously, and adjust for alignment as it dried. Getting
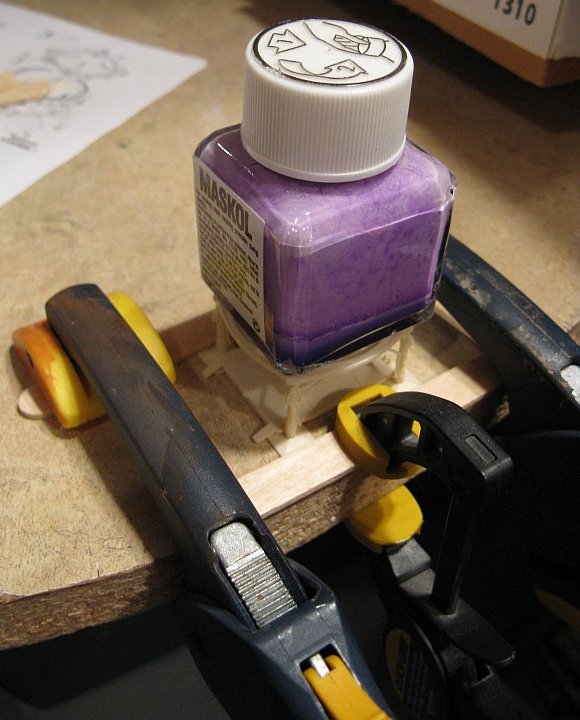
the pads to stay square was difficult and I found a quick
and dirty solution using some Popsicle sticks and clamps.
The holes molded to receive the angled support rods running from the legs to the underside
of the table are too large and leave noticeable gaps that need filling.
With the turntable finished I moved onto the rocket proper. I was anticipating trouble with the long seam between the two body halves but in the end
the seam turned out
to be easy to remove, especially if one takes a bit of extra care here while gluing to ensure the join is as flush as possible.
The rocket's tip looked rather odd.
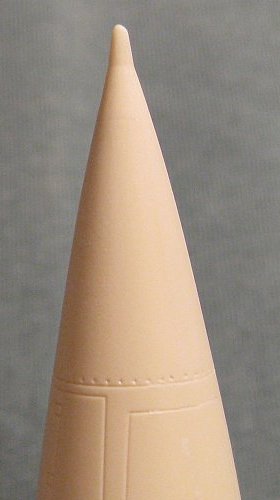
Some sanding
shaped it into a proper point versus the knobby protrusion as shown above.
The exhaust deflectors are molded directly on the fins and I cut them off so I could shove a stick up the end of the rocket to make painting easier. Each
deflector also had a small hole drilled into its base to insert a toothpick as a handhold during painting.
Attaching the fins also proved to be
easier than anticipated. There was some misalignment of the molds leaving a seam, but it was easily dealt with. Otherwise the join was quite good, and only
small adjusting of the mating surfaces with a little scraping and sanding was required to get a good fit
with the body, resulting in next to no filler being needed.
Aligning the fins was a bit more problematic. The butt join doesn't make for the best construction method for keeping the fins perpendicular while they dry. My
solution was to place the rocket on top of the turntable and insert the trailing edges of the fins
into the slots of the fin locating points molded onto the upper ring of the turntable (part 11), which was the reason that I started construction with the turntable.
Doing this keeps the fins in their proper position as they set without resorting to any custom made jigs.
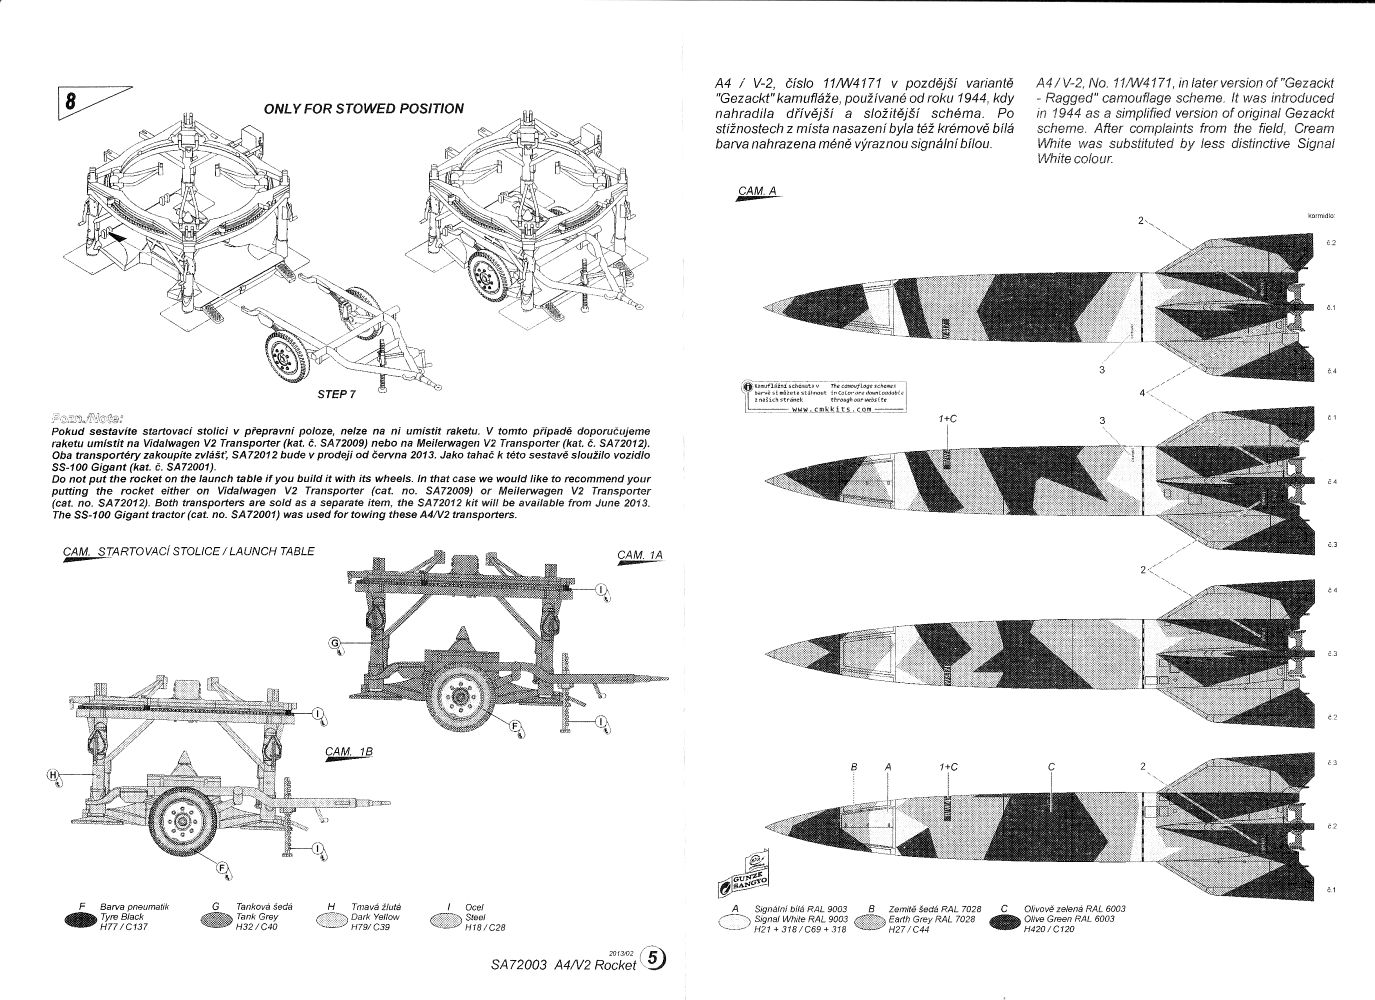
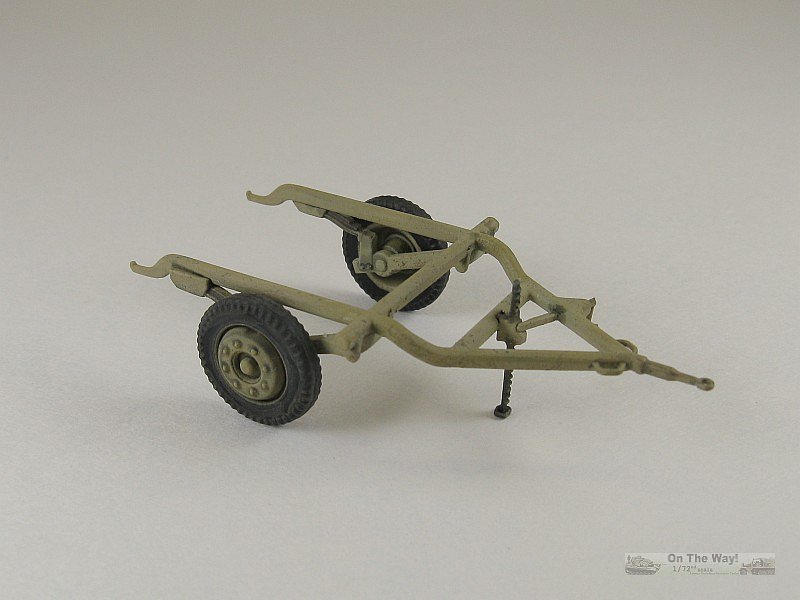
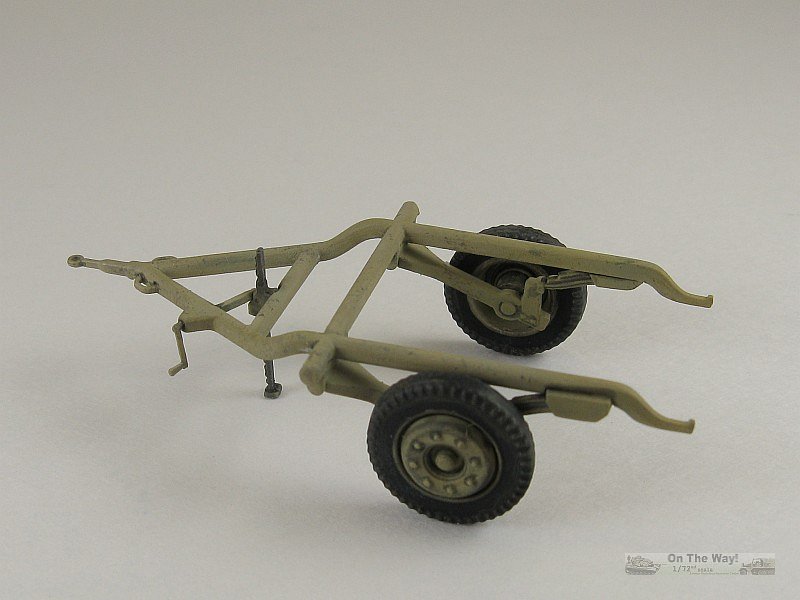
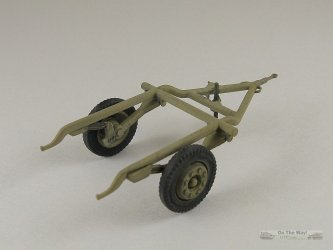
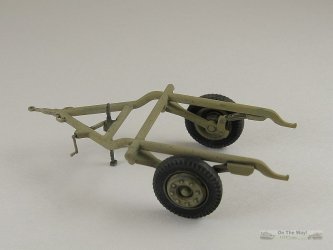
The small trailer used for carrying the turntable (I could find no Sd.Ah. designations in my references) was rife with ejector pin marks on the underside of the frame.
They were filled and sanded but it was not an easy task as the sanding tended to flatten the round shape of the frame members. Outside of the work to fill the pin
marks, the trailer goes together quickly - it is only 7 pieces. No extra detailing was done to the trailer. I could find no good pictures to see if there were any
brake levers or cabling on it.
Painting
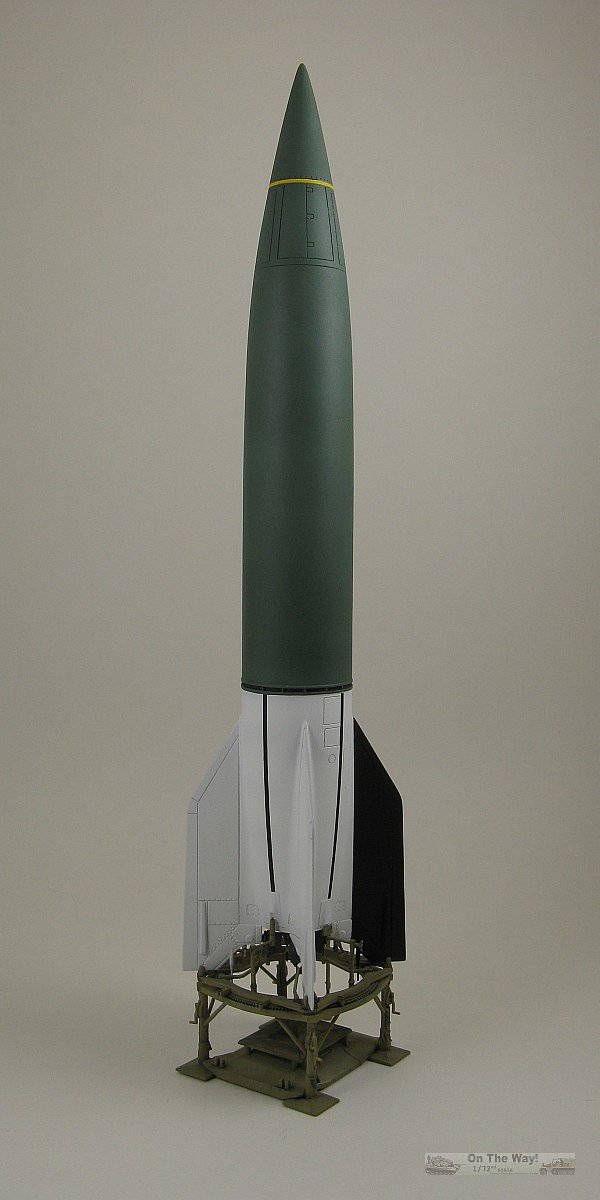
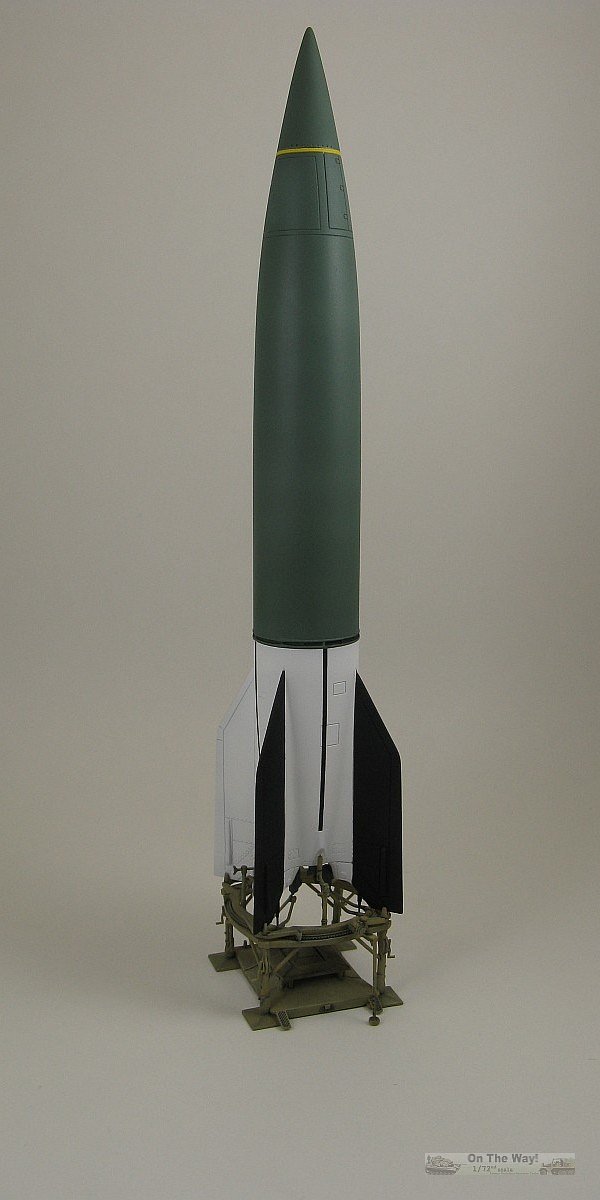
I chose to paint my rocket in a late test pattern of white/black lower body & fins with olive green upper body, as seen in reference [2]. As per my norm, the first
coat of paint is Testors light grey used as a primer. Any flaws were fixed, re-primed, and then Testors Flat Black (1749) was sprayed along the panel lines of the
rocket, in
the recesses of the launch table and along the edges of the trailer, as a pre-shade. For the rocket's white tail I used
Tamiya Fine Surface Primer L White (87044) decanted from the spray can allowing some of the underlying black to show through. Two fins were to be black, so the
white was masked and Testors Flat Black used
again on the two exposed fins.
The upper body is Testors Panzer Olivegrun (2097), again spraying so the underlying black pre-shade partly showed through the green. The turntable and trailer were
sprayed Testors Panzer Dunkelgelb (2095), and
then again with the Dunkelgelb lightened considerably with flat white. Once camouflage was finished everything was given a coat of Testors Glosscote sprayed straight
from the can. After this dried I used Tamiya Panel Line Accent Color (Black) as a pin wash on the rocket (midriff vents), turntable and trailer. The latter two were
then weathered lightly with Testors Afrika Dunkelgrau (2103). The rocket was not weathered as I figured its life exposed to the elements was limited.
Decaling was minimal. The kit's yellow stripe was added to the nose followed by vertical strips of black on the white tail section. The strips were sourced from a
set of Warbird Decals, sheet 72003 for the B-36. A few liberal dowsings of Microsol snugged all the images to the paint. The final spray session was for a coat of
my favourite flat finish - Golden Hard MSA Varnish with UVLS (Matte) mixed with lacquer thinner.
Exhaust deflectors were painted Testors Panzer Schwarzgrau (2094) and then given a dry brushing of Testors Chrome Silver enamel (1790) to give them a graphite like sheen.
They were re-attached to the fins just before the rocket was affixed to the launch table.
Conclusion
This is a nice kit. Only some annoying ejector pin marks detract somewhat from what was an enjoyable build.
As far as I can tell this Special Armour release is manufactured by the same MPM group of companies, which also produced an A4/V2 under the Condor label circa 2001.
When compared to the old Condor kit (build review here) the progress in kit technology is readily apparent.
References
[1] wikipedia
[2] V2rocket.com
[3] post-war V2
[4] The Illustrated Encyclopedia of the World's Rockets & Missiles, Bill Gunston, Leisure Books 1979
[5] German Military Trailers and Towed Equipment 1935-1945, Horst Beiersdorf, Schiffer Military History, Atglen 1995 ISBN: 0-88740-757-9
Review sample purchased by the author.

|