Condor
|
German Missile A4/V-2 |
|||
| Kit #: C72001 |
Review by
- Al Magnus
|
|||
Condor
|
German Missile A4/V-2 |
|||
| Kit #: C72001 |
Review by
- Al Magnus
|
|||
 |
|
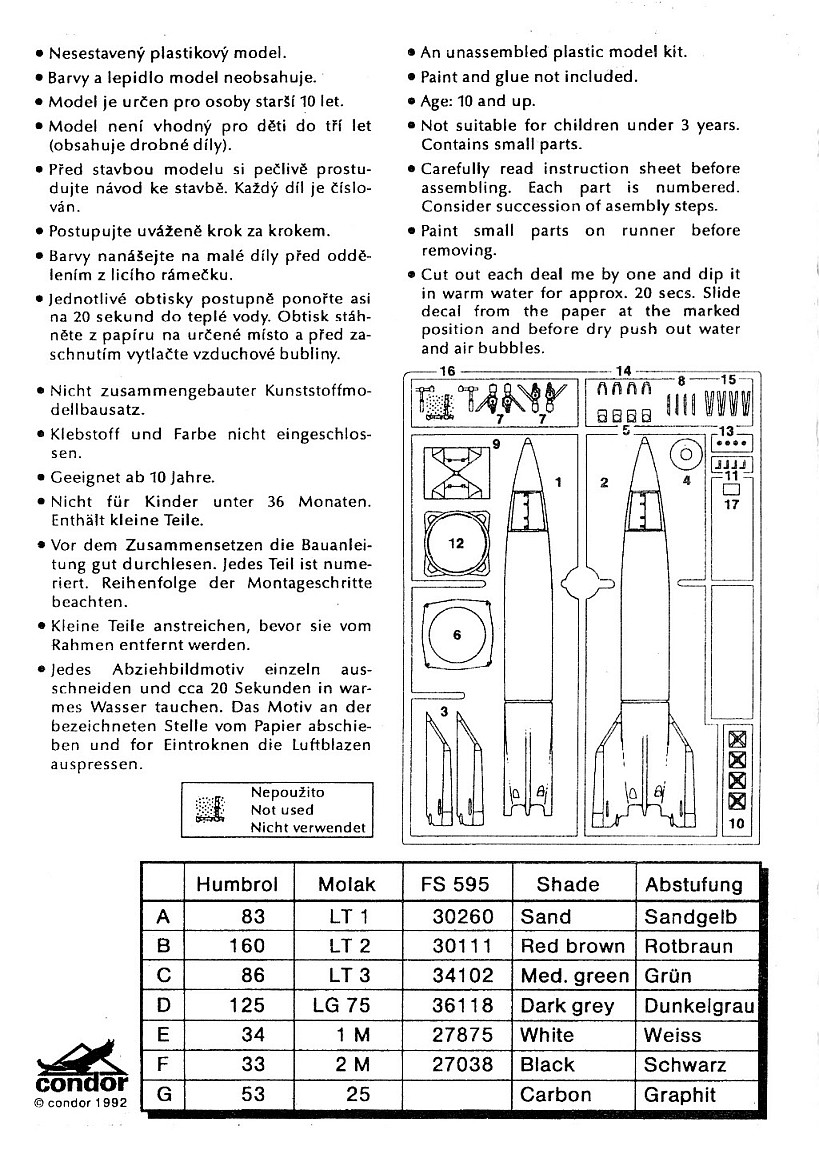
Inside the box there is one tree containing 44 medium grey parts. The plastic is soft and very easy to work with.
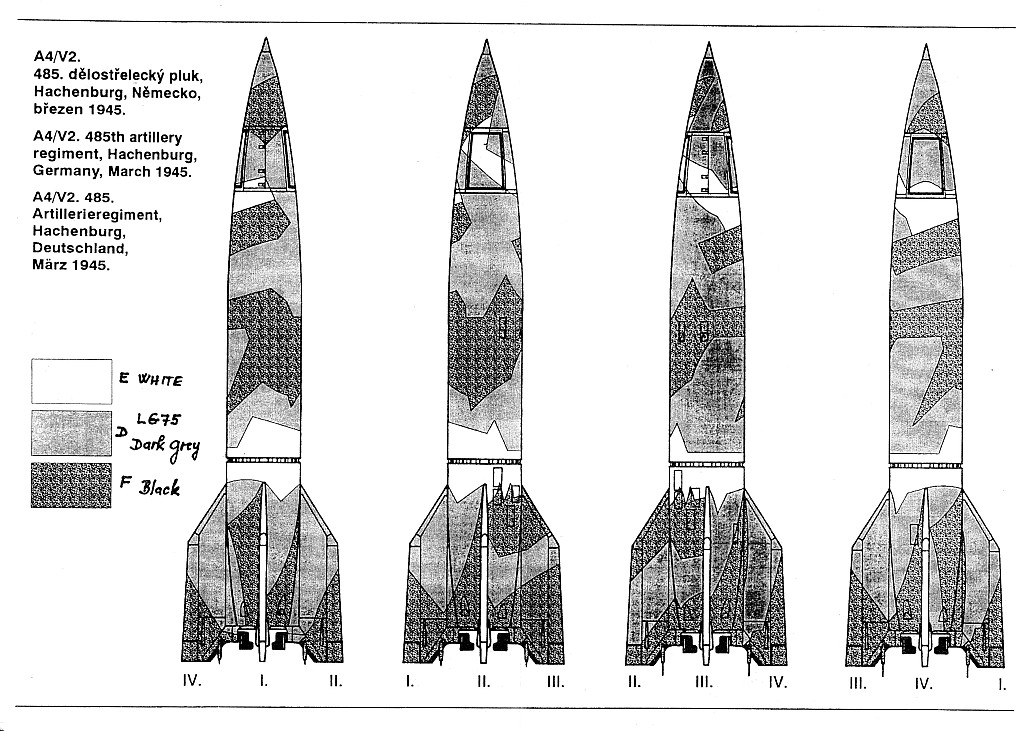
The instruction sheet contains the build sequence with a historical description. There is a separate sheet for the painting guide. Two options are shown:
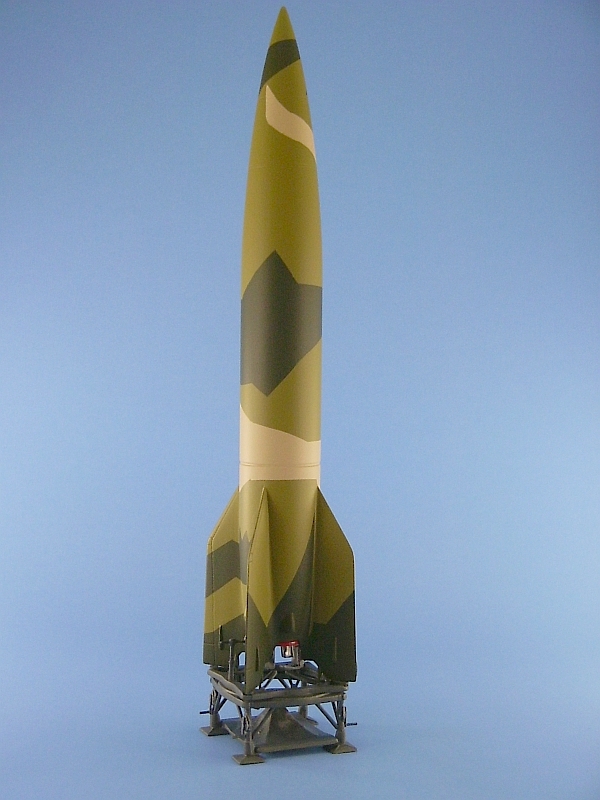
The parts are for the most part well cast, though the body and fin pieces have a definite pebbly/orange peel texture to them. The molds are a bit off, so many of the pieces have seams to scrape and sand. This is most noticeable on the small parts and along the edges of the fins. There are no locating pins on the parts so some care is needed to align the pieces. The kit comes with no decals. Building is straightforward though a bit time consuming. The two body halves go together well. One body half has a pair of molded on fins. The remaining fins just butt join to the fuselage. For all four fins there are substantial seams to deal with where they meet the rocket body. The launcher (parts 6, 9 & 12) has sink marks and depressions that need filling. Instructions are a bit vague regarding the placement of the launcher parts. Some care will be needed here and it is a good idea to refer to some pictures of the real thing to help with part locations. I replaced the small guide probes located at the trailing edge of the fins with pieces of wire cut from guitar strings. The stock plastic pieces were too thick and didn't allow the rocket to seat properly on the base. I also replaced the arms and handles (parts 11) for the leveling cranks with plastic rod as the kit pieces were quite blobish. The rocket was painted with Aeromaster and Testors enamel paints. The splinter pattern was painted in layers, starting with the off-white layer, which was masked after it was dry and then the dark yellow/sand colour was sprayed. This too was masked after it dried and the final coat of dark green was applied. The masking was carefully removed and the rocket given a final coat of Testors Glosscoat to even the layers of paint. Once completely dry, a final coat of Aeromaster Acrylic flat was applied. The launch pad was sprayed dark grey and it too was flat coated after it had dried. The rocket cone and steeling vanes were both painted flat black and then dry brushed with silver to give them a metallic sheen. A circular cover for the exhaust cone was made and then sprayed Testors gloss red. This was super glued to the end of the cone. Last was the addition of the steering vanes. The completed rocket was then mounted on the launcher. In conclusion, the kit is definitely worth the money. Though the parts are a bit crude in places, and some major filling is required around the fins, the kit builds into a nice replica of the infamous A-4/V-2.
Review sample purchased by the author. |
| Back to Condor Kit List | Back to Construction Reviews |
Article Last Updated: 26 January 2009 |
Back to Home Page |