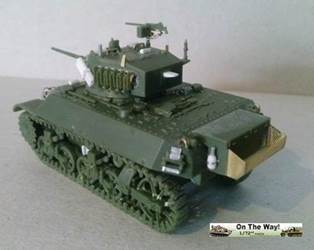
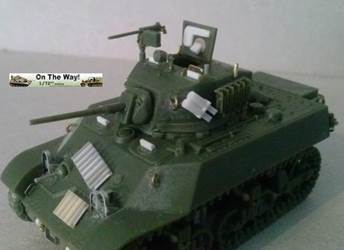
|
I
like this tank family, so I was happy when I received this kit as
a present by a friend. The M3/M5 Stuart tank fought on every front:
North Africa, Italy, NWE, Far East, Pacific and Russia. Some tanks
were also used by the Germans and the Japanese which captured them,
giving us a very wide range of modelling opportunities.
About the Normandy campaign, the M3A3 (aka Stuart Mk V) depicted by
S-Model was present in the Recce troops of the British 7th AD and
11th AD, the Canadian 4th (Cdn) AD and 2nd (Cdn) AB. In Mr.
Peter Brown’s list there are also 12 Stuart Mk V within
the British 6th AB (with 4 Mk VI). Some of them had their turret removed,
giving us the possibility to have something different, if one wants
to scratchbuild the inner details. Sadly I found very few photos of
the British Stuarts in Europe.
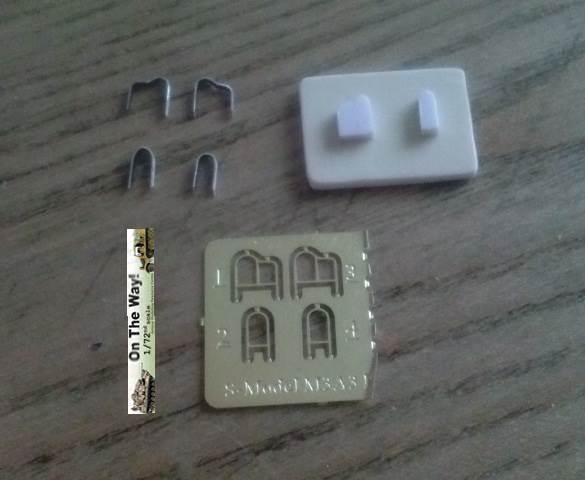
The kit is composed of two identical olive green moulds, two PE fret,
the decal set and the instructions. Clean and crisp, the pieces look
very well on the sprue. The only critical points are the joint between
the pieces and the sprue. These points are large and strong and removing
tiny pieces can cause them to break.
General dimensions are very correct for my taste:
|
1/1
|
1/72
|
kit |
Length
(mm)
|
4330
|
60.14
|
60.50 |
Width
(mm)
|
2470
|
34.30
|
34.90 |
| Height
(mm) |
2290
|
31.80
|
31.50 |
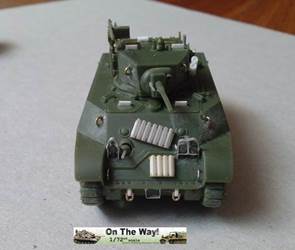
I was aware about the track problem thanks to the preview.
Some minor details are still missing, but what is given is quite correct;
the aspect looks right and being a simplified model I think it is
very fine. Making a display model is another story. None of these
problems looked impossible to solve to me, tracks apart…
Furthermore a NWE British tank (my choice) had some specific details
which are present only in the second release of S-Model Stuart V Kit
PS720133 (not yet available when my friend bought the kit with the
French/Chinese markings).
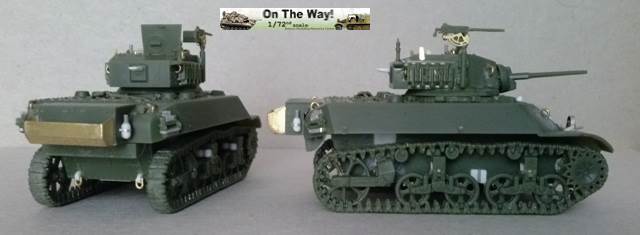
Assembly didn’t give problems; the pieces fitted very well and
no putty was needed.
To help me I found this walkaround
which luckily is enough to work with on a 1/72 model.
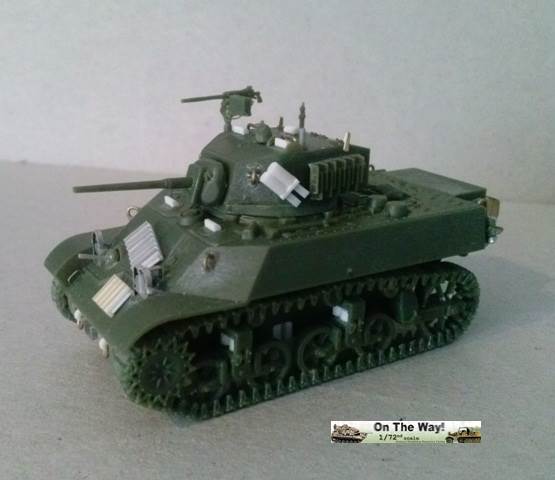
I choose to have two tanks of two British recce troops in Normandy,
so I had to add the missing details. I marked with (X) where the details
are present in the British markings Kit PS720133.
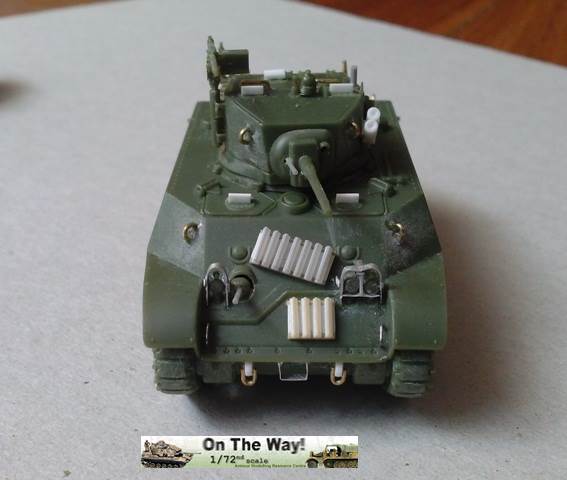
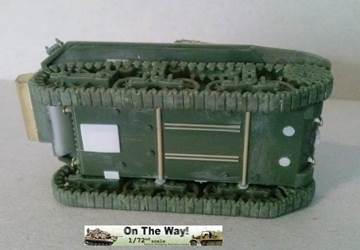
Hull
- First
of all, I filled the moulding slots for the idler pins with plastic
sheet.
- The
4 lifting rings were made with metallic wire.
- To
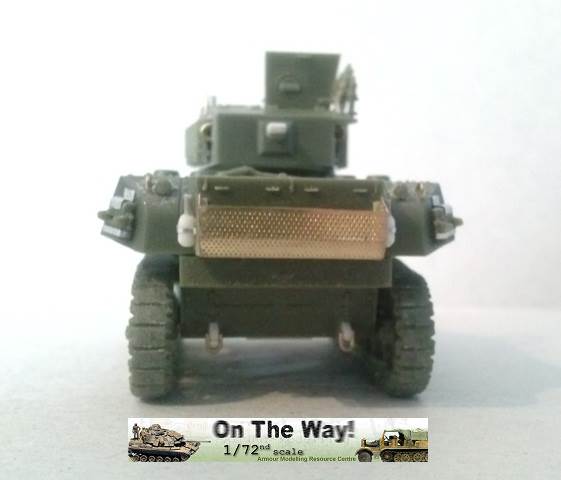
ease the work, I glued the exhaust deflector to the upper hull,
after having closed its backside.
- After
having glued the turret ring I filed an interlock for the turret
because otherwise it will fall away as it would only lean on the
hull otherwise.
- The
periscopes are closed; I replaced them with 1.00 x 1.00 mm plastic
rod sanded to a triangular section leaving the hypotenuse domed.
- The
4 towing points are missing. I made them with plastic. To these
I added the shackles made with metallic wire.
- (X)
On the glacis of British tanks there were other grousers. 4 stowed
horizontally and 7 stowed at an inclination. They weren’t
alternated as per the turret but were aligned.
- (X)
I scratchbuilt the fire extinguishers on the hull bin sides.
- The
spare track links (A15) were fastened with a holder which is missing.
I did it with thin tin strips.
- Four
handles were made with thin metallic wire: two for the engine deck
rectangular grate and two for the glacis near the fenders.
- On
the front I added a step made with metallic wire.
- The
belly is completely flat. To give it just a bit of detail, I added
the two transversal rods and the four longitudinal stiffeners, all
made with stretched sprue. Also the maintenance plates were added
using plastic sheet. I didn’t add the bolts, though…
- The
PE brush guards shapes are well done, but they are too flat. I choose
to make my own pieces and I used the PE fret as a template to make…
a template. Around this I wrapped a thin metal strip to make my
guards. I also added the rear arms. At the end they could look a
bit oversized, but to me the effect looks better than the kit parts.
- The
PE bin attached to the rear box is a bit too wide. I cut off the
sides and I glued them to the bin after having made a frame with
stretched sprue to have a stronger assembly. Then I reduced the
transversal part width and I glued it after bending it. The joints
were carefully glued with cyanoacrylate and then sanded to have
corners without gaps.
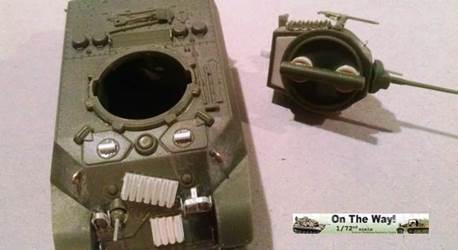
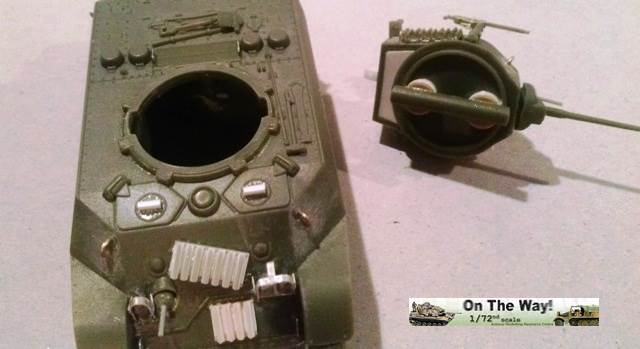
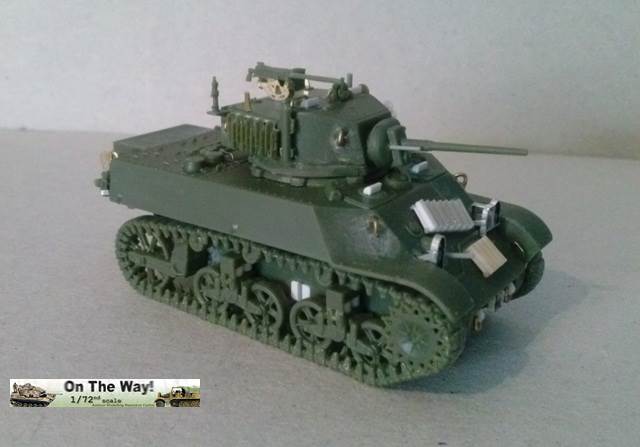
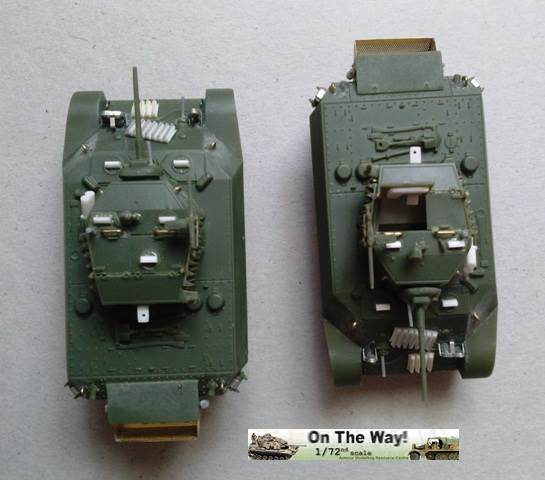
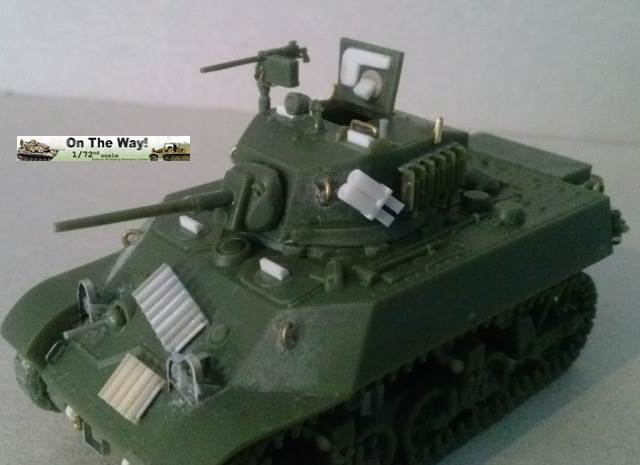
Turret
- I
used plastic sheet to close the floor of the rear overhang.
- The
four lifting rings were made with metallic wire.
- (X)
The kit antenna base was placed on the rear right side for aerial
“A” and a second one was made for the rear plate.
- (X)
An antenna base was made with stretched sprue on the turret roof
for aerial “B”.
- On
the turret sides the grousers were stowed. There were 10 grousers
on starboard and 11 on port (alternated like in the kit) placed
on their racks which were made with stretched sprue (see on the
walkaround). I had to pay attention to the correct sequence.
- The
inner sides of both doors are flat. For the door I glued in an open
position I made the inner part of the periscope housing and the
pad.
- On
the base I made an interlock to keep the turret on the hull (see
above).
- I
made two large handles in front of the crew doors with metallic
wire.
- The
periscopes are closed; I replaced them as for the hull.
- I
drilled out the gunsight.
- (X)
I scratchbuilt the smoke launchers.
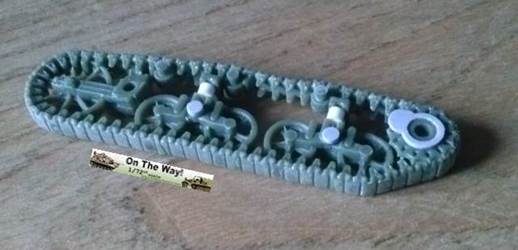
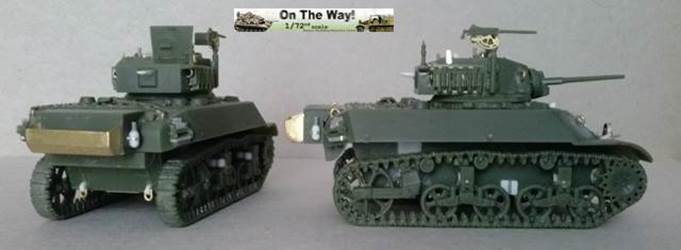
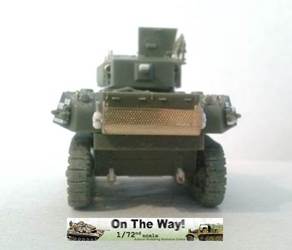
Wheels and tracks
- Each
set is made as a single solid piece. Like other “quick building”
kit makers, S-Model choose this way to ease the production and the
assembly for the war gamers. But we are a bit more finicky. Having
a single row of wheels means a double row of guide teeth. S-model
made them as a single solid transversal rod and they are not realistic.
Here
you can find a good way to correct the problem, but it looked a
little too complicated for my ability, so I chose another way: I
cut off section of the tracks. When I had separated the length I
filed off the thickness between guide teeth with a squared file.
When hollowed out, I refined them with sand paper. The track length
was glued with liquid cement which was use to “wash”
the inner side to give a cleaned surface. This work didn’t
reach every single tooth leaving solid the ones which are part of
the wheels. Anyway, it worked and the finished work looks well.
The only real problem was the working time. Between a cut and another
(depending where is the cut) I had to wait until the glue had dried
to avoid distortion of the set.
- The
inner sprockets are too thick. In this case I followed the way suggested
by the preview.
- On
the back of the sprockets on the hull sides there were the elliptical
shaped gear covers, which are missing in the kit. To have something
which could look like the real thing, I made four large diskettes
and other four smaller. To ease the work, they were glued on the
sprocket back which mostly hides them.
- The
bogeys are quite well done although solid. Anyway the springs of
the suspension system were very visible and the box like look of
them is not realistic when compared to an original photo of the
tank. I filed off the coil springs area and made them with two rod
sections each.
- The
lower inner sides of the bogeys are not connected to the hull sides;
I glued a round plastic section shim to each. To get a better result
I should have to hollow out the idler arms, but I didn’t find
a good way to do this without replacing the idler wheels, so I had
to leave them as they are.
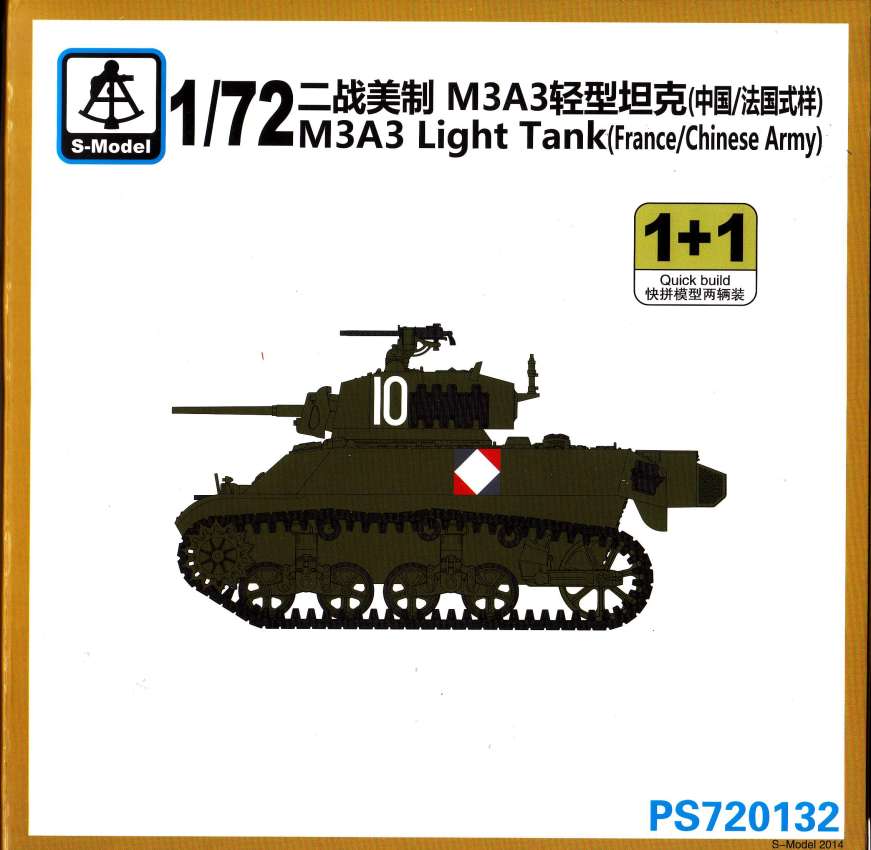
Decals
The
decal set provides two tanks:
- 11124
- a Chinese tank in CBI (visible here)
- 10
- a French tank of the 5e DB in Alsace, November 1944 (visible here).
I’m not interested by either. Anyway, the French one looks like
it is missing something to me.
My Normandy tanks will receive their markings from other sources.
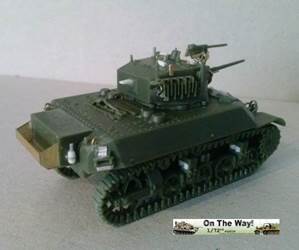 
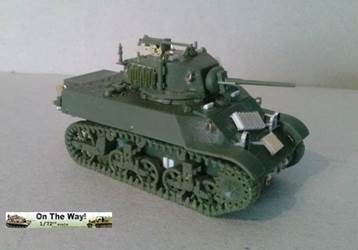
Conclusions
The kit looks to be a half way point between a display model and a
simplified quick building kit with the only simplified parts being
the wheels and track sets. The remaining parts are what one can find
in a good display kit, with also some PE parts. An aftermarket set
could make the difference, however the improvement work is not so
hard and at the end the only parts I wasn’t able to improve
were the idler wheels.
Preview sample purchased by the
author.
This model can be
purchased from

|