|
S-Model
|
www.onthewaymodels.com |
M3A3 France/Chinese Army |
|||
| Kit #: PS720132 | Preview
by Kenneth Overby
- cpl_overby(at)yahoo(dot)com
Edited by Marc Mercier |
||||
|
S-Model
|
www.onthewaymodels.com |
M3A3 France/Chinese Army |
|||
| Kit #: PS720132 | Preview
by Kenneth Overby
- cpl_overby(at)yahoo(dot)com
Edited by Marc Mercier |
||||
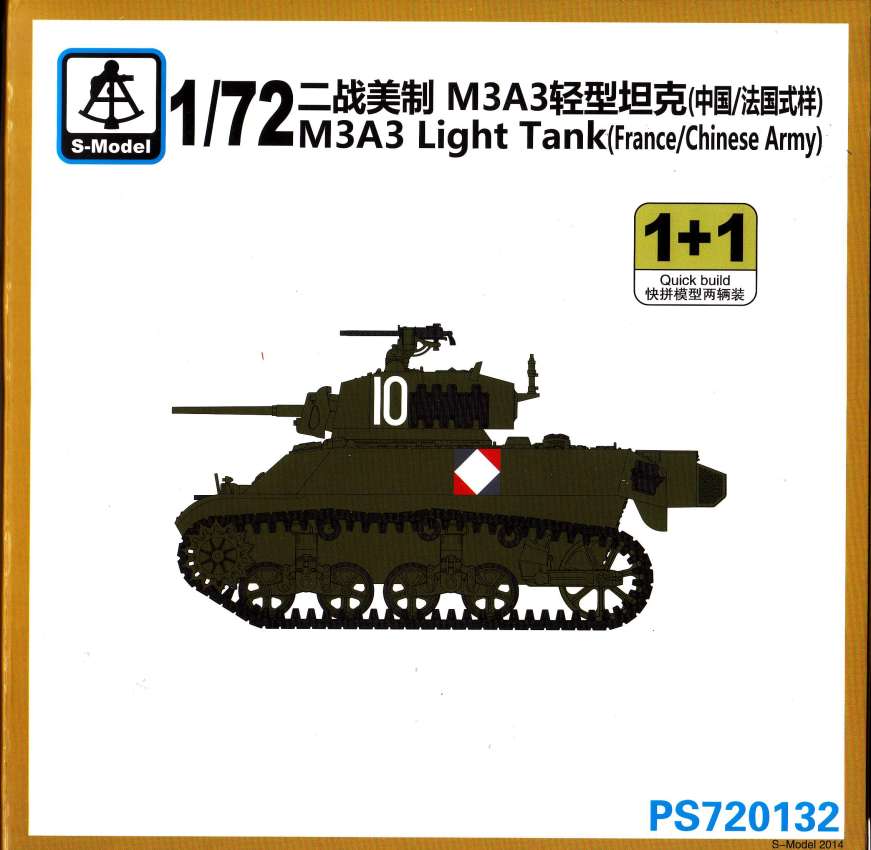 |
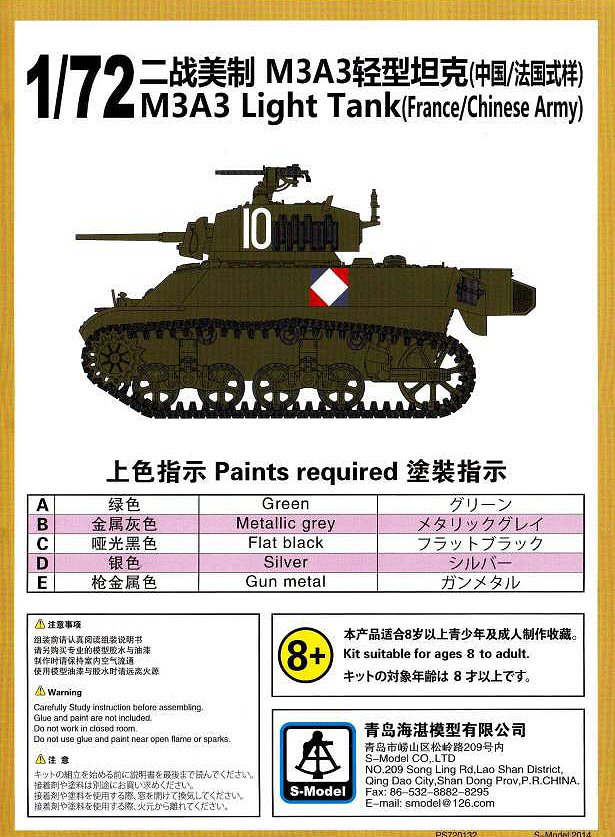
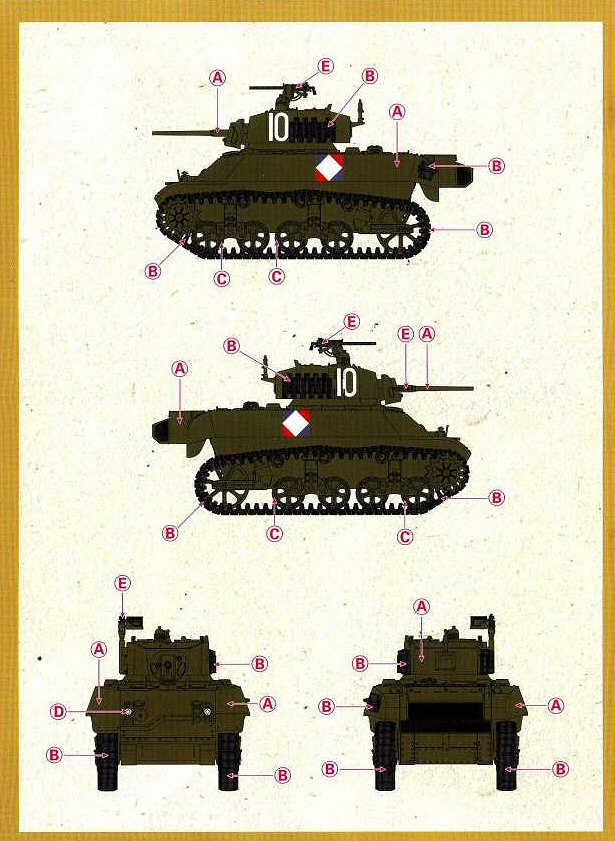
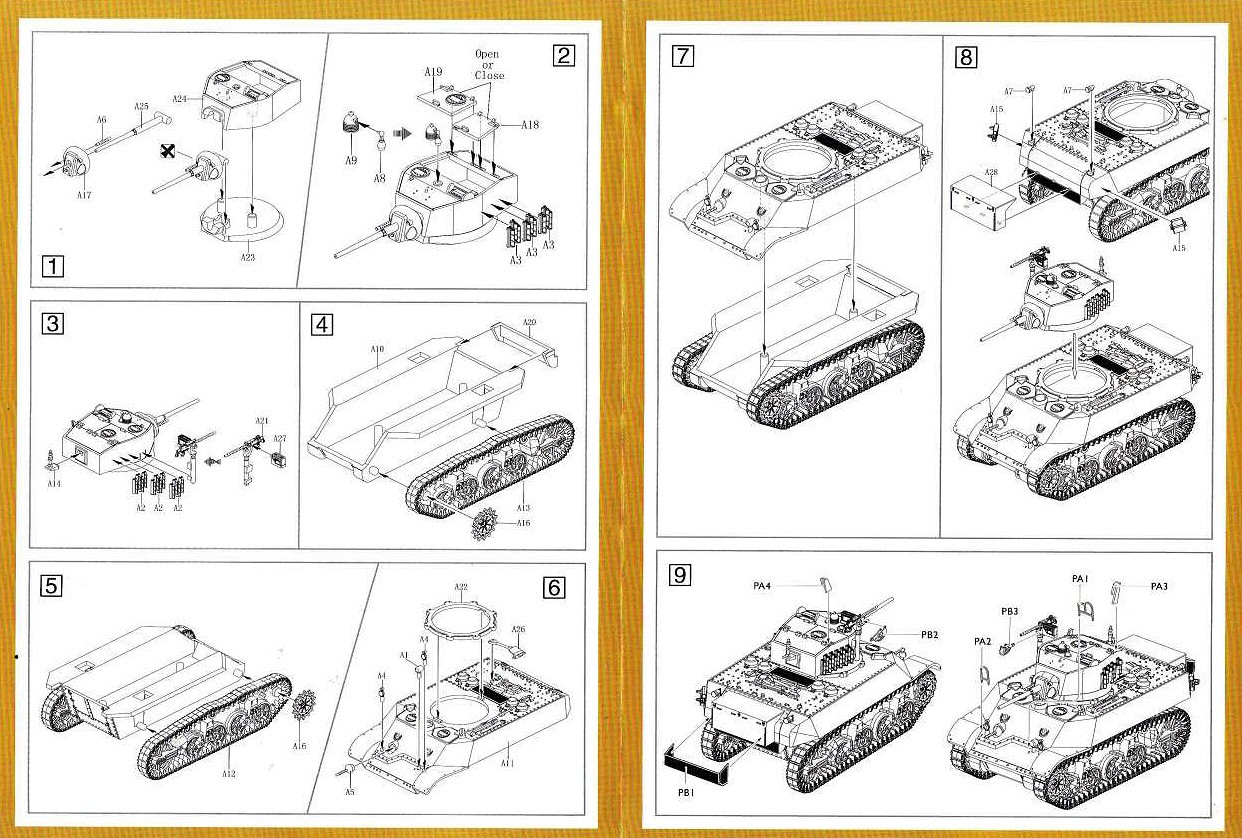
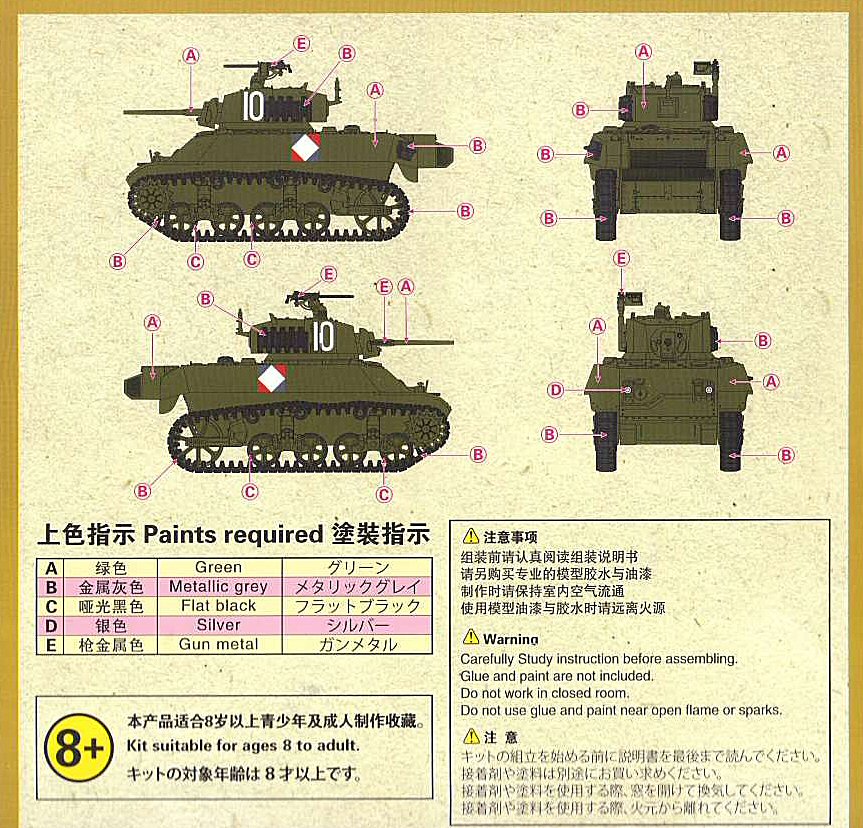
| There
has been a lot of excitement over this little model and to be honest
I am excited as well. . The detail is beautiful, right down to the "screws" that hold the engine deck in place, and the tracks (Vs. the ones that come with the PSC M5A1) But every kit has a few "shortcomings" so I will post the good and the bad, and let you make up your own mind. First off is the box, the art is very nice, and well meant to entice you to buy (worked on me). Now I would show you the back, but it is the same as the last page of the instructions so I'll pass on that. Here are the instructions. They are very clear, no missed steps, and easy to follow. |
|
  |
|
 |
|
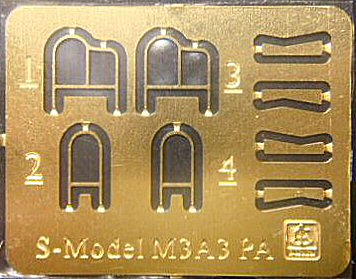
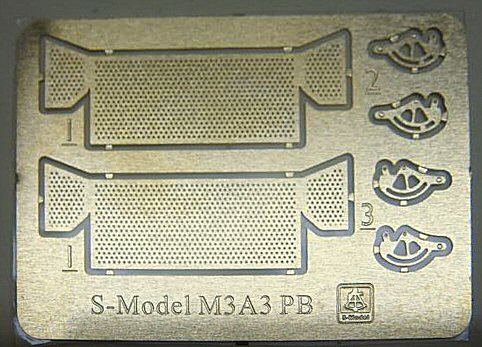
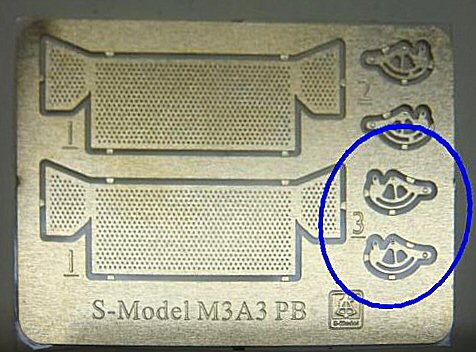
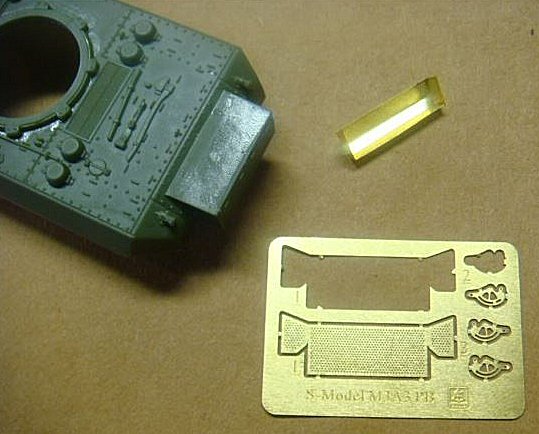
Two
nice small frets of PE parts : |
 -------------- -------------- |
and
a small sheet of decals : |
 |
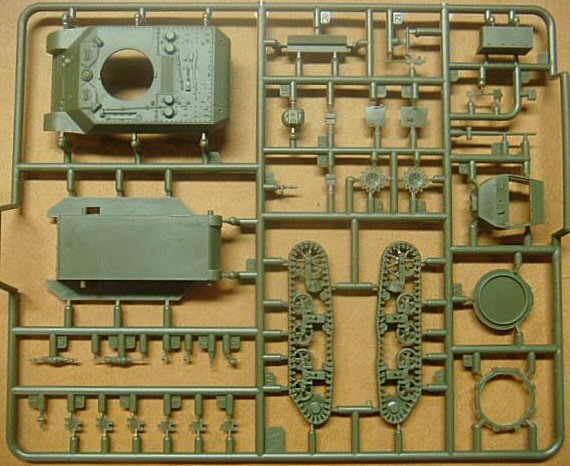
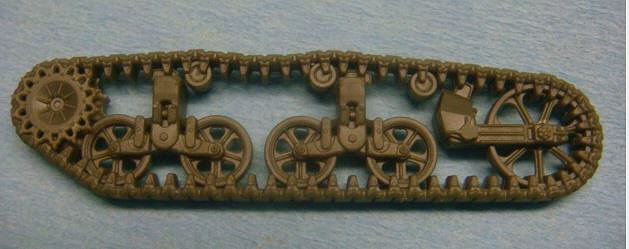
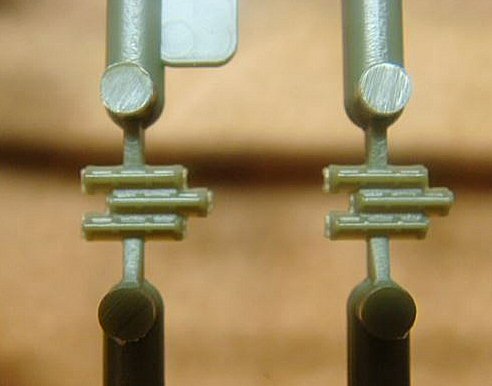
Here
is "one of" the sprue (always two per box) |
 |
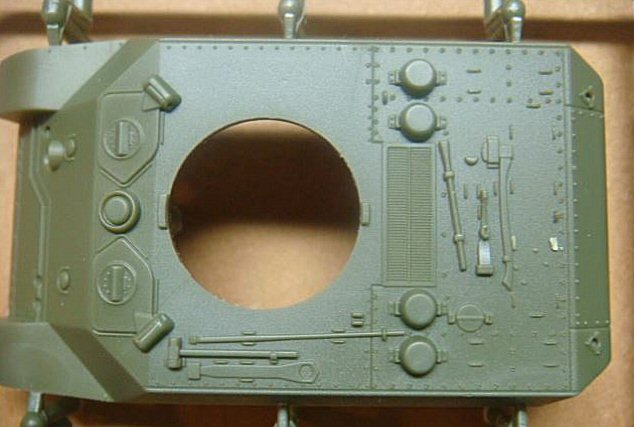
And
here are a few "close ups" |
 |
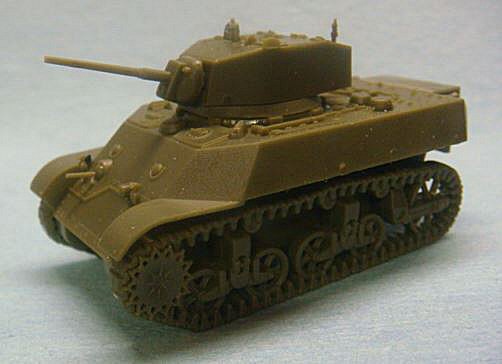
Now because these all come "two to a box" I did a partial build of one to see how it all fit. |
 |
 |
|
| Now
I purposely left a couple of items off, because I am going to talk about
them directly.
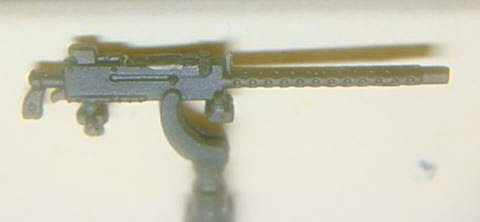
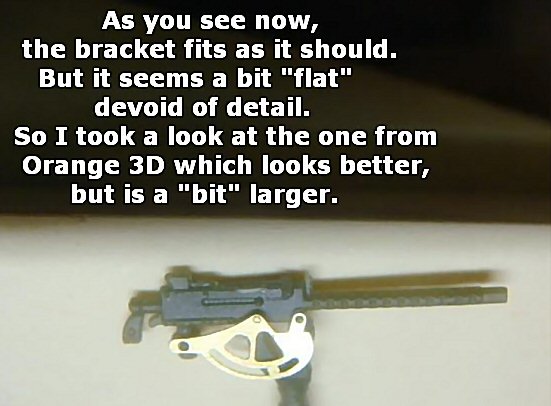
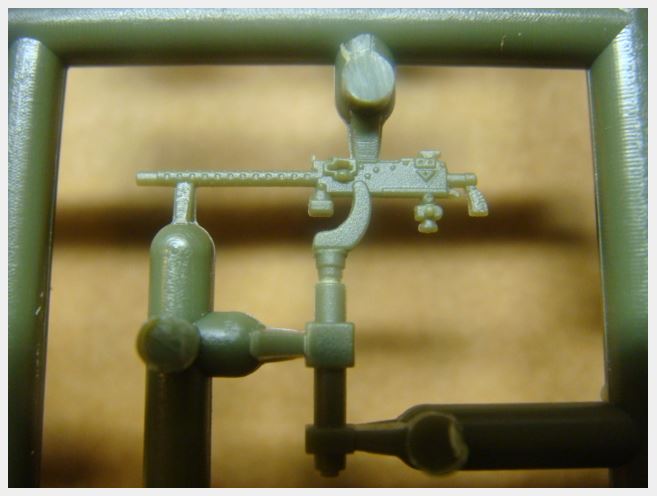
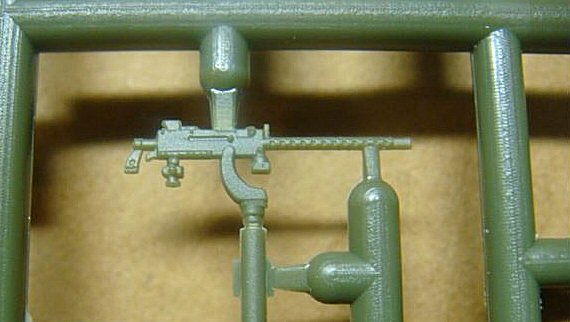
Lets
talk about the beautiful Browning 1919 .30 cal the molding is clean
and crisp, with beautiful detail.
|
|
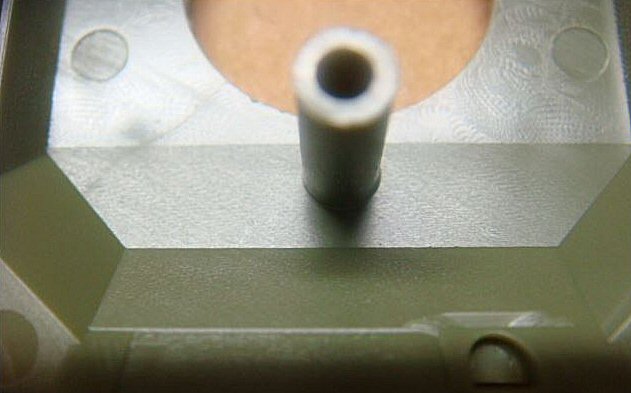
Here
is the .30 cal : |
 |
here
is the gun mount bracket : |
 |
this
is when I noticed this as well, but it has no bearing on the kit : |
 |
here
are the mounting points for the gun mount : |
 |
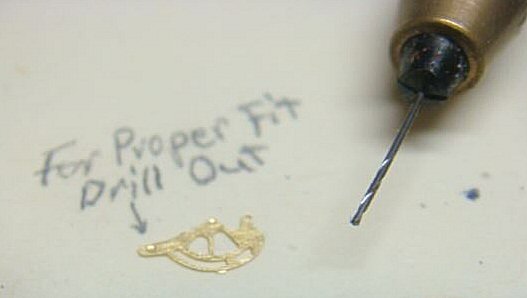
you
have to do this to the bracket to ensure proper fit, I drilled out
one of the holes with a No.79 drill bit. |
 |
now
the bracket is mounted, but can be improved (if you so choose) : |
 |
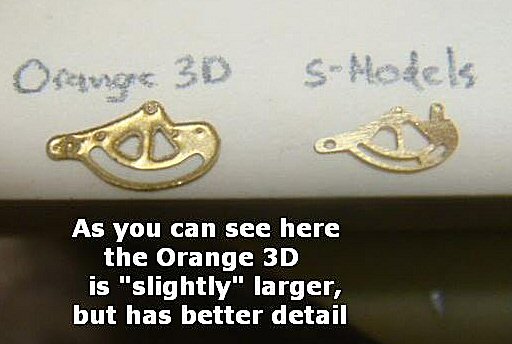
Side
by side : |
 |
and
on the MG : |
 |
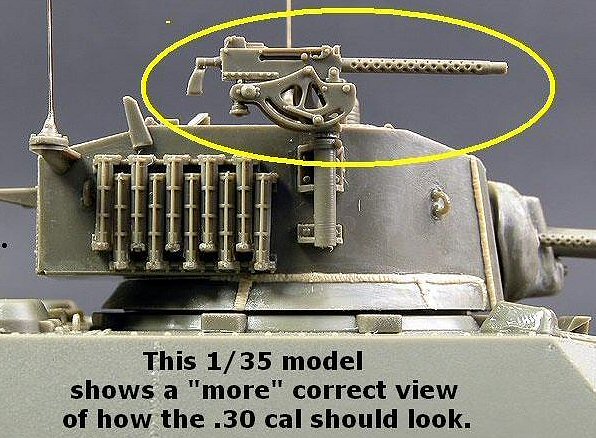
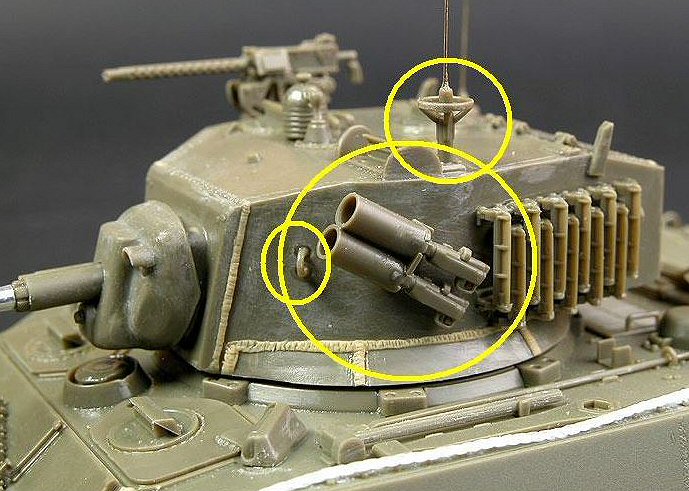
Here
is a view of a 1/35 model to show how it should look : |
 |
now
let's look at the hatches; everyone likes open hatches. Unfortunately,
you will disappointed here.
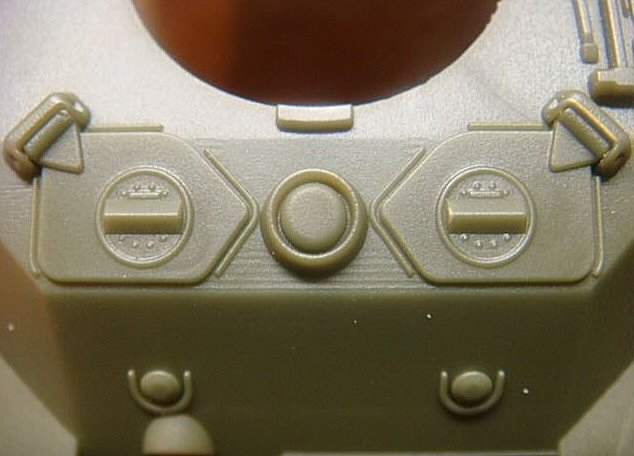
here
are the hatches, they are molded closed : |
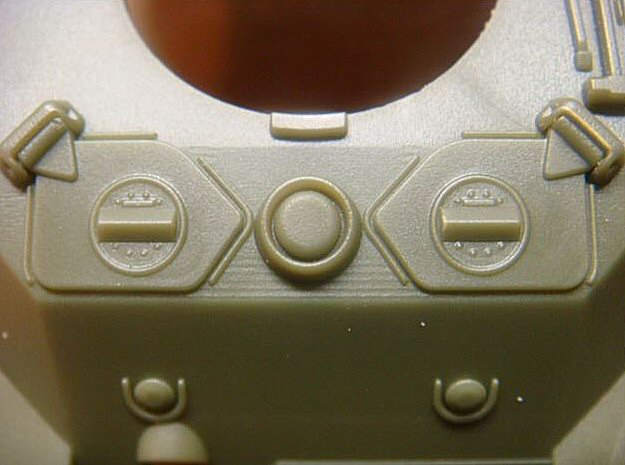 |
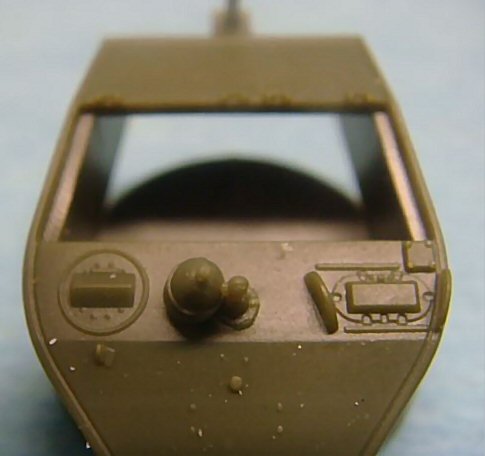
Now
some if not most people say : "I'll just take a nice new sharp
#11 blade and open them". That's all well and good except....
|
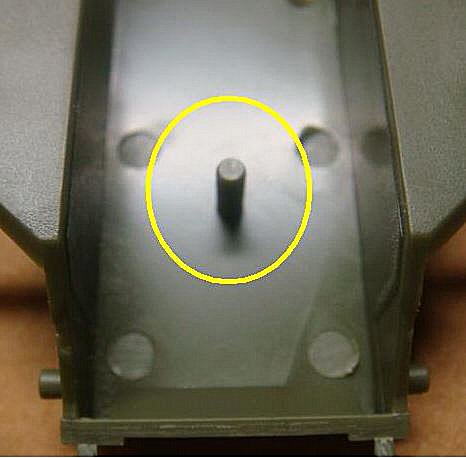
 |
That post you see in the center is a locking "sleeve" that fits over a "post" in the lower hull. Aanyway
attempting to cut open the hatches will greatly weaken the upper hull,
and while you may get one hatch open..... |
 |
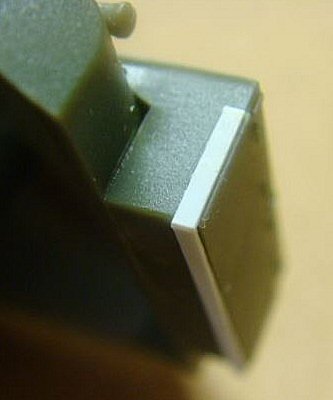
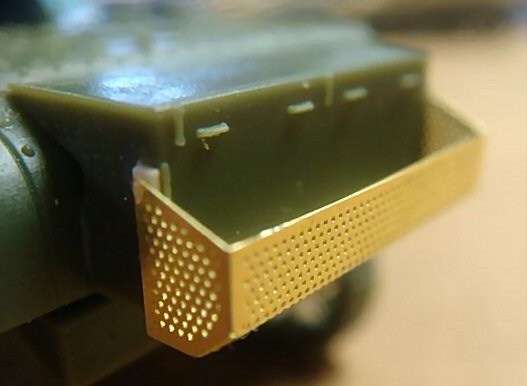
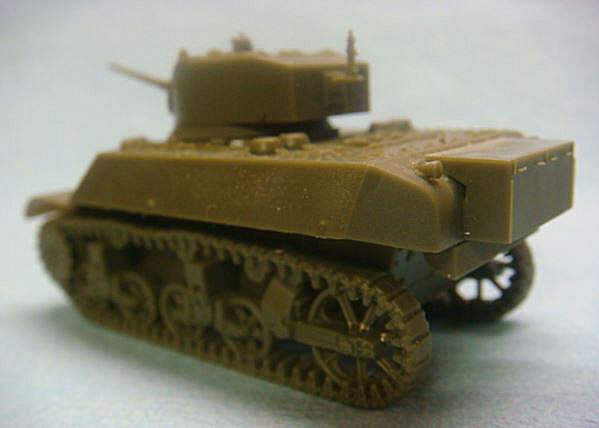
| Now
the "stowage basket" for the rear is a frail little thing.
|
 |
I took a real hard look and decided that I "did not" bend it wrong, it was just plain too big. So I took Evergreen strips and glued them around the "contact points" for the basket.
|
 |
after that the basket fits just fine :
|
 |
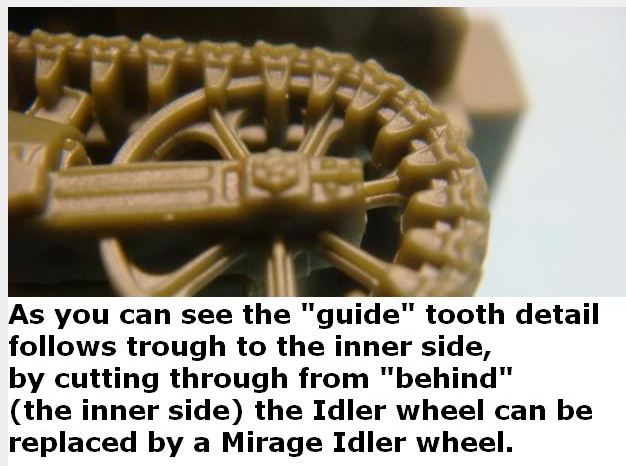
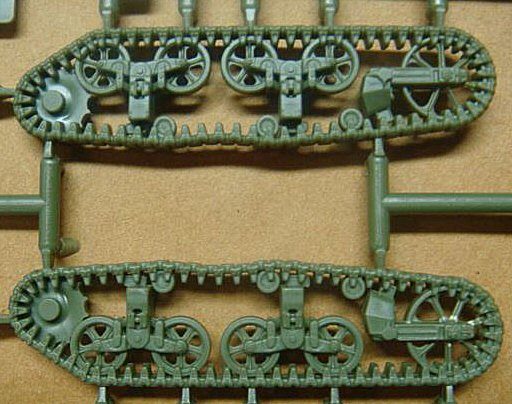
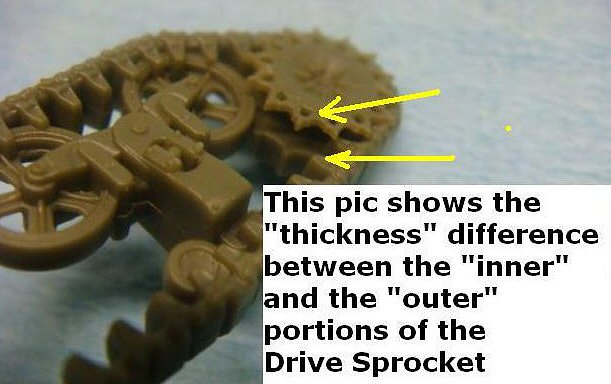
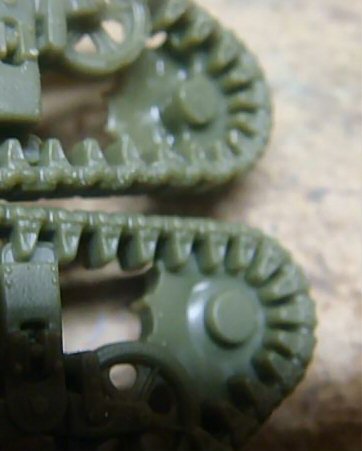
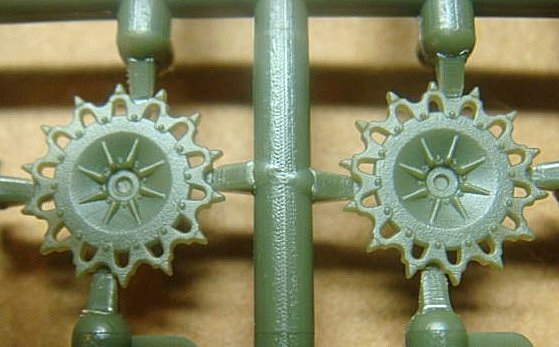
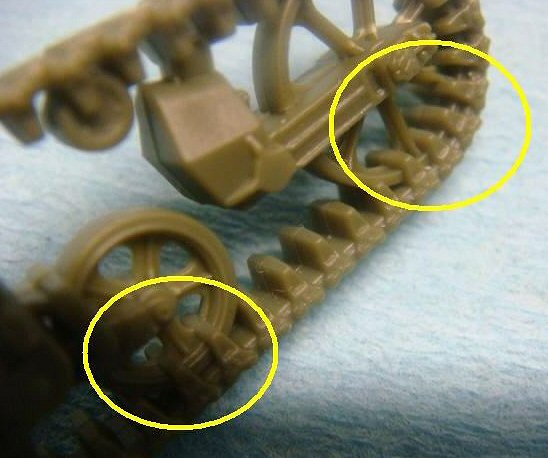
Now....let's
talk tracks (yes, the tracks). At first glance they "look"
great, they have the "track pads" in the correct locations,
(even a little "track sag" between the 1st and 2nd return
rollers) and have separated drive sprockets. |
 |
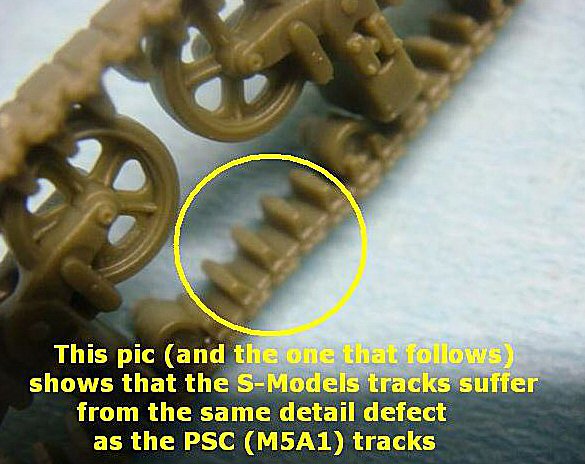
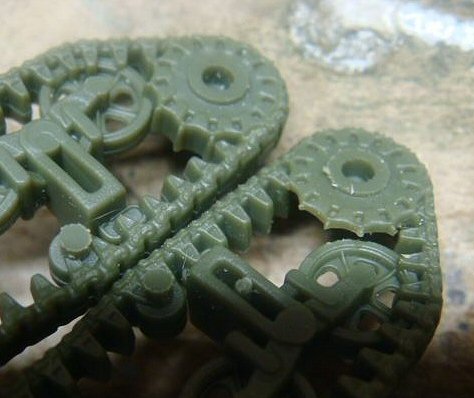
but when you look "closely", you see this : |
 |
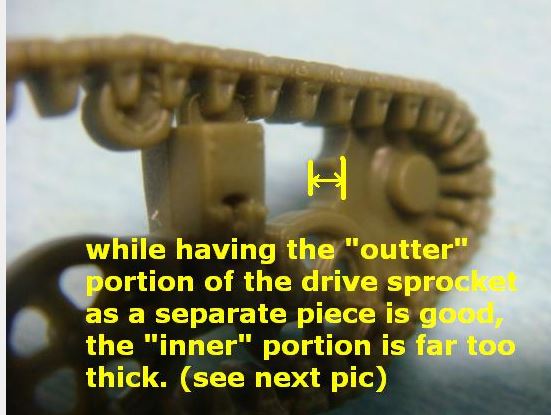
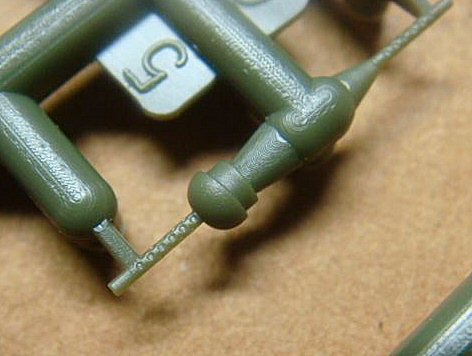
At first glance, a separate drive sprocket is an outstanding feature : |
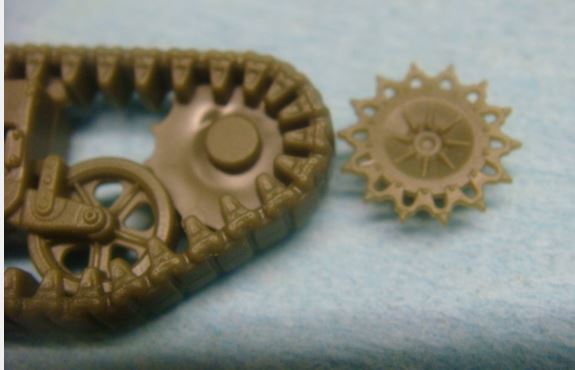 |
but if you look very close :
|
 |
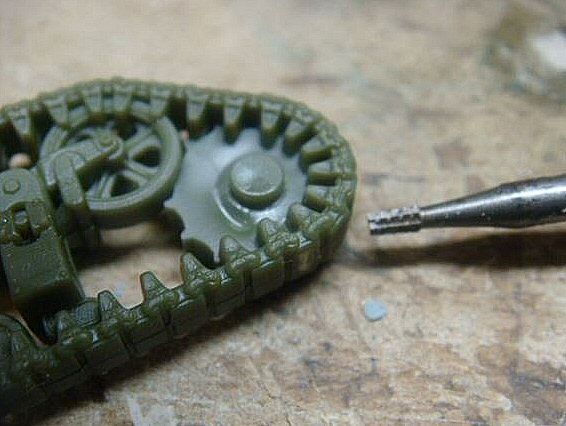
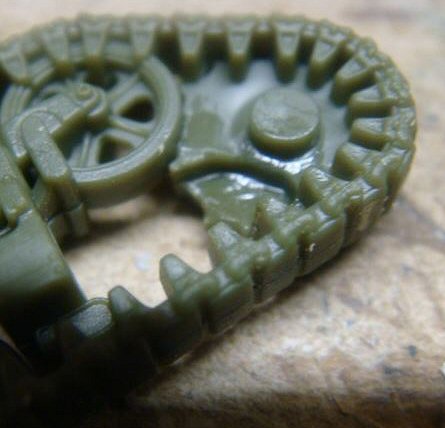
So
I took my Dremel
|
 |
after
I did a little bit of grinding, I stopped to see my progress. |
 |
...seeing
that I was doing OK, I continued. |
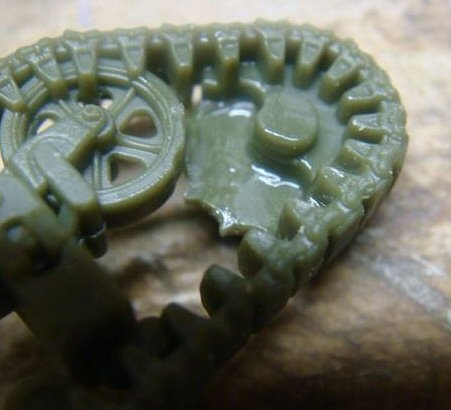 |
I thought that I was done, but I needed to go a little deeper. Here I am done : |
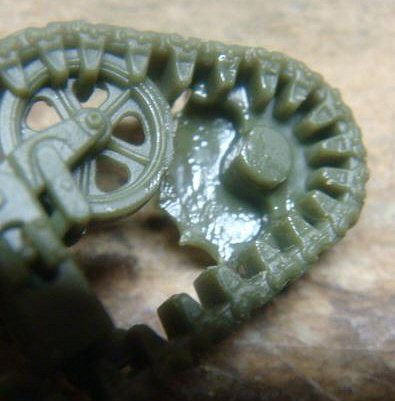 |
This
is a view from the other side : |
 |
This
shows just how much I had to grind away : |
 |
here
shown from the other side just how much was taken away : |
 |
and
here is how it looks with the drive sprocket in place : |
 |
And
here it is on the tank : |
 |
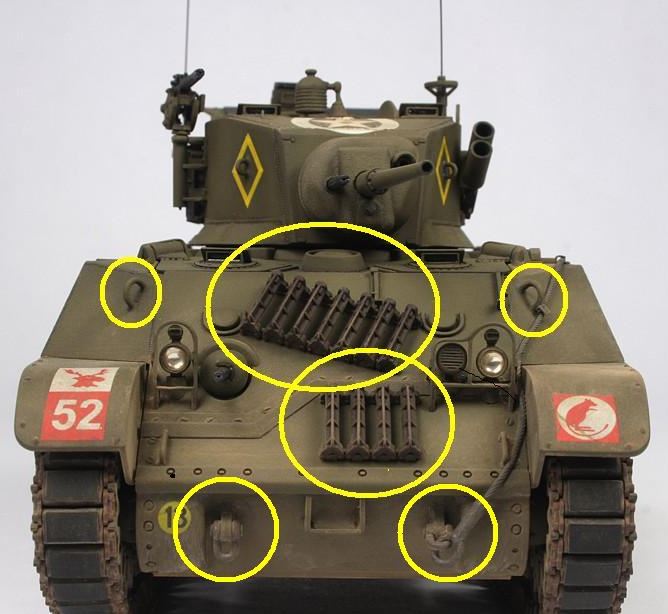
So....lets
now look at omissions. In the kit(s) there are a lot of little details
that, while not imperative to the model, are a matter of complaint
in other models that have been released in the past.
|
|
the
front of the tank : |
 |
 |
 |
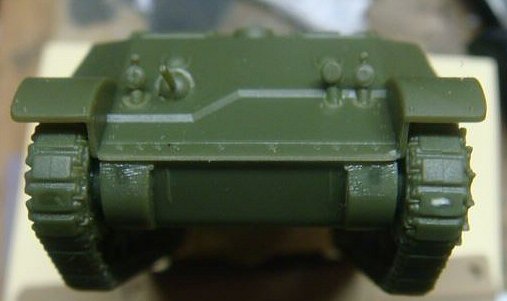
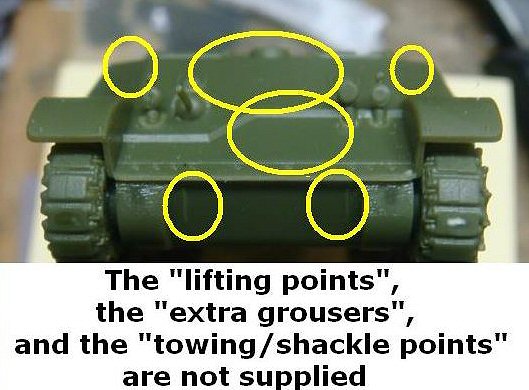
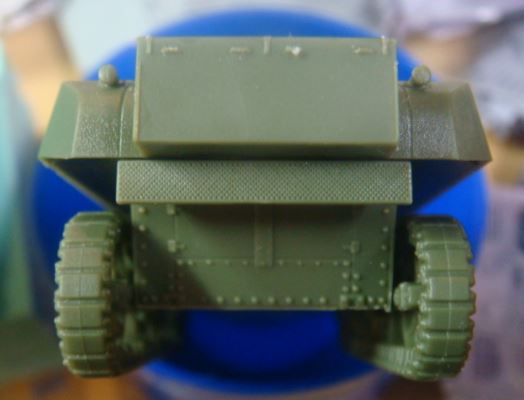
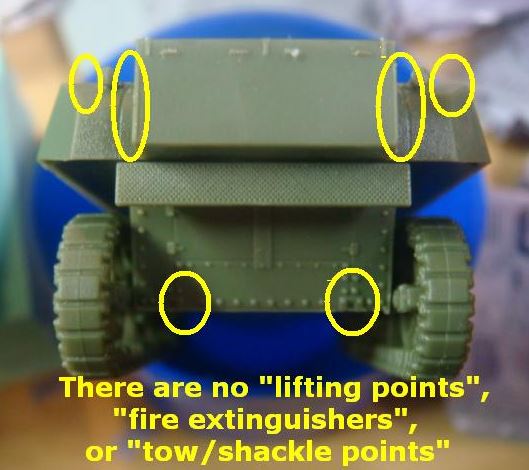
The
back (rear) : |
 |
 |
 |
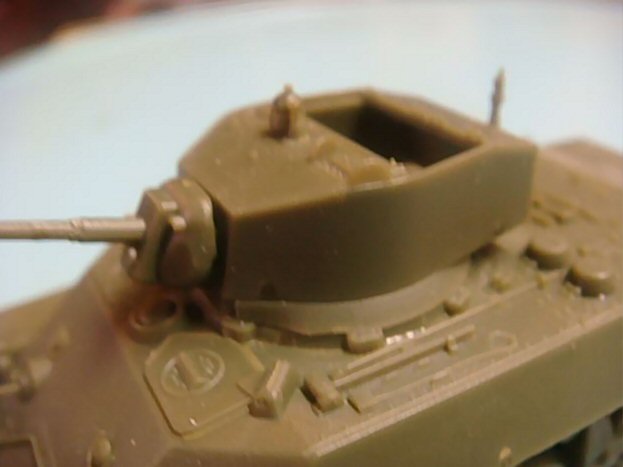
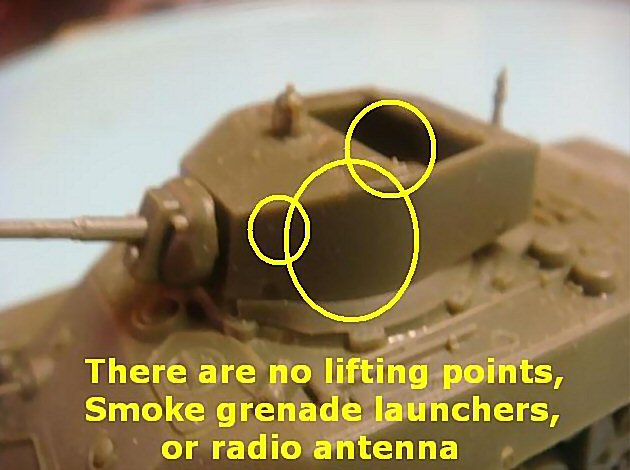
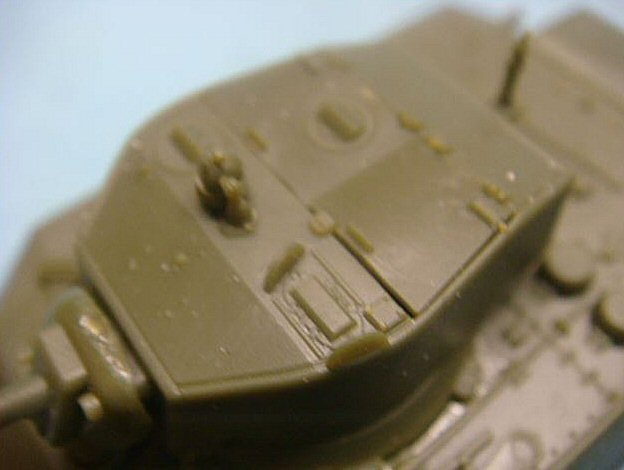
the
turret : |
 |
 |
 |
Did
I mention that there is no turret "floor"? When assembled, there is an open space in the back of the turret. |
 |
Almost
forgot about the only open hatches in the kit(s): all interior detail has been completely omitted. |
 |
 |
|
| Now
some of the missing parts can be gleamed from any of the Mirage Stuarts
kits, such as the lifting points, extra grousers (from their M5 and
M5A1). Conclusion For the
"Gamer" this is a fine little kit, it is fast to build and
on the battle table will represent that M3A3 quite nicely. Preview sample purchased by the author.
This model can be
purchased from
|
|
Back to S-Model Kit List |
Back to Home Page |
Article Last Updated: 14 february 2015 |
 --------------
 --------------
 --------------
 --------------
 --------------
 --------------


 --------------