|
UM
|
Armored Self-Propelled Car D-37 with D-38 Turret |
|||
| Kit #: 601 |
Review by
- Al Magnus
|
|||
|
UM
|
Armored Self-Propelled Car D-37 with D-38 Turret |
|||
| Kit #: 601 |
Review by
- Al Magnus
|
|||
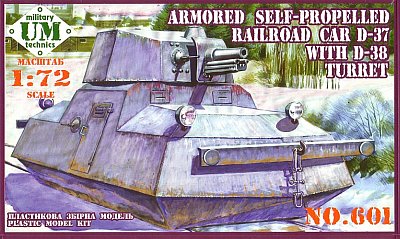 |
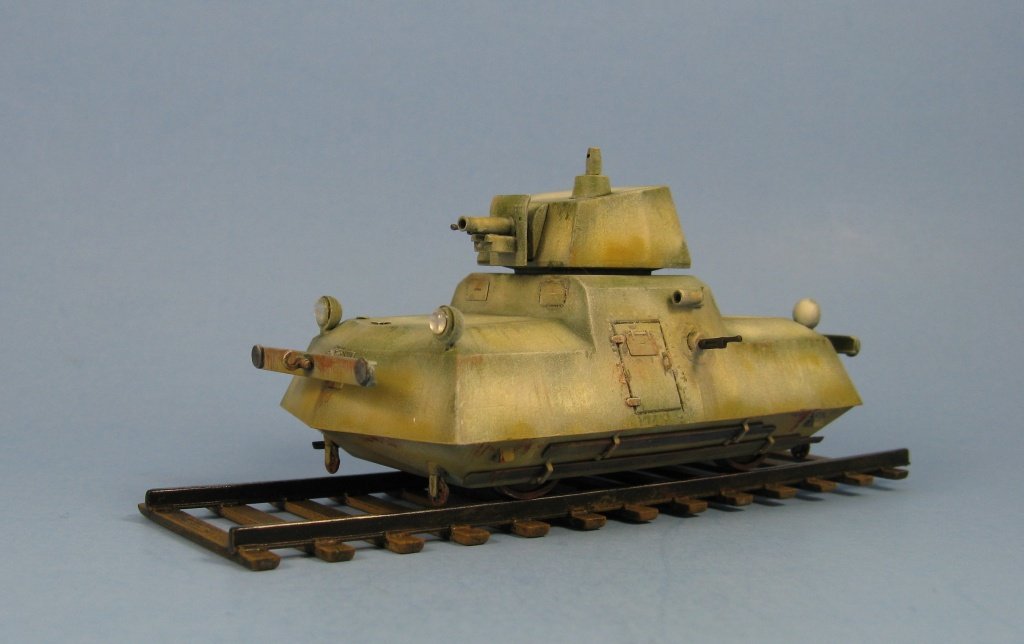
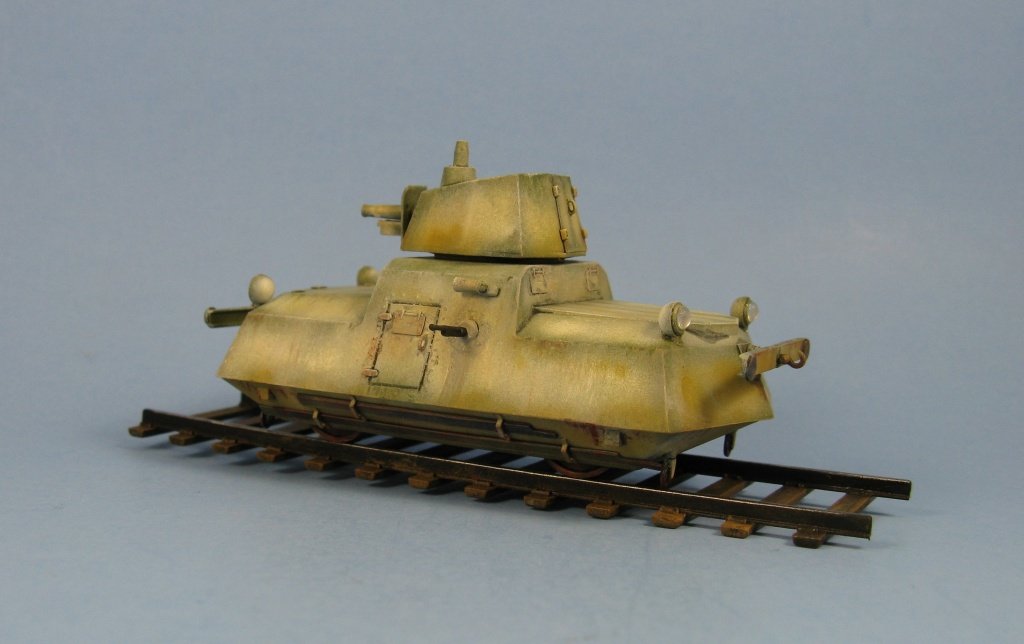
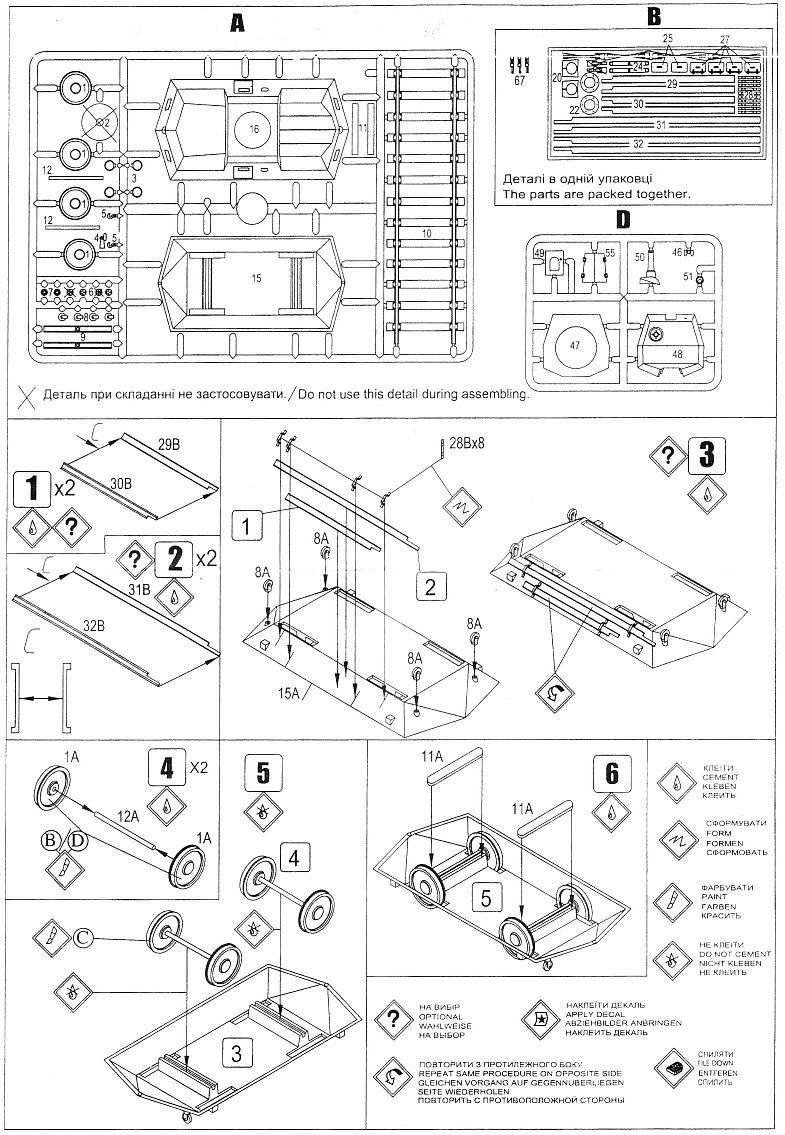
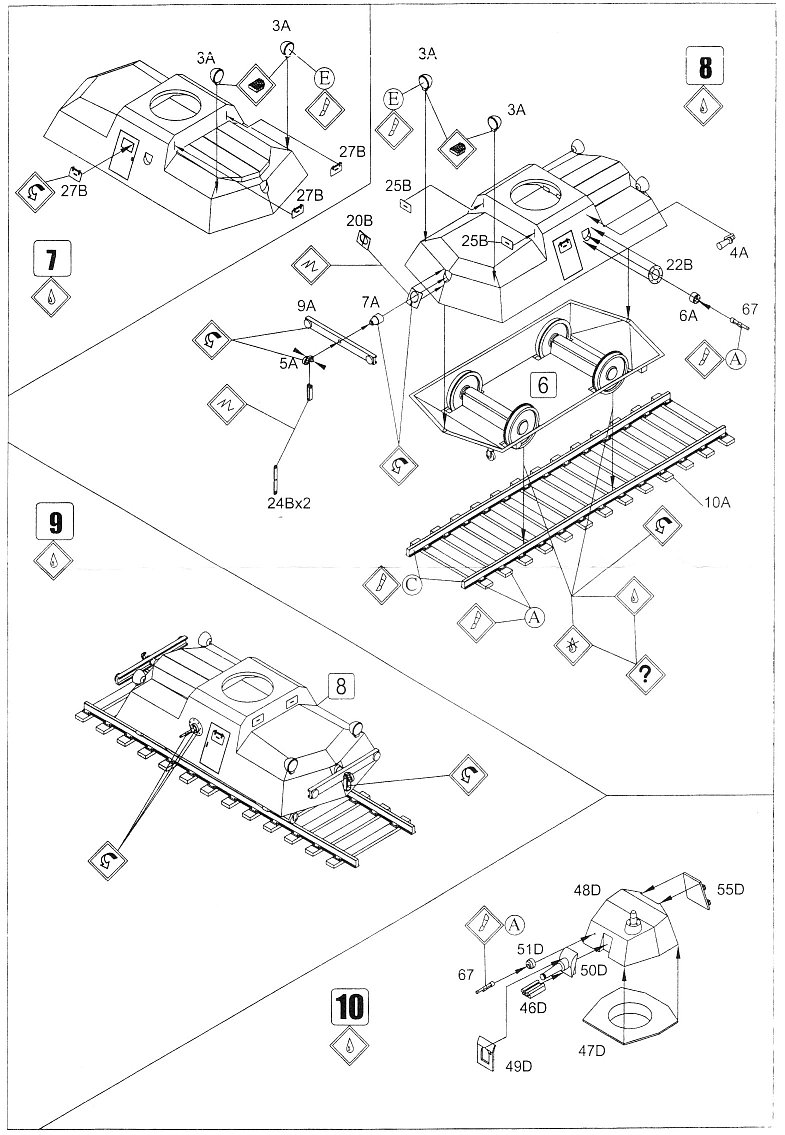
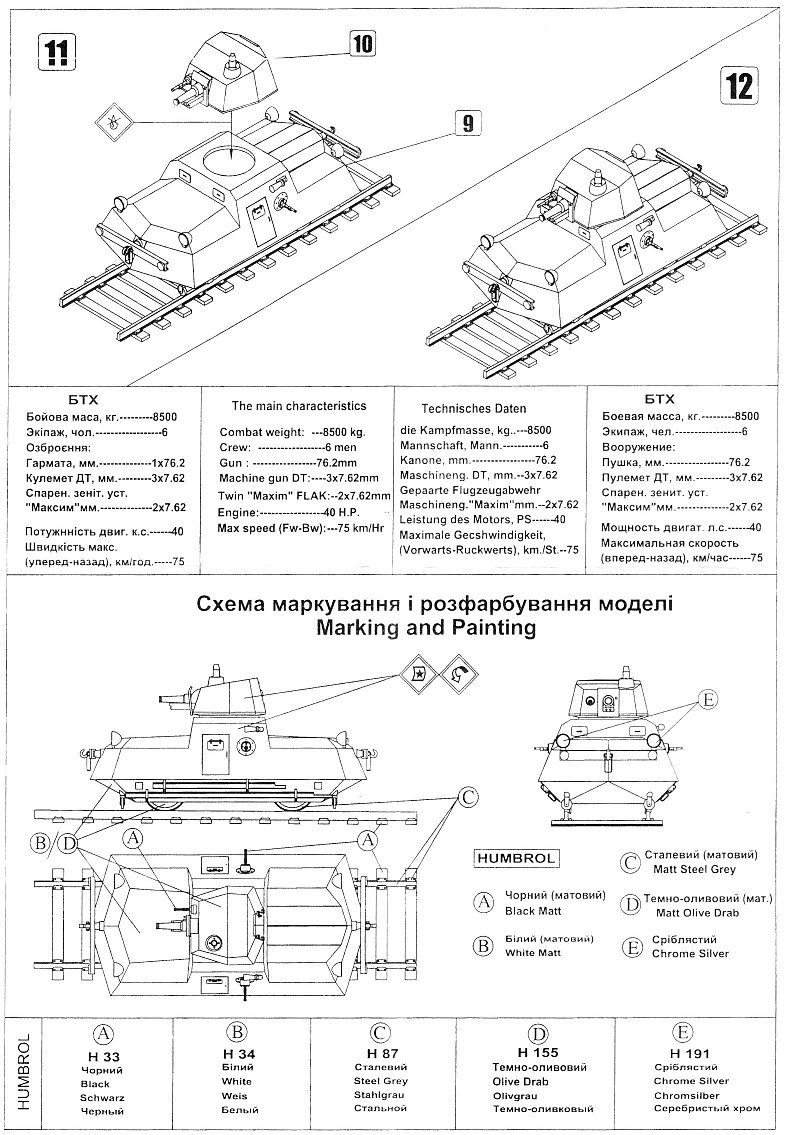
This is the latest UM Draisine kit in my continuing pursuit of building the complete set. So far I have thoroughly enjoyed building these kits. For those that are interested my other UM Draisine builds, reviews are available at On the Way! (Leningrad Draisine review & BD-41 Draisine review.) Once again a search on the web turned up nothing on this subject regarding any historical information or any specifications such as speed and range. Everything I know about this draisine comes from the fractured English on the instruction sheet, which I have paraphrased below, along with an interesting write up from Ilian Filipov on how the Draisine was switched between tracks. Mucho thanks Ilian for your help! The D-37 type Draisine with the D-38 turret was a Soviet design in 1932 intended for railroad protection duties and as a scout car for armoured trains. The hull was of uni-body construction comprised of 6-12mm armoured plates welded together. A 40hp Ford engine was located in the lower part of the hull. The weapons were located in the hull as well as in the turret. Armament consisted of a 76mm model 1927 gun and DT machine guns. An anti-aircraft station with twin Maxim machine guns was located in the rear hull covered by a two piece hatch. For combat the station was opened and the machine guns were raised for action. The D-37 never entered production but served as a test bed for the more advanced and similar looking DT-45 Draisine (which is also offered as UM kit no. 602). The railcars were equipped with special devices allowing them to change over to a parallel track, if available, in the case where the track being traveled on was damaged or if it was necessary to clear the track for passing trains. The equipment included a leaf spring blocking system, two jacks (not known if they were hydraulic or mechanical) and two pair of beams, each pair to be joined together forming a rail section. The switching operation was as follows. First the leaf springs were blocked to allow the wheels to lift together with the vehicle. Next the railcar was hoisted using the two jacks to a height where the wheel flanges were clear of the rails to a maximal allowed distance between the flange and the rail of 5mm. After this the transfer beams were assembled, placed on the rails and fixed to them with special brackets. The two lengths of beams were joined with spacers to form a short temporary track. There were two small casters each end of the railcar to fit this track. After checks to ensure the beam was perfectly horizontal and that the two beams were parallel, the car was simply pushed onto the nearby track, or aside the track it used. To push the car 4 men were usually enough though if they were unable to move the Draisine a winch with 500kgs pulling capacity was available. Its rope would be tied to a nearby telegraph pole, tree, or something similar. The other end of the rope was tied to a hook welded for this purpose located in the middle of the car sides. For changing tracks the maximal distance between them was not to exceed 4.1 metres. When not in use the beam pairs were carried on the car sides using the brackets provided and the other equipment was carried inside the hull.The kit itself has 38 plastic parts in UM's typical medium hard, green plastic plus 3 MGs added as separate pieces. These had obviously been cut from a different sprue (their colour was non-green) and were placed inside a poly bag along with the etched fret. The photo-etched fret was done in copper and contained 34 etchings. Three of the plastic parts and four of the etched parts are not used and are crossed out with Xs on the layout diagram. There is a decal sheet and of course an instruction sheet. Decals markings are generic and they have obviously been cut from a larger sheet. There is no indication in the instructions as to which markings go where, just a vague indication to put some on the turret but no indication as to which images should be used. I didn't bother using any as the box art and my pictures from Ilian showed none applied. As with the other Draisine kits from UM the construction is quite straight forward though there were a few areas that required some extra attention. Once again the body parts come molded with a rough texture which I toned down with a light sanding and like it's brethren this kit also has large sink marks on the underside of the lower body pan (part 15A) between the wheel openings that need to be filled. The door outlines seemed a bit faint to my eye so I deepened them by scribing along the lines to make them stand out from the hull a bit more. The upper hull (part 16A) is slightly larger than lower hull. At first I thought this was an error but a close inspection of the instructions shows that this is as it should be. Still you need to be careful joining the upper and lower hull halves as there's not a lot of room to work with and the plastic is injected a bit too thin. A slight gap will result if they are not aligned properly before gluing. There are some missing rivets around the doors and the hull MGs. These were added using thick super glue. From previous experience building the other UM Draisines I replaced the weak plastic axles with some stronger axles cut from .049inch diameter piano wire. The wheels were super glued to the new axles and then the wheel assemblies were glued into their mounting groove in the bottom of the hull (part 15A) with some 1-minute epoxy to provide a nice strong bond. I drilled out holes in the transfer wheels (parts 8A), the main gun barrel, the turret periscope opening and the horn. Handles were fashioned from some wire. Door hinges were cut from thin plastic sheet. The etch parts were much better with this kit than found in the Leningrad and BD-41 Draisine kits. Not one part required replacing though the etched loops intended for mounting on the tow hooks proved too fragile and broke almost as soon as they were bent. They would have been to flat looking any way so their absence is no loss. If I can find suitable replacements I'll add them at a later date. I was pleasantly surprised by the etched brackets used to hold the the tranfer tracks to the lower hull (parts 28B). I fully expected most of them to break as they were folded but none did and it was nice of UM to supply 10 brackets even though you only need eight. Placing the brackets on the hull was problematic. The instructions show where they should be located but there is no marks on the hull to assist with their placement, so I just made my best guess. This same issue also applied to the vision ports located on the front and rear of the casemate. The transfer rails are also provided as etched parts. There are two pieces for each rail which need to be glued together to make a complete piece. Care needs to be exercised while gluing because the parts are quite thin and are easy to bend which will produce a warped rail. Based on past experience, I cut headlights a bit closer to the sprues to make the stalks a bit longer and allow the lights to sit level. If not done then they will bump up against the body and aim slightly downward. Each of the light's reflectors were made from small circles punched from a silver sequin and the lenses from a drop of 1-munte epoxy. A short section of rail track is included. (See my review on the UM Russian Railroad Lines for more information.) Two colour options are listed. One is for an overall green vehicle while the other is for an overall whitewash winter scheme. I chose the later option opting to try my luck painting a winter camouflage for the first time. I felt the predominance of fairly large and flat panels found on this vehicle would give me the least amount of grief as I experimented with the paints and washes.All in all this was a much easier build than the two other two previous UM Draisines. Outside of the bit of extra work done for detailing this kit went together very quickly and without much fuss.
Review sample purchased by the author. |
| Back to UM Kit List | Back to Construction Reviews |
Article Last Updated: 07 June 2010 |
Back to Home Page |