|
UM
|
Armored Self-Propelled Leningrad Railroad Car |
|||
| Kit #: 604 |
Review by
- Al Magnus
|
|||
|
UM
|
Armored Self-Propelled Leningrad Railroad Car |
|||
| Kit #: 604 |
Review by
- Al Magnus
|
|||
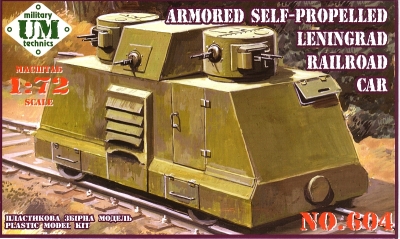 |
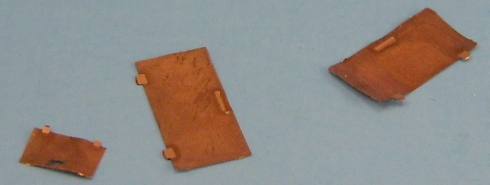
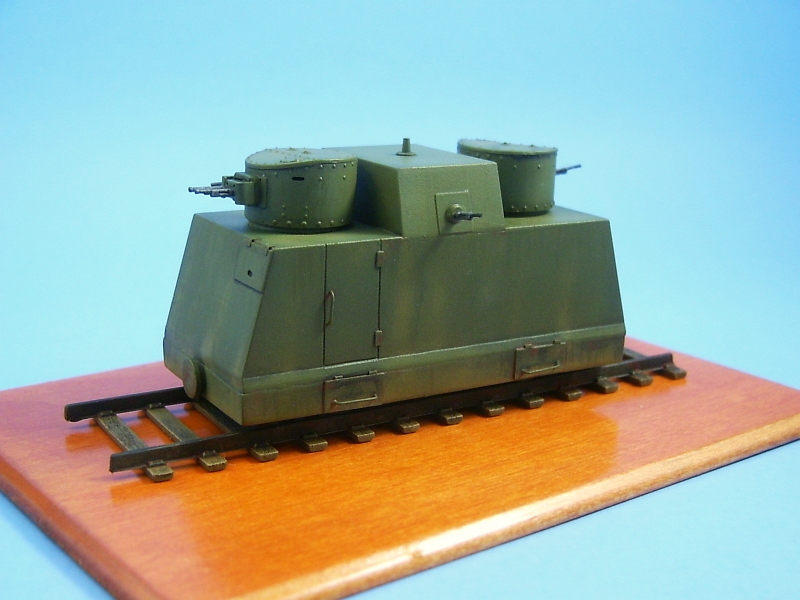
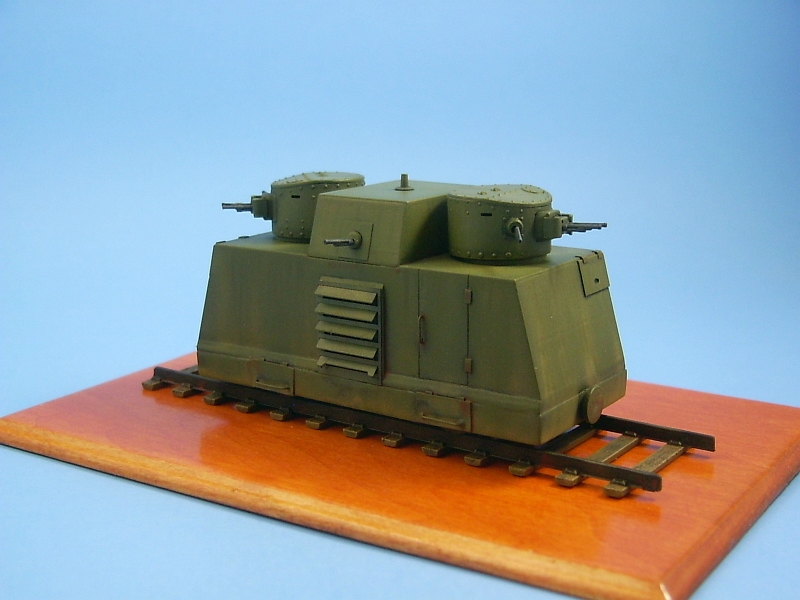
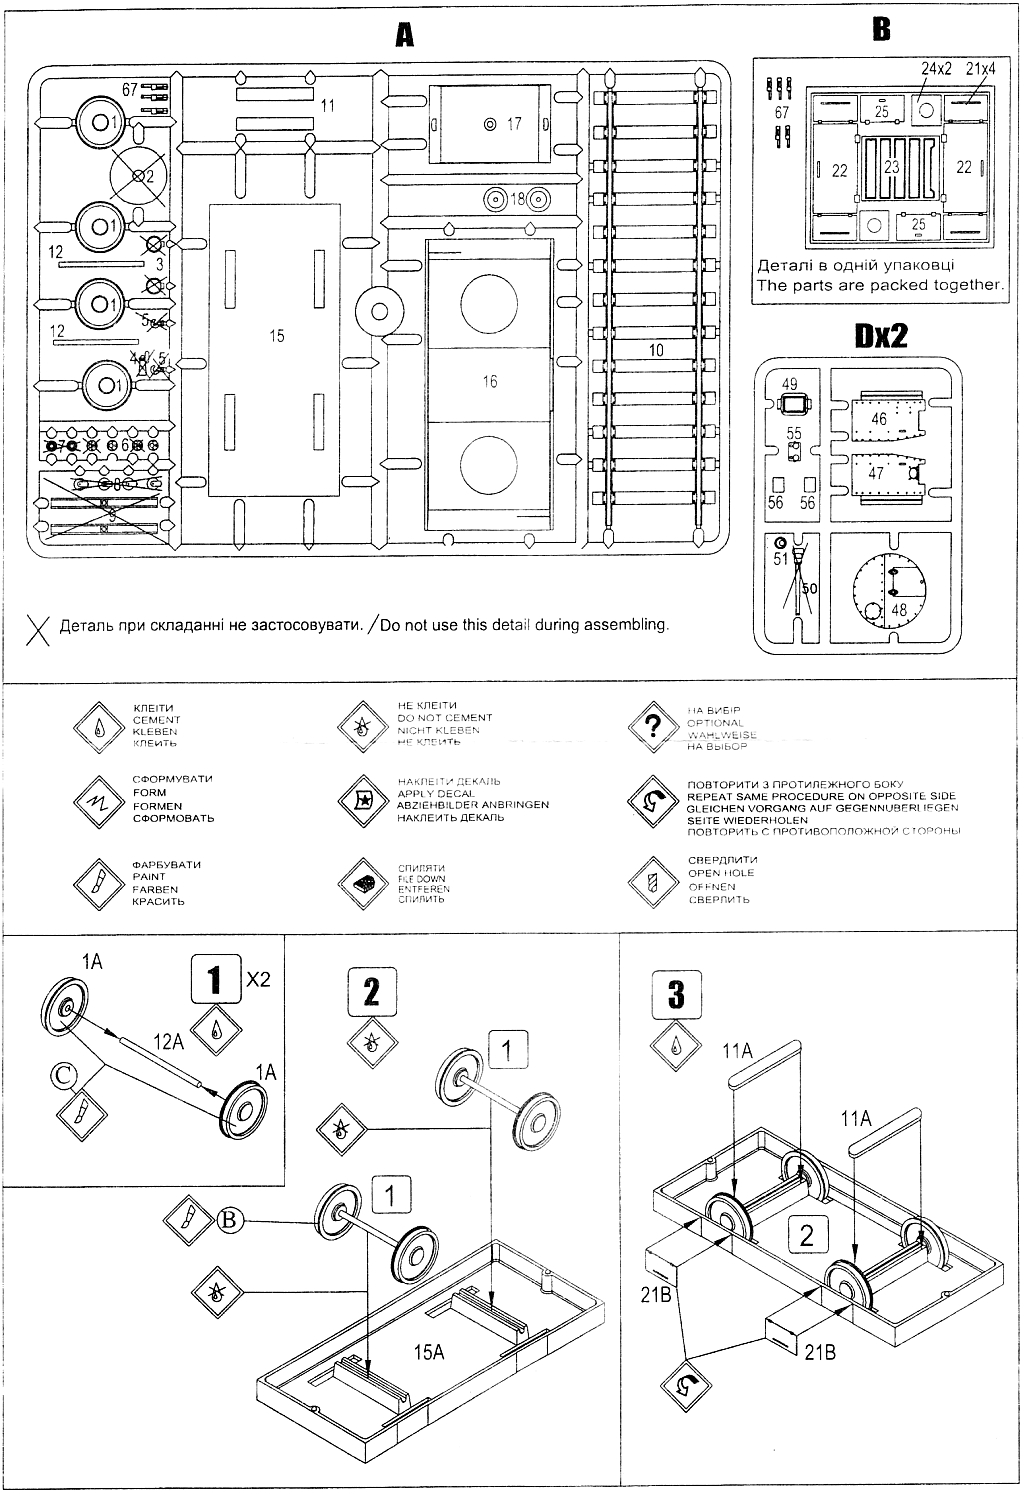
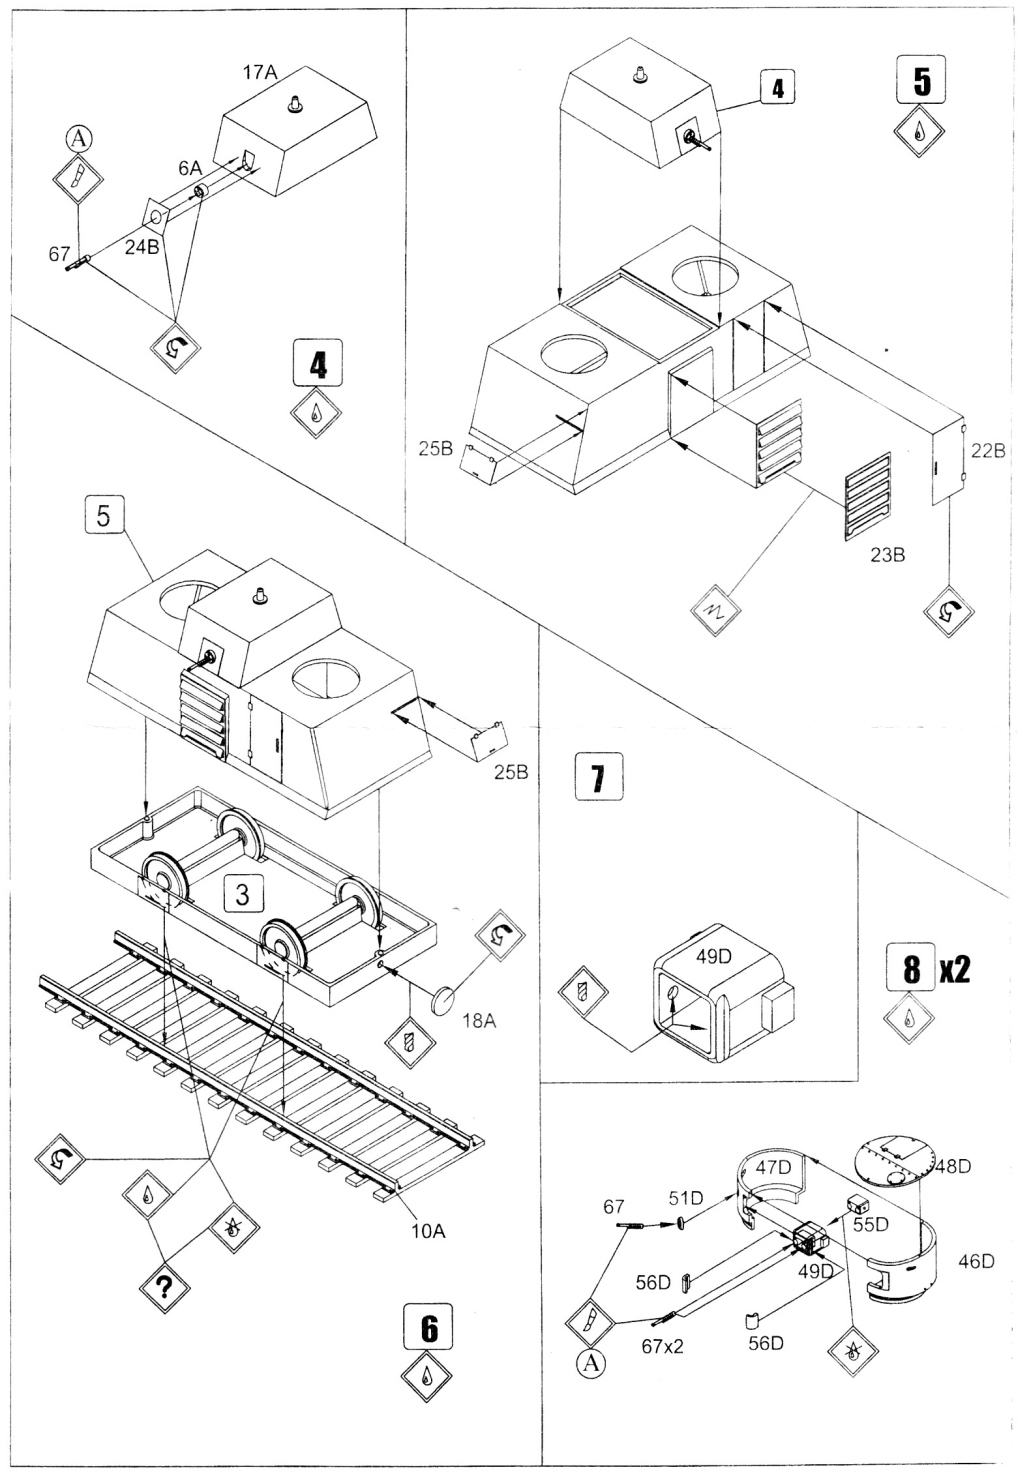
I purchased this kit with the though that it would be a quick build and also because it was as the saying goes - "cute as a bug". A search on the web turned up nothing on this subject regarding any historical information, if there were others made, or any specifications such as speed and range. Everything I know about this kit's subject comes from the fractured English on the instruction sheet, which I have paraphrased below. The Leningrad Armoured Draisine was designed and constructed at the Kirov Plant in the autumn on 1941, and was then subsequently transferred to the "National Avenger" Armoured Train unit. It participated in fighting on the Leningrad front up to 1945. It had an armoured hull made of sheets 8-12mm thick, and was equipped with doors and access hatches. Armament consisted of eight 7.62mm machine guns. On the top of the hull were two BT-2 tank turrets, each with a pair of DA-2 machine guns plus an additional DT machine gun. The remaining two machine guns, one on the left and one on the right side, were in a fixed casemate located between the two turrets. Crew consisted of 7-8 persons. The kit itself has 56 plastic parts in UM's typical medium hard, green plastic. Sixteen of the parts are not used and can be assigned to the spares box. There is a photo-etched fret in copper consisting of 11 pieces. There is a generic decal sheet and some instructions. Construction was straight forward though there were a few areas that required some extra attention. First of all there are a few large sink marks that need to be filled. You'll find them on the underside of the lower body pan (part 15A) spanning the area between the wheel openings, as well as on both ends of the upper body piece (part 16A). The photo-etched pieces are very poor and the worst part of the kit. The parts for the appliqué armour on the casemate guns and the vent louvers are quite useable since they employ the full thickness of the copper sheet, but it appears that the doors, visors an access panels were etched deeper into the copper in an attempt to create handles and hinges, resulting in parts that are too thin and warped. A picture of the poor etched pieces:
Since these parts were complete useless I replaced all of the access panels and visors with scratch built items from plastic sheet. For the doors I just deepened the locating groove for the etched pieces that was already engraved into the plastic hull. I added handles from bent wire to the doors and to the access panels located in front of the wheels. I originally used the kit's plastic axles but they proved to be very weak. I found this out the hard way after I had them and the wheels glued in place on the lower pan. When I went to add the upper body shell I accidentally placed a bit too much pressure on one of the axles and the wheel snapped off. So I decided that it would be best to replace the obviously weak plastic axles with something stronger. To do this I snipped off all of the wheels I had already installed and drilled out the holes in the back of each wheel. New axles were cut from .049inch diameter piano wire (as measured with my dial calipers). The wheels were super glued to the new axles and then the axles were placed back into their mounting groove after I reamed it out to remove the old plastic axle. Three of the eight machine guns (part 67A) come molded on sprue A while the remaining five are loose and found inside the small plastic bag containing the photo-etched fret. They have obviously been snipped from the sprues of another kit at the factory. I cut out the opening for the vent, backed it with some plastic sheet and inserted a piece of wire mesh. The body parts are molded with a rough texture which I didn't like too much so the parts were sanded to tone it down some. On the turrets, I didn't bother drilling out the holes in the gun mantlet (part 49D) which allows the guns to elevate. I just cut off the locating nubs on the machine guns mount (part 55D) which fits inside the mantlet and glued it in place instead. A short section of rail track is included. After sanding out the ejector pins marks I added some grain to the upper sides of the wood ties by scraping my hobby saw over the surface of the plastic. The kit parts just before painting:
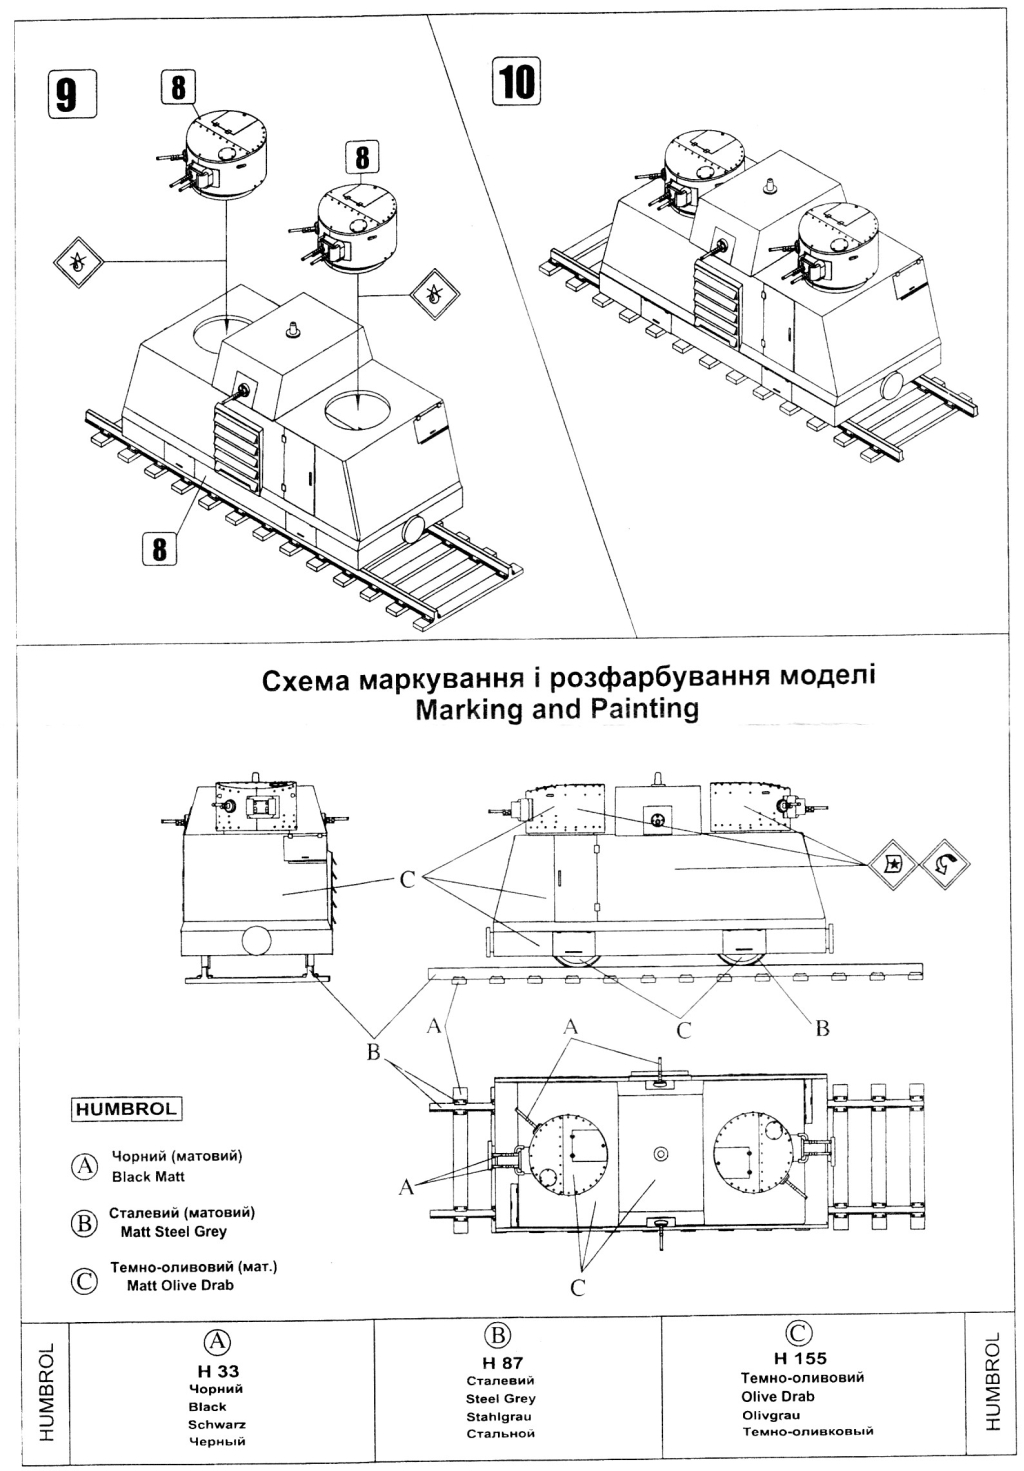
I built the kit as four sub-assemblies: main body, turrets and track. To give myself some handles to use as I painted the parts, I glued a short section of sprue to the inside of each turret and I also inserted a short section of wood dowel into one of the turret openings. All my painting was done with enamel paints. The wheels were pre-painted with a coat of Krylon Gloss Black sprayed directly from the aerosol can. Before the primer was applied the wheels were masked. The primer was a coat of Testors light grey followed by a coat of Green Drab, which is quite dark. I then misted some Testors Russian Armour Green and Olive drab vertically over the body inside the panel edges to get a nice streaky finish. A coat of Testors Glosscote was followed to level the coats and followed with some pin washes in black to the panel lines and so forth. Since I use enamels lots of dry time is required before applying the washes. Then some dry brushing with Aeromaster Earth Brown was done once the wash was thoroughly dry. A final misting of some Aeromaster Earth Brown along the bottom edges and some Testors Rust dabbed here and there finished the painting. Outside of the extra work to replace the photo-etched pieces and the problems with the axles, this was a fairly quick build and was quite enjoyable. I think I will look into buying some of the other Draisine kits that UM are now offering.
Review sample purchased by the author. |
| Back to UM Kit List | Back to Construction Reviews |
Article Last Updated: 27 April 2009 |
Back to Home Page |