|
|
www.onthewaymodels.com |
Italian L3/33 Light Tank |
|||
| Kit # PS720002 | Construction review by Rob Haelterman | ||||
|
|
www.onthewaymodels.com |
Italian L3/33 Light Tank |
|||
| Kit # PS720002 | Construction review by Rob Haelterman | ||||
.jpg) |
| For a preview of this kit, containing a scan of the sprues, see here.
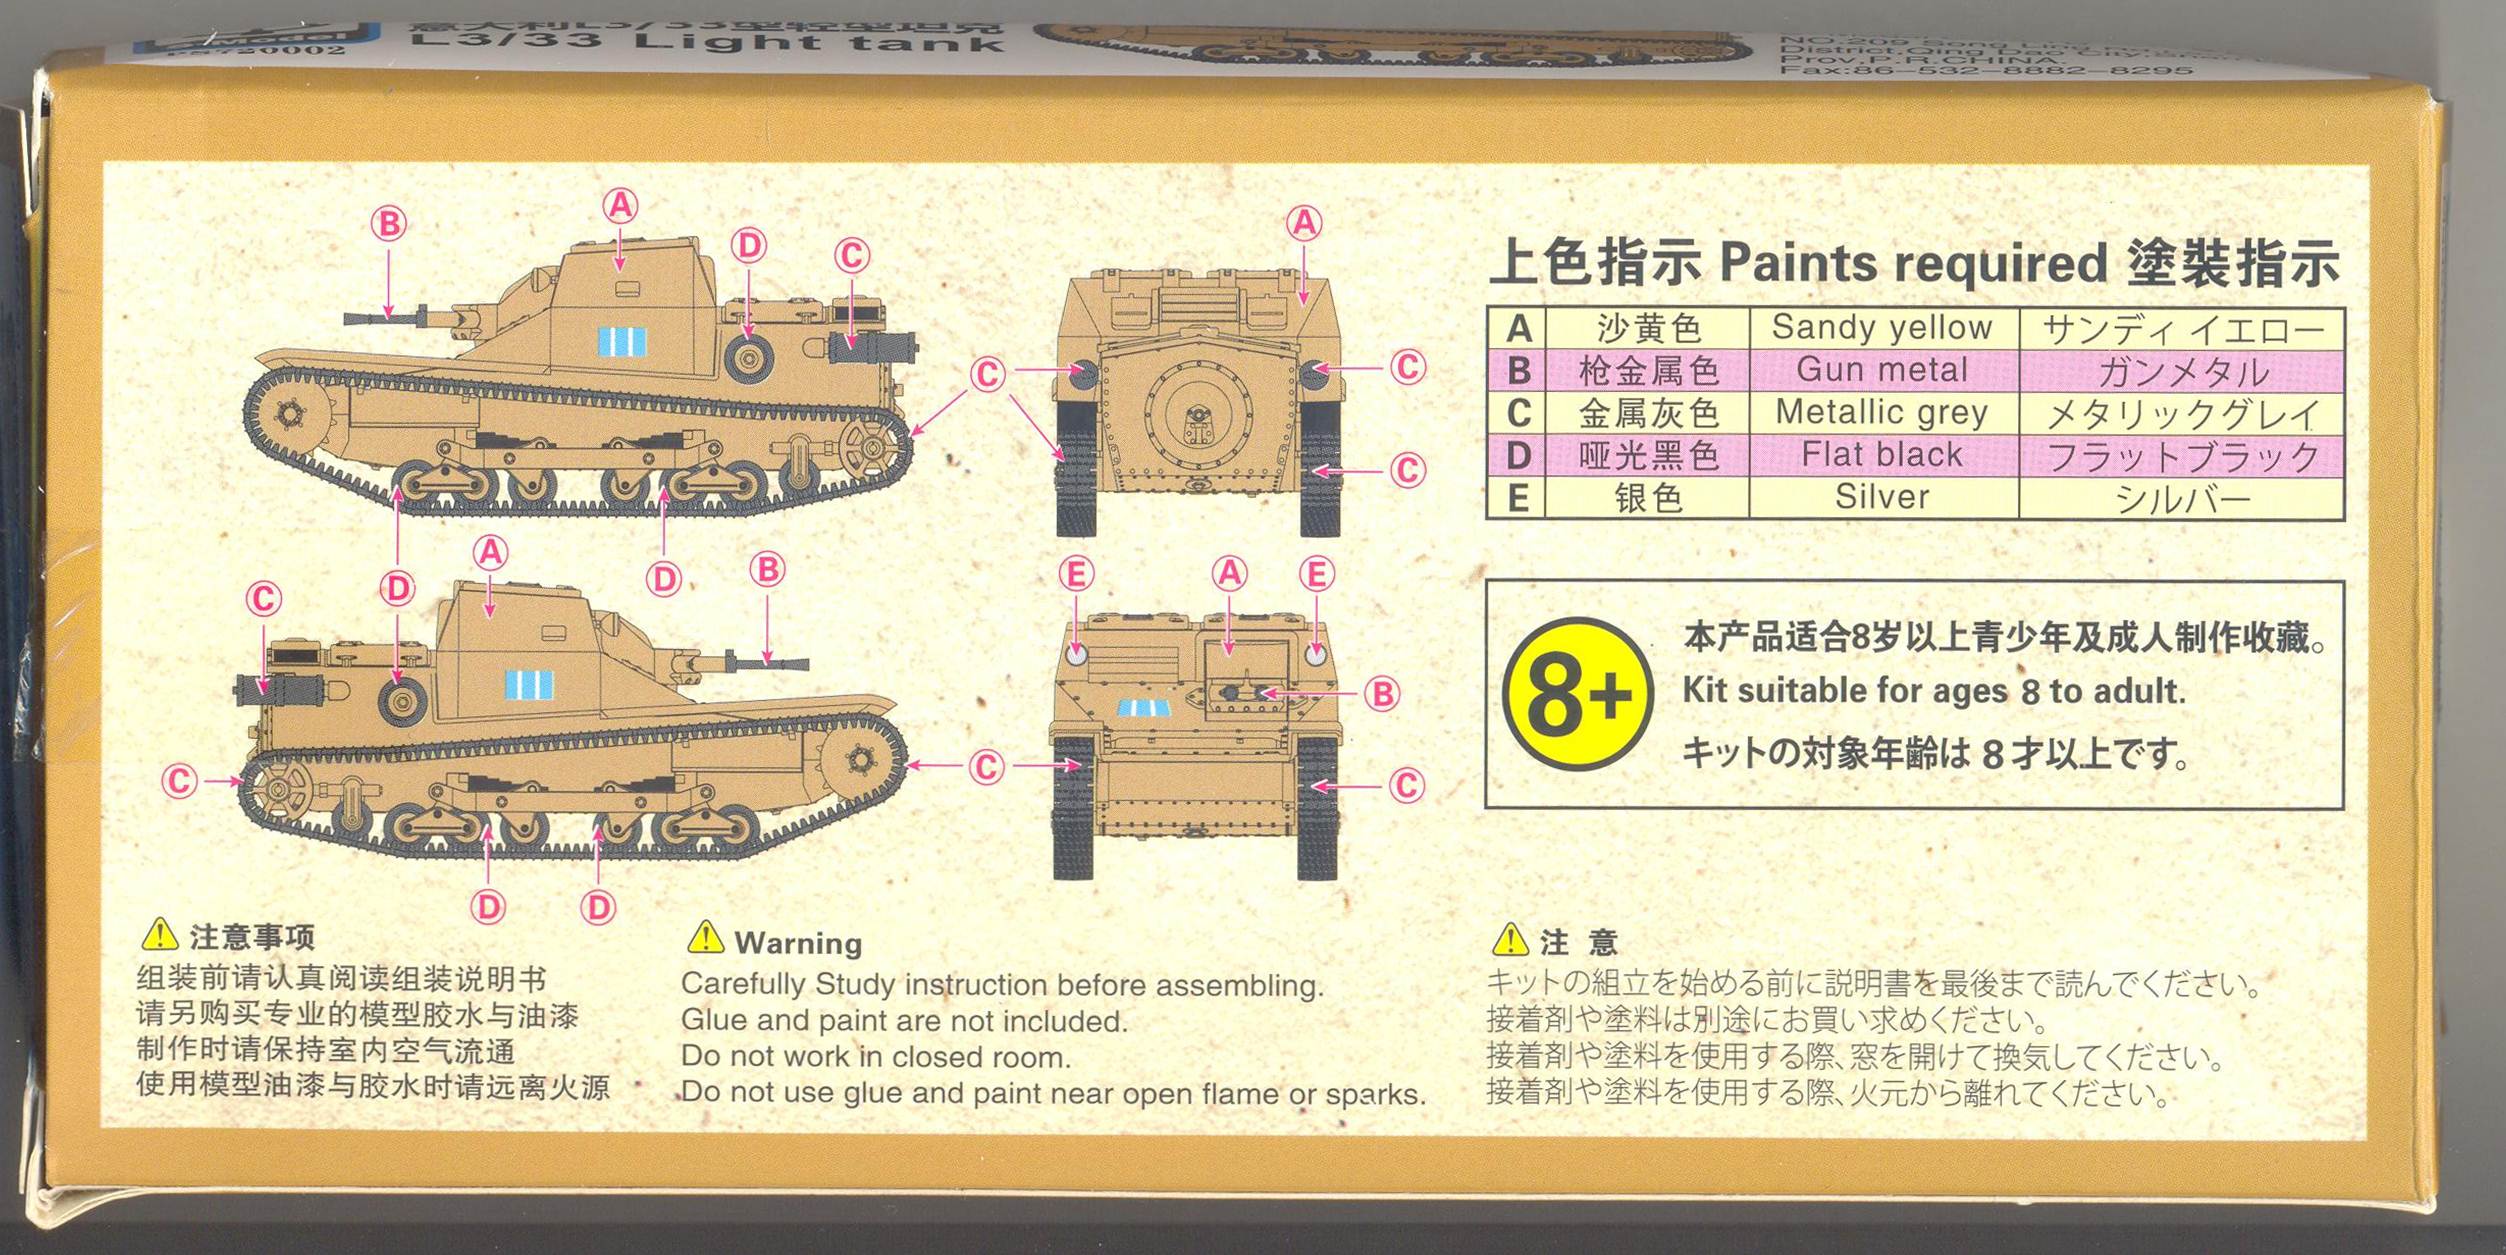
History The L3/33 (aka CV33) was developed from the British Vickers Carden Lloyd Mk.VI and came in two versions [3]:
The CV35 was basically the same vehicle but with riveted hull. A good
number of tanks from the first series were re-armed with various types
of gun, including a 20mm Solothurn anti-tank rifle or a Breda 12.7mm
MG. Flame-thrower variants also existed (cf. kit # 720004). A radio
version was also produced, as was a bridge-layer. Prototypes of a
tank-destroyer carrying a Breda 47/32 gun and a recovery vehicle were
also tested.
The kit (Note
that there are two identical kits inside one box.) I started by removing the bigger parts and cleaning them up. This was an easy affair with only the tracks demanding a bit more work due to the large number of attachments to the sprue. As there is a (minor) seam running down the middle of the tracks, it is a pain to get rid of it without damaging any of the fine detail on the track faces. I mated the upper to the lower hull, trapping the MG mount, which remains mobile after assembly. Little glue was required and fit was perfect. Note that the plastic that S-Model uses is very soft and overzealous use of glue is a sure recipe to ruin some of the finer details. The
tracks can be attached to the hull without glue, which aids painting
them enormously. Still, I decided to add just a small drop of glue
to the rear attachment to ensure alignment. As you can see from the pictures, there is no interior, although the hatches can be opened. If you put a figure in the hull, not much extra work will be needed. If not, some additional detail might be welcome.
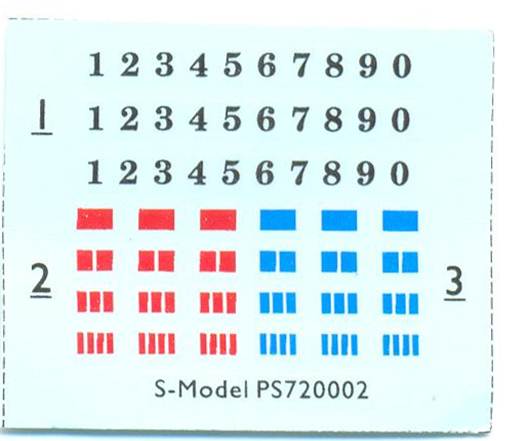
The tiny roadwheels are a pain to paint. This is not really a fault of the kit, but the ready-assembled suspension doesn't help. S-model gives us a tiny decal sheet. The Italian "colored bar" system is well-known, but I am at a loss how to use the numerals. They are on a single carrier film, by the way, while the bars are on individual carriers. The decals look thickish on the sheet, reminding me of Hasegawa decals, but once applied they seem to have "normal" thickness. What can't be seen on the sheet is the white between the bars. Once applied it becomes visible, and you discover that the white is slightly out of register with respect to the red, and that the edges are somewhat ragged. (Without actually applying the blue bars, I can't tell if they suffer from the same defect.) My references show that (at least some of) the vehicles carried the bar-markings in four locations, while S-model gives you only three. Also note that you cannot build the two vehicles inside this box in markings of the same unit, due to the lack of sufficient decals.
My second vehicle was completed as a Bulgarian vehicle, using the Bison decal set. This set gives you two color options and two marking options, and while it mentions that the vehicle carried a single Schwartzloze MG, it shows the suspension of a Series II vehicle, while the real vehicle was a Series I. This meant that I scratchbuilt two tiny suspension brackets and an MG. The twin gun mounts were filled in and a single central hole drilled out. I added a small towing eye to the nose plate. I chose the marking option "01". I noticed that the two decals for "01" were slightly different and had no indication which one had to go left and which one had to go right.
Accuracy
Note that, if you don't want to simulate the lenses of the headlights, you can always "cover" them with a canvas cover that only left a small slit.
Conclusion
References
Review
sample provided by the Hobby
Den. |
| Back to S-Model Kit List | Back to Construction Reviews |
Article Last Updated: |
Back to Home Page |
.JPG)
.JPG)
.JPG)
.JPG)
.JPG)
.JPG)
.JPG)
.JPG)
.JPG)
.JPG)
.JPG)
.JPG)
.JPG)
.JPG)
.JPG)
.JPG)
.JPG)
.JPG)