![]()
| Hotchkiss H38/H39 | ||||
| Kit #: PS720008 | Review by Doug Chaltry | |||
 |
| This
may be a controversial statement, but I don't feel that
S-Model kits will ever be prize-winners without some
level of modifications to them. This is primarily because
of the limited detail on the running gear due to the way
they choose to mold them as single parts. When I build a
model, I try to decide up-front what level of effort I
want to put into it: enough to make it worthy of winning
a medal at a model show? Or just enough to make me happy
to display it with satisfaction in my display case? Some
aftermarket companies make replacement running gear for
early war French tanks, such as Syndikate Co., but I
don't have any of those parts in hand. So I chose the
latter approach this time around, just building something
that will make me happy. This particular build is not an
example of what can be built out of the box, because this
kit had a couple of features that were simply
unacceptable. Rather it will be a demonstration of how
just a couple of simple modifications can go a long way
to improving the final look of a model without going
all-out to build something really stunning. It's easy to
do with S-Model kits, because they provide such a nice
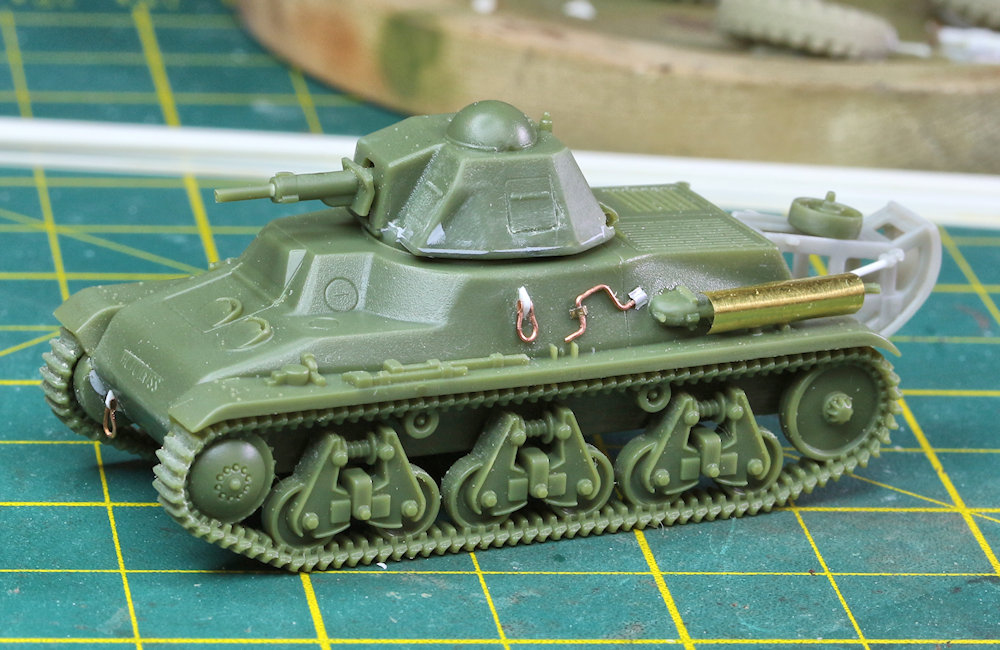
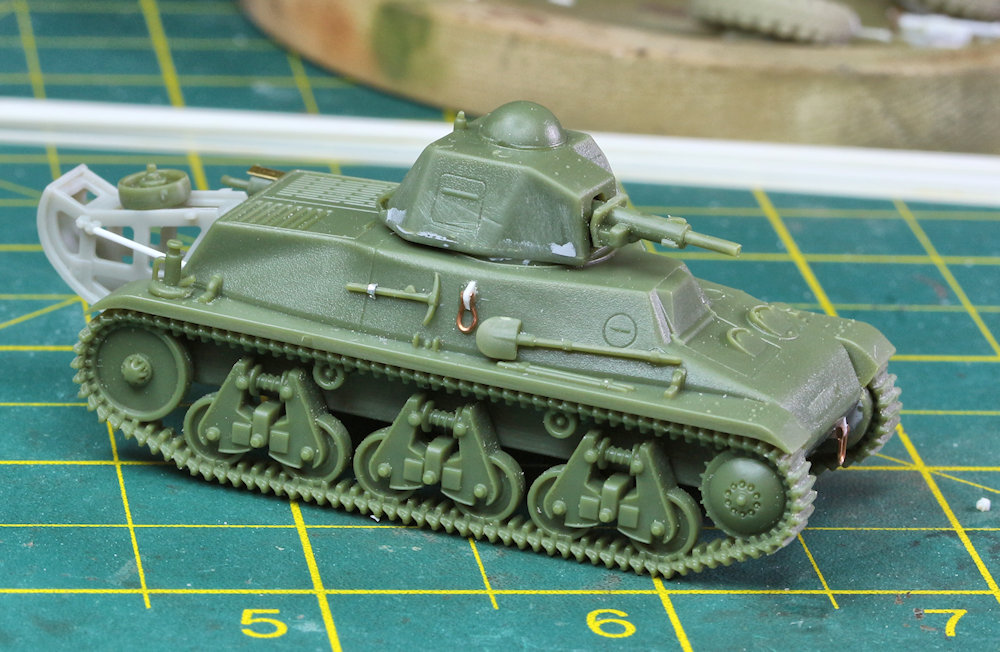
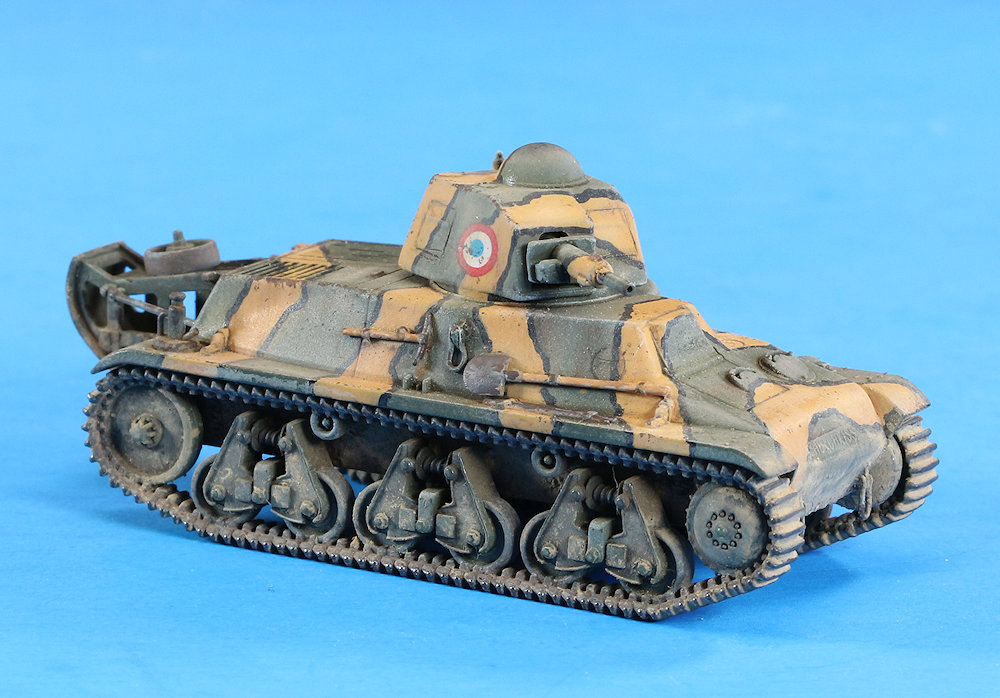
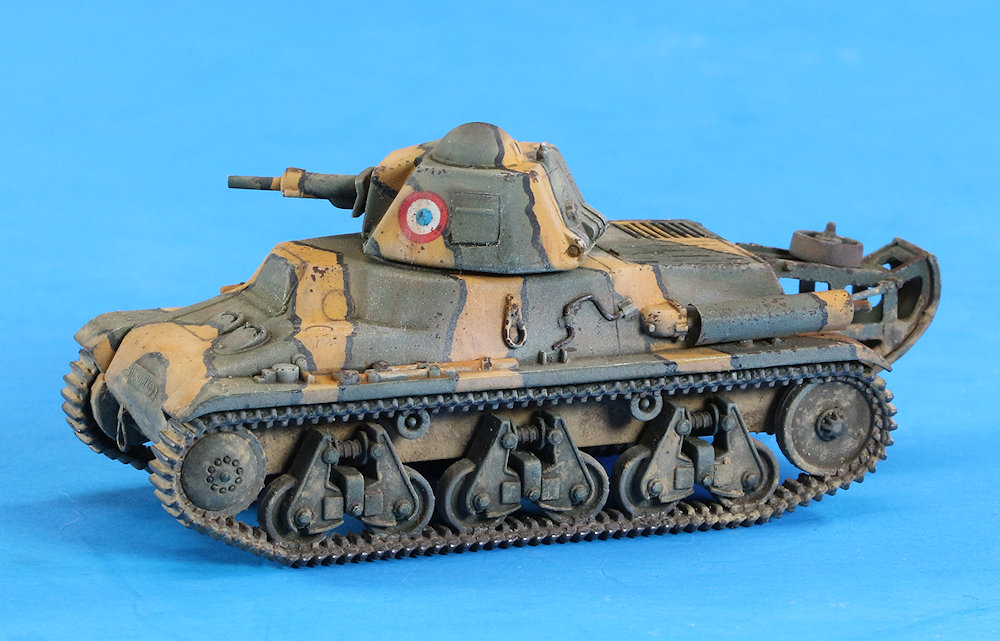
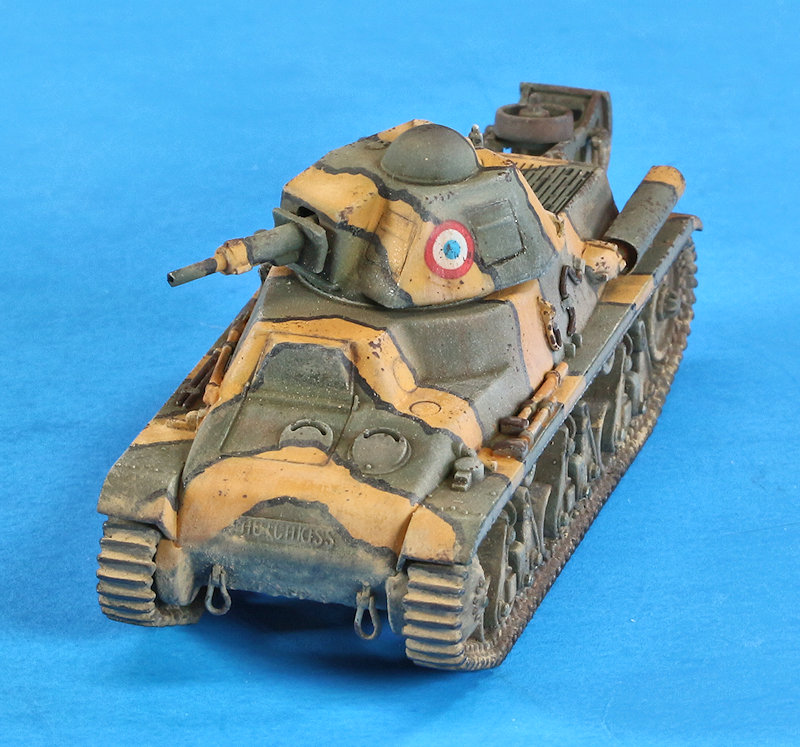
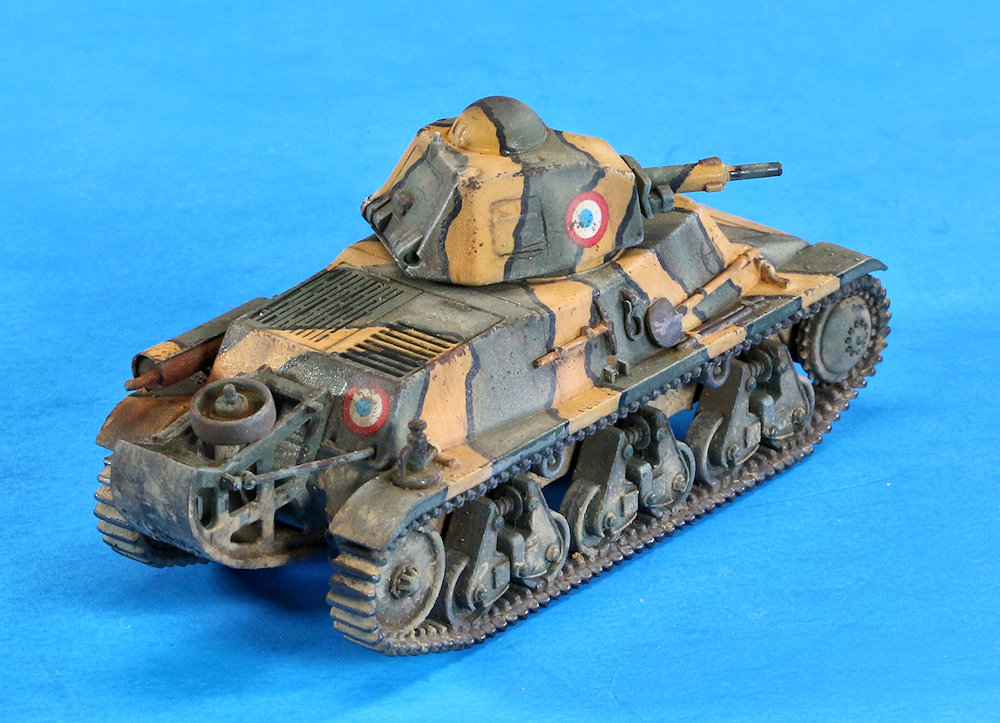
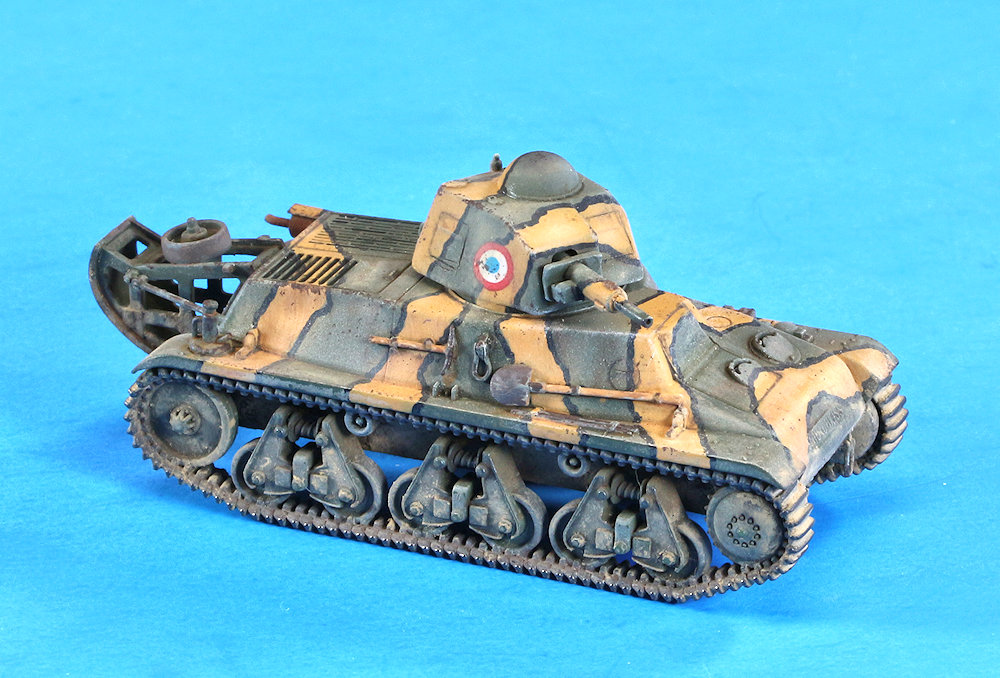
starting point. By the way, scans of the kit parts and instruction sheet can be found in Rob's earlier review of the pre-production version of this kit. Personally, I like his better... The following two scans show the simple modifications that I made for this kit. The rods that attach the rear trench-crossing skid were too long, so I fabricated new ones from styrene rod. The engine crank handle and the towing shackles were all represented in etched brass, which looked absolutely terrible, so I replaced those with copper wire bent to shape and styrene. There was a small amount of putty work on the turret, and the front and rear joins between the upper and lower hull parts. Had I wanted to go further, I would have improved (or even replaced) the molded-on pioneer tools, and replaced the tool brackets for the shovel and pick, which are molded onto the plastic parts. And of course, if one has replacement wheels and tracks, those would drastically improve the looks of the final model.
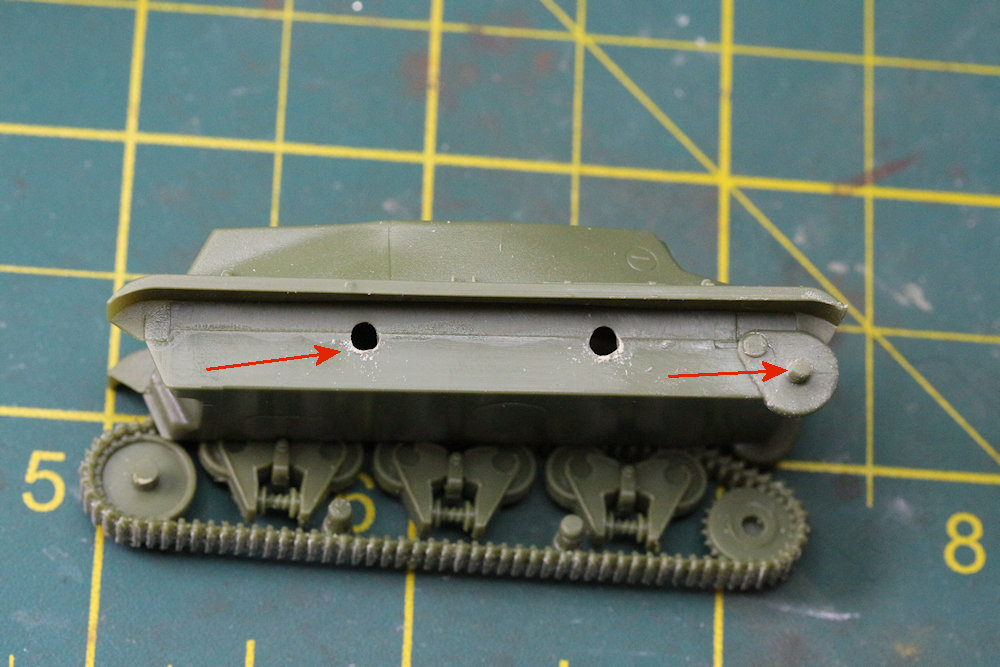
Assembly of the model was easy, as it is for pretty much every S-Model kit I have built to date. The only tricky bit I encountered with this one was that the wheel/track units seemed to sit up too high on my kit, so that the tracks were scraping the underside of the fenders. The following picture illustrates where I did some targeted grinding in order to make the track units sit a little bit lower on the hull sides. I don't think I took it far enough though. I now think, perhaps, that it may have looked a little better had I tried to carve out the undersides of the fenders so that there was room underneath them to accomodate the tracks. That would have likely looked a little better, but it certainly would have been more difficult.
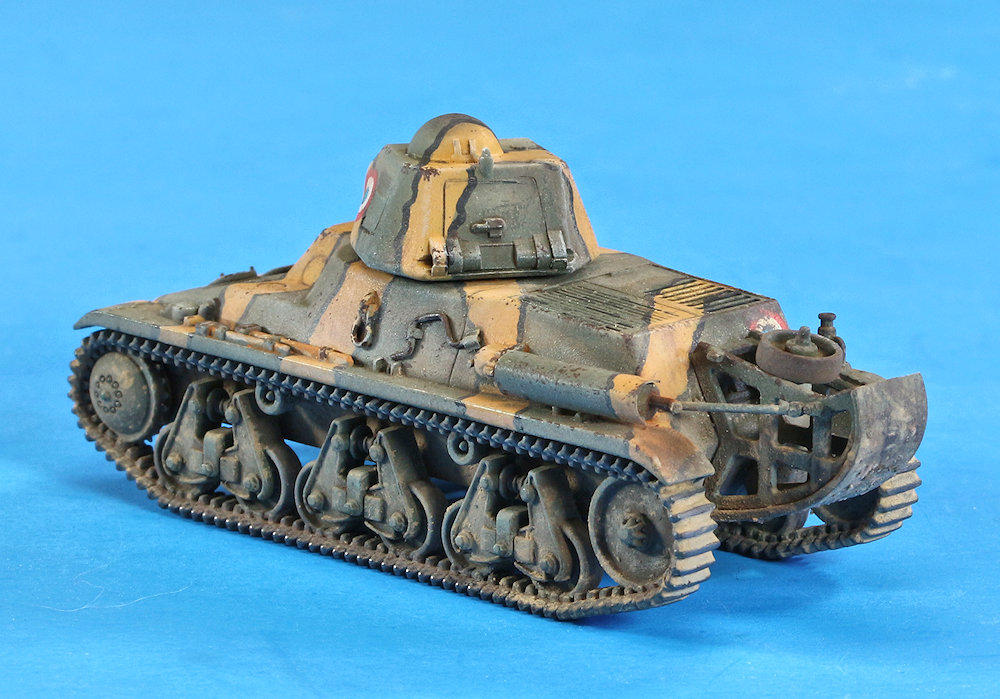
I tried a new technique with the painting this time. As I was looking for something a little more colorful than simply another green tank, I saw this pattern in (I think) and old Concord book on the invasion of France, and thought it looked intriguing. But how to paint the fine black lines? I don't trust my ability to use a simple paint brush; I figured that my hand would likely shake, and it would be difficult to keep a consistent thickness of the lines. So I bought some generic acrylic paint pens with a 0.7mm tip, which was the finest tip that I could find. I'm not happy with the result. First, I think I needed a 0.5mm tip, but I don't think they make them that fine. And secondly, my hand still shook resulting in some pretty jagged lines in places. I ended up having to do a lot of touch up with the paint brush anyway, which looked far better than the pen, so I think the next time I attempt one of these demarcated schemes, I'll just try to free hand it. Maybe I need to try one of those hand stabilizers... I airbrushed the green base coat, then hand painted the yellow camouflage with Vallejo Model Colors, which did not cover very well. In order to get solid coverage so that I could see no green through it, I would have had to lay down an incredibly thick layer of paint. So I mostly just hand painted a wide outline of the yellow patches and then filled them in with the airbrush. Another example of a camo scheme that I should have masked.
Ultimately, I think I hit my goal of making something that I'm happy enough with to put in my display case. I think I am always going to find fault with my own work, and this one is no exception. Maybe instead of looking for flaws I should highlight what I'm happy with; in this case, I think I'm getting pretty good at painting old mufflers. I'm also happy with the dirt on the trench-crossing skid. I keep treading the line between a tank that is simply dusty and one that's totally gunked up with dirt and mud, always ending up on something in between. Maybe soon I'll try to paint something really, really dirty. |
| Back to S-Model Kit List | Back to Construction Reviews Back to Home Page |
| Article Last Updated: 27 January 2026 |