|
The Kit
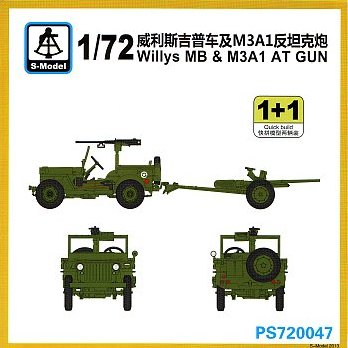
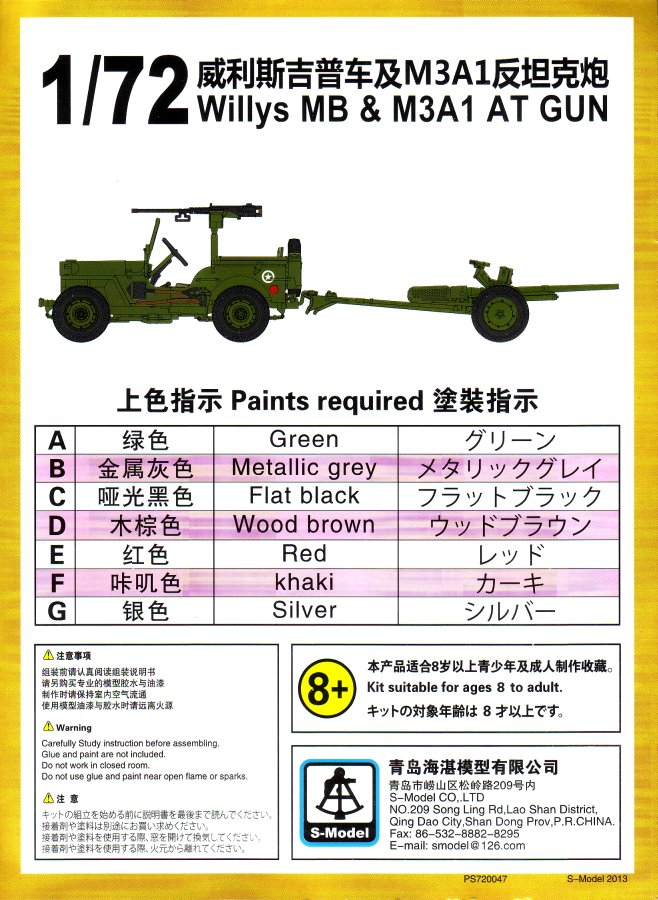
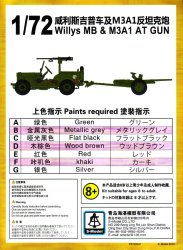
The kit comes in S-Model's typical end opening box. For your money you get two Jeeps and two 37mm M3 anti-tank guns. Inside the box there are six sprues of
green polystyrene plastic.
Four of the sprues are for the Jeep - two labelled A (33 parts each) and two labelled T (6 parts each). The remaining two sprues, labelled B (17 parts each) are for
the M3 gun. There is also a set of three photo
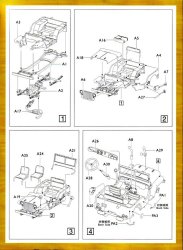
etched frets containing parts for both the gun and Jeep. Rounding out the package is an instruction sheet, in the typical exploded diagram format, and a small
decal sheet of generic white US stars and a set of Chinese roundels. A lot of parts stuffed into the box for the price!
The 37mm M3 Anti-tank Gun: A Review
A Brief History
Following the First World War the United States spent most of the 1920s trying to improve their inventory of guns to provide anti-tank capability. This activity
was unsuccessful leaving their Army with no anti-tank capability by the early 1930s. In 1937 a pair of 37mm PaK 36 guns were purchased from Germany and by late 1938
a design based on the German guns was accepted into service as the 37mm Gun M3. By the time of the Pearl Harbor attack in 1941 the gun had pretty much become outdated
with the rapidly advancing improvements in tank being produced in Germany, though the gun still remained capable throughout the war against the weaker armour of
Japanese tanks. For the 37mm M3A1 version, the loader's shield was modified along with the traversing lock to allow faster tracking of moving targets. Also
the barrels were threaded for a muzzle brake but the brake was never issued. In all over 18,000 guns were produced.
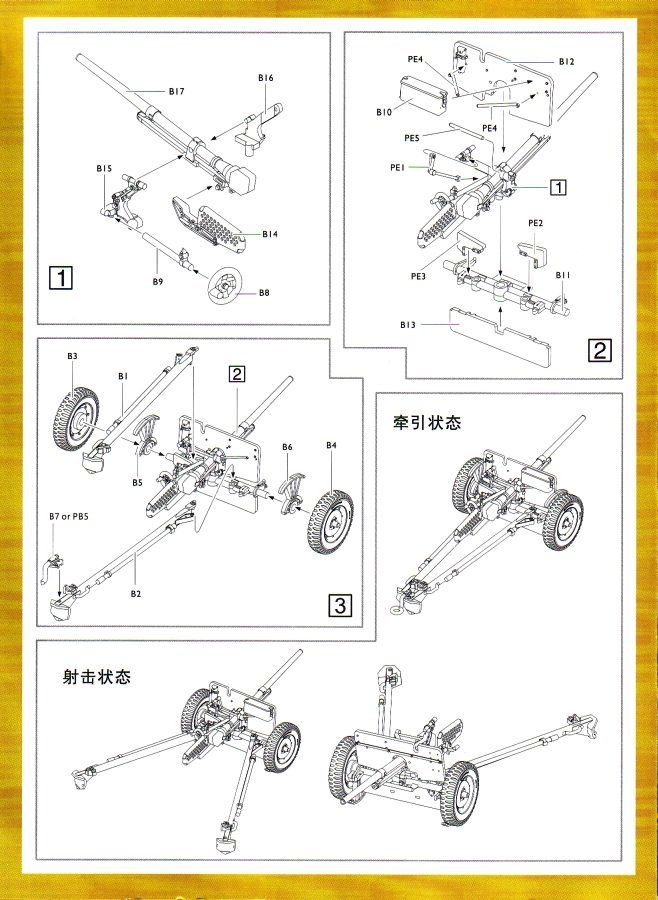
The Build
|
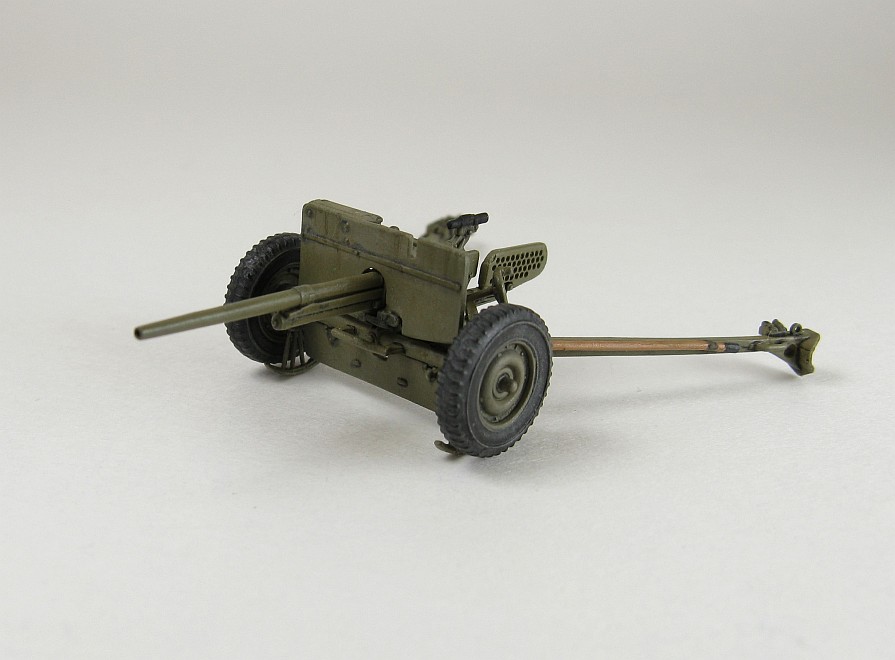
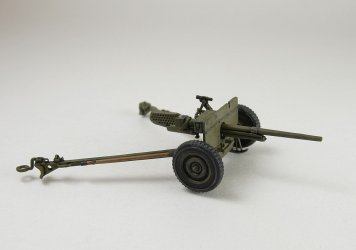
As far as I can determine the S-Model kit is representative of the 37mm Gun M3 on M4 carriage.
This kit has many very small and delicate parts, removal of which is not helped by the numerous injection gates and flow relief points. It's nice to see the lifting
handles already molded to the spades and the rammer rods are well molded. The muzzle comes with a molded in opening out-of-the-box. It's not very deep so I
deepened it some with a small drill bit. The trails are quite petite and mine were slightly warped. A quick bending easily fixed this. I liked the wheels which feature
a fairly realistic tread pattern. It would have been nice if S-Model had included an ammo case and maybe a loose round or two to complete the kit.
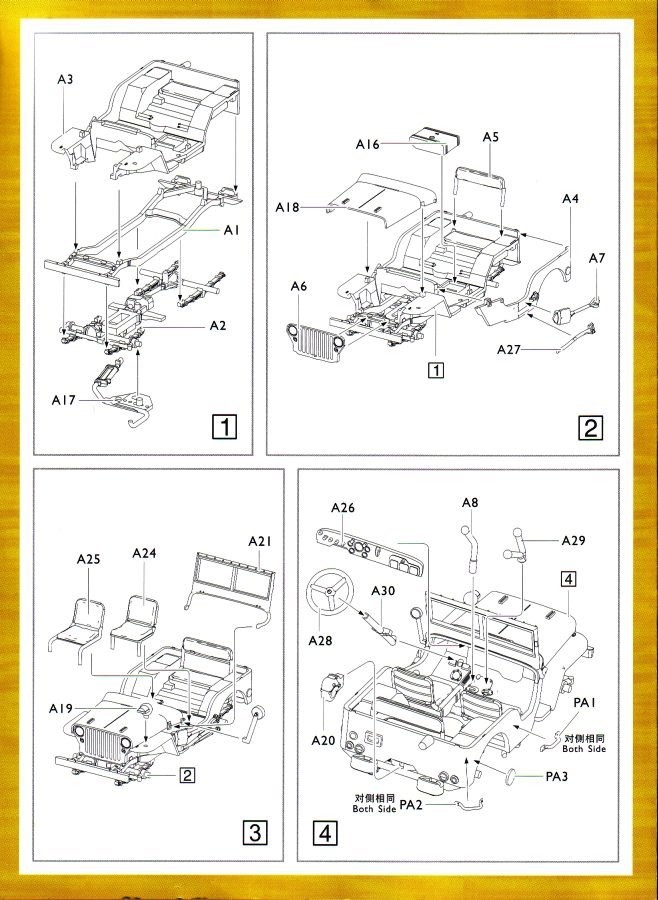
I found the instructions to be quite poor with regards to the gun. The exploded diagrams are too small making it difficult
to tell where parts are to be located and vague mounting points for the parts doesn't help matters either. This was especially true with finding the
location for the photo-etched auxiliary shields (part PE2) that mount to the top side of the axle.
I strongly suggest lining up some reference pictures before getting too involved with construction.
|
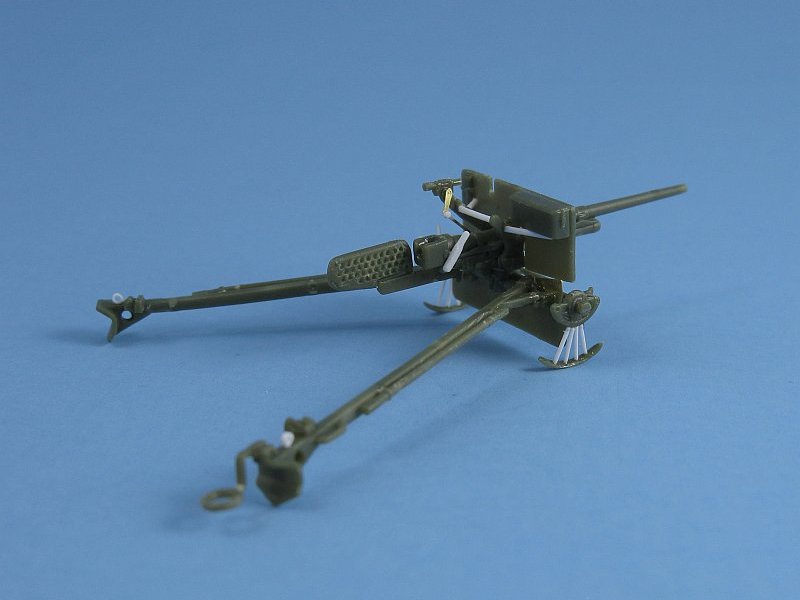
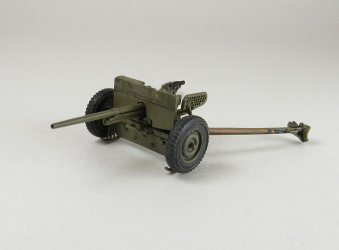
Overall the detail is quite nice, though some improvement work is needed to make the gun that much better.
I started by drilling out all of the holes in the loader's shield. A tedious process but one that improves the looks vastly. The breech is a solid piece of plastic so it
was modified through the use of some drill bits to add the opening for the rounds. I also added a breech lever to the right side.
I moved on to the trail legs next. S-Model has taken a short cut here with the triangular shaped spaded braces. These are unfortunately molded as a single
solid piece where they should be a pair of
separate braces with a gap between them. I didn't bother replacing them and just settled for drilling the lightening holes through the kit's supports. On which
trail leg the towing loop mounts to is easy to miss as the border around the Step 3 diagram cuts it off. There's mention of an optional photo-etched
part here (part PB5) which I'm not sure what it is (maybe the trail lock?), but I have no idea what to do with it as the instructions don't provide any directions
on how or where exactly to mount it. On the top side near the end of the legs are something called rammer rings (see the parts call out in reference [3]) which I
also added.
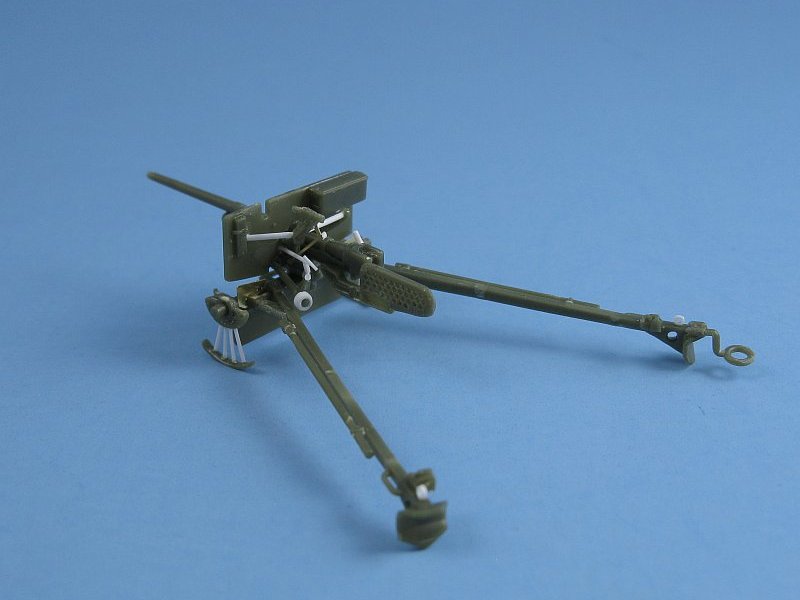
Next was the adding the shield and barrel to the axle. The photo-etched shield braces are much too flat to look convincing. These were replaced with lengths of
plastic rod.
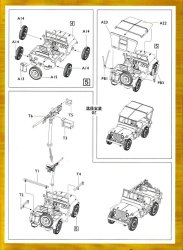
S-Model provides an elevation wheel (part B8) but do not include a traverse wheel so this needs to be added by the modeller.
Where to mount the control wheels is something of a guess and depends upon which reference pictures you use. I chose to follow the photos found at [4] and mounted the
wheels accordingly. This results in a slightly different location for the elevation wheel from where the instructions would have the modeller mount it.
A scratch built traversing release handle made from thin plastic rod added a little more detail to the backside of the shield.
I found a small hole in the face of the shield caused by the
mounting hole on the backside of the shield for the aforementioned missing traverse wheel. Once I had the traverse wheel's shaft in place I filled this hole.
The face of the shield has rivets that are so tiny as to be next to invisible. These were sanded off and replaced with new ones from Archer Fine Transfers. The final touch
was the addition of a knuckle to the hinge joint of the gunsight's brace.
This gun features something called wheel segments that were used to lift the wheels off the ground to stabilize the gun during firing. These are molded as a
solid piece.
I modified them by cutting off the spokes and replacing them with short lengths of plastic rod.
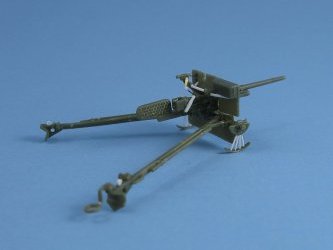

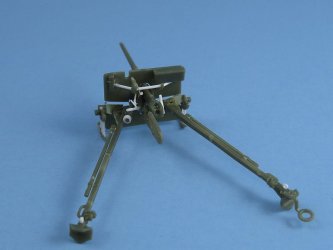
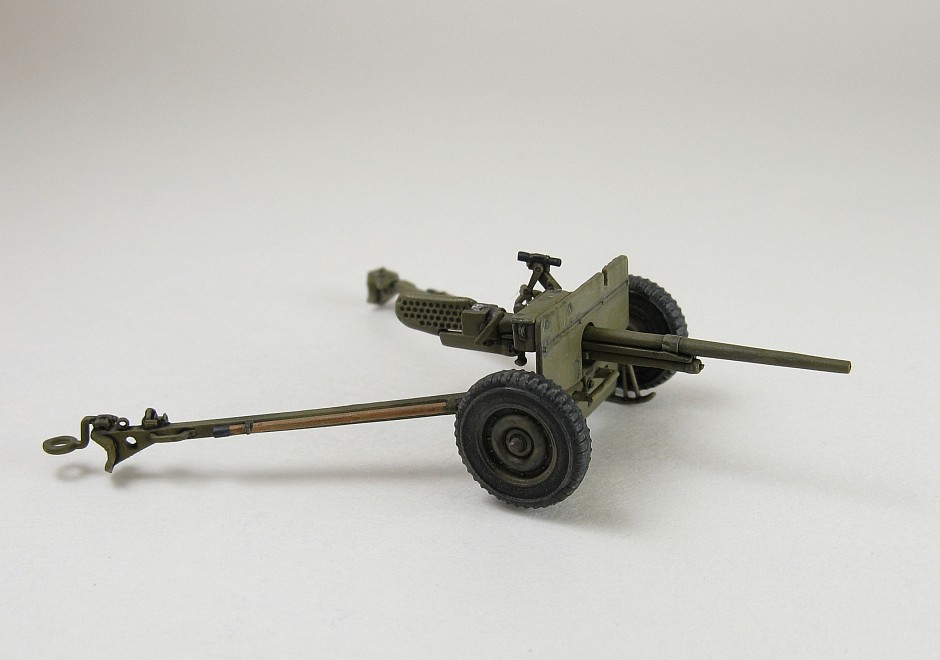
Conclusion
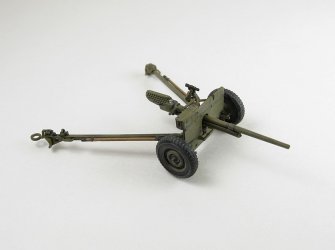
I like the look of the S-Model 37mm M3 anti-tank gun. It captures that angular, yet spidery, look of this small gun. According to wikipedia the overall barrel length
is 6ft 11in (1.15in in 1/72). I assume this means from breach to the end of the muzzle,
so a quick measurement of the S-Model gun barrel shows it to be 1.17in. Close enough for me.
No matter how you look at it
this kit is light years ahead of the old Hasegawa offering. If you have the Hasegawa kit I'd strongly suggest scrapping it and getting the S-Model version. Now just
what to do with the extra 37mm M3 in the kit? Maybe save it to add to a PT-109 kit, or try to make a T32 gun as seen
here. Choices, choices!

The Willys MB Jeep: A Preview

| S-Model & Airfix Comparison (Dimensions & Notes) |
|
S-Model |
Airfix (kit no. 01322) |
| Wheels |
Diameter: 0.39in
- The wheel hubs correctly portray the extended hub found on the front wheels. Oddly the instructions don't point this out. They show
using four identical wheels (part A14) but if you look at the sprue there are two distinct wheels with different part numbers. Part A31 (not mentioned
in the instructions) have the extended hub and should be mounted on the front axle, while the other wheels (part A14) should be mounted on the rear axle.
- Much better tread pattern on the tires that looks like a proper tire with the square opposed lugs
seen on most Jeeps versus that of the Airfix kit. |
Diameter: 0.39in
- All wheels have the same hub style |
| Frame |
Dimensions: 1.715in long x 0.41in wide |
Dimensions: 1.705in long x 0.44in wide |
| Body |
- Body has been oddly molded as two parts with the right side panel integral with the body pan while the left side
is a separate piece.
- All of the grab handles are separate photo-etched parts as is the right side reflector.
- Underside detail is slightly better than the Airfix kit
- Interior looks better than Airfix kit |
- Body molded as a single piece. Seats are integral to the pan but there are large holes on the underside beneath them that should be
filled or covered over.
- Rear grab handles are provided as plastic pieces. Side grab handles are molded as solid bumps. |
| Engine Hood & Cowl |
Dimensions: 0.610in long x 0.55in wide (@ radiator) x 0.68in wide (@ rear cowl)
- Hood has hinge line missing from the Airfix kit |
Dimensions: 0.615in long x 0.57in wide (@ radiator) x 0.72in wide (@ rear cowl) |
| Grille |
- Has the correct number of slats & slots
- Grille closer to the more squashed look of the Academy & Hasegawa versions |
- Has the correct number of slats & slots
- Bridge weight class disk molded onto the grille which is a minus as far as I'm concerned |
| Other Items |
- Windshield panes are just open spaces and there's no ledge in which to place
any clear plastic. This will make adding glass inside the frame problematic. No clear plastic is provided either.
- Tools are separate parts
- Steering wheel is more delicate than the Airfix version and even has finger depressions molded to the backside of the rim
- No rifle mount for the inside of the windscreen for the rifle they've supplied with the kit. |
- Windshield is molded as a single clear part
- Tools are molded to the body
- Rifle mount on the inside of the windshield is included but it's molded directly to the windscreen and so badly represented that they shouldn't have bothered anyway. |
| Due to the different hood dimensions I doubt the Airfix/Heller windscreen can be used as a replacement for
the S-Model version and vice versa. You could probably attach the Airfix/Heller windscreen to the S-Model Jeep but I would suspect there'd be a large gap between hood and windscreen.
|
Conclusion
Both kits are quite nice. I think overall the S-Model kit has the advantage when it comes to suspension & underside detail, separate tools and better wheels &
tires. Where it really fails is the lack of clear inserts for the windshield and with the grille detail.
References
[1] Allied Artillery of World War Two, Ian V. Hogg, Crowood Press, Ramsbury, UK 2001 ISBN: 1-86126-165-9
[2] US Anti-tank Artillery 1941-45: Osprey New Vanguard 107, Steven J. Zaloga, Osprey Publishing, Botley, Oxford 2005 ISBN: 1 84176 690 9
[3] Silicon Valley Scale Modelers (37mm M3 walk around)
[4] inert-ord.net
[5] wikipedia
[6] usarmymodels.com (37mm M3 walk around)
Review sample purchased by the author.
|