|
A brief history
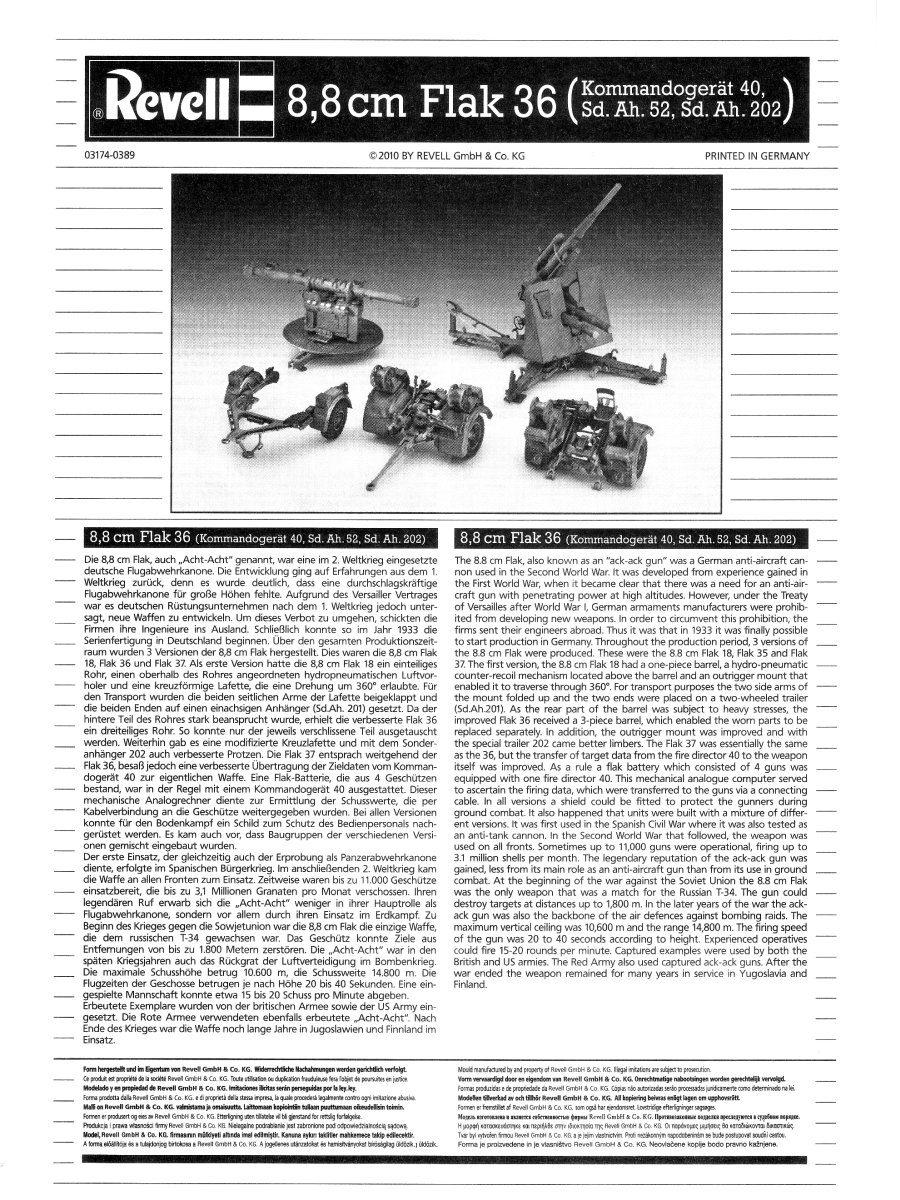
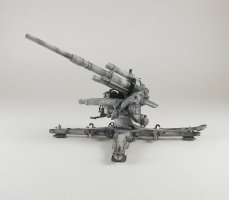
I won't say much here other than the 8.8cm series of anti-aricraft (Flak) guns are probably the most famous gun of the German arsenal in World War Two. It was
used successfully through out the whole conflict in the dual role of anti-aircraft gun and anti-tank gun. A quick search on google will provide thousands of articles
and images of this gun, enough to keep one busy for ages trying to read or browse it all.
How to identify an 8.8cm Flak gun version
| Feature | FlaK 18 | Flak 36 | FlaK 37 |
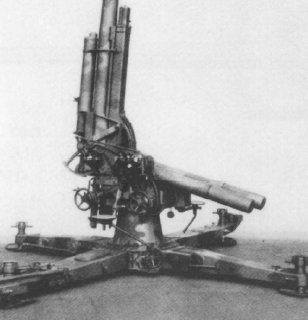
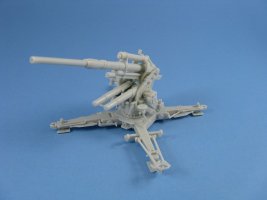
Flak-Lafette 18 mount with ground
anchors located inboard of the leveling pads
Levelling pads are round
  |
 |
 |
|
Flak-Lafette 36 mount with the ground anchors located
at the tips of the legs outboard of the leveling pads
Levelling pads are rectangular
  |
|
|
|
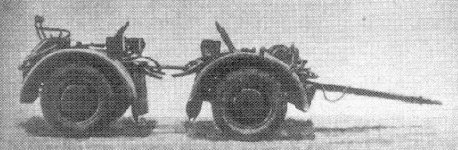
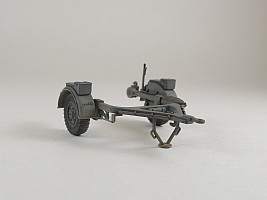
Sonderanhänger 201 trailer with twin wheels
on one bogie and single wheels on the other
 |
|
|
|
Sonderanhänger 202 trailer with twin wheels
on both bogies
 |
|
|
|
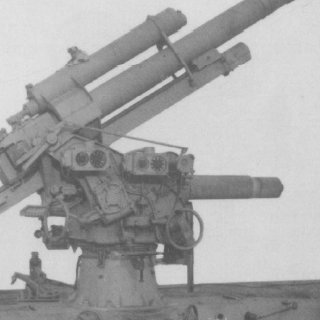
round Lampenempfänger 18 data transmission system
 |
|
|
|
rectangular Folgezeigeempfänger 37 data transmission system
 |
|
|
|
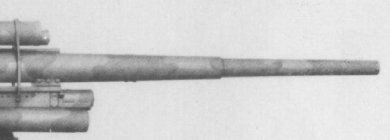
mono-block Flak-Rohr 18 barrel
 |
* |
* |
* |
multi-part Flak-Rohr 36 barrel
 |
* |
* |
* |
*Barrel type can not be solely used to identify the gun model.
The Flak-Rohr 18 was the original barrel style introduced with the Flak 18.
The Flak-Rohr 36 barrel was introduced with the Flak 36 gun.
According to German documents published in reference [2] the barrels were interchangeable between the gun types. |
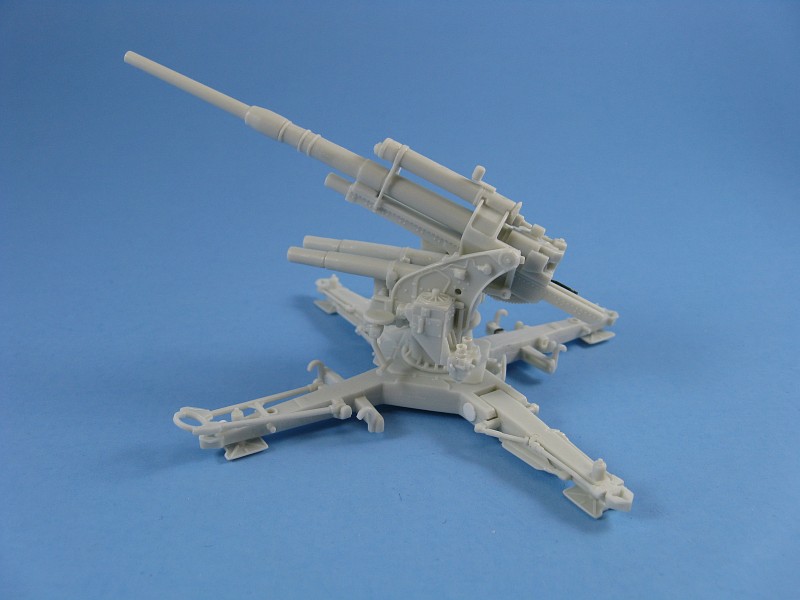
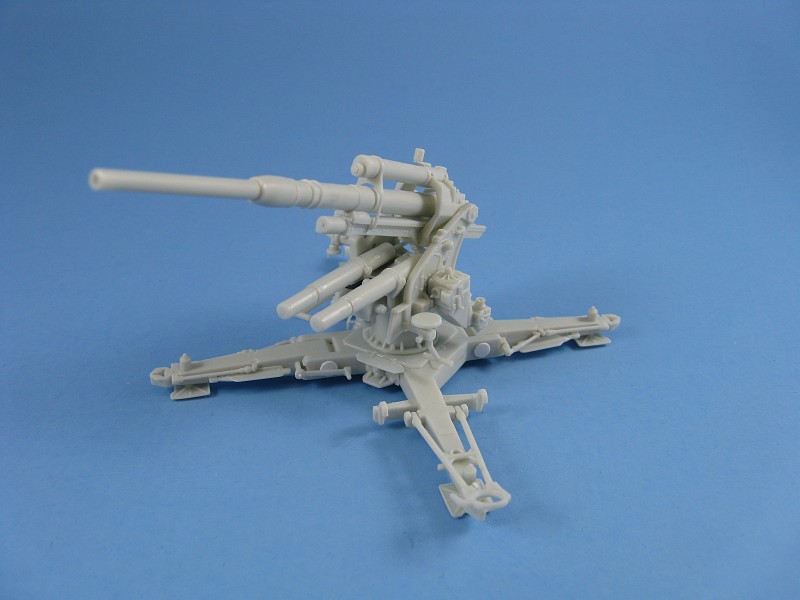
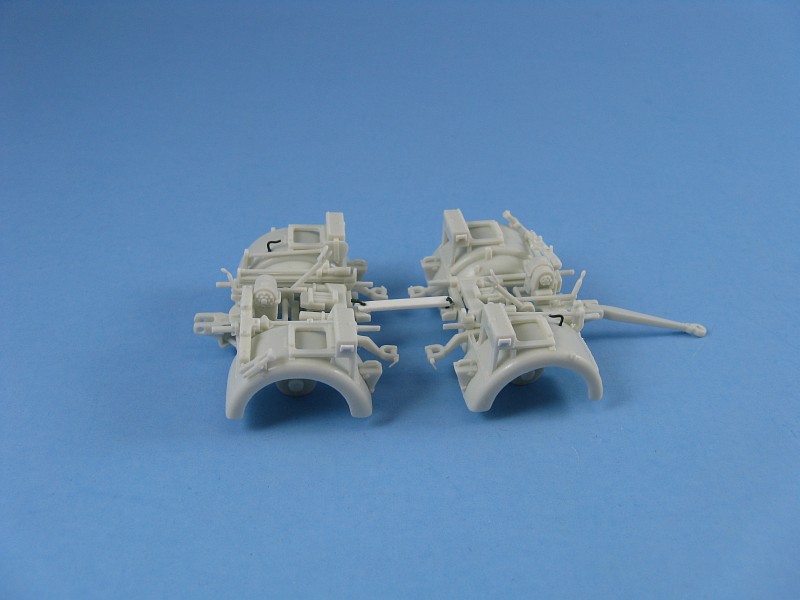
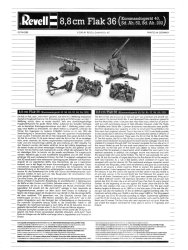
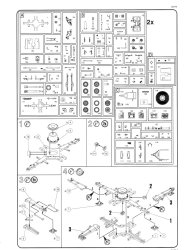
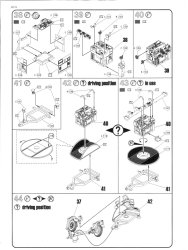
The kit
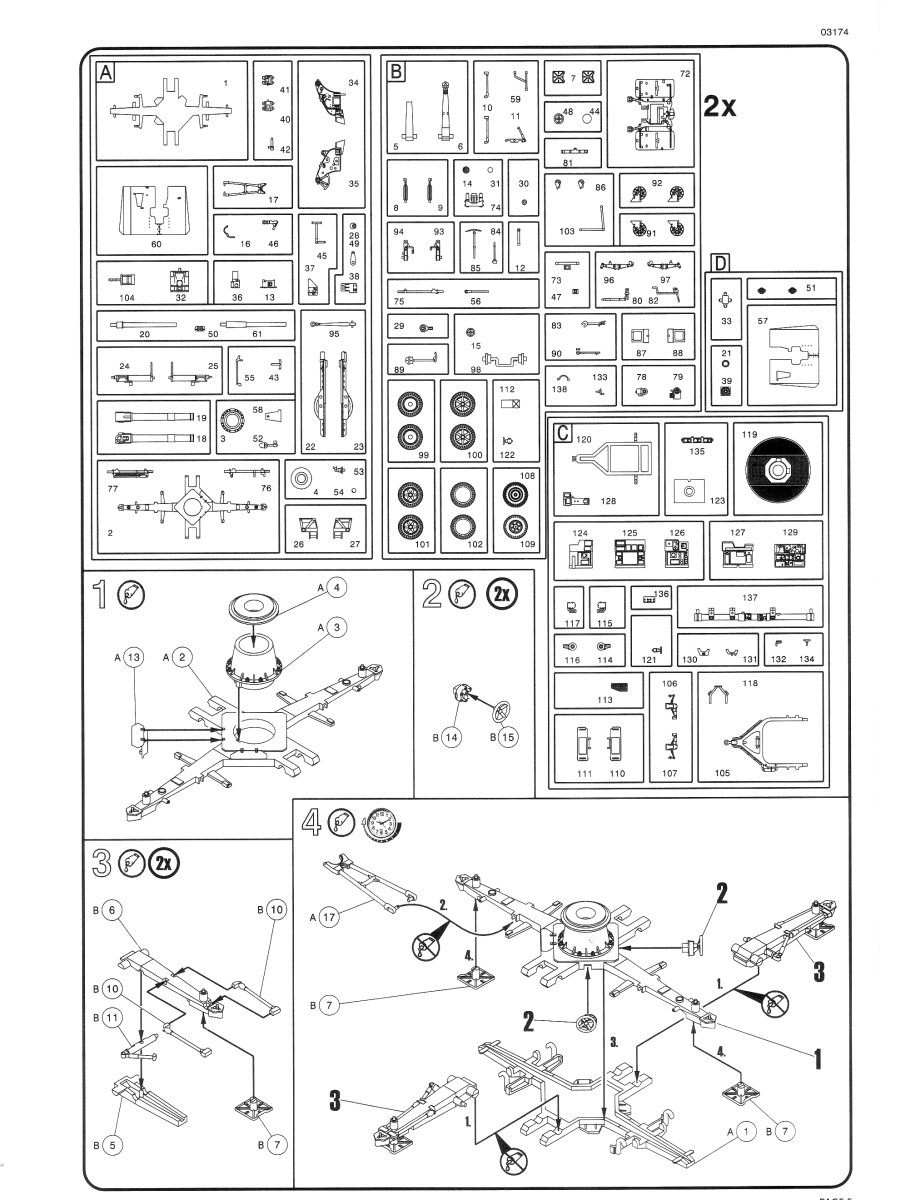
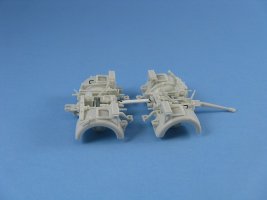
The kit comes in an end opening box. Stuffed inside are five sprues:
1xSprue A of 41 parts, 2xSprue B with 62 parts each, 1xSprue C with
28parts and 1xSprue D with 6 parts, enough to build one FlaK 36 with
its Sonderanhänger 202 trailer, and one Kommandogerät 40 with
its Sonderanhänger 52 trailer. There is a small decal sheet and
12 pages of instructions covering 44 construction steps. The decals
are in register, look to have opaque inks to prevent bleed through of
the underlying paint, and printed on very thin film.
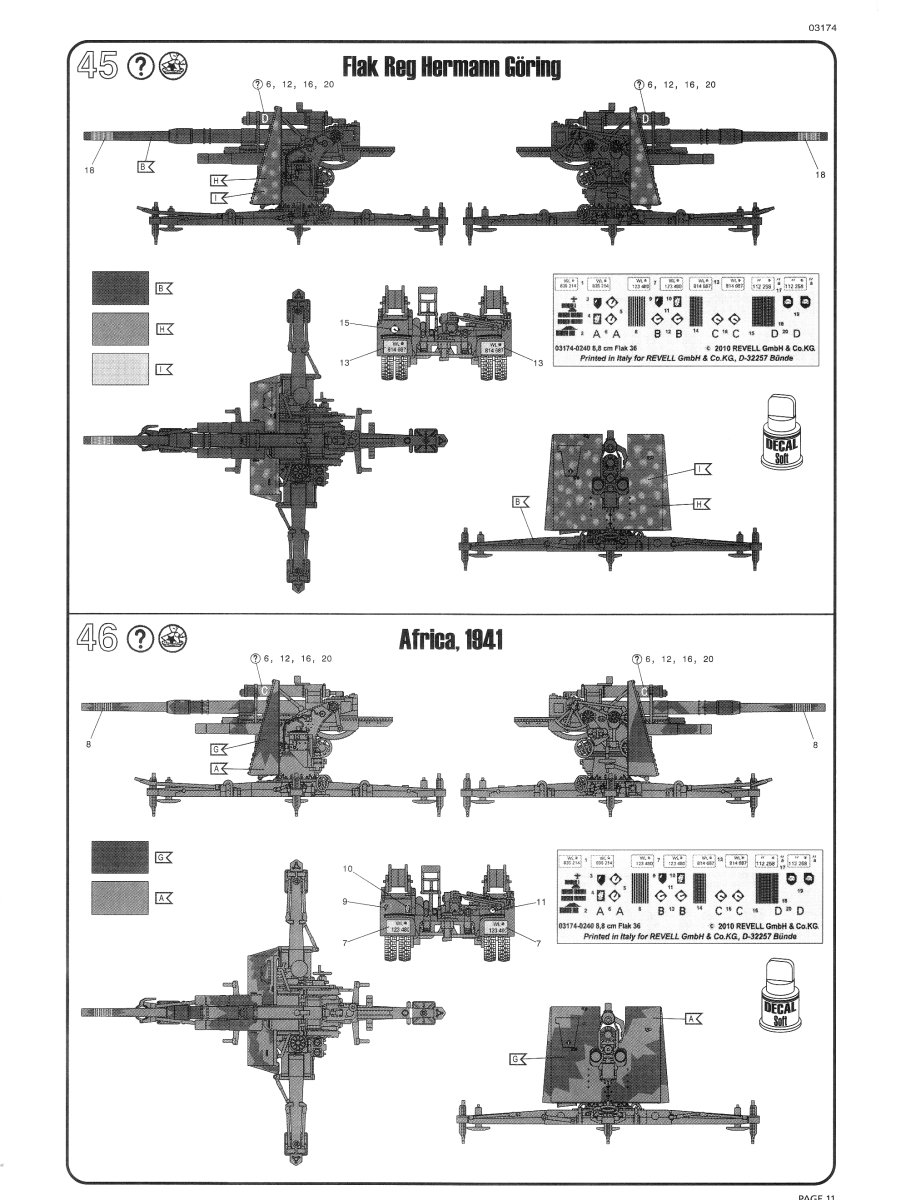
The painting guide covers 4 options:
- Overall
panzer grey gun with the Flak Regt. Herman Göring
- Sand
and dark earth gun, Africa 1941
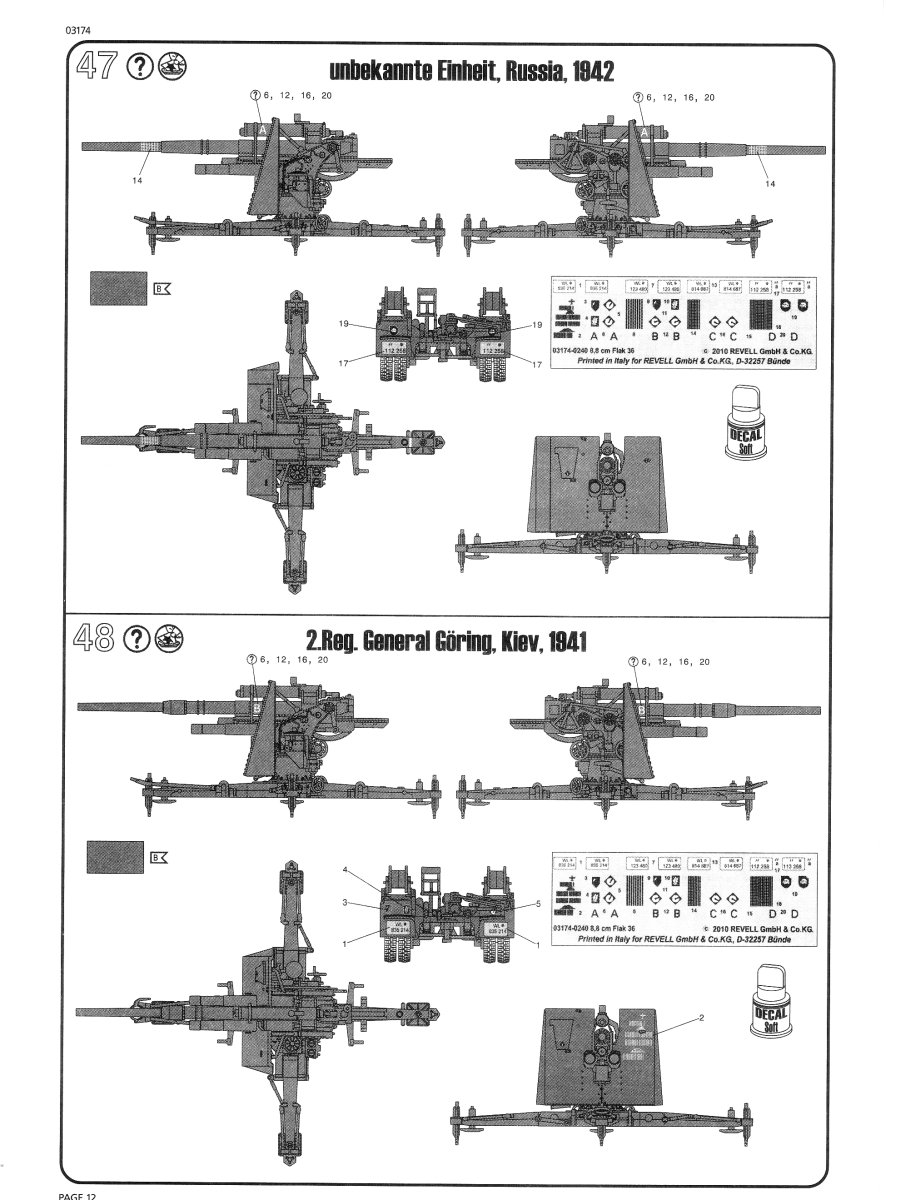
- Overall
panzer grey gun of an unknown unit, Russia 1942
- Overall
panzer grey gun of 2.Regt. General Göring, Kiev 1941
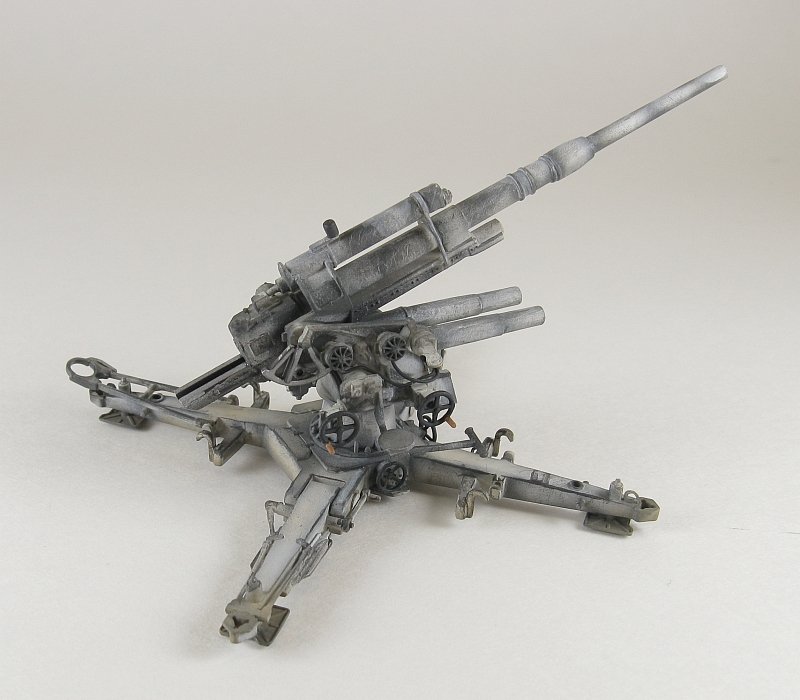
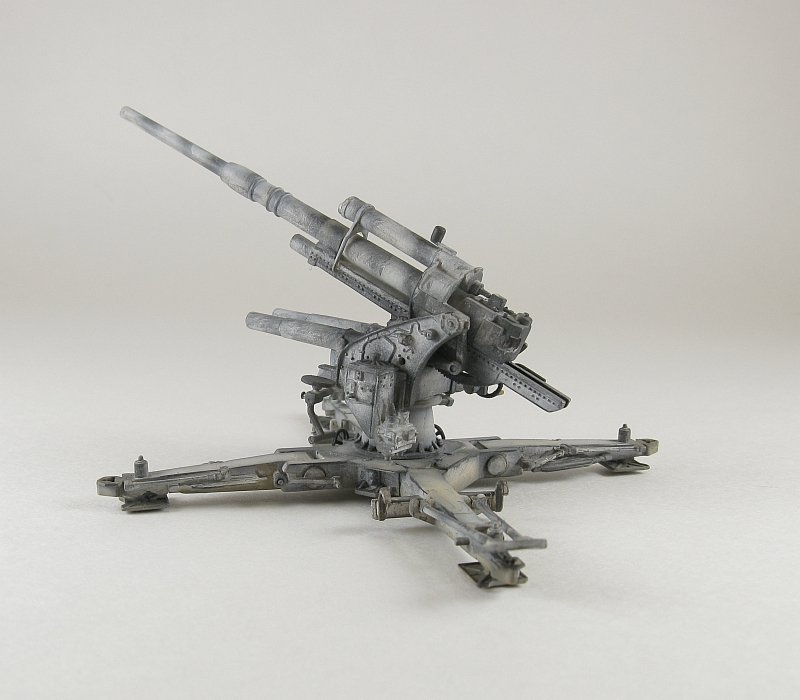
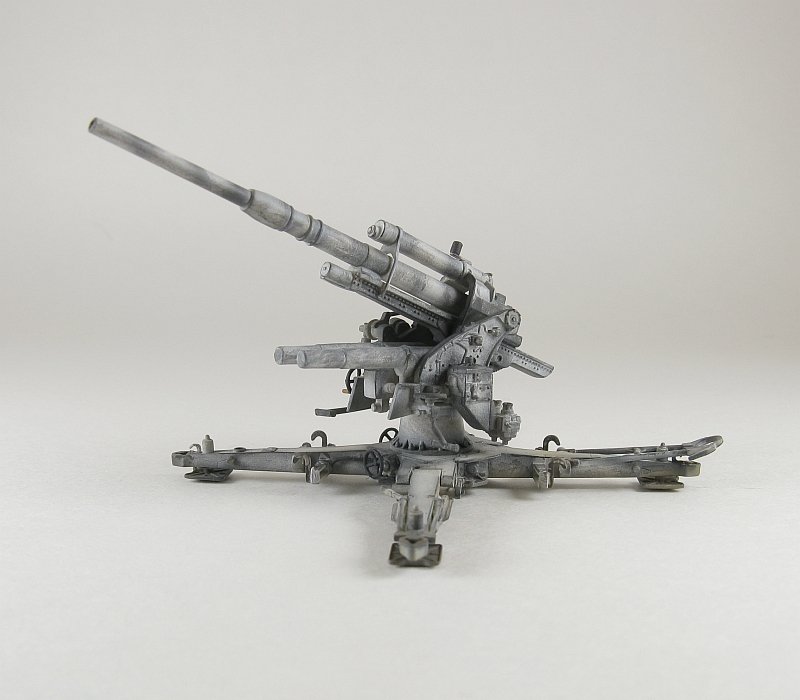
I didn't
really plan to do any of the proposed camouflage options offered, instead
wanting to try my hand at doing a winter whitewash over a panzer grey
base.
Overall mold quality is excellent with only a few of the parts having
sink holes which for the most part they were in places that were fairly
easy to deal with. The worst ones were on one half of what looks like
some sort of crank assembly (part B79), the large tube of the Kommandogerät
40 (part C137) and on the side of the breech (part A18). Ejector pin
marks are located for the most part in places that are hidden once pieces
are assembled. There is a fine hairline seam on most of the parts.
The
build
For me this kit has way too many multi-part assemblies. I think that
it would not detract from the overall detail if some of these assemblies
were reduced to a single piece. A healthy application of the KISS
(Keep It Simple Stupid!) principle, would work well here to simplify
some of the assemblies and make the build less of a chore for the
modeller.
Here are a couple of good examples:
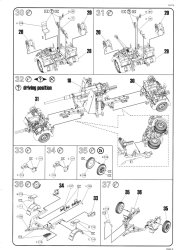
Constructing the barrel. The rear section of the barrel is a two part
piece split vertically leaving long seams to deal with. Then you add
the optional pieces for either the mono or multi-part barrel making
sure the barrel is aligned and doesn't sag anywhere. Then comes the
2-part cradle (two more seams to eliminate), 3-part recoil tube (another
two seams to eliminate) and finally the paired (and easily broken)
brackets. The seams are often in difficult places to reach making
for some trying moments.
In Step 9 you build the fuse setter, which is built up as a 6-piece
part! And the list goes on for the gun's base, seats, etc. Lots of
small pieces used to make larger assemblies, usually joined with small
and indistinct locating points and instructions that are often vague
as to where the parts meet. All gluing needs to set completely before
adding sub-assemblies together or pieces will break off or be displaced.
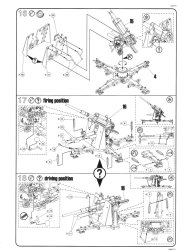
Some
things to watch for:
- The
horizontal seams resulting from the joining of the top and bottom
parts of the outrigger arms (parts B5 & B6) will need to be
filled
- If
the gun is built in firing mode, the barrel support support (part
A17) will partly block the opening for the ground anchor when it's
allowed to fall forward
- There
are two shield options. One is the standard shield (part D57) and
the other has an insert that make it slightly wider (part D60).
The wider shield is only used for camouflage option 47 only.
- There
are also two barrel options: a mono-block tube (FlaK Rohr 18) or
a multi-piece barrel (FlaK Rohr 36). If you follow the instructions
the mono-block tube is only for camouflage option 47. In reality
this gun was so common, and with tubes that were interchangeable,
anything pretty much goes for those who wish to ignored the instructions
regarding tube/shield/camouflage combinations.
- The
ground anchors, which are separate pieces, have not a hope in hell
of fitting through the openings on the ends of the legs so I didn't
even bother trying to get them to pass through their assigned slots
(I'll give kudos to anyone who can), and I mounted them in the stowed
position as I have seen many photos of guns firing without deploying
the ground anchors. They also lack the lightening holes. As these
parts were quite small I didn't even attempt adding these.
- The
tool boxes on the trailers have hollow bottoms which I covered with
strips of tissue paper thin plastic sheet.
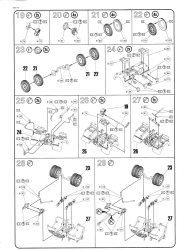
- All
my wheels were slightly warped forcing me to glue them together
in stages.
- The
shafts on the tools are a bit on the thin side and easily broken
when removing them from the sprue. I broke one of the two axes and
didn't bother repairing it or adding it to the trailer.
- If
you're like me and like to fill holes on the inside of fenders,
then you should attach the cable brackets early and fill the holes
while there are no other parts on the trailer bogies.
- Some
of the parts have tiny joining points making their sturdiness suspect.
Take care with the attaching of the two equilibrators (parts B29),
the seats, and the aiming wheels.
- In
Steps 5 through 8 are for the construction of the gun tube, cradle,
recuperator and associated brackets. The instructions would have
you build these in halves and then join them together to make the
final assembly. This didn't make much sense to me as it would make
the removal of the resultant seams next to impossible. Instead I
built the tube first and finished the seams, then built the cradle
(parts A22 & A23) and recuperator (parts A24, A25 & A28)
and finished their seams, and completed the assembly by adding the
brackets/supports (parts A26 & A27).
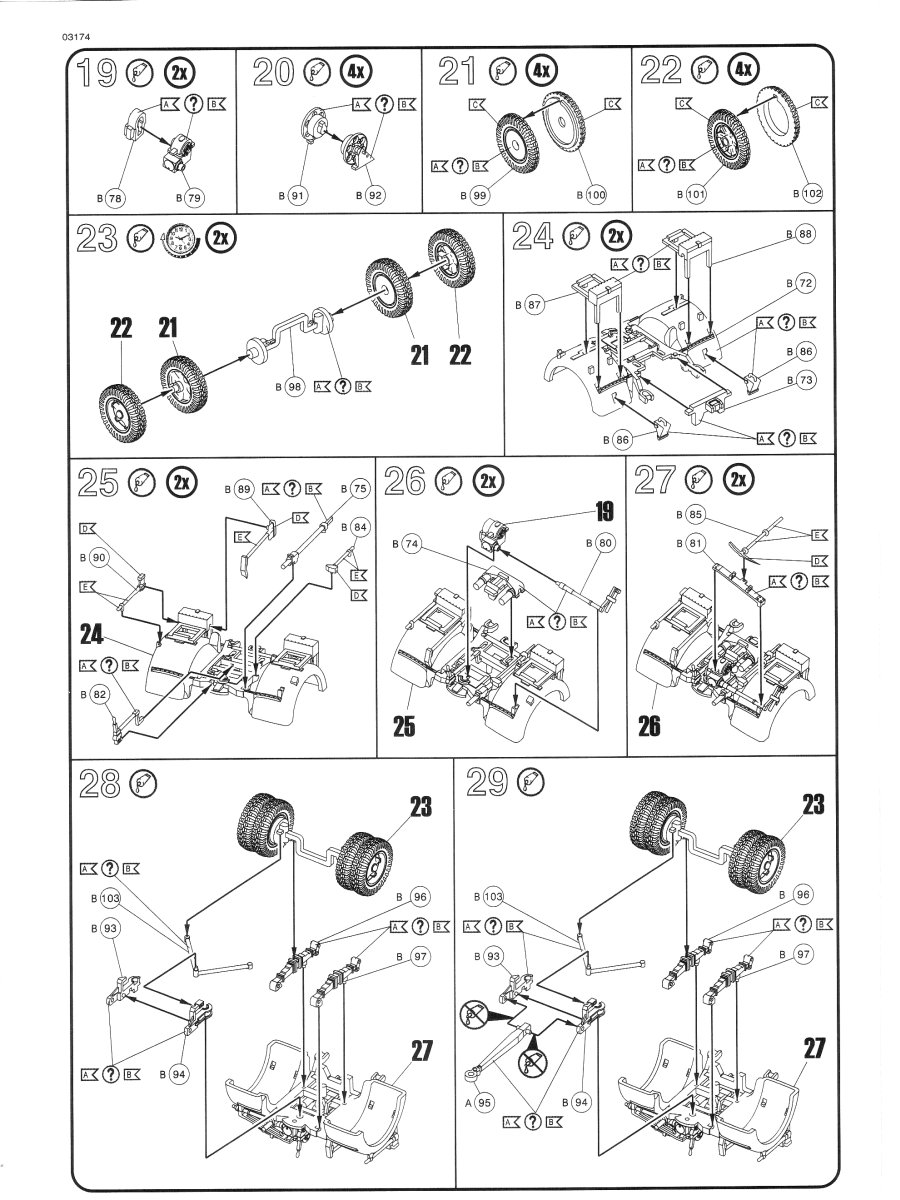
- Revell
doesn't supply any location points when joining the twin wheels
together which can result in the spokes being out of alignment.
Based on photos the wheels should be joined so that the spokes line
up with each other.
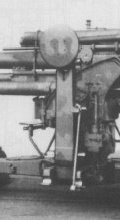
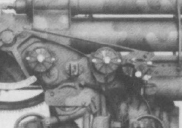
A word on the equilibrators:

Equilibrators with the barrel horizontal. The the movable inserts
are pretty much flush with the housing. The needle indicator
on the protractor gauge is all the way to the left. |
|
Equilibrators with the barrel partly raised. The the movable
inserts protrude noticeably from the housing. The needle indicator
on the protractor gauge has deflected slightly to the right. |
|
Equilibrators with the barrel at a high angle. The movable inserts
protrude significantly from the housing. Also note how the equilibrators
have depressed from the horizontal. The needle indicator on
the protractor gauge is near vertical. |
The equilibrators change to balance the gun as the barrel is
elevated. Exactly by how much for a given barrel angle, I can
only guess, but the three photos above (left-right: barrel level,
barrel at approximately 45o, and barrel at close
to maximum elevation of 85 o) show the change quite
well. Also the indicator needle moves along the protractor gauge
in relation to the barrel angle.
The kit has the protractor needle displaced for an angled shot.
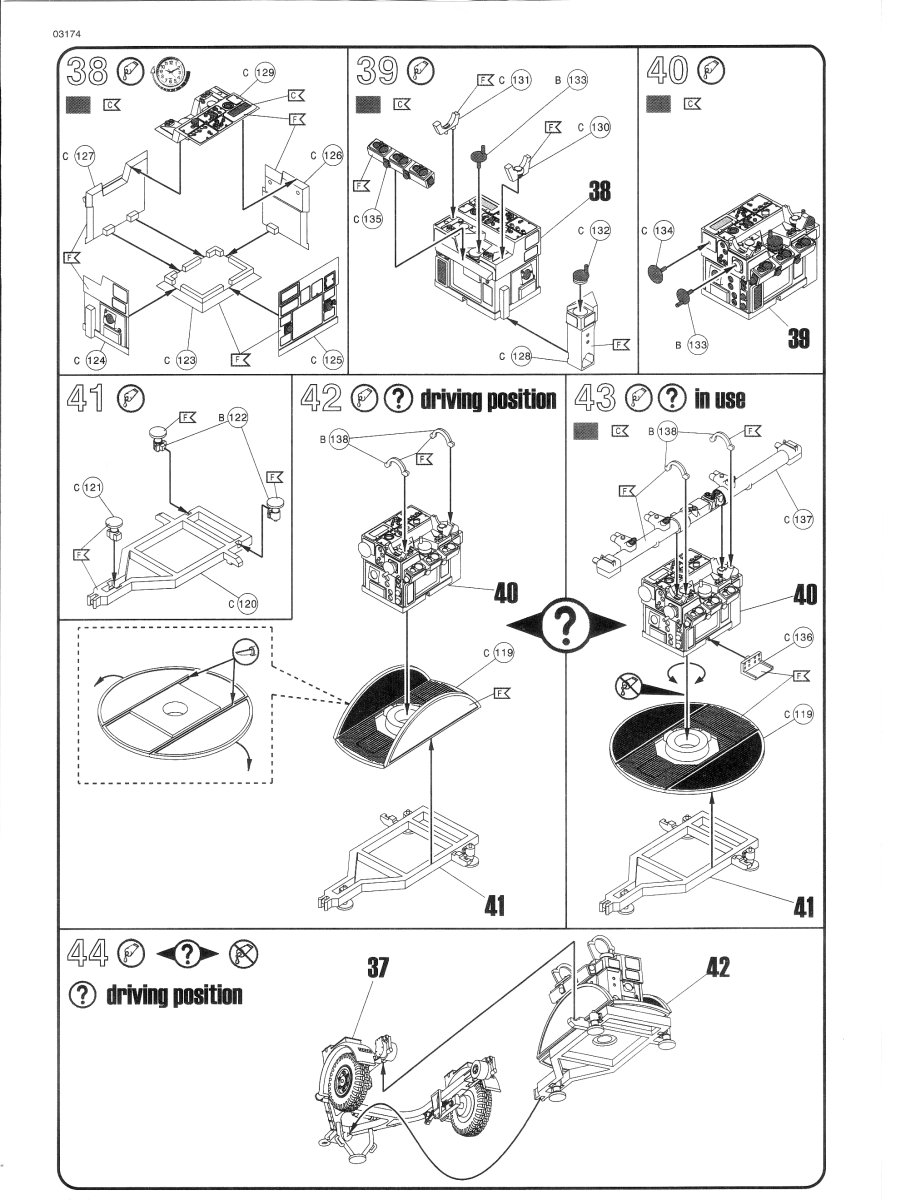
For the equilibrators Revell provides two build options: the
barrel in travel mode (i.e. horizontal) with parts B31 being
used in conjunction with the equilibrators (parts B29), or with
the barrel elevated (at about 45o based on the instruction
diagram) with parts B31 & B30 being added to the equilibrators.
My view is that parts B31 & B30 would be more suitable for
a barrel closer to the gun's maximum elevation of 85o.
Using what I had seen in photographs, and working with what
Revell supplied for parts, I posed my gun at approximately 45o
to be close to the protractor needle's angle and only used parts
B30 and discarding parts B31. The locating nubs for part B31
were then sanded off. I the builder wants to have the barrel
at close to the maximum elevation, the equilibrators will need
to be jury rigged to displace them, as the kit doesn't have
the provision to do this. |
 |
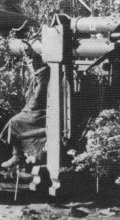
Photograph of the cable reel minus the cable (reference [5]).
Notice how the spindle has a void in it. The kit's cable reels
have no cable molded to the spindle nor any cable supplied separately,
so the kit's spindle will need to be modified, as seen at left,
if no cable is added.
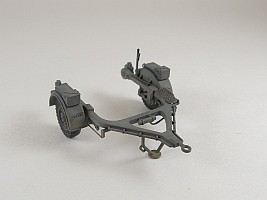
I chose to leave two of the reels off the trailer as it was quite
common to see trailers in period photographs with one or more
of them missing. To two of the reels, cable was added using thin
wire. The remaining two reels were assigned to the parts box and
in the place of one of the missing reels I attached a rolled tarp
from the excellent Value
Gear line. |
 |
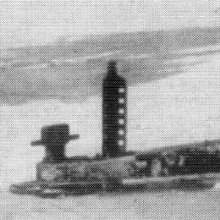
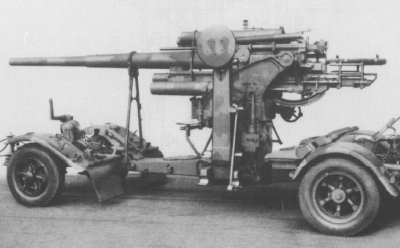
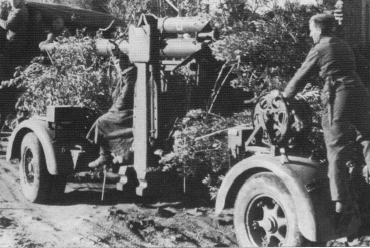
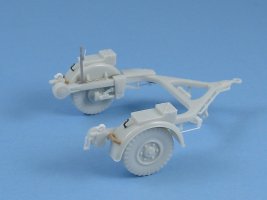
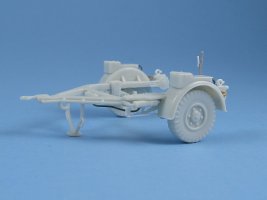
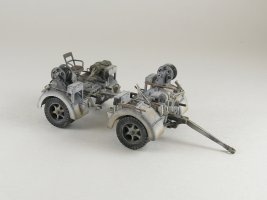
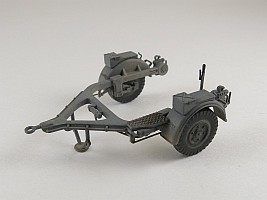
At left is a photo of an Sd.Ah.202 trailer (reference [12]). Note
how in this picture the two bogies have been joined by some sort
of bar shaped coupler. My guess is they were joined this way to
ease moving the bogies as a single unit versus moving them individually. |
 |
I
built my bogies joined together making an educated guess as to
what the bar would look like. |
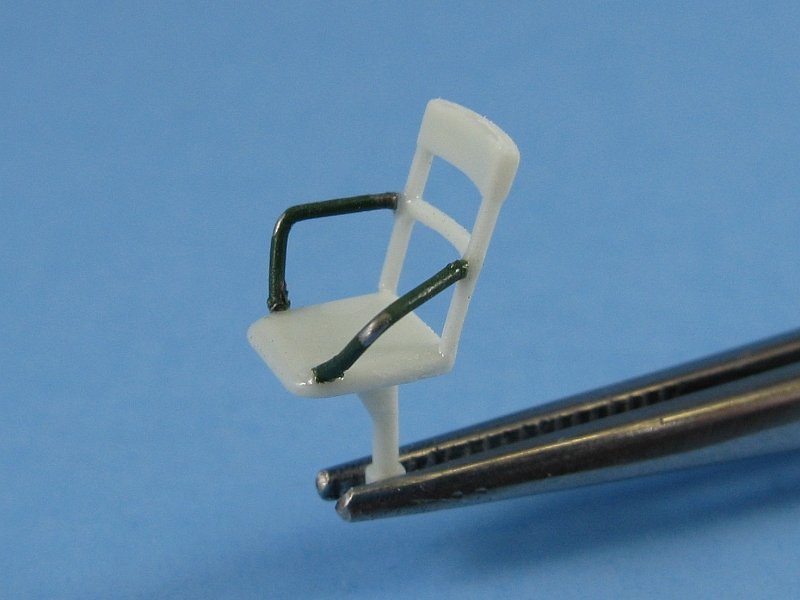
I performed some additional detailing and modifications thusly:
- Added
armrests and a cushion to the passenger seat
- Added
the cabling that runs from the round Lampenempfänger 18 dials
on the right side of the gun
- Added
missing cable on the one platform leg
- Added
the tie downs to top of the fenders
- Added
a tarp to one of the missing cable reel brackets


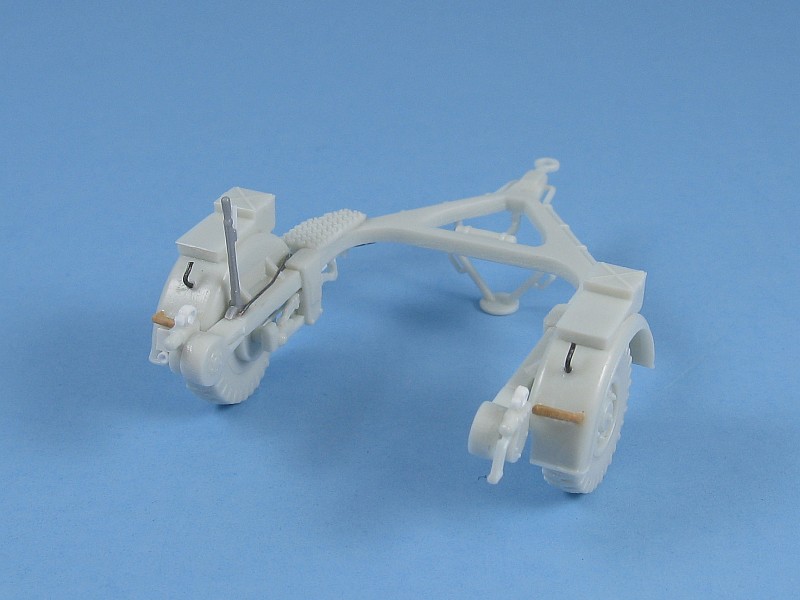
I did not construct the Kommandogerät
40. That may come at a later time. I did build the Sonderanhänger
52 trailer though. The trailer is quite basic out-of-the-box. I added
some detail in the form of a hand brake with its cable and linkages,
brake line, licence plate, rear brake light and grab handles. Following
painting it will sit with my Revell 2cm Flakvierling 38 kit, as that
gun used the same trailer as the Kommandogerät 40.

Conversion possibilites
I would venture that the Revell gun, along with the Hasegawa mount
(with suitable detailing) & trailer would make the best 8.8cm
Flak 18. And to make the collection complete, an 8.8cm Flak 37 would
be a simple conversion by just replacing the kit's round Lampenempfänger
18 dials with scratch built rectangular Folgezeigeempfänger 37
housings, or if one wants to avoid the conversion to a Flak 37, then
Revell has released one as kit number 03210.
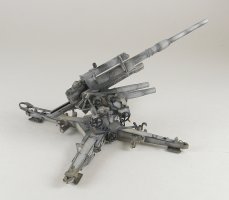
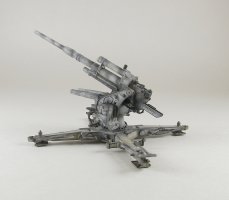
Conclusion
This kit is easily the best and most detailed 8.8cm Flak gun on the
market. My only complaint is that the engineering could have been
tightened a bit to make the build less taxing.
References
[1] 88mm Flak in the First and Second World Wars, Werner Müller,
Schiffer Military History, Atglen 1998 ISBN: 0-7643-0393-7
[2] Dreaded Threat The 8.8cm Flak18/36/37 in the Anti-tank Role, Thomas
L. Jentz, Panzer Tracts, Boyd 2001 ISBN: 0-9708407-0-5
[3] 8,8cm Flak 18-36-37 L-56: Militaria in Detail 11, Pawel Przymusiala,
Miroslaw Wasielewski, Jakub Grzedzinowski & Dariusz Karnas, Wydawnictwo
Militaria, Warsaw 2002 ISBN: 83-7219-147-6
[4] 8,8cm Flak 18-36-37, Waldemar Trojca, Model Hobby, Katowice-Speyer
2005 ISBN:83-60041-11-3
[5] German Artillery at War 1939-45 Vol.1, Frank V. De Sisto, Concord
Publications, Hong Kong 2007, ISBN: 962-361-143-9
[6] German Artillery at War 1939-45 Vol.2, Frank V. De Sisto, Concord
Publications, Hong Kong 2008, ISBN: 962-361-144-7
[7] forum.axishistory.com
[8] wikipedia
[9] militarymodels.co.nz
(FlaK 37 walk around)
[10] www.toadmanstankpictures.com
(FlaK 36 walk around)
[11] Stephen Brezinski Revell FlaK 36 preview
(onthewaymodels.com)
[12] German Military Trailers and Towed Equipment 1935-1945, Horst
Beiersdorf, Schiffer Military History, Atglen 1995 ISBN: 0-88740-757-9
[13] www.kfzderwehrmacht.de
[14] www.panzerarmee.com
[15] primeportal.net
Review
sample purchased by the author.


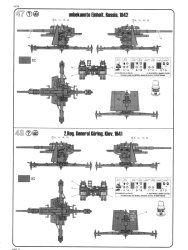
Timothy
Lau points out that the last marking option is the one seen here
and here,
and at that time was equipped with the monoblock barrel.


|