|
A Very Brief History:
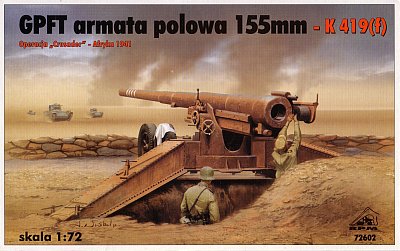
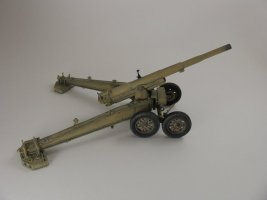
The Canon de 155 Grande Puissance Filloux (GPF) mle.1917 was a 155mm cannon used by the French Army during World War One. It was designed by Colonel L.J.F. Filloux and became the
standard heavy field gun of the French Army from 1917. When the USA entered the war they adopted it as their standard heavy field gun as well, designating it
as the 155mm Gun M1917 or M1918. The French Army still had some 400 plus of theses guns in their inventory at the time of the German invasion in 1940. Captured guns were employed by the
Germans and re-designated K418(f) or K419(f): the K418(f) was for the single axle carriage while the K419(f)
was for the dual axle carriage. The Germans also converted some of the guns for heavy anti-tank duty by mounting a 12.8cm barrel on the dual axle GPF mount with the designation
12.8cm Pak 81/1. There is one picture in my references showing GIs examining a captured example of this gun sometime in 1945.
Contents:
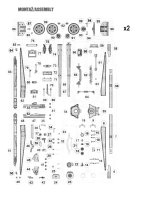
The kit contains one large sprue with 117 parts molded in a medium grey plastic of medium hardness, containing all of the gun parts plus one set of wheels. There is another
smaller sprue, containing 15 parts, for the second set of wheels, and it has obviously been cut from the top of another of the large sprues. Pieces not used
for this version of the gun are greyed out.
Instructions span 8 pages with an almost mind numbing 57 steps (for only 132 parts!) in exploded format. I for one am not a big fan
of this style of presentation. It's quite easy to get sub-assemblies mixed up. My solution was to mark the sub-assembly with its number
using a black marker as I went along, thus avoiding the problem completely. You can tell RPM wants to be counted as one of the big boys on the block when
it comes to kit detail, like Dragon, Hobby Boss and Trumpeter, but they don't
quite yet have the same expertise. RPM has to build up their assemblies from many small parts, while the others often do it with one. As a
result the build are a bit more fiddly though the detail remains quite nice.

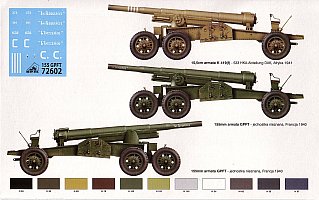
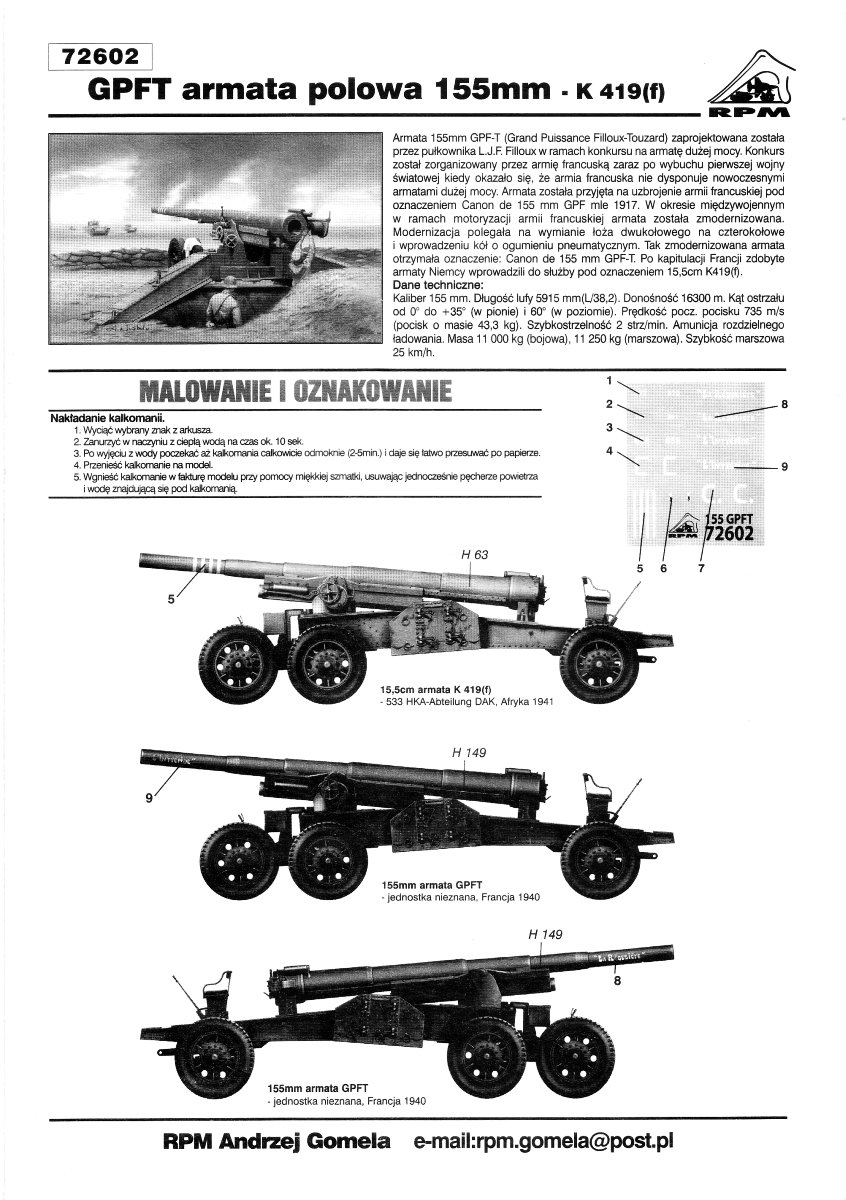
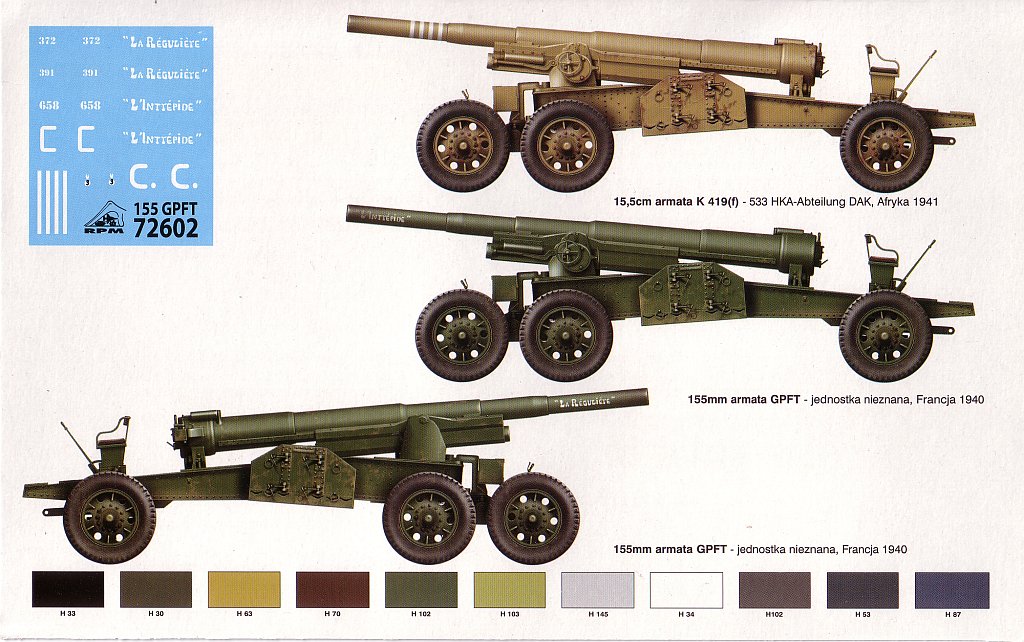
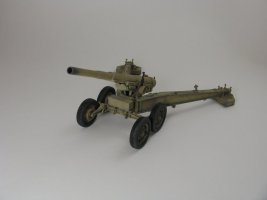
A small decal sheet is included. There are painting and decal options for 7 French guns in overall dark green (all for unidentified units, France 1940) or
a single German gun in a tan desert scheme
(Heeres-Küsten-Artillerie-Abteilung 533, Africa 1941).
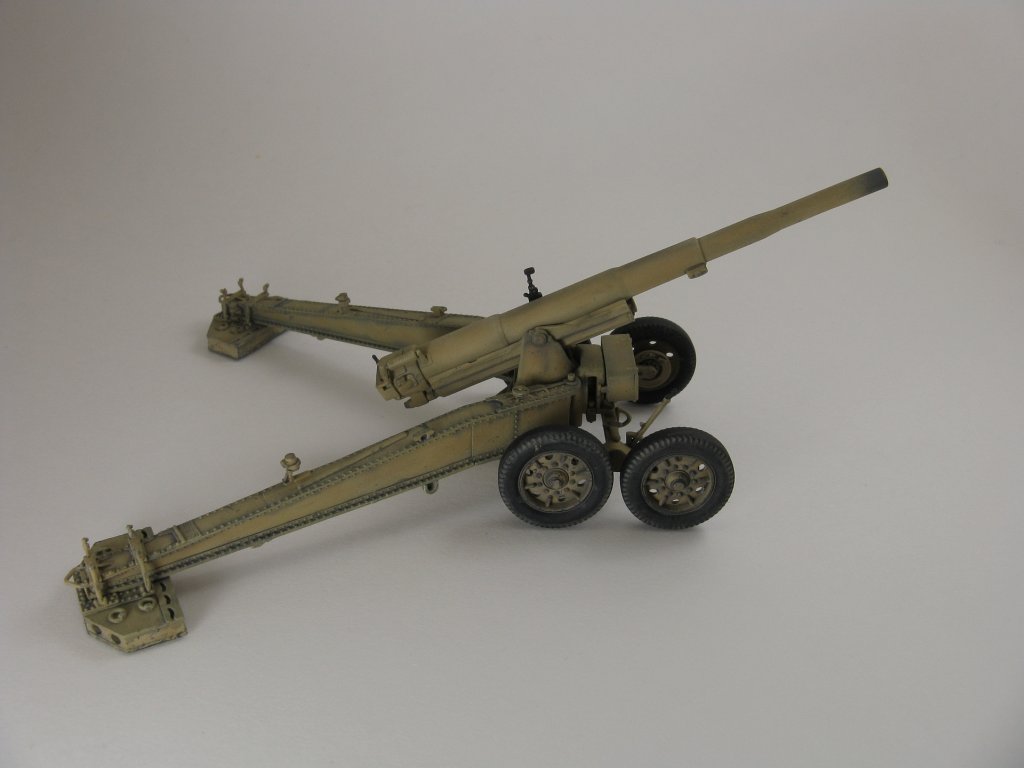
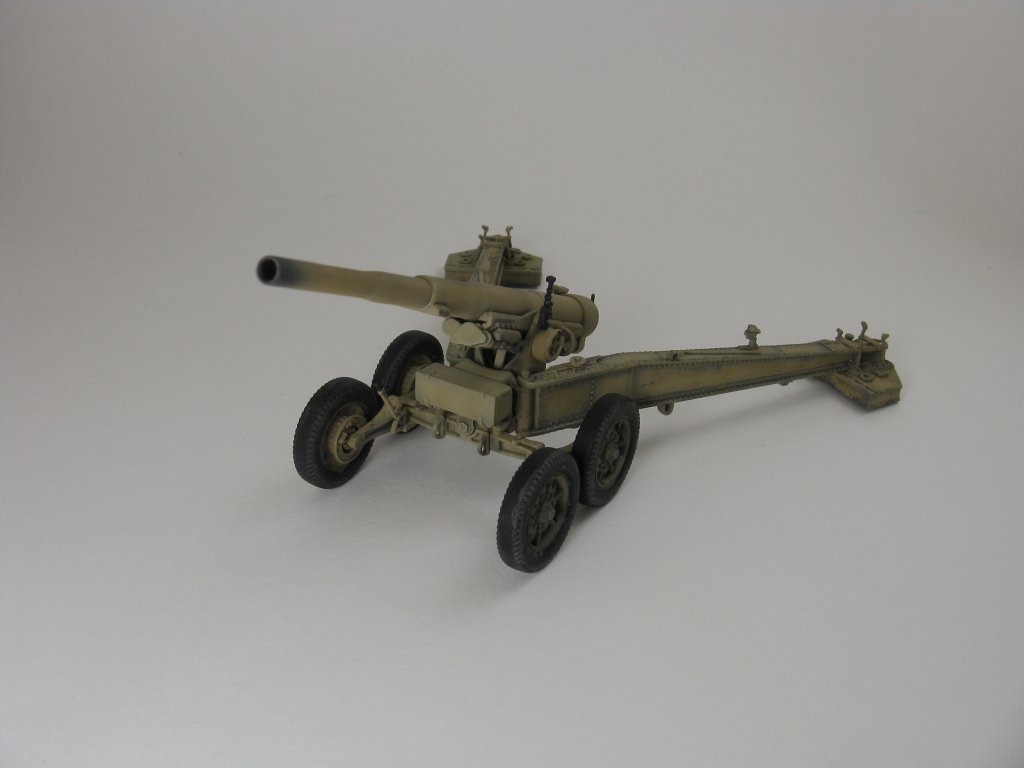
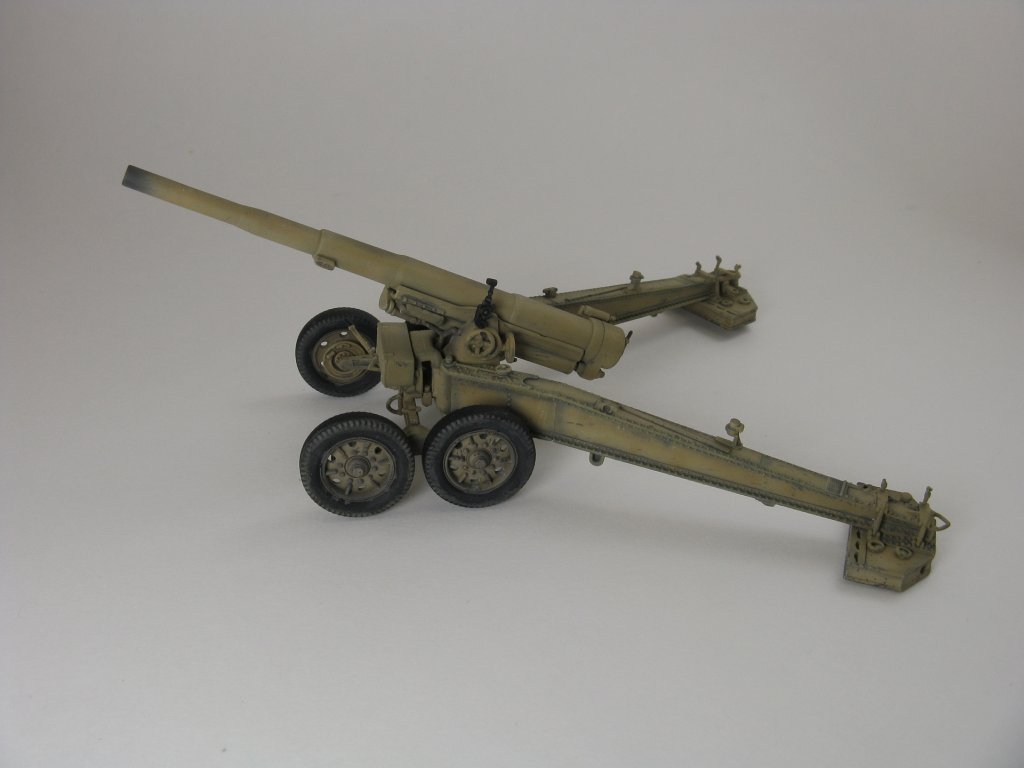
I chose to do the German gun as I like the lighter German tan colour versus the French green and I felt I needed more practice painting another desert scheme.
Construction:
This kit is one of my very few built straight out of the box.
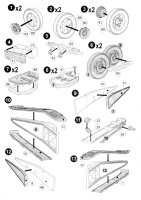
Steps 1-3 & 6 have you build the wheel assemblies. I'd suggest that it's better to clean up the parts, mark them if wanted and put them aside to add towards the end
of the build, as I did.
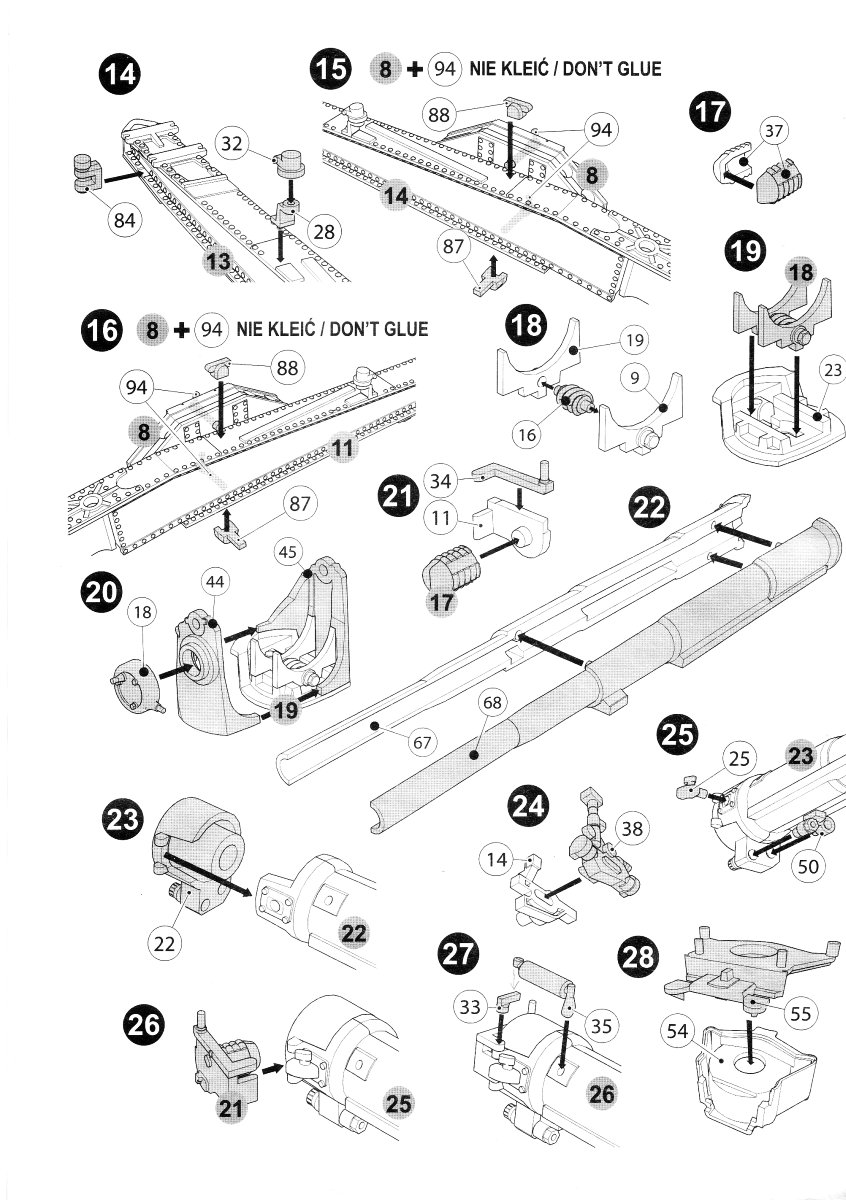
Steps 4, 5, and 7-16 are for the trails and pads. For the most part the instructions are easy to follow. Take care in Steps 11 & 14 to ensure that you have the pieces
for the trail locks on their proper leg. Also there are no location points for the lugs (parts 87 & 88) used for attaching the pads to the sides of the trail for when the
gun is in transport mode, so some care is also needed here to glue them in the proper location. In Step 8 the holes in the trail pads should be refined with a drill bit.
As far as I can tell the seam that runs around the circumference of the pads should be filled as well.
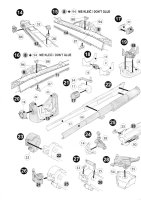
Steps 17-27 build up the breech, breech cover, upper carriage and the barrel. At Step 21, the nub on the breech cover (part 11) over which to place the breech screw
(built form parts 37 in Step 17) is round
while the opening in the back of the screw is not. Notch the sides of the nub until the screw will fit over it. Step 22 is the building of the barrel. The barrel is
longitudinally split into two halves. The pieces are quite thin and flexible, so I suggest that you do as I did, and
insert a piece of plastic rod inside it to add some strength. The face of the breech (part 22) has nice detail but it is marred by ejector pin marks. I found the breech
door fit to be a bit off kilter so watch out for this potential problem. I could find only a single picture of the breech door open, and it was not taken close enough to the
gun to tell exactly how the hinge should sit with an open breech, so I decided to glue the door closed with the breech. So, unless you can find something showing an
open breech you're pretty much forced to glue the cover over the breech as I did.
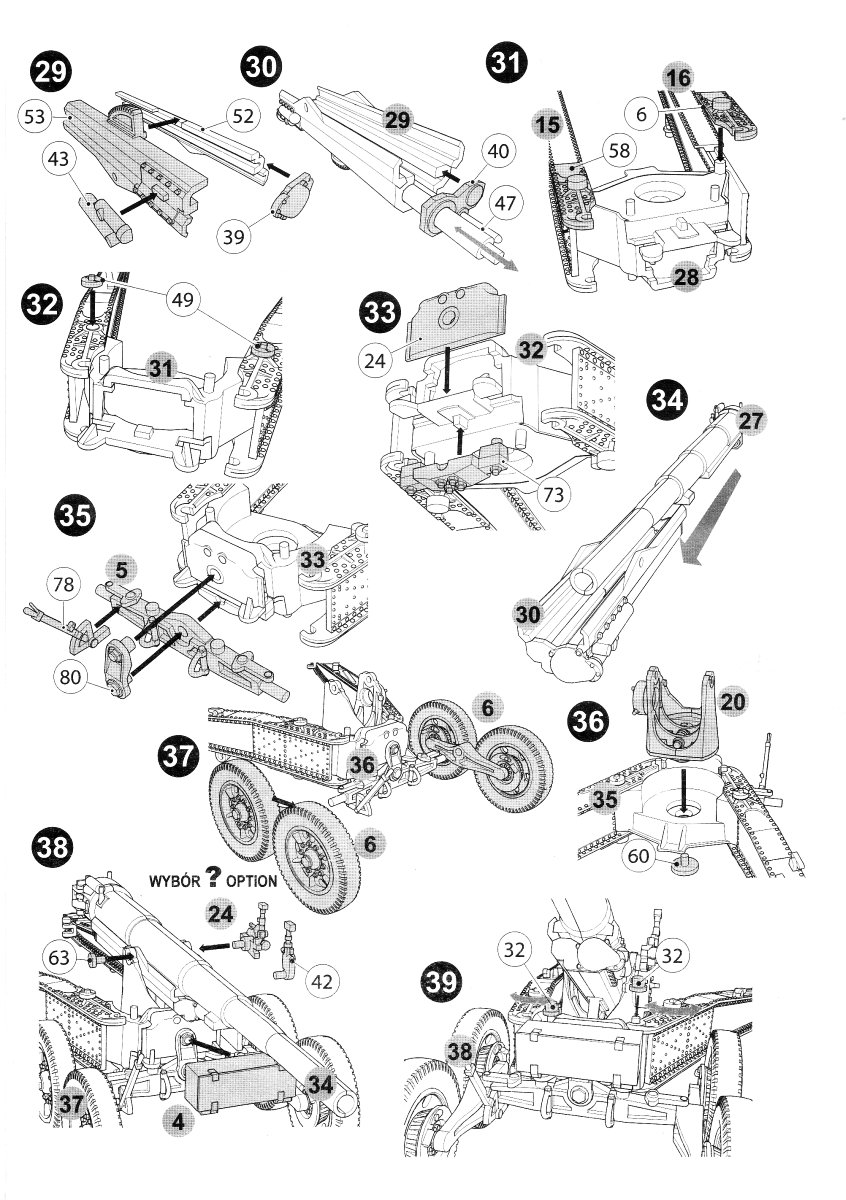
Steps 28-39 cover the carriage, trails, cradle and wheels.
Steps 29 & 30 put together the cradle. Make sure that you allow Part 47 to run freely inside the cylinder if you wish to mount the gun in traveling position.
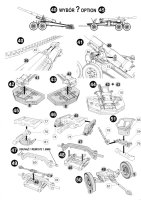
Optional gun sights are presented at Step 38. I think one is a French sight while the other is German, but the instructions give no indication as to
whether or not this is the case. Once again a check of my reference pictures seemed to indicate that part 42 is the sight needed for the German gun, and it's the one I used. The other sight
is actually built up using two parts in Step 24, so this step can be skipped for the German gun, and the parts assigned to the spares box.
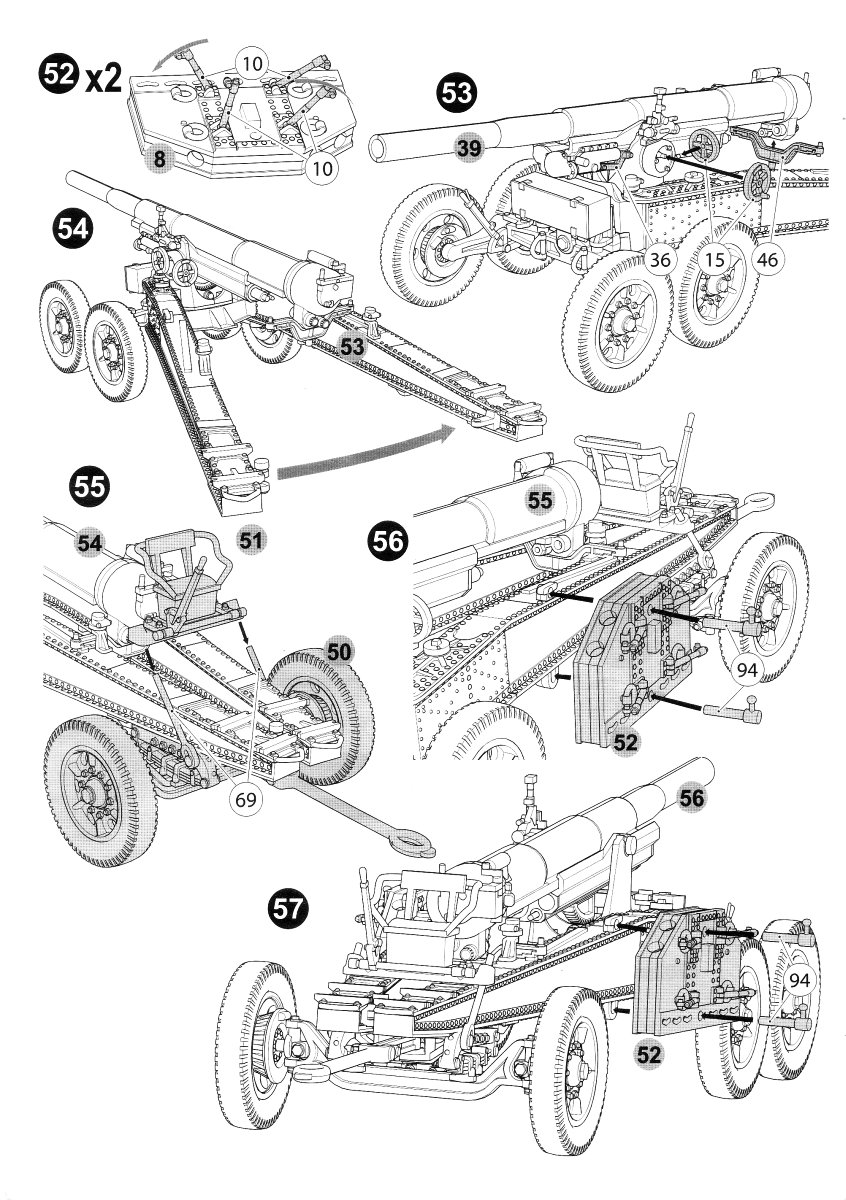
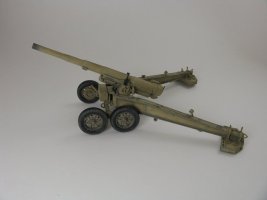
At Step 40/45 the builder needs to make their decision on the gun's configuration: either towed or firing. Initially I found the instructions somewhat confusing at this
point but after closer inspection I figured out that Steps 40-44 are to make the gun in firing position, while Steps 45-57 are to make the gun in travel position and
the building of the limber. Since I was building the gun in firing mode I skipped these steps.
In Step 41 the traverse and elevation wheels are supposed to be added. I actually left these until the final phase of construction following the painting,
at which time I discovered that the wheel facing to the rear (traverse?) interferes with the barrel. The link arm (part 36) appears to be molded to fit with the
barrel/cradle at full elevation. If you lower the elevation like I did then this part needs trimming to fit.
Conclusion:
Overall, this kit is very good. Detail is decent and assembly is not too complicated. The only knocks against it are the hairline seams on most of the parts,
slightly confusing and busy instructions, and most of all, the lack of tread detail on the tires. I attached my wheels with white glue so I can remove them later
when the aftermarket guys get their replacements on the market.
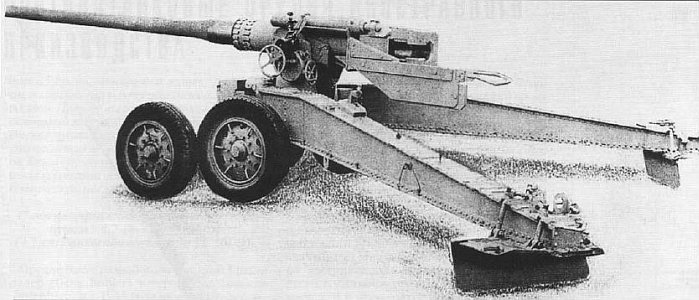
Addendum 1: RPM has the makings for the German 12.8cm Pak 81/1 conversion of this gun on the GPF carriage. It would seem to me that all they need do is use the
wheels from this kit and make a new sprue for a set of different spades and for the gun & cradle (like the one pictured below taken from reference [8]).
Addendum 2: A set of resin replacement wheels for this kit containing tread channels has been released by Modell Trans
(item no. MT72401). Looking at the picture on the
Modell Trans site it appears that there are 3 grooves, while pictures of the real tire show four.
Addendum 3: It also looks like Modell Trans has beat RPM to the punch as they also now offer a 12.8 cm PaK (K 81/1) 44 conversion set (item no. MT2399) for this kit, though it appears that
all you get is a new barrel (with a muzzle brake which shouldn't be there according to my references) and cradle but no new spades, and if you want the detailed tires they will need to be purchased separately as well. This could make for a very
expensive German anti-tank gun for your collection.
References:
[1] Wikipedia
[2] Lexicon der Wehrmacht (discussion on Küstal Artillerie units)
[4] axishistory.com (forum discussion on Küstal Artillerie units)
[5] axishistory.com (forum discussion of the K419(f) gun)
with some pictures as well, many of them showing the colour/marking options of this kit)
[6] axishistory.com (forum discussion of the K418(f) gun in German use)
[7] feldgrau.net (forum discussion of Küstal Artillerie units in Africa)
[8] Antitank Artillery of the Wehrmacht 1939-45, Maksim Kolomiets, MK Strategy, Moscow 2006 ISBN: 5-901266-01-3
Review sample purchased by the author.


|