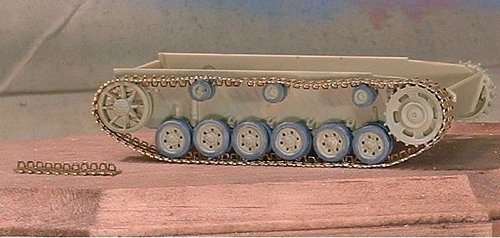
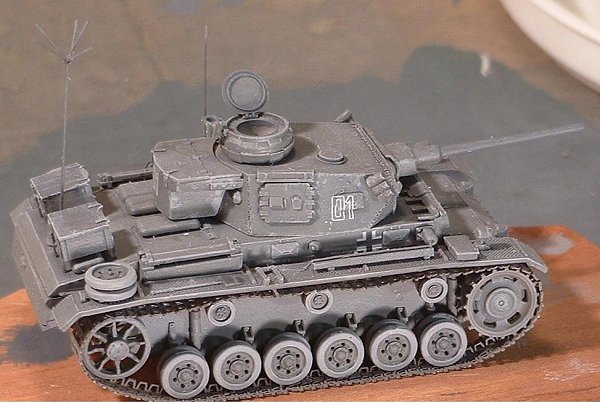
Russia May, 1943 Resin, Plastic and White Metal Conversion to Revell Panzer IIIM This is a multi-media conversion/upgrade kit (white metal and resin) produced by MR Models of Germany. It is designed to be used with the Revell Panzer IIIM. It consists of a resin turret, cupola, hull upgrades and stowage boxes, plus white metal bits and pieces. While the Revell Panzer III is a nice kit, it practically cries out for upgrades to some of the various vehicles, which were built on the same chassis. MR Models does a few of these, including the command version, the Panzerbefehlswagen III Ausf.K. This was a purpose built vehicle (other command version were field modifications) with a modified turret and extra radio equipment. There is some question as to whether the Ausf K had a working gun or a dummy. In my view, the space requirements for three radios inside the vehicle, plus map tables and other command requirements, would make space extremely tight within the turret. As well, to accommodate the vision port on the front of the turret, the mantlet had to be shortened, which would have implications for the mounting of the main gun. You would have a problem anchoring the starboard side of the gun, since it would not reach all the way over to the side of the turret. It is likely, therefore, on the purpose built Ausf K that the gun was a dummy. If this were the case, the turret would be fixed as well. The lower hull builds up generally as outlined in the Revell instructions. While the Revell tracks are quite nice, I decided to use the Part etched brass set of replacement tracks, which have the benefit of open guide horns. These fold up and go on quite easily, although they don't fit very well over the teeth on the Revell drive wheel. Unlike other etched brass tracks sets I've used, these did not seem (to me, at least) too thin.
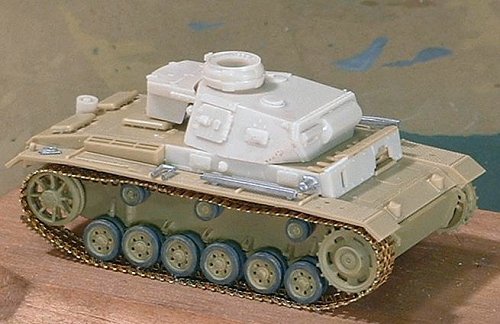
Once the tracks are complete, the modification begins. MR provides replacement sides for the upper hull, as well as a new front glacis plate with a square port for the hull machine gun. These parts are extremely thin and easily broken. I had a problem with the upper edge above the mg port, which I tired to fix but is still visible. Some modifications have to be made to the stowage layout, most visible being: moving the forward spare bogey (the Revell kit has two on the port side) to the rear starboard side, and the addition of an extra antenna mount and channel. The large pot for the rear-deck mounted antenna should be added at this point as well. While the antenna mounts are provided in white metal, the "L" shaped swivels that go into them are not. One can be scrounged from the donor Revell kit, but the other has to be found. I ended up buying another Revell Panzer III to get the part.
The turret is fairly straightforward. Unfortunately, it is moulded as a "plug" (i.e. solid), so opening it up and detailing the interior is not an option. The detail is generally good, but gets a little soft around the side hatches - it might have been better to mould these separately in white metal rather than in one piece with the turret. The downsized mantlet is another very delicate piece of resin - I managed to crack mine when I was removing it from its pour block.
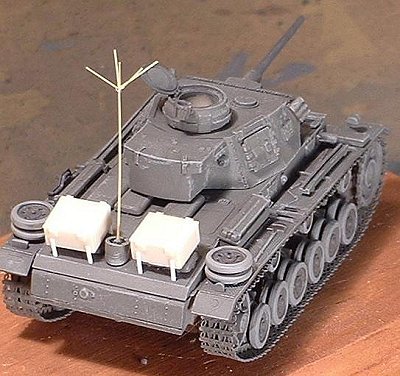
The large stowage boxes were then added to the rear hull. In the upgrade kit, these were double height, which seemed a bit too high. I cut them in half and only used the top part. MR does not provide the mounting points to allow these to sit above the engine ventilator covers, so they must be scratched from strip styrene. Once they are in place, you can see why the rear antenna pot has to be positioned first - there's no way you can work in the area once the stowage boxes are mounted. Some features that seemed to belong to the late Panzer III M were a bit of a problem. For example, the M had the armoured covers over the rear deck side louvers and the specialized "wading" exhaust. I decided to include these on my kit, on the basis that a command mount would be upgraded with all the fancy bells and whistles as they became available.
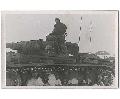
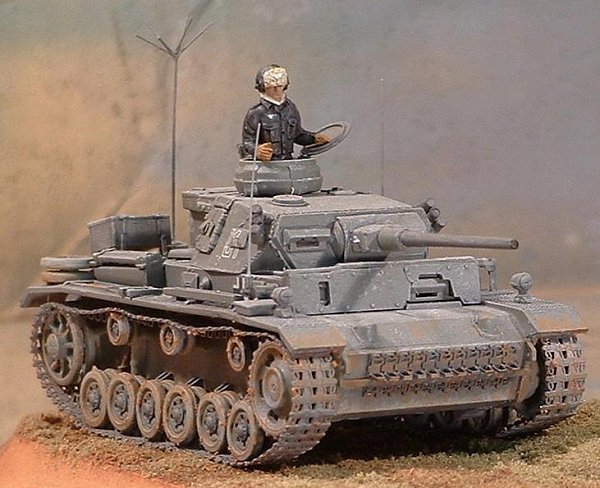
Once the kit was together, I had to decide on a colour scheme. There are several photos of Ausf K's in action, the most common of which is one of Count Hyazinth Strachwitz (von Gross-Zauche und Camminetz) in his command mount in early 1943. According the Chamberlain and Doyle, in their Encyclopaedia of German Tanks of World War Two, 50 Ausf Ks were produced between December 1942 and February 1943. This puts it right at the break point where factories began painting vehicles in panzer yellow rather than grey. Looking at the photo of Strachwitz' tank, I concluded that his vehicle was Panzer grey, although others have interpreted the colour differently. Not having a lot of info to go, I decided to do a generic vehicle rather than Strachwitz' mount. I therefore painted the tank in overall Panzer Gray (Testors Modelmaster Acrylic) with medium grey tracks and bogey rims. I tried to pick out some detail with a flat black wash, but this tended to get lost in the grey. To counteract the panzer grey, I did some dry brushing in light grey, which helped pick out the detail. Once the base coat was on, I hit the tank with a gloss coat and added the "01" decals to the sides and rear of the turret. I decided not to add a divisional marking.
After a flat coat, I used a light tan spray to dust up the kit, then picked some of the details (like the blade of the shovel) with a soft pencil. I also added a crank to the jack at this point, as well as the star antenna on the rear deck (from stretched sprue) and the single antennas on either side. I decided to not mount the hull machine gun, since, if I were the hull machine gunner/radio operator, I would keep it safe and clean inside the tank until it was actually needed, which wouldn't be often with a command vehicle.
The commander figure is a modified MIG tanker. The original had his hands in his pockets (a very realistic pose) but would not fit into the copula. I therefore cut his arms off at the elbows and attached new arms extending out from his body. His winter gear (hat and scarf) was appropriate for the early spring timeframe I was after.
The base was purchased from a local craft store and the groundwork is model railroad flocking over Green Stuff putty. I mixed some Burnt Sienna acrylic paint with the glue for the road to give it more of a muddy look. AMPS 2004 This was one of the kits I took down to AMPS this year. For those of you who aren't familiar with AMPS (Armor Modeling and Preservation Society), the organization has developed and uses a very detailed judging system. Unlike most competitions, pieces are judged not against each other (i.e. 1st, 2nd, 3rd) but against a fixed set of criteria (and are awarded a gold, silver or bronze). They judge only your work, not how it stacks up against other models on the table. These criteria are available on the AMPS site (http://www.amps-armor.org/contestRules.asp). A really great feature of this judging approach is that not only do the judges (usually a team of four or five) take a good amount of time examining your work, but they also provide written comments sheets indicating the score you received in the three major criteria categories (9 sub categories) and why. These are necessarily brief (i.e. seam lines on engine deck, decals silvered on turret, etc.) but usually of great use to the modeller who wants to improve and do better on the next model. Here’s how I did.
Total = 24.5 out of 30 (with 4 judges the lowest score is dropped, if 5 judges are available, highest and lowest are dropped) Okay, with one exception, the comments were pretty fair. I had missed the seam on the rear deck – sloppiness on my part. I should have filled and filed it out. The track issue is a bit of problem – it is very difficult to get a tight fit between the brass tracks and the plastic sprockets. If you force the brass it tends to deform and look wrong. I’ll have to work out a solution to that one. The antenna channel issue was one I was aware of going in – I had not attached the antenna "pots" until everything else was in place and painted. Once the port one was on and obviously not lined up with the channel, I had the option of tearing up the channel or leaving it as is. Since I was rushing to get things done for the show, I left it and was docked as a result. The final comment raises some concerns – I had, in my description sheet accompanying the model, explained my reasons for believing that the gun on this command vehicle was a dummy and not a functioning gun. If it’s a fake, there couldn’t be muzzle discolouration. I can understand a judge disagreeing with my assessment (perhaps it has been proven elsewhere that the "K" had a functioning gun) but in this case I think the judge in question just didn’t read the description provided. Other participants at this year’s AMPS have voiced the same concern. Part of the problem could be that there were fewer judges available this year, while the number of models entered remained high. I think the point should be made with the judges at next year’s show that if written material is submitted, it should be reviewed by all judges (or a notation added to the judging sheet that, due to time constraints, the written work was not taken into account). The end result was a silver medal (advanced category), which I was very happy to receive. |