|
MK72
|
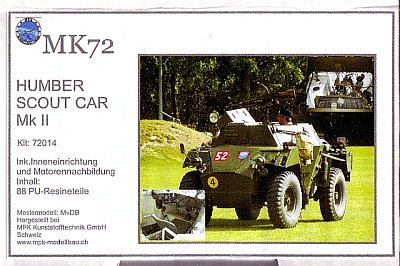
Humber Scout Car |
|||
| Kit #: MK72014 & Decal set #: D72011 |
Review by
- Al Magnus
|
|||
|
MK72
|
Humber Scout Car |
|||
| Kit #: MK72014 & Decal set #: D72011 |
Review by
- Al Magnus
|
|||
 |
|
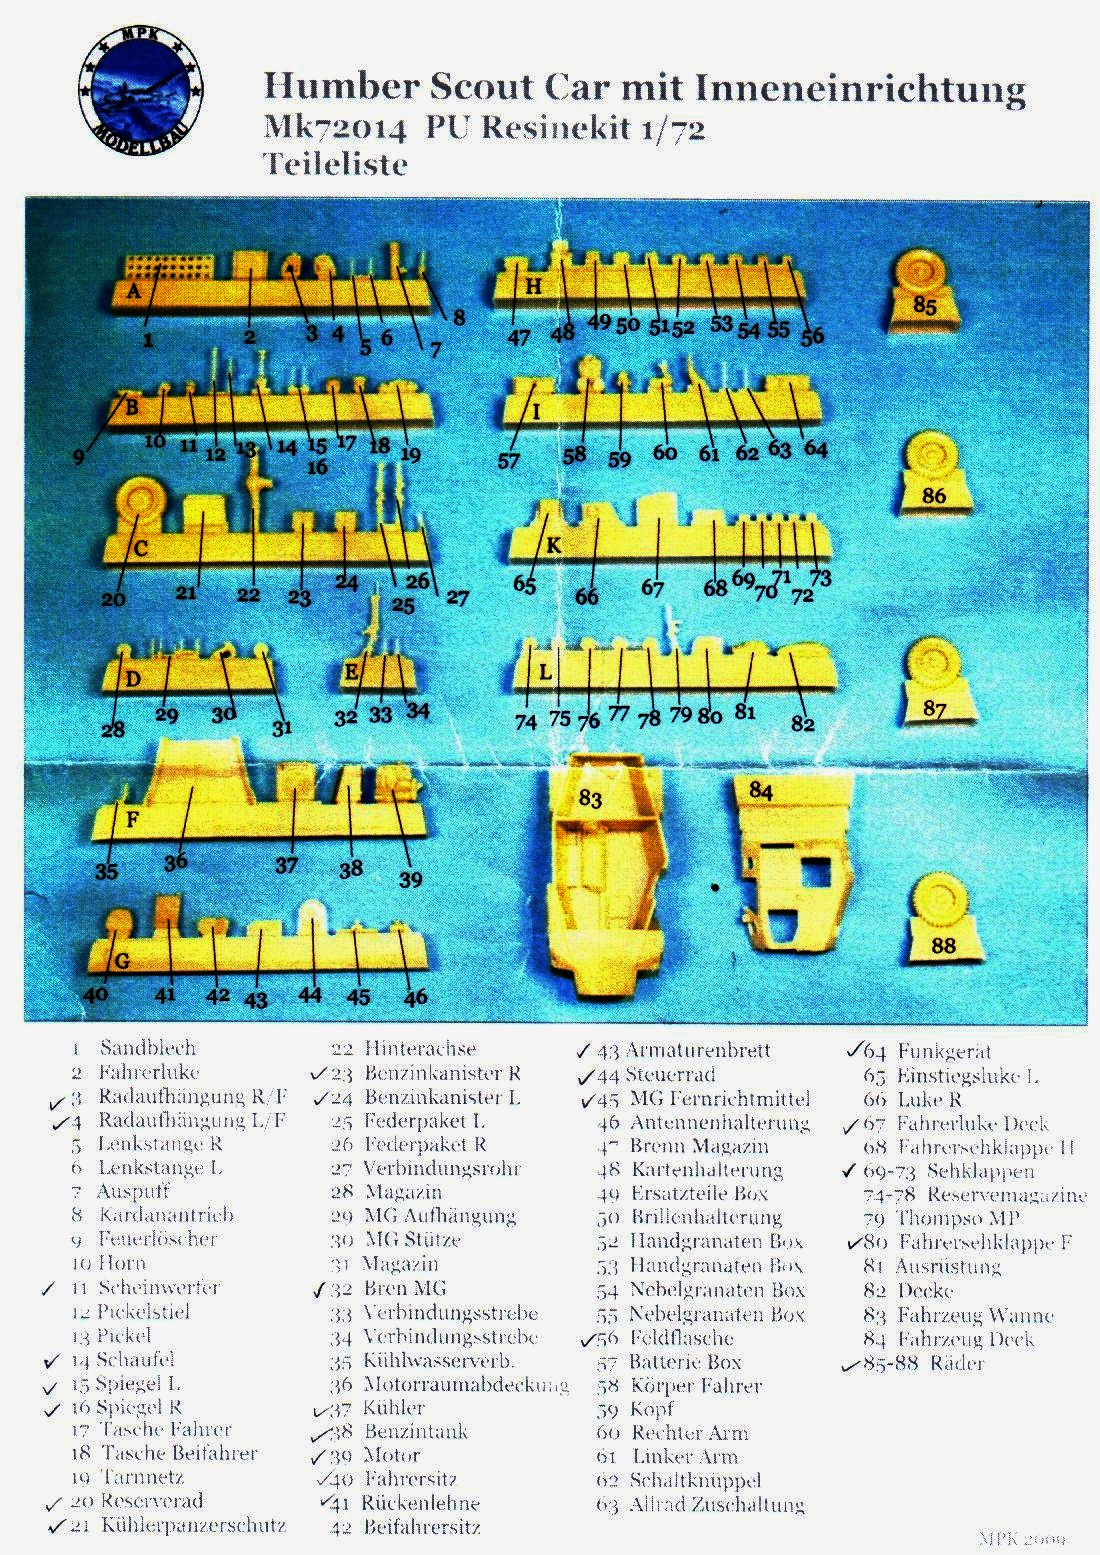
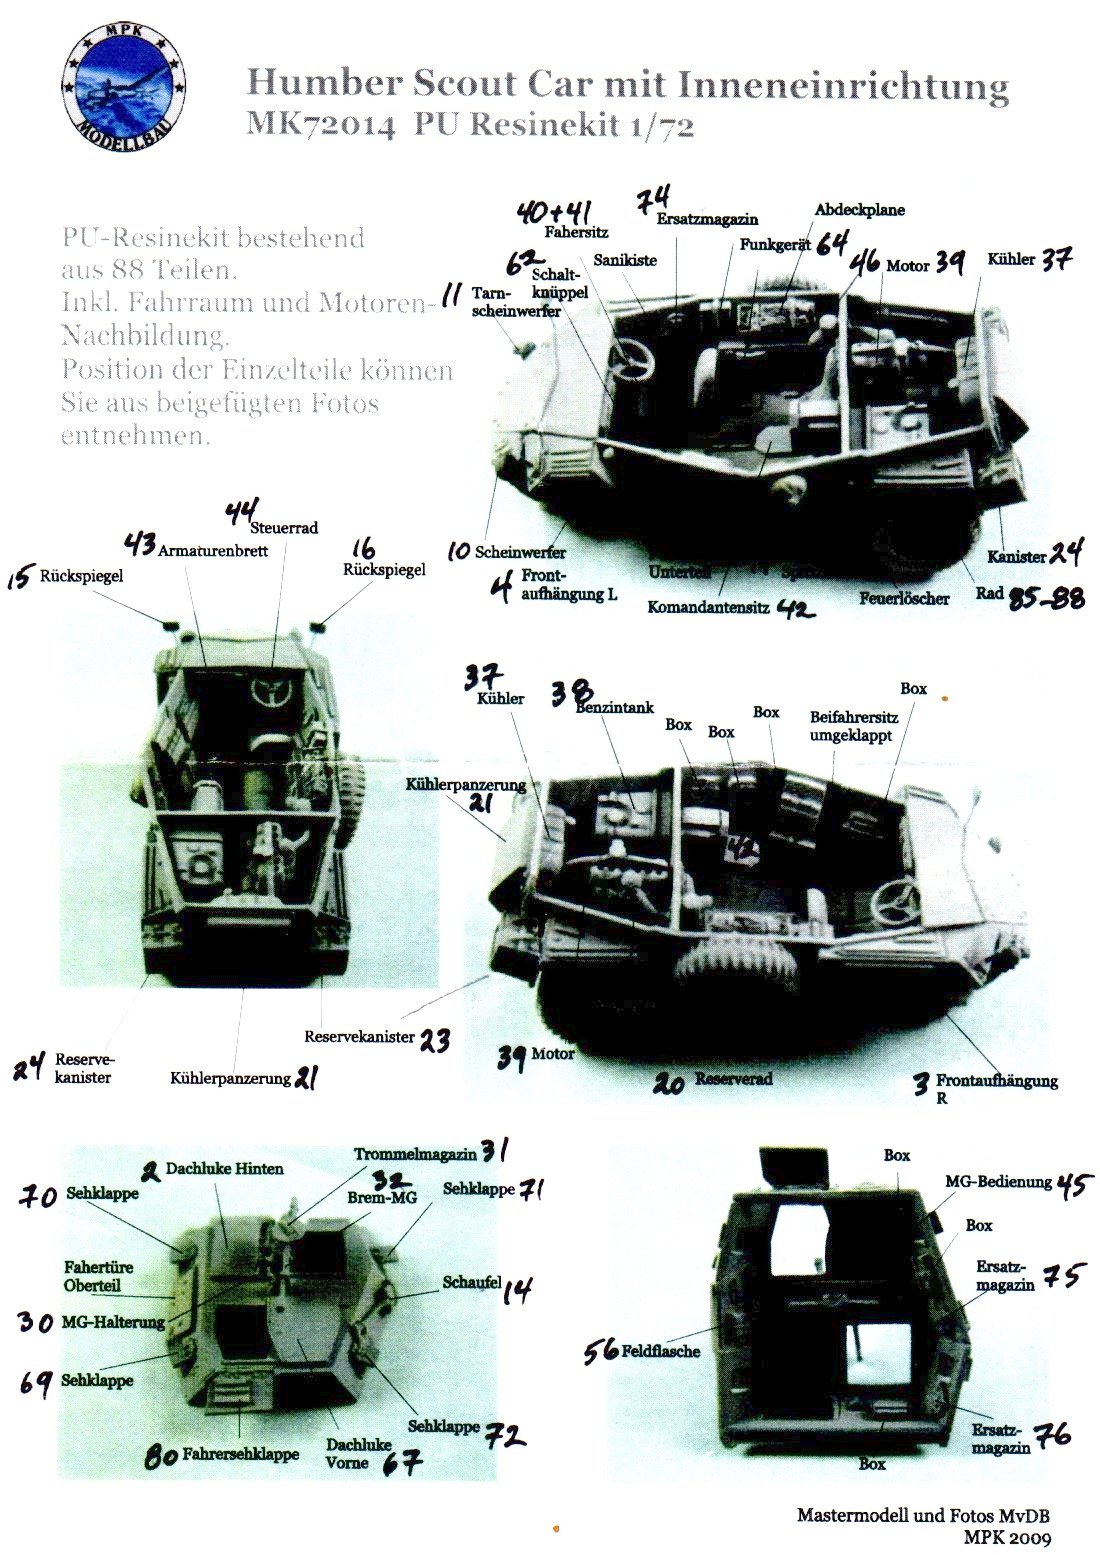
Inside the box one gets a total of ninety two parts molded in light grey resin. Instructions come as a set of three individual pages and there are no decals. Even though the kit is packaged in a very sturdy cardboard box, I was dismayed to find that all the parts were left attached to their pour plugs which were then enclosed in plastic bags and placed directly into the box. This didn't afford much protection during its trip to my mailbox and as a result they rattled around inside the box so much that the majority of the small parts arrived shattered into small pieces. Most disappointing! Just a little bit of tape and some thin cardboard backing would have easily prevented the damage. I have always found repairing small resin pieces a pain in the posterior so I decided right from the start that some concessions were in order. After a close
inspection of the carnage in the box I decided to:
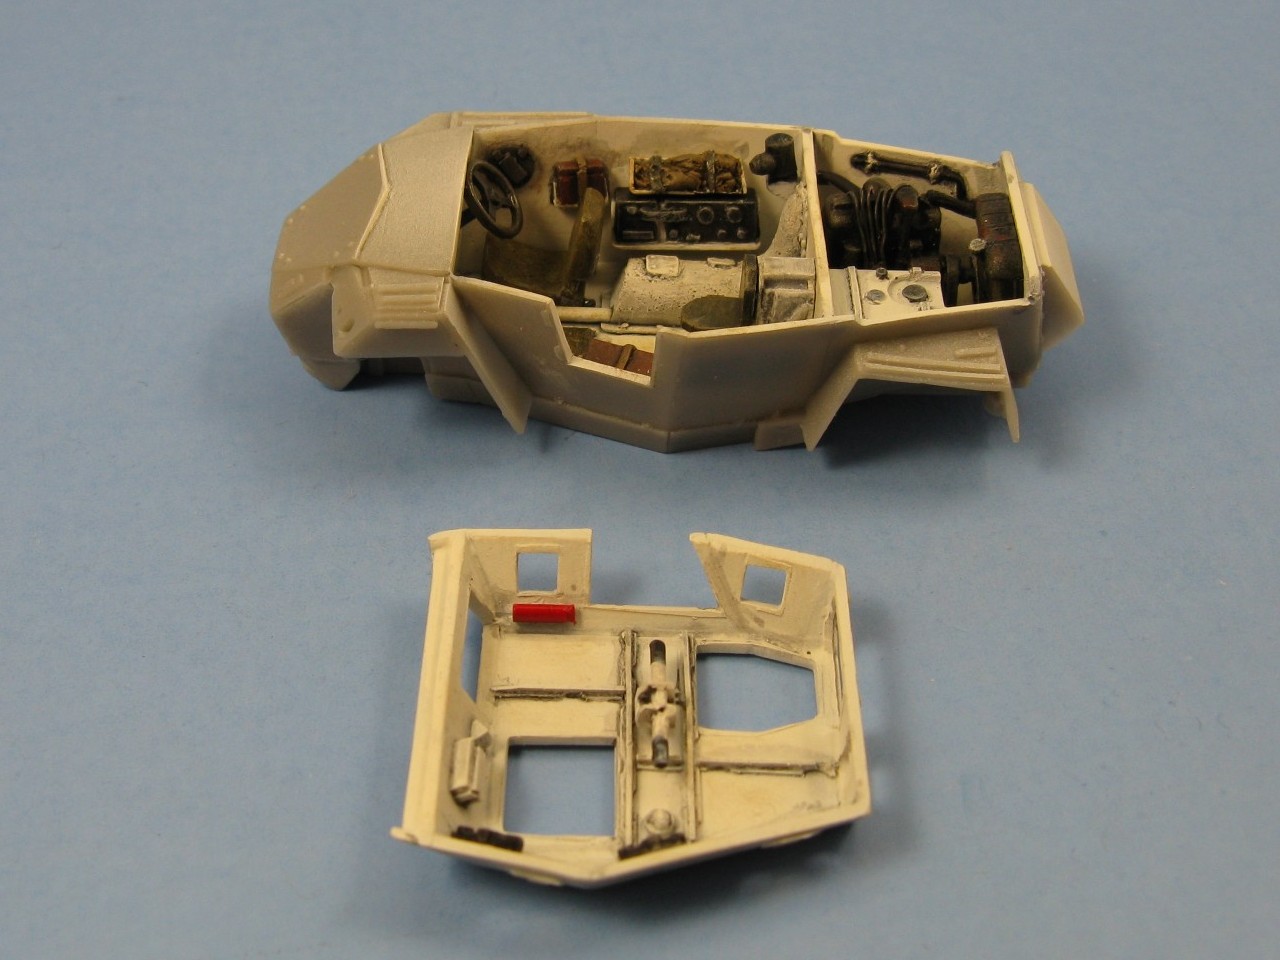
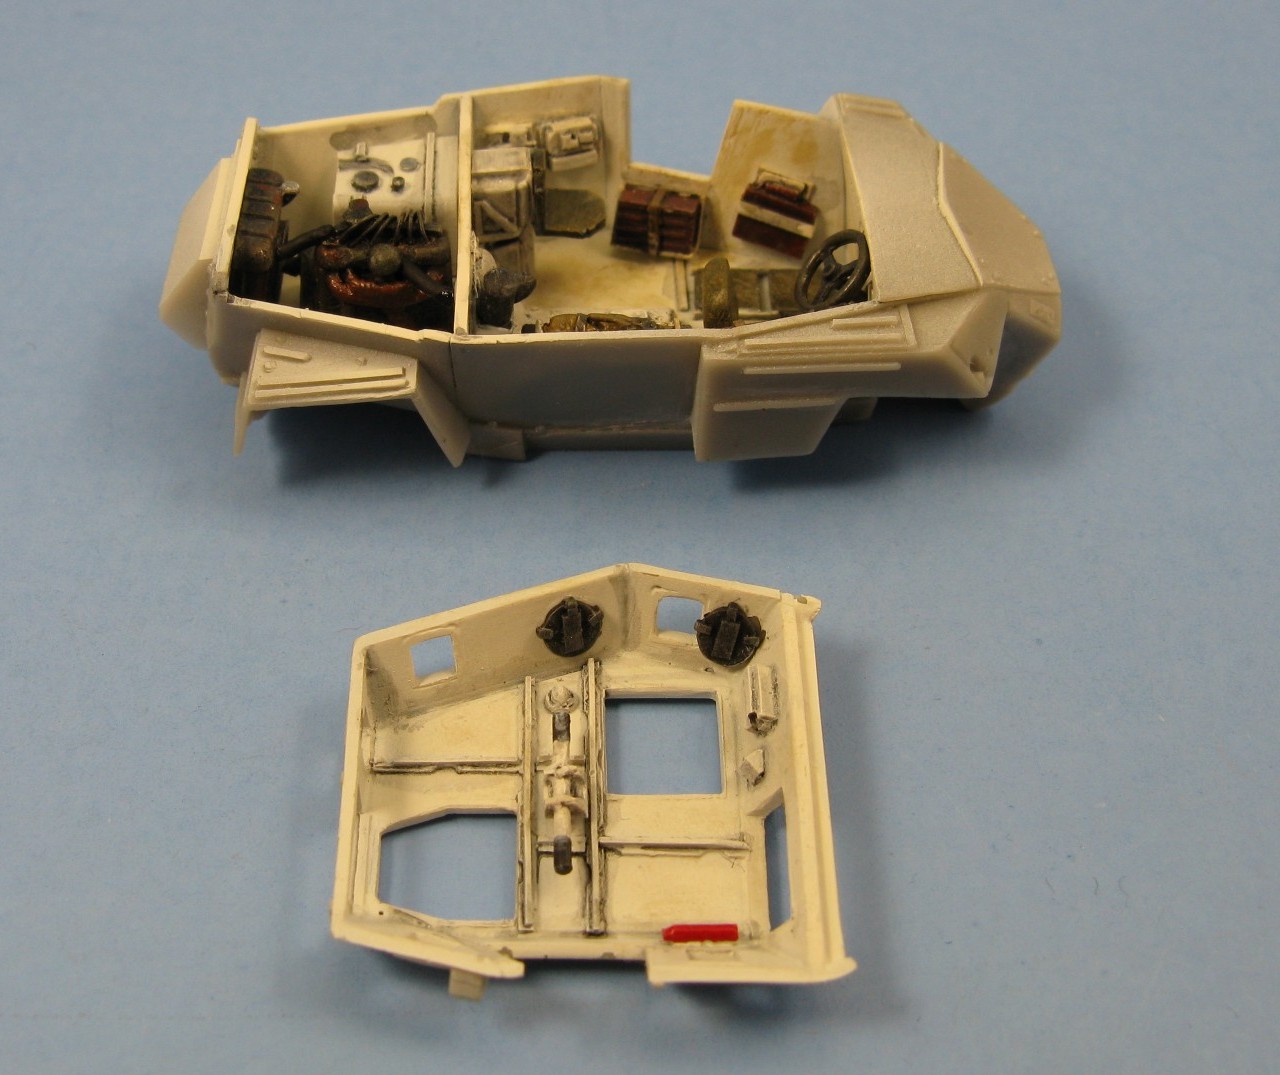
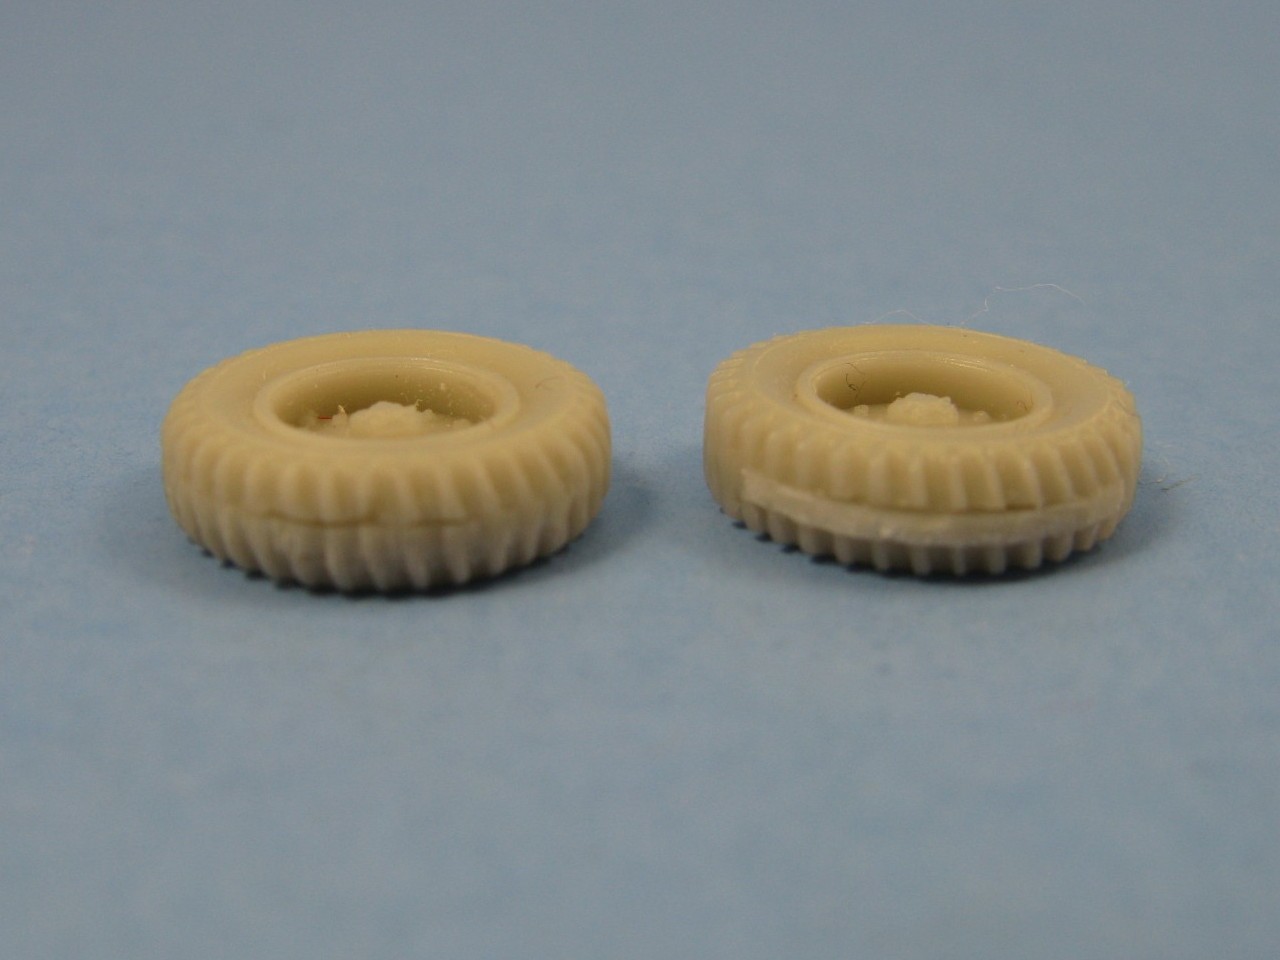
Inspection of the pieces still on the pour blocks showed the interior parts and the rear axle to be a bit on the blobish side. The flat surfaces on the hull interior and exterior all have a slightly rough texture and there is the odd small air bubble that needs to be filled. The front suspension parts were cast with next to no open space between the axles and the arms. There was one oddity. The MPK logo is cast directly onto the resin on the underside of the body just below the rear axle. Kind of reminded me of what the plastic manufacturers did circa 1960's and gave the kit a retro feel. You can either leave it there and live with it, or remove it, which requires a lot of scraping and sanding in a very enclosed place. I found the shovel and pick to be a bit chunky for my liking.
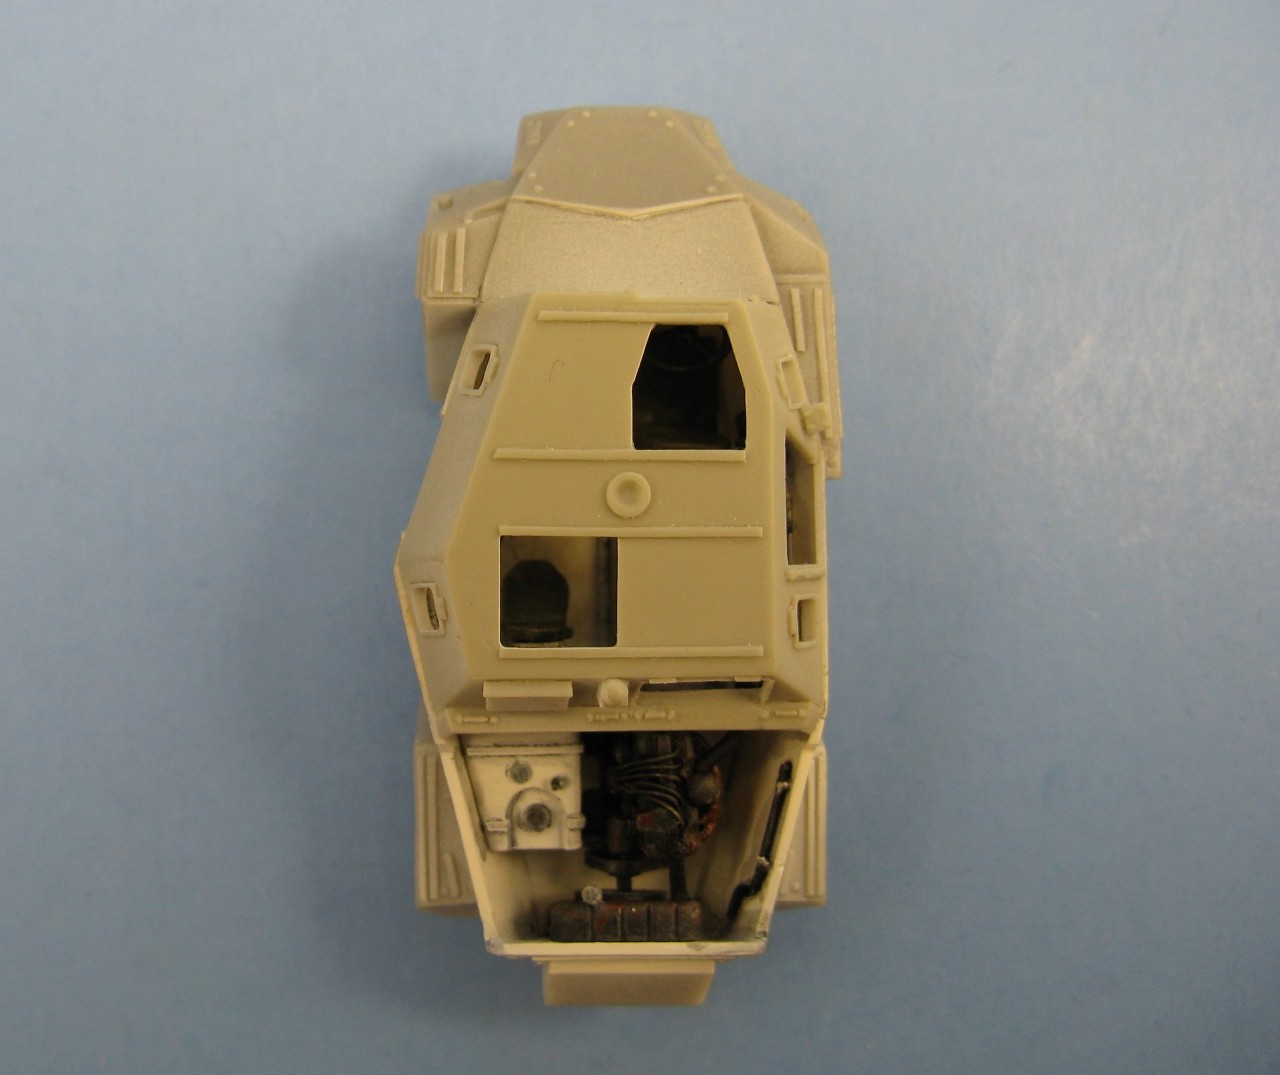
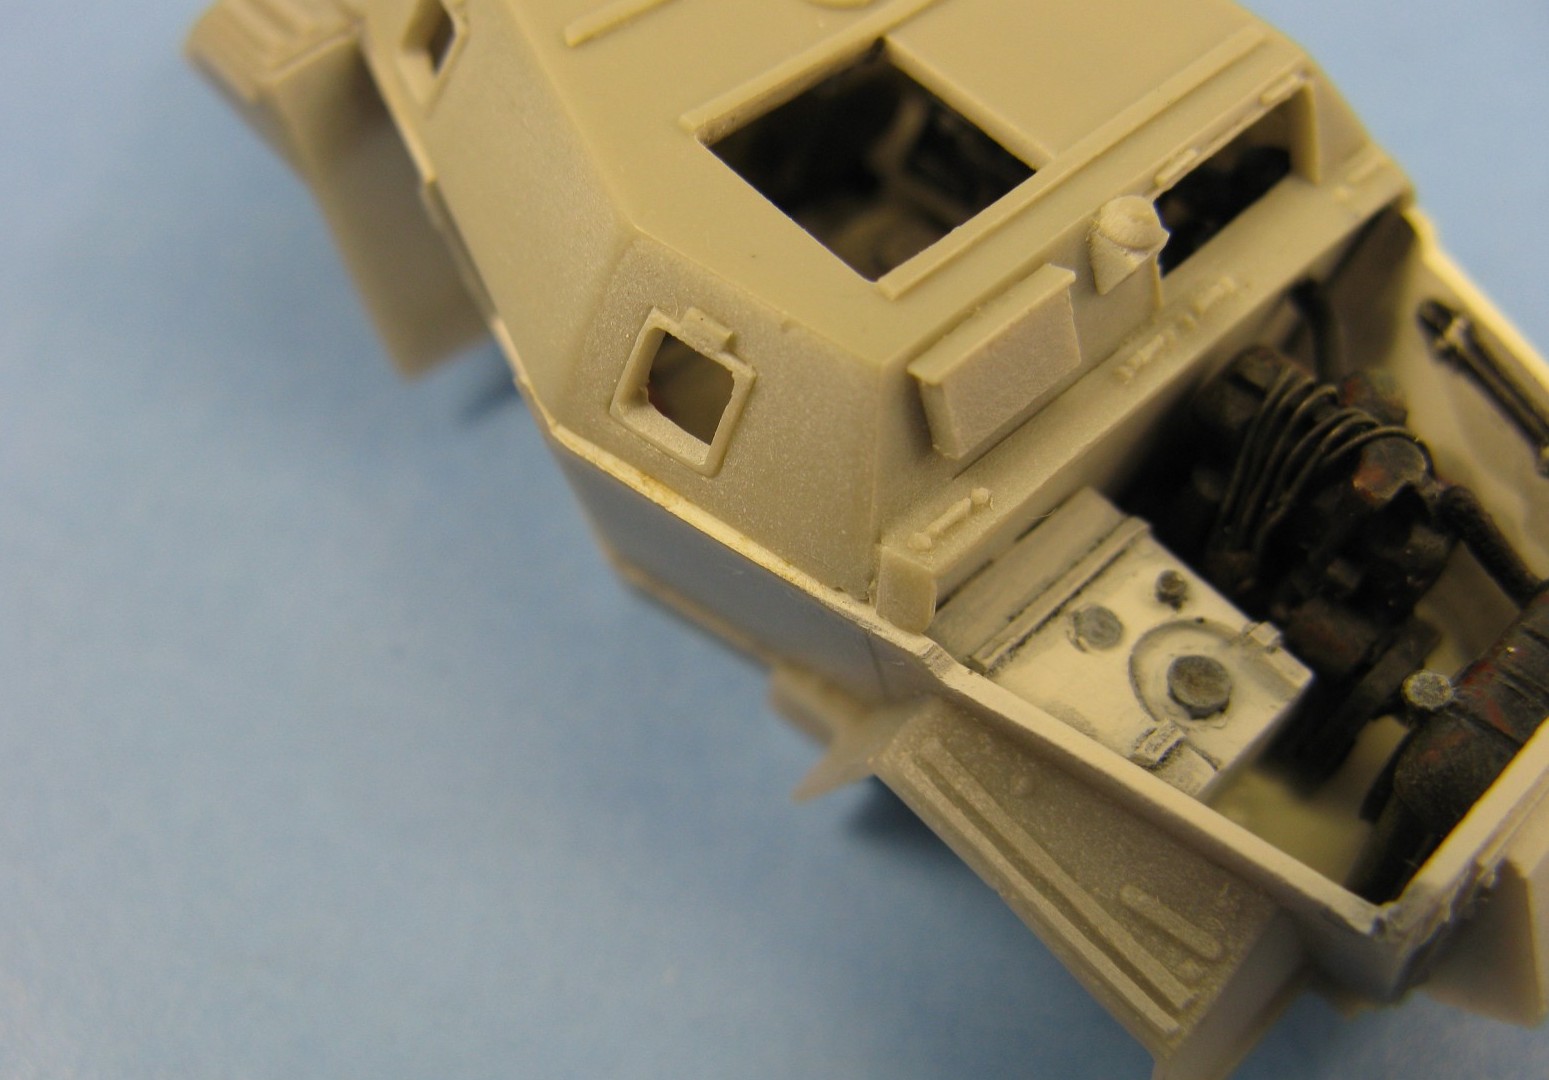
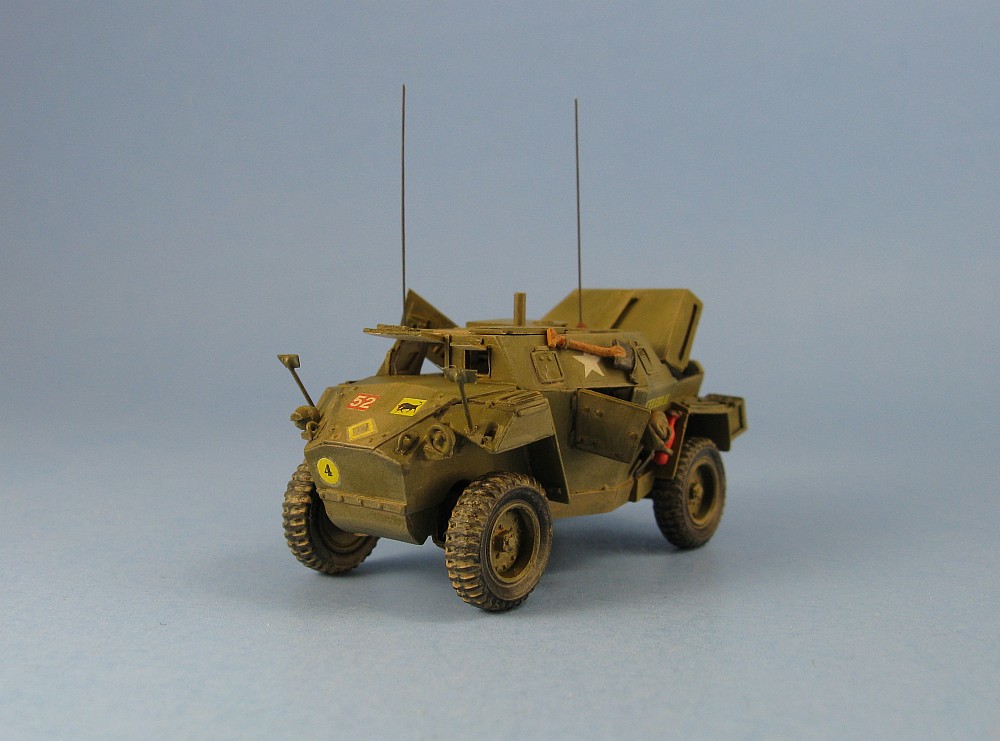
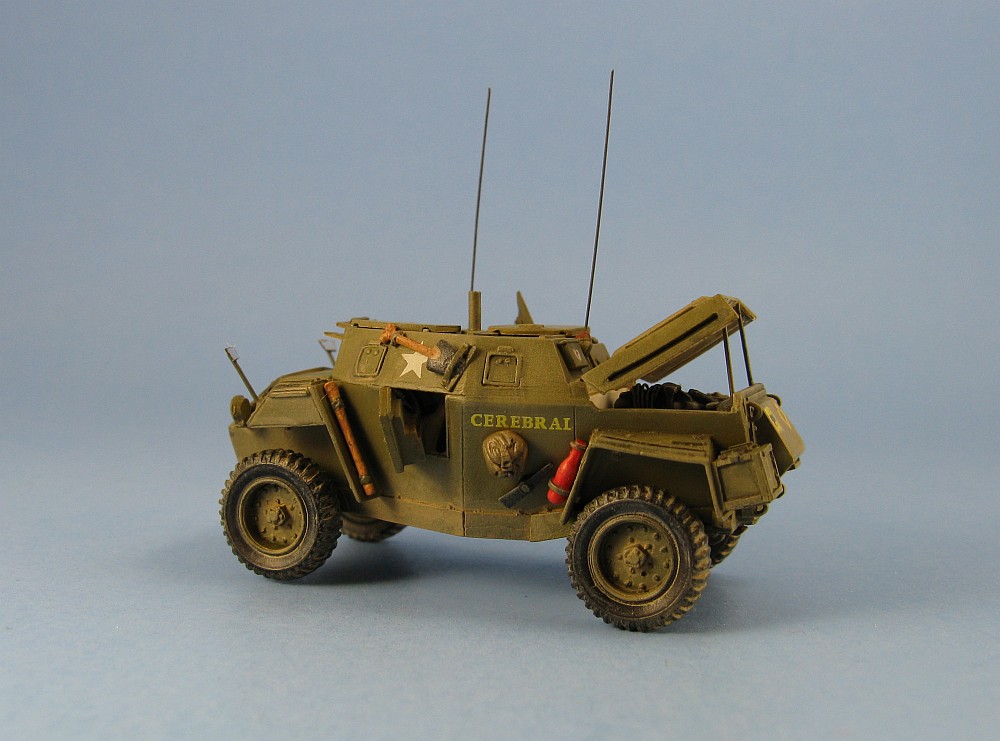
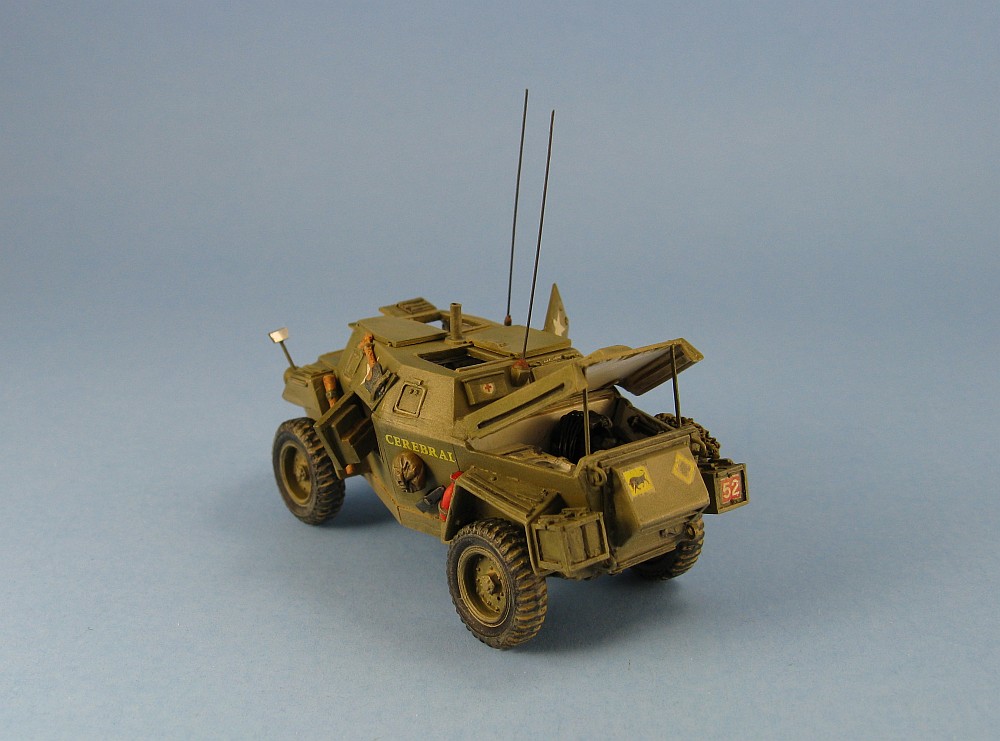
The kit provides the option of building the vehicle with the hatches, view ports, doors and the engine cover either open or closed. I felt that having too many open ports was a recipe for disaster and chose to close most of the really small ones.
The fact that the engine cover doesn't fit extremely well over the engine bay helped me decide that this definitely had to be mounted open. It also gave the opportunity to view the engine, which is quite a nice item and I added plug wires made from very thin wire to it just for the fun of trying something different. Unfortunately the instructions were one again found lacking. Sure, MK72 give you the nice engine bay and the parts to go into it, but exactly how the cover is held open is not shown. So it's again up to the modeller to find this out. The pictures at war-wheels.net did not have anything showing exactly how the engine hood is supported, but if you look closely at the engine bay photographs you can just make out a portion of the support rods at the rear end of the bay. I have no idea how long these rods were so I once again I made an educated guess, cut a short length of thin piano wire and attached them with some super glue between the cover and the rear of the engine bay. A nice touch was the small indentations for the tow rings. These were deepened slightly using a drill bit and then wire was bent to shape and superglued into the holes. Painting was problematic - exactly how was I going to paint this sucker with the minimum of finger handling, and how was I to mask the openings to prevent overspray entering and damaging the white paint on the interior? My solution was as follows. First, to avoid touching the model as it was painted, I found my strongest welder's tweezers and used it to hold the model by the rear axle. As for the masking, I first tried some of the more common masking items I've used before to stuff into the opening (tissue paper, masking tape, blue tack) but they all failed. My final solution was to use some Parafilm "M". The film was cut into small pieces, stretched, and then formed into small wedges that were carefully pushed into each opening. The wedge shape kept the film snug in the opening and the slight tackiness of the Parafilm kept it from falling out. Any small voids between the film and the edge of the opening that might allow paint through were easily closed up by slightly stretching the film with a toothpick so it would touch the edge. This worked quite well except I had one minor mishap. The point of each film wedge projects into the interior a bit and while pushing one of them into its place I accidentally snapped off one of the interior pieces. Unfortunately I wasn't able to remount it after the masking was removed because the spot where it was supposed to go was too confined and the ports and doors openings were too small to get any sort of tweezers through. Alas, after many attempts I had to give up trying and just accept the fact that the modelling gods would not allow me the satisfaction of fixing this.
A close examination with the old magnifying glass showed them to be slightly pixelated as is common with many ALPS style decal sets. With the naked eye the pixelation actually isn't very noticeable except on the gold/tan portion of the unit flash for option 3 above (decal number 11), where it is quite noticeable. Ink density also appeared to be quite good but I had misgivings about how well the decals would handle bleed through of the dark green camouflage of some of the options. After some rumination, I chose option 1 as the decals showed no obvious pixelation. Based on previous experiences with other ALPS printed decals and their fragility while being handled, I first coated the images I wanted to use with Microscale Liquid Decal Film. The decal film is very thin and care is definitely necessary when applying them to prevent them folding over on themselves. I found the decals were a bit stubborn when is comes to sitting down snuggly even after many applications of Microsol setting solution. Almost all of them unfortunately silvered. It may be best to apply these on top of a small puddle of Future Floor Polish (marketed as Kleer in Europe if I'm not mistaken) and let the drying of the polish pull the images down snug and also give a nice glossy undercoat to help prevent silvering. I found the white stars allowed the dark camouflage to bleed through, thus darkening them a bit. Normally when I'm in doubt regarding the opacity of white decals I'll replace them with ones I know will not bleed, but I figured I'd give these a try just to see how well they would work. Now, don't get me wrong. Outside of the atrocious instructions, and the inexcusable lack of decals, the molding of this kit is one of the better examples of what can be produced in polyurethane resin. But in my mind, as nice as this kit is, this subject would have been much better served as an injected plastic kit. Maybe MK72 will explore this option now that they appear to be branching out into this media. I'm sure this would be a very popular subject in injected polystyrene plastic. As for the decals, they are somewhat disappointing due to their pixelation and density issues. Any silvering was of my own doing. Review sample provided by Peter Kuonen of MPK.
|
| Back to MK72 Kit List | Back to Construction Reviews |
Article Last Updated: 19 August 2010 |
Back to Home Page |