 |
Sd.Kfz. 234/3 | |||
| Kit # 7307 | Construction Review by Stephen ‘Tank Whisperer’ Brezinski - sbrez(at)suscom-maine(dot)net | |||
|
Sd.Kfz. 234/3 | |||
| Kit # 7307 | Construction Review by Stephen ‘Tank Whisperer’ Brezinski - sbrez(at)suscom-maine(dot)net | |||
 |
| Eine Menge der Seemöwen
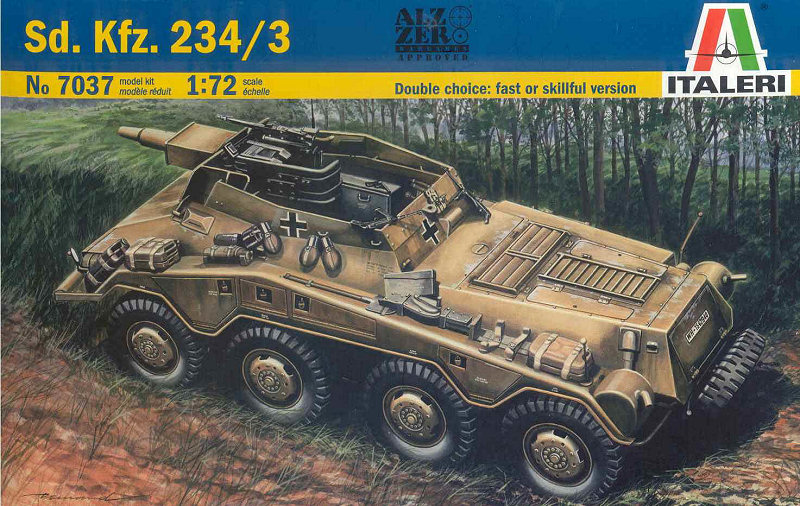
I have long thought that we can learn much about a model kit from the box art. Here we have Italeri’s nice box art of their 1/72 scale support armored car, often times known as the Stummel due to the short 75-mm gun, the same main weapon as mounted in the SdKfz 251/9 and SdKfz 250/8 halftracks. Italeri’s depiction shows a vehicle finished in overall dark yellow (Dunkelgelb RAL 7028) color. We see a light sheen to the rubber tires contrasting with the more flat vehicle paint. The paint finish appears streaked with dust running down the sides. In addition to the exterior stowage we can see inside through the open exterior the main gun breach and what appears to be an ammunition storage box.
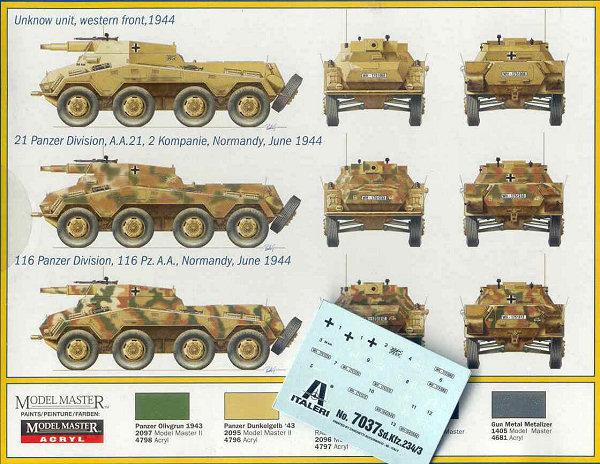
On the back of the box Italeri gives us three 3-view color paintings for Heer (German Army) vehicles in France, the color guide is nice but the choice in markings are disappointing to me and other modelers who focus on the Eastern Front. Italeri’s decals cover the three vehicles in the color guide.
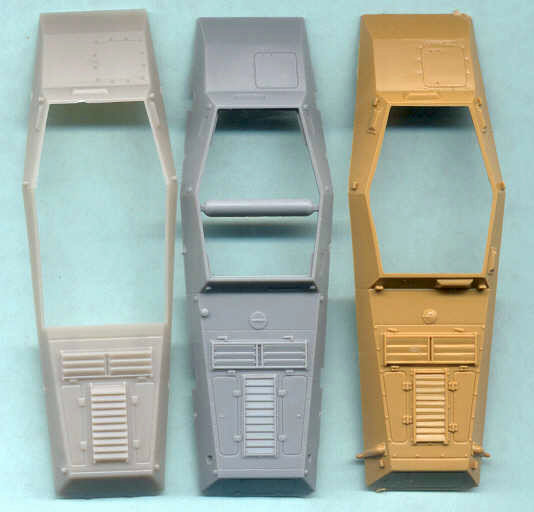
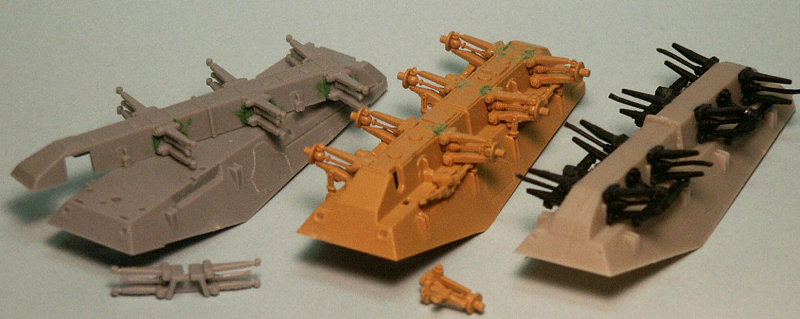
This is a comparison of Italeri’s SdKfz 234 upper hull (in tan styrene @ far right) with the Hasegawa’s gray styrene hull in the center and Roden’s light gray upper hull at far left. Roden’s hull is a tad longer and all the hulls appear slightly different in rendition of some fittings and parts such as the engine deck louvers. Italeri gives us exhaust pipes molded on which, for a good display model, would be good to replace with heavy gage wire. All three kits will benefit from etched brass detail and replacement parts.
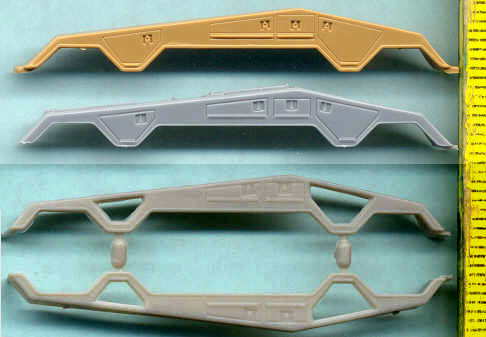
Italeri’s tan styrene fender at top is similar in quality and proportions to Hasegawa’s fender immediately below it. Roden’s fenders at the very bottom are slightly longer than the others. Roden gives us a wonderful option of having open storage bins. Like their other parts Italeri molds their fender parts very well with few to no flash or sinkholes throughout the kit. Like other parts Italeri’s and Hasegawa’s parts have overall better rendered detail than Roden’s.
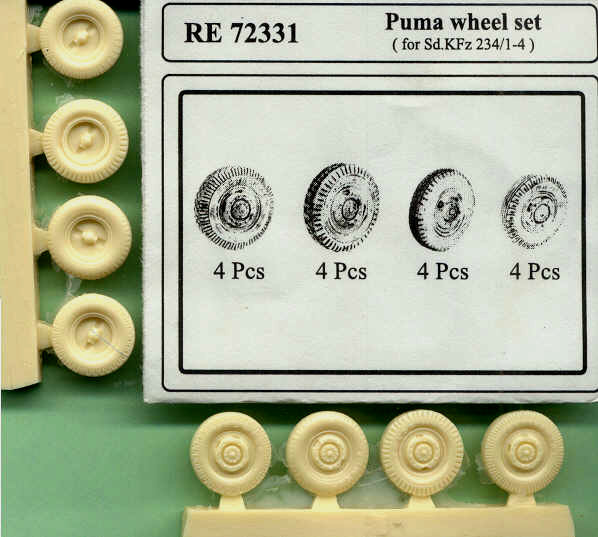
From left to right here we have a side-by-side comparison of Hasegawa’s SdKfz 234 roadwheels with separate hubs, then Italeri’s in tan, Roden’s two-part black styrene roadwheels, and Attack’s resin Puma Wheel Set for the Hasegawa 234 kits. Roden’s roadwheels appear slightly smaller than the others. I’ve found that Attacks great roadwheels can also be easily modified to use on Roden’s SdKfz 234 kit. All the styrene plastic wheels have a problem in missing tread detail on their surface; hence the Attack superbly detailed resin replacement wheels.
The backside of Attack’s wheels at left show the attachment points where the wheels attach to Hasegawa’s SdKfz 234 suspension arms. Attack’s major drawback is that the way the attachment points are oriented, the flat spot without tire tread where the resin poring stub is will always be visible. Attack should have oriented the wheels so their pour stub spot was on the bottom! With some work these wheels can be modified to fit on the Italeri model.
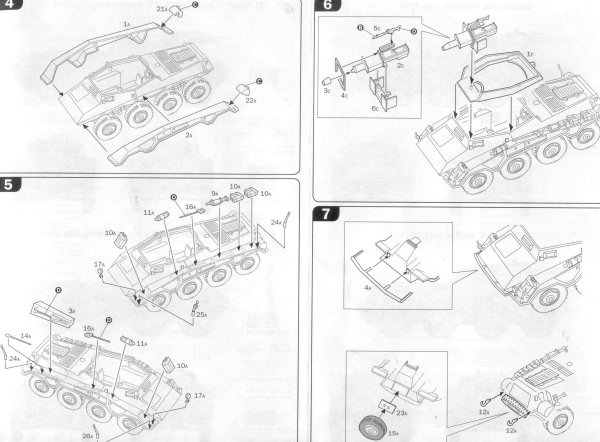
Italeri’s instructions are pretty clear and simple exploded-view type reflecting the few parts and the simple assembly. Italeri gives us a choice of quick Wargaming assembly with simple rod axles, or display model assembly with the more complicated independent axles and suspension shown in the photo below.
Here we have a comparison of the lower hulls and suspension of the Hasegawa SdKfz 234 kit (far left in gray), the Italeri kit in the center, and the Roden kit at far right. I found Italeri’s suspension to be more complicated to assemble than Hasegawa’s and had a bothersome gap on the bottom that was filled with green model putty. Italeri’s wheels attach on posts making it difficult to turn the wheels and to use Attack’s aftermarket resin wheels. (BTW, if Roden’s suspension looks uneven, that is because the suspension arms were modified so the wheels can be articulated over uneven ground.
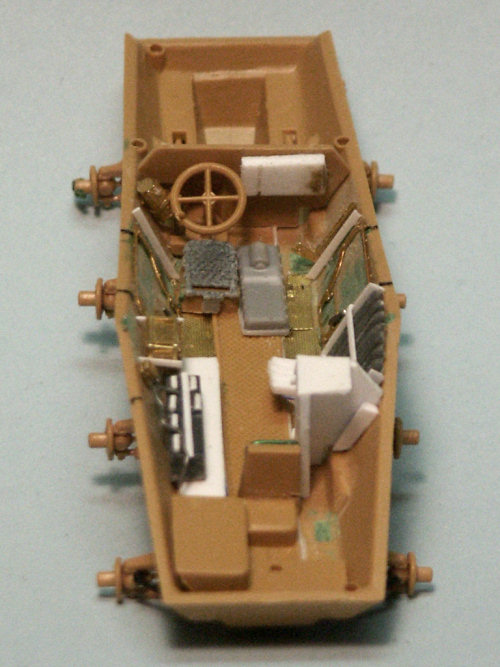
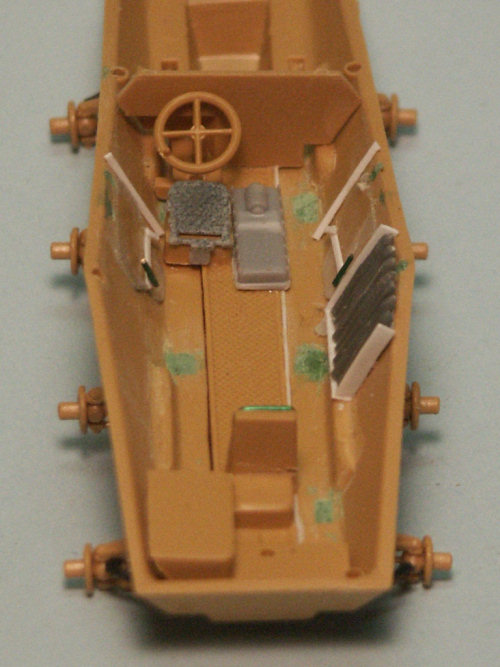
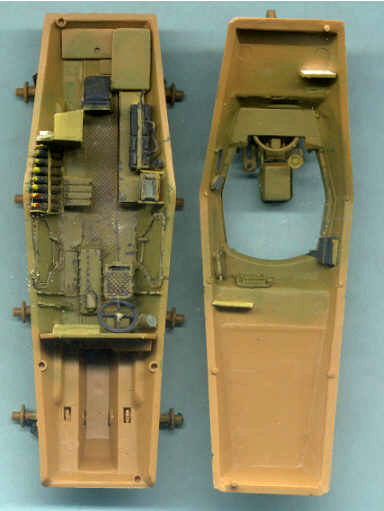
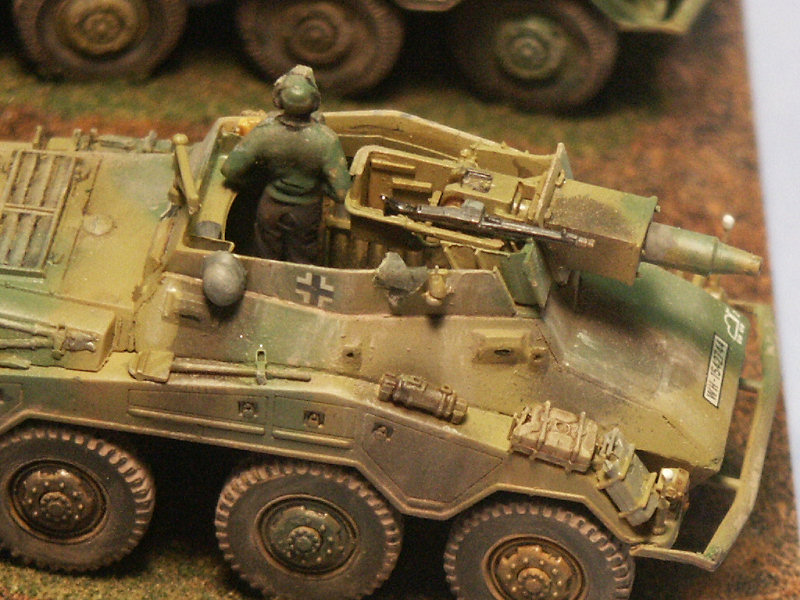
Since a significant part of the SdKfz 234/3 interior is visible it will need some accurate scratchbuilding as well as a few etched brass parts to get accurate for a display model. At right is how bare the interior would be without many new, additional parts. Some of Italeri’s interior parts like storage boxes are inaccurate, and things like the fore and aft driver seats are greatly simplefied. A seat back has been taken from a Dragon SdKfz 251 kit; a transmission or drive train piece (the gray box next to the rear diver’s seat) was cut from a Hasegawa SdKfz 234 kit; the frame for the side escape doors are etched brass; storage boxes and the ammunition ready rack are scratchbuilt. The Italeri rendition of the 7.5-cm K51 gun and upper superstructure is pretty basic and needs some detailing and corrections. The recoil guard received a support frame of copper wire and the front armored plate received some bolts made from copper wire. The interior of the superstructure has a narrow storage bin along its length I fashioned from sheet aluminum.
The interior will need to be completed, painted and weathered before the upper and lower hull sections are glued together. Here we see the fore and aft driver locations, ammunition stowage, and underside of the gun mounted on the roof of the upper hull. Good references for the interior of this vehicle were rare for me and my interior is therefore a compilation of details from a half dozen museum shots, historical photos and trusted well-detailed models by respected modelers. The interior was painted all dark yellow, parts like the batteries and ammunition were painted appropriate colors, then a point-wash was applied and all was weathered.
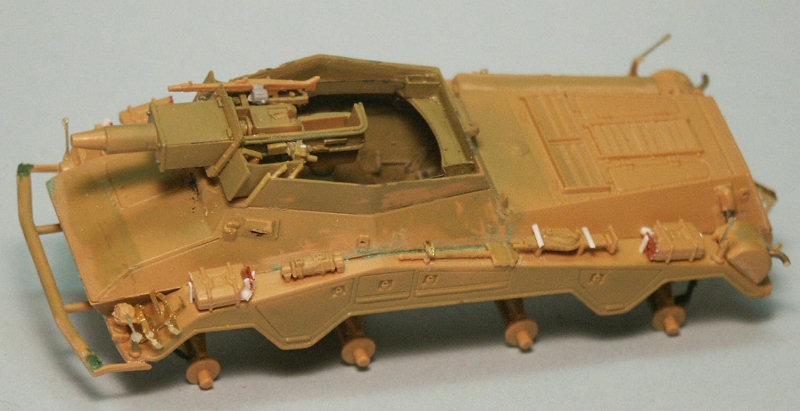
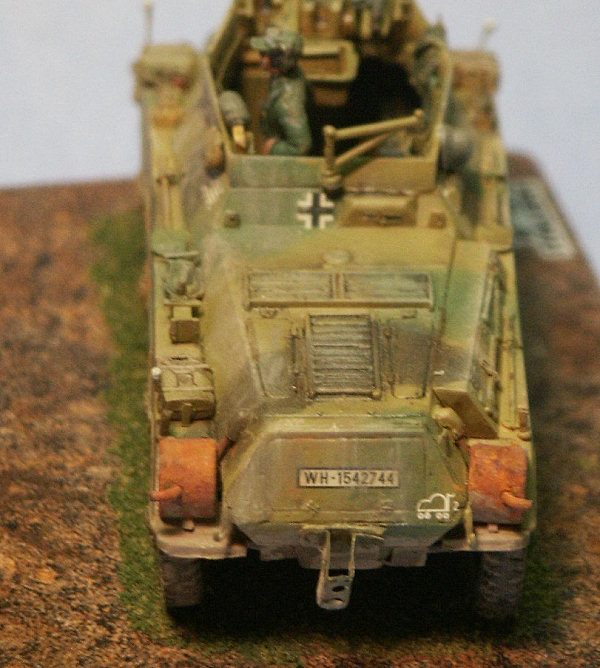
Now ready for painting many of the modifications and scratchbuilt pieces can be seen. The attachment points for the wheels are visible. Ta Daaa: the completed model! Colors chosen were a basic three-color sprayed on scheme, though rather than the typical German Rotbraun I opted for a darker brown. Over the Dunkelgelb color a point wash of dark brown and black was applied in recesses and around bolts. The markings are Italeri’s water slide decals which applied very well over an acrylic glosscoat. The model was then given a light application of acrylic flat coat tinted with dust-colored paint to tone down the vehicle camouflage. I tried to simulate the weathering on Italeri’s boxart (see the boxart photo at beginning) which appears to me to be light-colored dust running down the vehicle sides perhaps by precipitation. Dust in the model’s wheel tread was simulated by painting on dry paint pigment with a damp brush, then brushing it off the high areas with a stiff brush after the wet pigment had dried. In this photo I see that I should have replaced the hull lifting points (near the front visor and left of the fire extinguisher) with scratchbuilt or etched brass parts. The brass clasp for the shovel is also bent in the wrong direction.
CONCLUSION The Italeri model builds into a decent rendition of an SdKfz 234/3 armored car. Though I have not measured the model it appears 1/72 scale and matches the Hasegawa SdKfz 234 in proportions. The parts are molded well and I recall few defects other than ejector pin marks in the interior that need to be filled. Like with the Hasegawa 234/3, my main complaint is the lack of accurate interior parts. |
| Back to Italeri Kit List | Back to Home Page |
| Article Last Updated: 22 November 2009 |