|
A very special variant of the CCKW was the amphibious DUKW (catalogue number G501). Used where US troops had to come ashore,
it saw wide use in the Pacific, in the Mediterranean and of course at Normandy. Currently we have just the Italeri kit available as a 1/72 scale plastic kit.
It is comprised of two medium olive green moulds, a decal sheet, a small transparency sheet and instructions. The kit has the option
to be built for war games using a second set of simplified wheels and leaving some details unused. About the quality of the kit, I found some details really
disappointing. The wheels' inner side is hollow and some items (the bilge hand pump, the boat hook, the sand anchor and the shovel handle) are moulded on in a way
that makes them seem half submerged into the deck. The tarpaulin is missing as well as the M36 mount (which wasn't frequently used anyway).
A preview by Will Alcott can be seen here.
Dimensions are just a bit oversized, being 1.0 mm longer and 1.3 mm wider.
| real | 1/72 | kit |
| Length | 372" | 131.2 | 132.2 |
| Width | 96" | 33.9 | 35.2 |
| Height (top of the tarpaulin) | 106" | 37.4 | no |
| Height (top of the windshield) | // | // | 35.3 |
| Wheelbase | 164" | 57.9 | 57.4 |
| Wheel track (front) | 65⅜" | 23 | 23.1 |
| Wheel track (rear) | 63⅞" | 22.6 | 23.8 |
| Tires | 11.00x18 | 15.0x4.5 | 13.2x4.1 |
| Rim | 18" | 7 | 6.4 |
| Footnote: CCKW tires were 7.50x20 type |
Regarding the 21,147 DUKWs built by late 1942 until August 1945, the registration numbers (beginning with 70) I found a total of 17,377
using printed and internet sources:
700100 through 702103 (2,004)
7014883 through 7015882 (1,000)
7017291 through 7019090 (1,800)
7019096 through 7022091 (2,996)
7022093 through 7031669 (9,577)
Fortunately, the restorer community provided me with info to fill the gaps. On the basis of correspondence between the frame numbers and the registration numbers, the
missing 3,770 DUKWs should be:
7031670 through 7034290 (2,621)
7034666 through 7035814 (1,149)
Compared to production variants, the kit depicts a mid production DUKW, having the slanted windshield, the spare wheel position introduced by May/June 1943
with frame 2,006 (7014885) and the air scoop discontinued by July 1944. On the sides, the steps introduced by December 1943 can be easily removed if needed.
The British Army received 2,000 DUKWs. I didn't find their WD numbers list. Anyway, photographic evidences I found show most are comprised from P5544763 to P5544865
and from P5575625 to P5576527. Out of these, I've found L5216147 (early amphibious lorry retained the suffix "L"), P5477182 and P5815193.
I built my DUKW following the production variant suggested by the kit giving it just some basic corrections. I used various sources, printed and on the internet,
among these, forum.g503.com is very useful for details, as well as the Tankograd book no. 6003. For operational photos, militarymashup.com and ww2db.com provided
me with some good images. Some info about the operational life can be found in "United States Army in World War II.: The technical services - The transportation corps",
which can be found as free eBook on the net.
Instruction sheets can be seen at Henk of Holland.
Here is what I did.
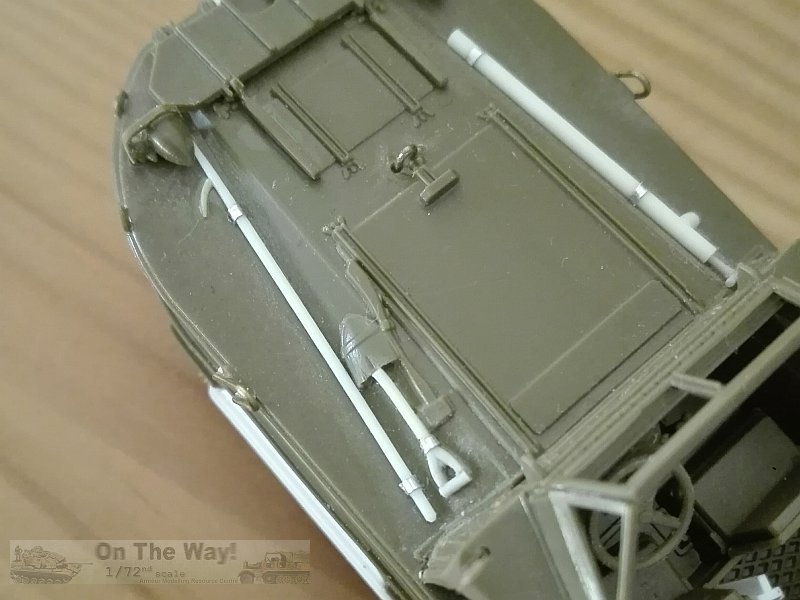
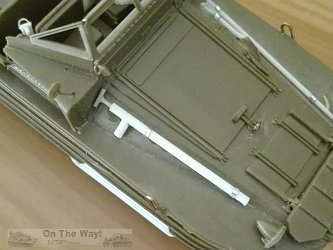
Deck
- The surf board, part 10B, was kept up when the DUKW was in the water. When on the ground it was lowered and its braces lay aside the hatch. I made mine in this way. The
two central hinges are missing. I added them by plastic sheet chips.
- Between the surf board and the hatch there was a welded on "U", depicted solid by the kit. I replaced it with metal wire.
- The hand operated bilge pump moulded along the bow top on the starboard side is shallow and badly depicted. I removed and replaced it using plastic rod and stretched sprue.
- Another moulded on item which looked shallow, is the hook on the port. This was replaced also.
- Also the shovel's handle is almost flush with the deck. I replaced it with plastic rod.
- The four eyes moulded on along the bow deck edge are horizontal. They were placed vertically. I cut them off and glued them in the proper direction.
- The windshield, part 19A, needed a bit of trimming along the central lower edge to fit properly in its interlock on the deck.
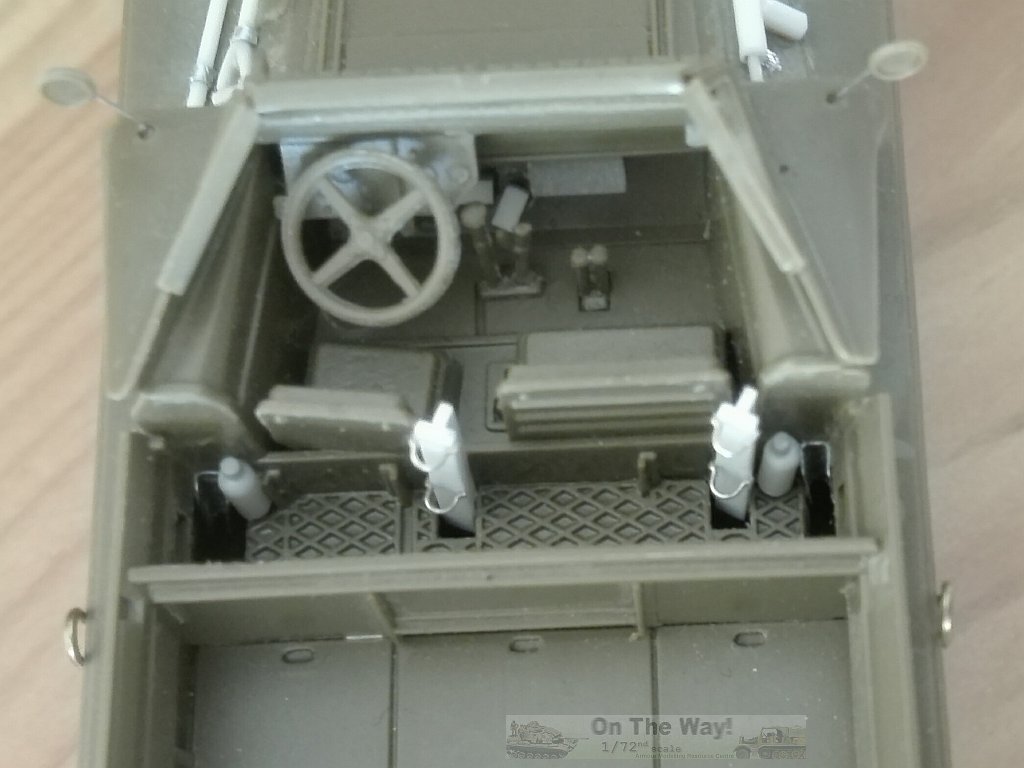
- The driver pedals are missing. I added them using plastic rod segments. The two which were aside the steering wheel rod were transversal and the third was
placed longitudinally.
- Even though it looks too big, the steering wheel diameter was effectively 20". The kit one is 7.4 mm, almost correct. It looks too close to the driver so I
cut off 1 mm of the rod and it went forward.
- A shaped piece of sprue provided a map case, glued in front of the driver assistant.
- The two backrests, parts 9A, were divided and the driver one was placed aligned to the seat, which is turned a bit clockwise.
- Behind the seats there was the ventilation well, which was closed by three removable meshed panels. I opened the parts which weren't closed. The results is
not bad. If I decide to make another DUKW, I'd replace the moulded on parts with metallic mesh for a better look.
- The rear view mirror supports were replaced with thin metal wire.
- In the ventilation well area I added three details missing in the kit: the fire extinguishers, the rifle racks and the M36 mount brackets. All were scratch built.
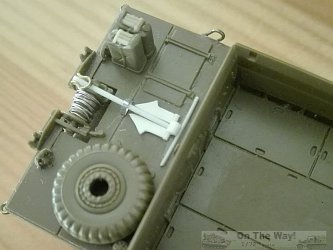
- I removed the moulded on anchor. It is shallow and not placed in its housing. A new one was fashioned from plastic rod and sheet.
- The wire on the winch spool is poorly rendered. I wrapped a thin metal wire around it.
- Four of the six lifting points are depicted solid. Two (the mid ones) are missing. I made them all from metal wire.
- The jerrycans needed the usual care. The solid handles were replaced with stretched sprue as well as the cap. Their holder wasn't symmetrical, having
a low edge and a high edge. When glued side by side in place, the lower edges have to be placed outside.
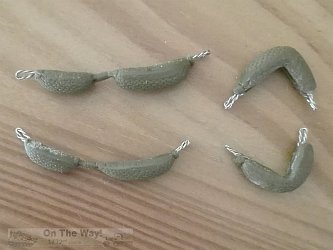
- On the real vehicle, protective bumpers were made of long rope wrapped around itself. The kit's pieces (21A, 22A, 23A, 24A, 27A and 28A) look a bit stiff. I
preferred giving them new hanging ropes made from twisted thin metal wire. I left them off to be glued after having painted the hull.
Sometimes the rope fenders were replaced by hanging tires.

Hull
- On the underside of the bow, the two shackles are moulded on solid. I replaced them by metal wire. Sometimes these shackles were connected to the upper
shackle by two chains. This could be added to give that extra nice touch.
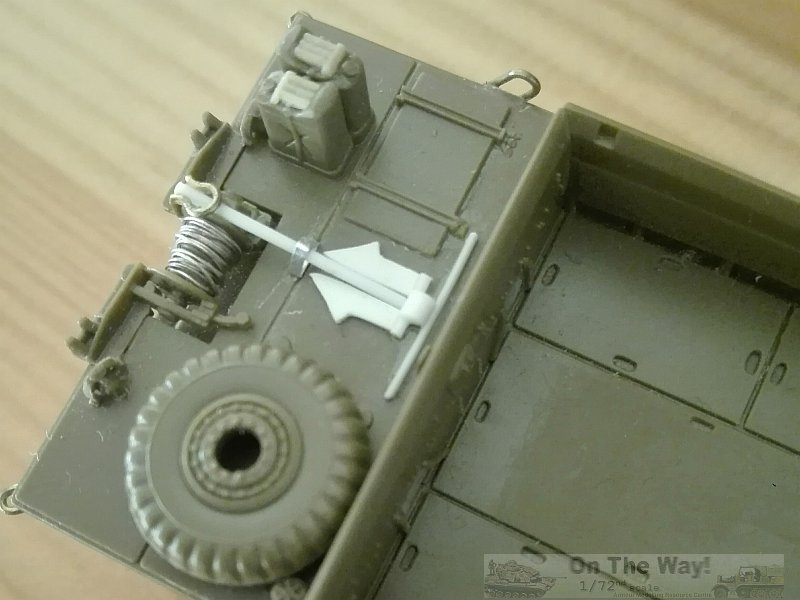
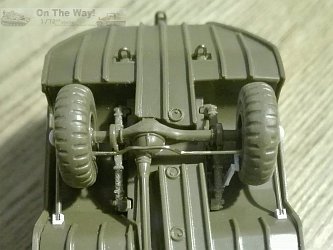
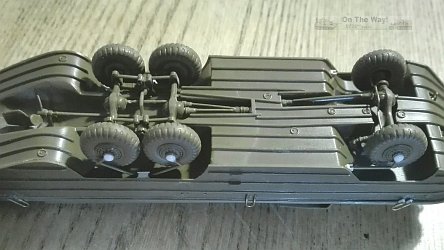
- The forward axle has the steering tie rod moulded on. It was replaced with a new one made by metal wire and in the correct vertical position (the kit one is
wrongly placed horizontally and looks to be going through the drive shaft). I glued the suspension springs to the hull and then the axle to them. Believe me,
it's a better way. The drive shaft needed to be bent upward to find its housing. Finally I had to make the steering linkage by plastic rod segments.
- The rear drive shaft's insertion point has a rectangular ridge. I cut it off.
- The rear coupled axles have a similar problem as seen with the forward one. Both drive shafts are horizontal and the third axle one goes through the second
axle. I cut off the drive shafts that pass through the second axle and bent them to pass above the second axle. The missing segment was replaced with stretched
sprue. The forward "V" drive shafts were consequently bent to reach the transmission case.
- The triangular "V" support of the propeller shaft is molded solid (it would work as a hydrodynamic brake). I opened it up using a sharp blade.
- The rudder is moulded on. I cut it off, thinned its outer edge and glued in place leaving a gap. On the upper edge I glued the pivot shaft which
went through a hole in the hull.
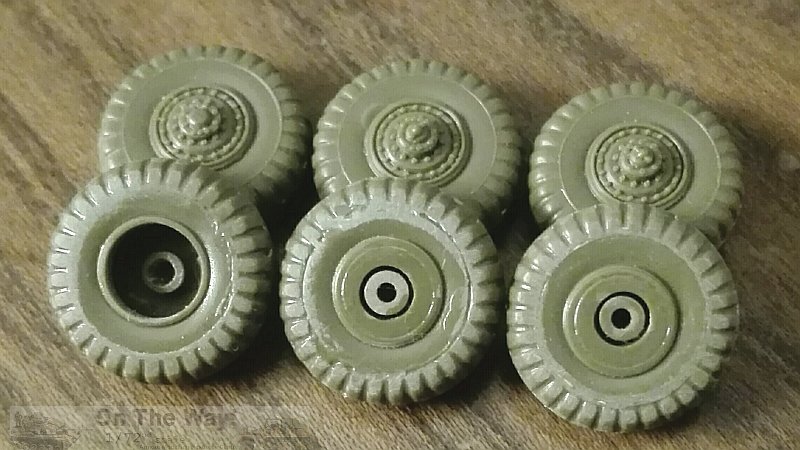
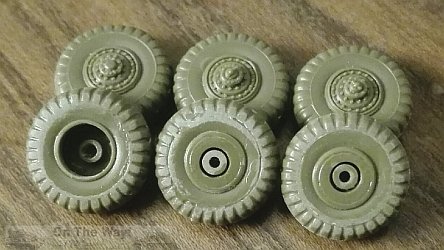
- The kit's hollow wheels are really disturbing in my opinion. Anyway, the kit provides us the material to correct them. By using the optional war gaming wheels
(marked as not for use on the instructions), I filed off the tread part of the tires and drilled open the hubs. When cleaned, these pieces were used to
close the cavity. It worked quite well.
- The central tire inflation system is missing. The hubs depict the wheels when the device is not installed. To add it, I had to add a domed cap from
plastic punched disks, while piping was made from stretched sprue.
- On the rear corners I added a ring from metal wire.
- Using plastic rod segments, I added the vertical guides of the winch.
- Two slices of plastic rod were used to add missing reflectors.
- I made the egg shaped ring by metal wire and its housing by plastic.
- The fender skirts are missing. In some photos one (or both) of them look to be removed because of damage, but they were usually in place even when
the DUKW was on the ground. I made skirts with thin plastic sheet and 0.5x0.5 mm plastic rod.

Decals
Four anonymous DUKWs are depicted, of which I found two supporting photos.
- British Army, Normandy 1944, A4 is a 199 Company RASC vehicle, a photo of it be seen on Wikipedia. No WD number is given (33210 was its
mobilization number). The AoS 54 suggested is wrong, because it belongs to the 297 Company RASC. The correct AoS number for 199 Company RASC was 1336.
- U.S. Army, Germany 1945, H105 - 954 "Pistol Packin' Mama". There is a photo of this vehicle on page 67 of Allied & Axis No.2 book.
No registration number or bumper codes are visible and its identity could remain unknown. As far as I can say, the individual number on
a light coloured (white?/yellow?) square could denote a 147 QM Battalion DUKW (829, 830, 831 and 832 Companies).
For those others that I couldn't find a supporting photo:
- U.S. Marines, Iwo Jima 1945 is a very generic vehicle. Its U.S. Army registration number is surely wrong because 7012801 falls within the Ford GPA
batch. If it was a Marine vehicle it should have a U.S.M.C. serial. Iwo Jima saw four U.S. Army Amphibious Truck Companies (471, 473, 475 and 476)
and this DUKW, with a correct registration number, could be in one of them.
- U.S. Army, Germany 1945, 233 "The Texan".
The rear load marking stripes introduced by January 1944 are missing.
Italeri supplies a set of bonus numbers, so making others registration numbers is possible. Unfortunately, Italeri
didn't provide extra WD suffix numbers; a letter L for an early British DUKW and a letter P for a late.
Conclusion
Currently this is the only DUKW available as 1/72 plastic kit. Being released
in 2004, it was very disappointing to find the moulded on items, the hollow wheels and the missing pieces. Supplying few additional parts would have made a big
difference. However the kit is quite accurate and improving the detail is not as hard as it looks if one uses old school methods. Better attention with the
decal set would have been nice though.
Review sample purchased by the author.
Italeri products are available at

|