Italeri
|
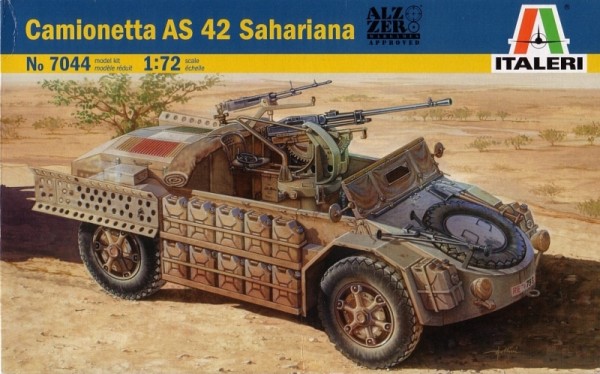
Camionetta AS 42 Sahariana |
|||
| Kit #: 7044 |
Review by
- Al Magnus
|
|||
Italeri
|
Camionetta AS 42 Sahariana |
|||
| Kit #: 7044 |
Review by
- Al Magnus
|
|||
 |
|
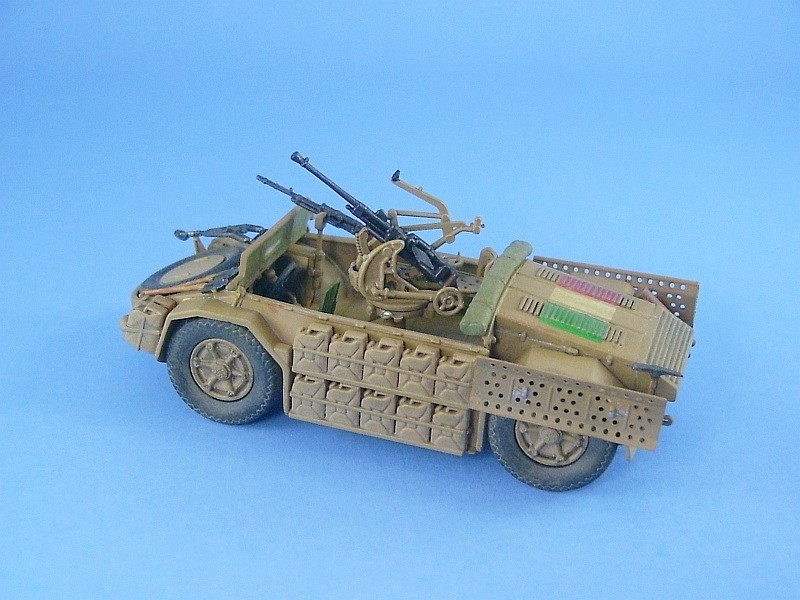
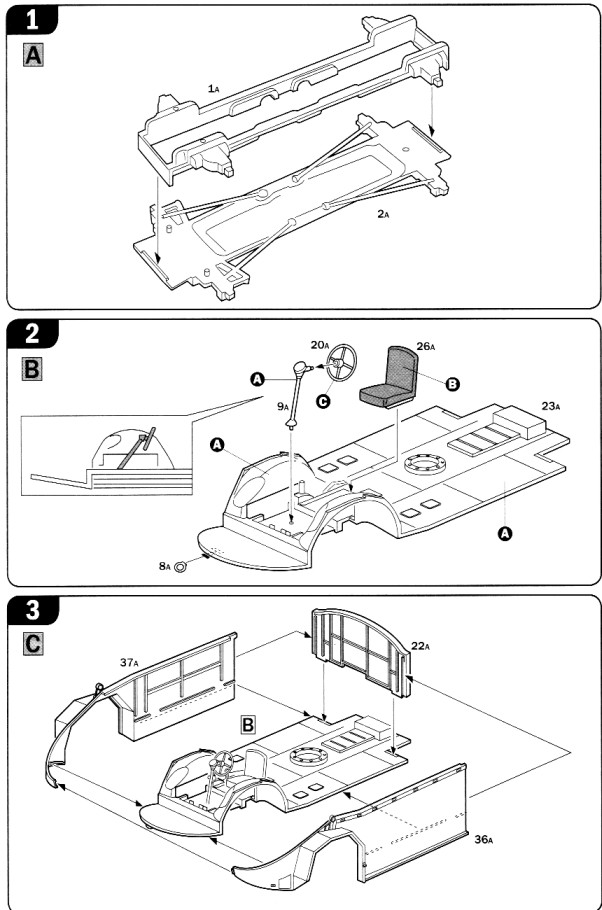
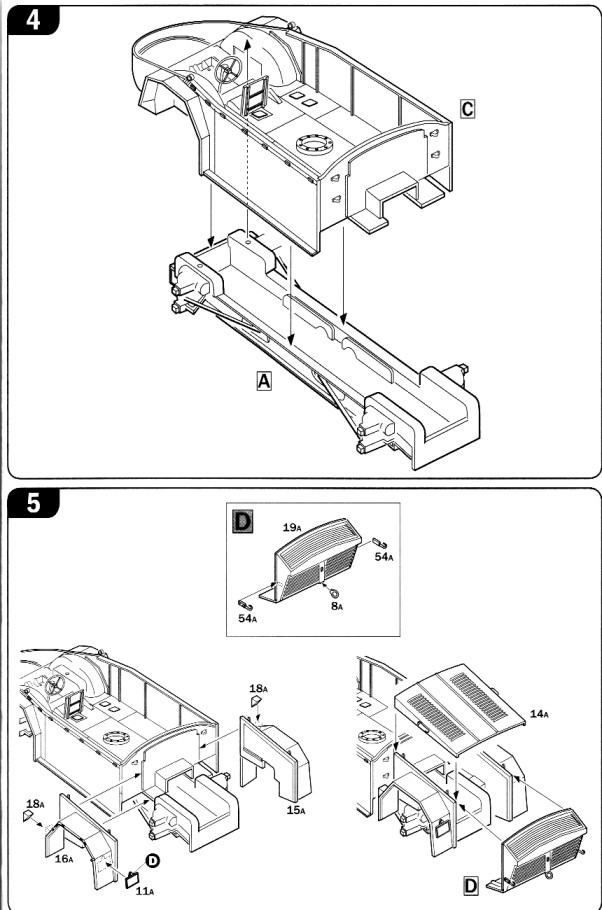
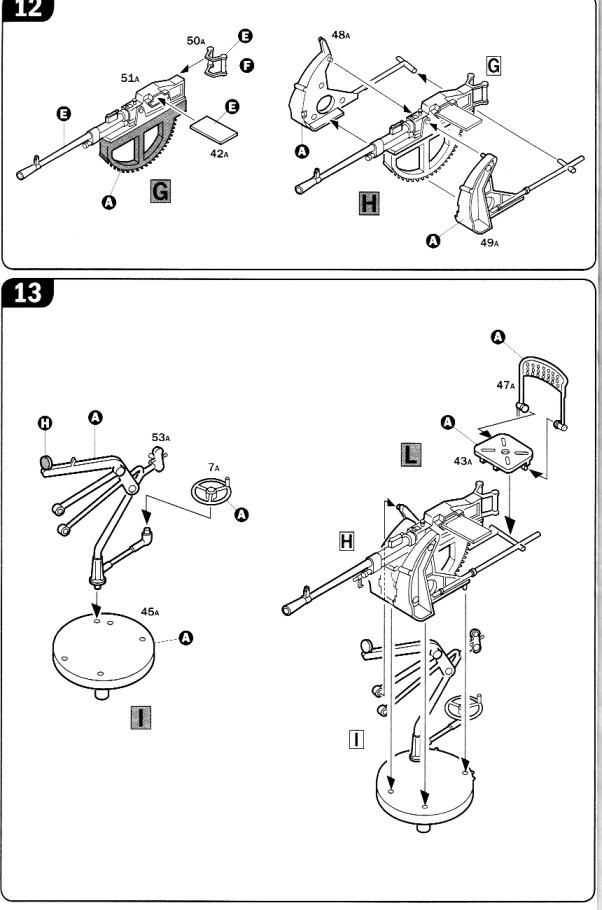
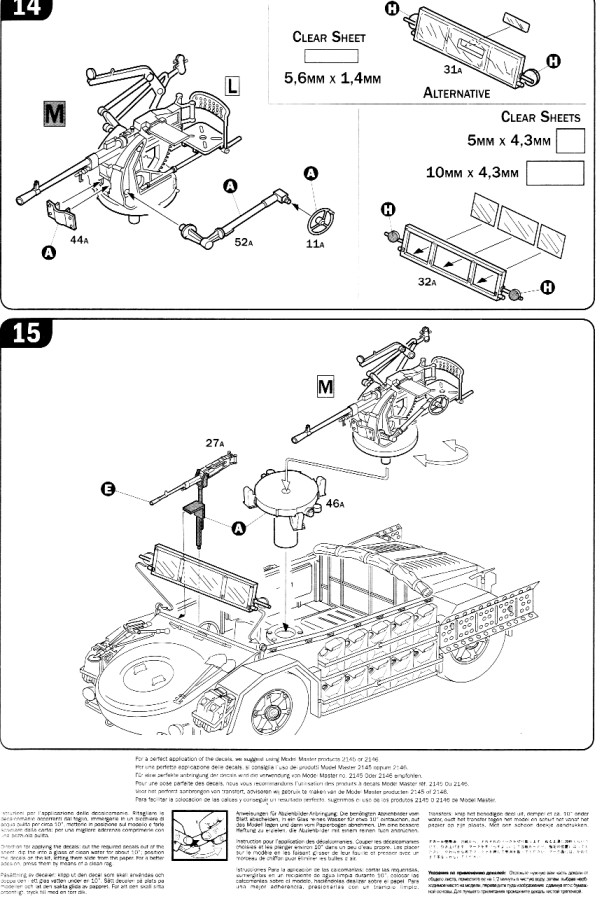
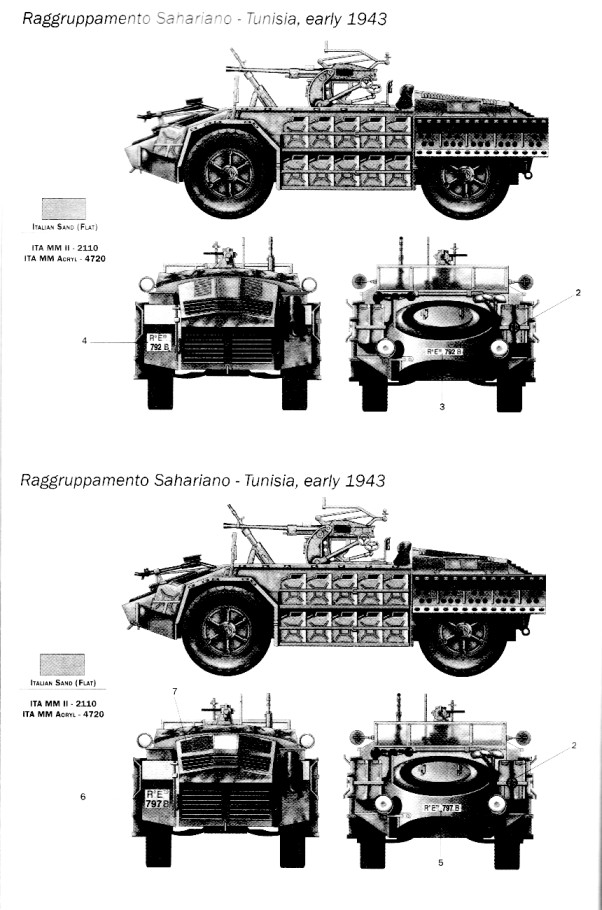
This is an excellent kit overall. There are 71 parts molded in a yellow/tan coloured plastic that is neither too soft, nor too hard. There is a small sheet of clear acetate plastic to use for the windshield which comes in two options - a fully windowed frame or a covered frame with a small window slit for the driver. I went with the covered windshield (part 31A) with the small opening, shying away from the windowed frame (part 32A) which needs three small pieces of clear plastic to fill the openings versus the one for the option I chose. The instructions give you the measurements for each but it's a tricky task cutting something that has fractional dimensions in millimeters. Unless you get lucky with your cutting, you will need to sand/trim the clear pieces to get them to fit anyway. Too bad the windshield wasn't completely molded in clear plastic as found in some of the Academy military vehicle kits. This would have made finishing the windshield a simple masking exercise before painting versus the onerous cut and trial fit exercise that I experienced. Instructions are a bit vague in places with regards to parts location. For example I added the rear side panels (parts 15A & 16A) to the floor pan first and when it came time to add the rear engine cover (part 14A) I discovered that I didn't quite have the side panels in the correct place and the cover wouldn't meet the edges of the side panels. This forced me to carefully remove the side panels and re-glue them to their proper place. I found the fit to be exemplary for the most part. As nice as the kit is, there were a few areas that just begged for some modification. The first modification concerned the wheel wells. When looking from inside the car you can see straight through the front wheel wells to the outside. To me this didn't seem quite right, so I filled these openings with some thin plastic card. The card was basically a rectangle with a notch cut out to go around the upper control arm of the suspension. I then sanded and scraped the inserts to feather them to the surrounding plastic. Unfortunately Italeri chose to mold the spare wheel directly into the part for the front nose panel (part 17). After much thought I decided to carefully remove the wheel and then boxed in the resulting hole. The wheel itself was sanded around its circumference to remove the plastic that remained from the panel. To the back of the wheel I glued a piece of plastic disk that I had in my spares box (sometimes it pays to cut off and keep some of the unusually shaped pieces of plastic you find on kit sprues) which closely matched the size of the tire and the disk was sanded down in size. Any sign of a seam where the two plastic pieces met was filled and sanded. The last item of concern was the jerry can racks on the sides. The frames that hold the cans to the sides of the vehicle don't go all the way around the end of the cans, so I quickly fixed this with the addition of some thin plastic strip. One thing to watch for is the machine gun mount (part 27A). It is a bit too tall and needs to be shortened just a tad to fit properly behind the windscreen. And double check the holes in the sand channels. I found a couple that weren't quite round and required opening up. My only other detailing was to drill out the gun barrel, the gun sight and the holes in the seat and back of the gunner's chair. The instructions list Model Master Italian Sand for the camouflage but I found this to be too brown and too dark for my liking so I painted my Sahariana with a base coat of the Model Master Italian Sand followed with a mixture of Italian Sand lightened quite a bit with some British Mid-Stone applied in a cloud pattern inside the panel lines. There are two colour options on the decal sheet, both for Raggruppamento Sahariano, camouflaged in overall Italian Sand.
Decals are excellent and snuggled right down with a thorough soaking in Microsol. A nice touch was the inclusion of a decal for the instrument panel. This saves the modeller from having to paint the tiny panel black and then pick out the instrument faces afterward. Outside of a few minor glitches (and the extra work I did with the spare wheel) this was on of the easiest small scale armour builds I have ever done and the kit makes up into an excellent miniature of the Sahariana.
Review sample purchased by the author. |
| Back to Italeri Kit List | Back to Construction Reviews |
Article Last Updated: 14 April 2009 |
Back to Home Page |