 |
Sd.Kfz. 234/2 | |||
| Kit # 31152/MT53 | Construction review by Stephen 'Tank Wisperer' Brezinski- SBrez1(at)comcast(dot)net | |||
|
Sd.Kfz. 234/2 | |||
| Kit # 31152/MT53 | Construction review by Stephen 'Tank Wisperer' Brezinski- SBrez1(at)comcast(dot)net | |||
| Eine Menge der
Seemöwen part 2
|
| My
intentions in this kit review will be to give you all my
impression of the model and my experience in assembling
it. This model has already been previewed
in the box by
Doug Chaltry so I will try and complement what he has
said and repeat as little as possible.
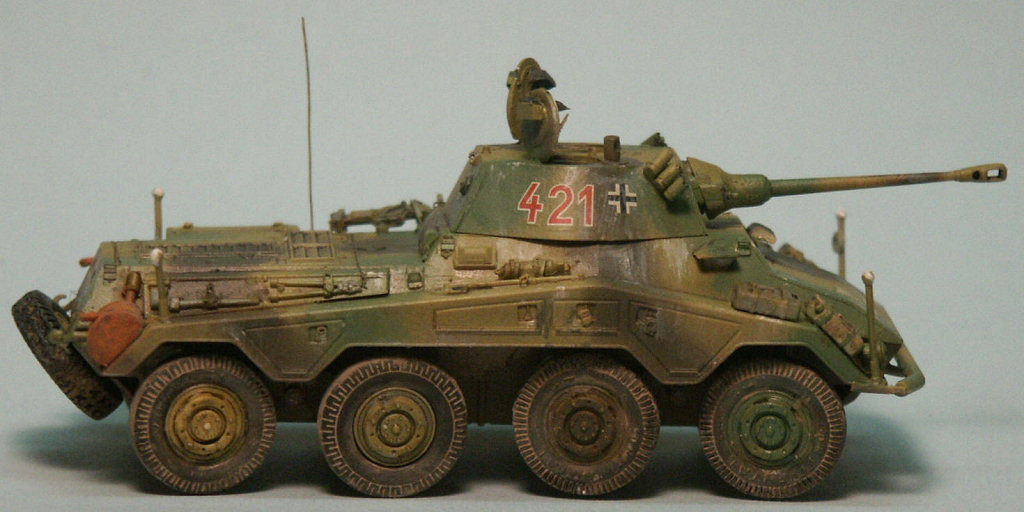
We’ll first look at the boxart to see what kind of vehicle we are supposed to have in the box, what it should perhaps look like when the model is done and to get inspiration and information as to the camouflage and markings. The SdKfz 234/2 8-Rad Schwere Panzerspahwagen (8-wheeled heavy armored car) is to me an impressive vehicle with all wheel drive, all-wheel steering and fore and aft drivers positions making it very advanced for its time and at home cross country or on roads. The SdKfz 234 Puma is the only version of the SdKfz 234 with an enclosed tank-like turret. In the turret we see a long barreled 50-mm gun similar to that in the Panzer III J but with a muzzle break to lessen recoil. On either side of the turret are two sets of three smoke grenade discharges to hide a quick getaway. We see four to six fuel cans strapped to the fenders but being diesel powered this is not as dangerous as carrying gasoline (petrol). On either side of the tubular bumper are rod width indicators with white knobs on them. On the engine deck behind the turret is a “star-antenna” indicating this is a command vehicle with an additional long-range radio set, however this antenna is not included in the kit. This reminds me about an interesting thing I read about German aerials, they were made of hollow copper rods, not flexible whip antennas as I’ve some modelers depict them. Rather than black, the tires are a dark gray with black-gray shadows in the tread pattern. Under the bow the independent suspension and steering arms are visible. The vehicle color is a base coat of Dunkelgelb (Panzer yellow) with a pattern of green. THE PARTS
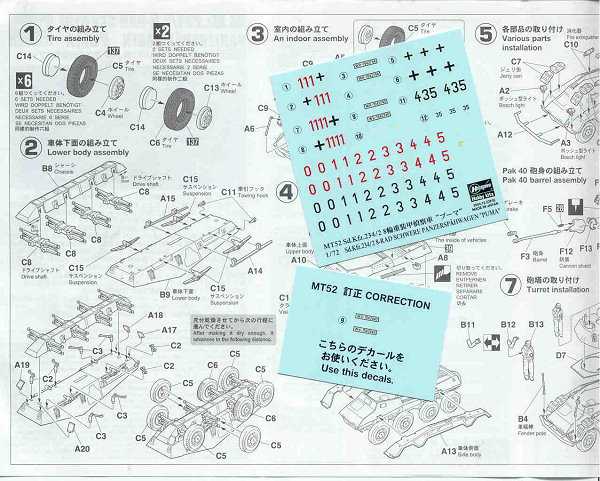
The first several steps of Hasegawa’s exploded-view instructions show assembly of the suspension lower hull and wheels and are the same as with Hasegawa’s other SdKfz 234 armored car kits. At about Step-6 the instructions get to the assembly of the turret particular to this model. The water slide decals shown here is the typical high quality decals Hasegawa offers along with an additional “correction” sheet with license plates.
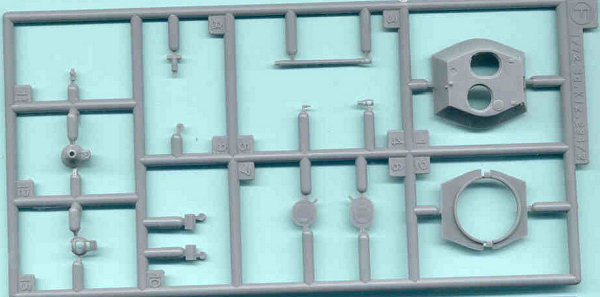
This look at Sprue F is of the SdKfz 234/4 turret particular to this particular vehicle. After this scan was made the gun barrel broke while in the box just behind the muzzle break and was not successfully repairable; this justifies my first impression that the 50-mm gun barrel for this Hasegawa kit is too thin. Like the rest of the model the molding is crisp and with few defects like sink holes.
Here is Sprue B which is common to all four of Hasegawa’s 1/72-scale SdKfz 234 models. We have the upper and lower hull sections, the fenders with closed storage compartment doors and a rather mediocre crew figure at center right. AFTERMARKET DETAIL PARTS
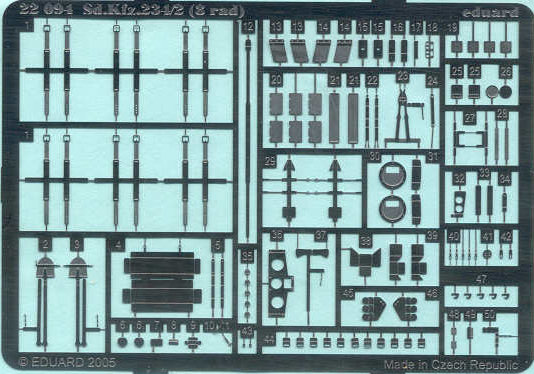
Eduard etched brass fret #22 094 designed for this Hasegawa model though certainly usable with the Roden kit as well. At upper left are straps for the fuel cans which are a great improvement. Below them, lower left are shovel handles that should be cut off and replaced by thick wire. In center are two brackets for the fire extinguishers. Lower left we have replacement lifting points for the turret and the hull.
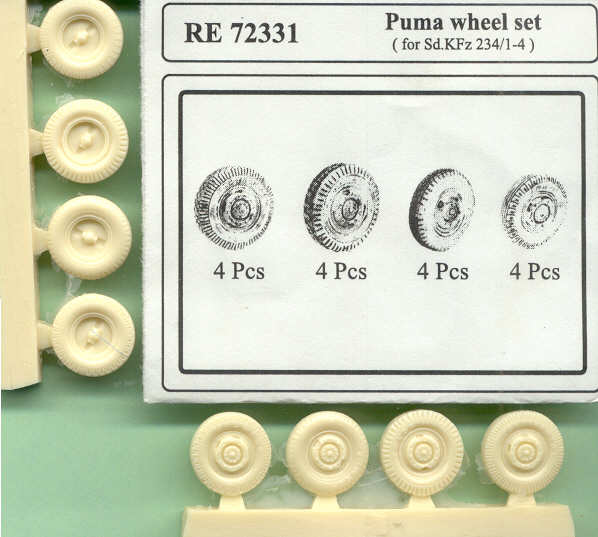
Attack Models has 16 resin wheels for the SdKfz 234 with four different tread patterns. That means that on any one model you will have at least two different tread patterns! The backside of Attack’s wheels at left show the attachment points where the wheels attach to Hasegawa’s SdKfz 234 suspension arms. Attack’s major drawback is that the way the attachment points are oriented, the flat spot without tire tread where the resin poring stub is will always be visible. Attack should have oriented the wheels so their pour stub location was on the bottom! With some work these wheels can be modified to fit on the Italeri and Roden SdKfz 234 model. KIT ASSEMBLY
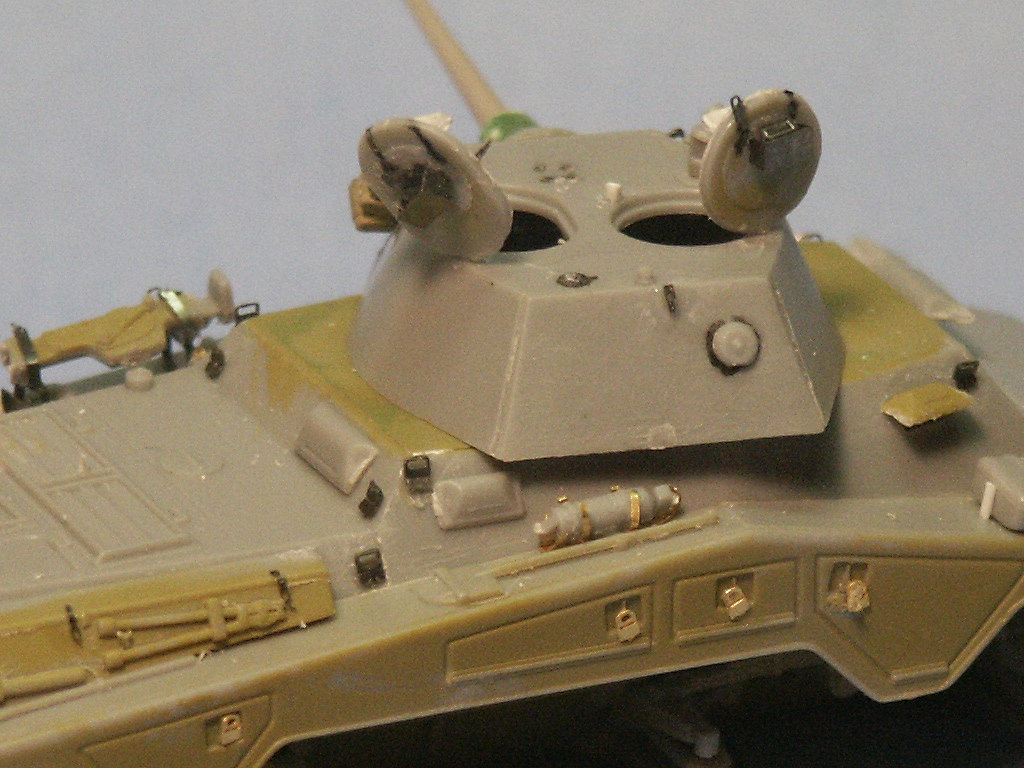
Moving right into an advanced assembly stage we have etched brass parts on the jack at left, on the fire extinguisher and the open turret hatches. On the turret’s rear plate is what I believe is a pistol port. The molded-on lifting points have been shaved off the hull and turret and the brass replacements attached with Isocyanite (super) glue. I appreciate that Hasegawa has molded separate visors; by cutting open the windows the separate armored visors can be glued on open (with some makeshift bracket material to hold the visor open). Weld seams have been scribed where appropriate.
The left side view shows the replacement Roden 50-mm gun barrel that Doug Chaltry so graciously sent me. The forward part of the cast pig gun mantlet impressed me as too narrow so I wrapped it with a thin sheet of styrene, plenty of green putty and sanded it to shape: much better. On the turret hatches are etched brass parts Eduard includes and scratchbuilt periscopes from thick styrene sheet. The two smoke discharger groups were taken from a Dragon Sturmgeschutz kit though with hindsight I should have used the Eduard brass parts. The fender storage bins are improved with etched brass padlocks. I also wish I had replaced all the fuel can brackets with the etched brass ones. COMPLETION Looking at the completed model we can see through the open hatches some of the interior parts that Hasegawa included such as a rudimentary radio and crew seats. I used Model Master acrylic paints sprayed on with masks used to make the brown and green patterns. The Attack Models resin replacement wheels look wonderful though the pour plug locations are visible. Hasegawa designs their 234 kits so the wheels can be easily turned. Note how all eight wheels are steerable; the forward two pointed right and the rear two pointed left in this case.
Hasegawa decals were used over a coat of clear gloss then a pin wash of black and dark-umber weathering was applied in recesses. Streaked white weathering was done with light gray oils and turpentine though ended up a bit heavy; based on this I have decided that that this vehicle obviously served near the seagull infested Baltic Sea coast or Lake Balaton in Hungary. A light flat coat tinted with about 10% tan paint almost completes the model. Paint pigment powder was brushed with a damp brush into the tire treads and on the hull. The damp, sticky powder adheres well to the tires and vehicle. When the pigment is dry it is easily brushed off the raised parts such as the high points of the tire treads.
My historical references on the SdKfz 234/2 are limited; I have many WW2 era photos but rare did I find identification as to the vehicle’s unit. This vehicle represents a reconnaissance vehicle of a Heer (Army) Panzer Division, vehicle number 1 of the second platoon, fourth company. Here is the rear right quarter of the Puma prior to mounting it on the base. Visible is tire #3 (bottom center) on the right side which is the only Hasegawa wheel and tire I used on the kit, the rest are Attack resin tires. Note that the Hasegawa tire has no tire tread on the surface, the main reason for our using Attack’s wheels which have great tread pattern. The two mufflers for the diesel engine are weathered with rust-brown paint, brown wash and red, yellow and violet pastel powder.
A modeling friend on seeing my SdKfz 234 models noted that some light streaky weathering reminded him that perhaps some birds had passed over leaving behind their residue, hence the title of my article, Eine Menge der Seemöwen: “A Flock of Seagulls”. References PANZER TRACTS No. 13 Panzerspaehwagen, Sd.Kfz.3 to Sd.Kfz.263; by Thomas Jentz & Hilary Doyle (2001). A concise, soft cover book listing and describing the heavy armored cars; highly recommended. Schwerer Panzerspahwagen (Sd.Kfz.234), Museum Ordnance Special Number 24, by Thomas Jentz (1998). This good softcover book is now out of print. |
| Back to Hasegawa Kit List | Back to Home Page |
| Back to Modeling the Sd.Kfz. 234 Article | |
| Article Last Updated: 20 March 2011 |