Jagdpanther
Manufacturer: HäT Industries (Armourfast) (Kit #99002)
This model took about 15 minutes to build, and three months to paint.
As is evident in the Preview for this kit, it was designed with wargamers in mind. It is very simple, with few parts, and construction was very quick and easy. Yet despite the simplicity and humble nature of the kit, it is remarkably accurate in most areas, and in fact, is actually the most dimensionally accurate Jagdpanther kit in 1/72nd scale. If you refer to the Previews of the Revell and ESCI Jagdpanthers, you will see that the Revell kit has problems with size, and the ESCI kit has problems with accuracy of its details. This HäT kit measures perfectly 1/72nd, and is an accurate replica of this highly effective tank hunter.
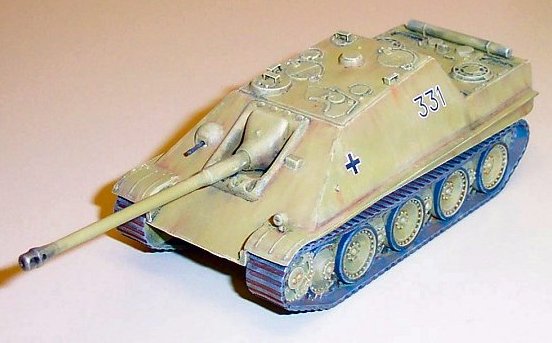
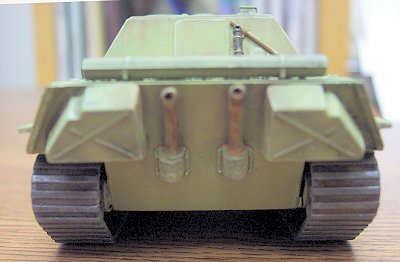
The model represents a late version of the tank hunter (though not the final version) with no tools on the hull sides, the late style bolted gun collar, the pilzen on the superstructure roof, the multi-part gun barrel, and the protective cover on the vent hole on the engine deck. All it lacks to make this the final version, is the crew heater added to the left engine ventilation fan. The exhaust pipes are the early style (also seen on late Jagdpanthers), with twin, single pipes, as opposed to the left pipe having the two smaller cooling air intake pipes attached. Although they should have had either exhaust shields or flame dampeners added to them.
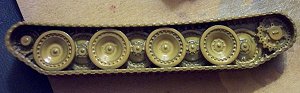
Unlike HäT's Sherman kit, I did very little to spruce up this model. There really was very little that needed to be done, without going full tilt to accurize it. The main detraction of the model is its running gear. As seen in the Preview, the wheels and tracks are molded as a single piece, which naturally is inadequate if intended solely for a display model. In order to overcome this deficiency, the modeler would need to completely replace the wheels and tracks from another Panther/Jagdpanther kit. I chose not to do so, for purposes of this review.
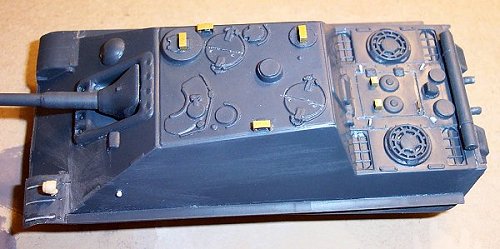
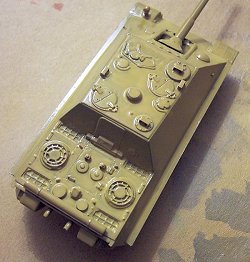
Aside from the wheels, there are a few minor improvements that can be made within a few minutes. The engine deck lacks panel lines showing the engine access hatch, so I scribed in the hatch myself. Similarly, the two hatches on the turret roof also lacked lines separating the two halves of each hatch, so I scribed these as well. I also chose to add some minor brass details from the Extratech Jagdpanther detail set (designed for the Revell kit), such as periscope covers, and two hatch stops on the engine deck for the rear fighting compartment hatch.
Some other styrene details I added include four lift hooks on the engine deck, and two tow cable mounting pegs on the hull sides. The only "surgery" done to the model was the removal of the lump of plastic on the left front fender, which was supposed to represent a Bosch headlight, and I replaced it with a light from my spares box. The removal of the kit "light" resulted in the loss of the raised detail on the fender, which I remade with stretched sprue.
And so endeth the construction.
Painting Fiasco!
My first attempt at painting the model ended in disaster. I tried to paint it with Testors Acryl Panzer Yellow (labeled on the jar as Sandgelb). When I poured it into the paint cup for my airbrush, it poured from the jar like molasses. So I thinned it considerably with my standard thinner mixture of 50/50 distilled water and alcohol. The result was catastrophic, as the following scans of the dried paint show:
A friend of mine informed me that the problem was that I didn't use the thinner that was specifically formulated for the Acryl paints, which I later went out and purchased. I stripped the paint from the model using EZ-Off oven cleaner, and cleaned it up as much as I could. After about three months of fuming over the disaster, and getting the model ready for another attempt, I tried it again. This time, I used the proper thinner. Also this time, I was intelligent enough to practice on the insides of the wheel parts. Good thing I did, because the result was the same.
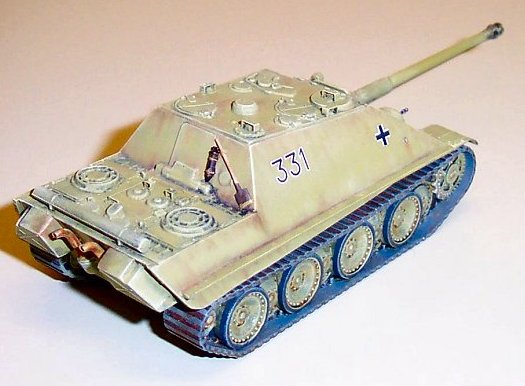
So I threw away that crap that Testors calls paint, and decided to go back to my old favorite of Polly Scale. But unfortunately, my Polly Scale Panzer Yellow was old and lumpy; totally unsuitable anymore for airbrushing. I thought I had another jar of it, and while rummaging through my paint collection, I came across a jar of Testors Acryl Dunkelgelb (up to this point, I had thought that I was using Dunkelgelb in my paint attempts, when in fact I was using Sandgelb). Upon opening the jar for inspection, I saw that this paint was a completely different consistency than the earlier Acryl garbage; in fact, it closely resembled the consistency of Polly Scale paints. So I decided to try it, and lo and behold, it was magnificent! This paint sprayed so smooth and beautiful, I wished I had a whole platoon of German tanks ready for painting. Oddly enough, though, this color has a very greenish cast to it; very similar to that seen in Jean Restayn's excellent artwork. Never one to be fixated on precise color matches (which is odd, considering my single-minded dedication to scale fidelity), I am going with it. But keep in mind that the scans in this review make it appear much more yellowish, and not nearly as green as it is in reality.
I followed my typical painting and weathering techniques of washing, highlighting, drybrushing, and "chalking". The decals came from a Kagero Photosniper book on the Panther, and unfortunately, silvered a little bit. From now on, I am going to try first gloss coating portions of the model where decals are to be placed. I know that most modelers do this regularly, but I've never seen the need, since I've never really had problems with decal silvering. But this paint is VERY flat, so this is a method that I best embrace.
After I finished painting and weathering, I decided that some final details should be added to give a little life to the tank, and those were a couple of items on the rear wall of the fighting compartment: a shovel and fire extinguisher from my spares box. This was the standard stowage place for late versions of this tank. Note also the location of the gun-cleaning rod storage tube. This is also correct for late war vehicles. Oh, almost forgot: I also added a machinegun to the front hull, which is not included in the kit.
Additional things that I could have done but chose not to are: some more tools added to the engine deck, some spare track links and tools on the rear hull corners, engine deck screens, and some improvements to the rear hull plate. But all of this was beyond what I was willing to do to finish this in a timely manner (after it spent three months sitting in limbo, that is).
One area that lacked any sort of detail is the rear hull plate, behind the mufflers. There should be all sorts of access hatches and tools here (such as the jack), but because this plate was molded on an angle, it wasn't possible to add this detail. It would have been better to make the rear hull plate a separate part, so that it could have been molded flat, with the appropriate detail. Also, there should be lift hooks on the front and rear corners of the hull side plates.
This is a very good model. I have been questioned in the past by a good friend of mine (who shall remain nameless) about why I give such good reviews to the HäT kits, when they are obviously inferior to Revell or Hasegawa. Well, you can agree with me or not, but HäT makes no pretension to producing anything other than what these models obviously are: wargaming kits. Keeping that in mind, they are outstanding wargaming kits, which can easily be built into something a little more by those industrious few, who want a more detailed replica. That, JIM, is why I give them good reviews :)
![]()
![]()
![]()
Thank you to HäT for providing the review sample.
| Back to HäT Kit List | Back to Home Page |