|
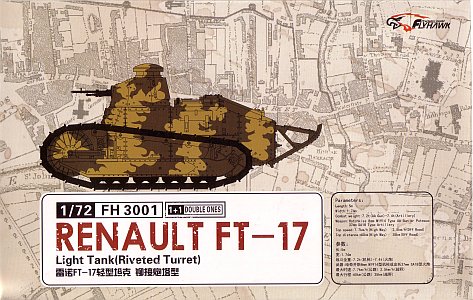
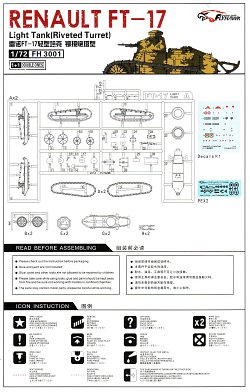
The Kit
A preview of this kit and the round turret version can be found at Marc Mercier's preview here.
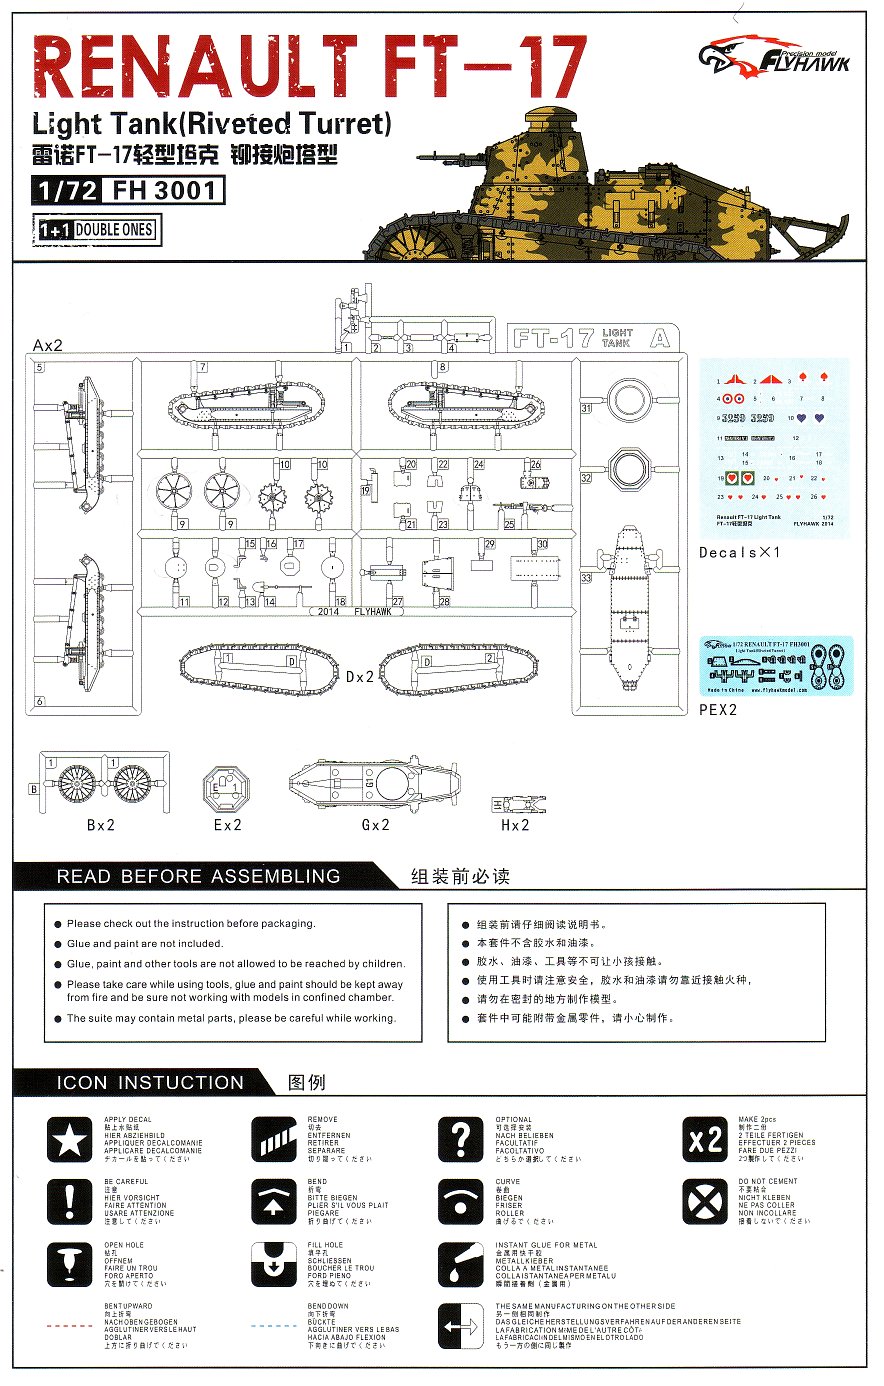
Inside the box there are two kits. Parts are light grey in injected molded styrene plastic. Each kit has the following sprues/parts:
Sprue A - 35 parts (containing the majority of the FT's parts)
Sprue B - 2 parts (optional metal idlers)
Sprue D - there are two of these each with a single, handed track part
Sprue E - turret
Sprue G - slide molded body
Sprue H - tail skid
Etched Fret - 15 parts
There is a decal sheet with more images than options offered in the kit. Some of the other images are for the related FT kit with the round turret (kit FH 3000).
The remaining images appear to be for future releases
as there are decal markings for a TFS observation tank.
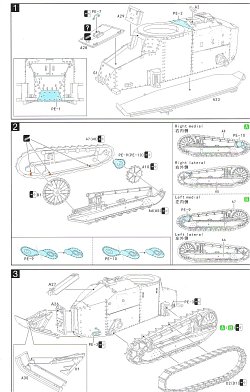
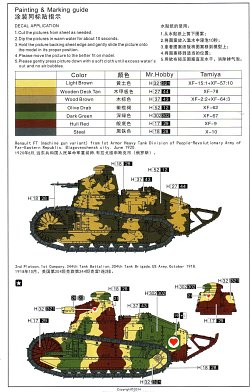
Instructions cover 4 pages, composed of eight steps. On the last page are colour profiles
for two marking options:
- Machine gun version: For the 1st Armor Heavy Tank Division of the People-Revolutionary Army of the Far-Eastern Republic, Blagoveshchensk City, June 1920
(I'm not sure but it looks to me like this is a tank operating with the White Russians in Eastern Siberia)
- Cannon version: For the 2nd Platoon, 1st Company, 344th Tank Battalion, 304th Tank Brigade, US Army, October 1918. There is a
photograph of this tank in both references [1] & [2].
A scan of the parts reveals excellent overall detail, absolutely no flash, and only a few marginal seams. The few ejector pin marks are in places that are hidden by other parts.
About half of the photo-etched fret provides optional parts to replace their plastic equivalents should the modeller decide to do so.
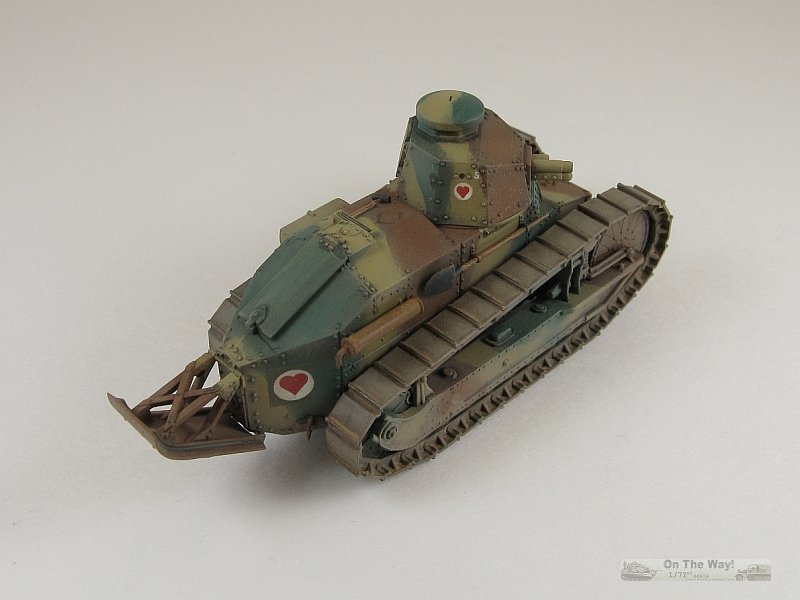
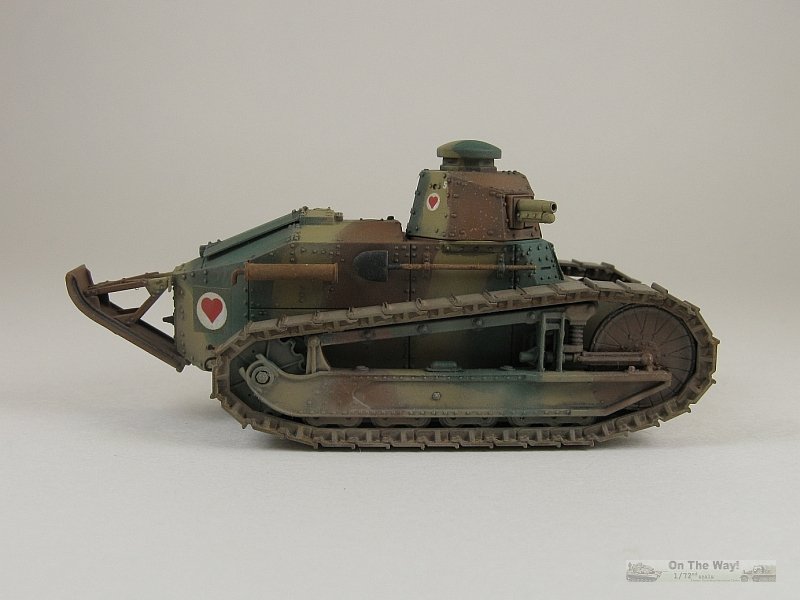
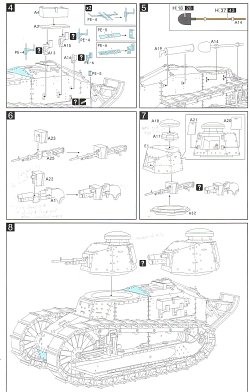
The Build
Due to the kit's excellent detail I chose to build my FT out-of-the-box. The instructions were followed for the most part.
In Step 1 has optional photo-etched handles for the driver's access hatch. I chose to use these and trimmed the molded plastic handles from the driver's access hatch (part A28). The etched handles were
not added until painting/weathering was complete, at which point they were touched up with some paint and lightly weathered.
It's odd that the shovel was molded as a separate piece (part A14) yet the only section of the sledge that is separate is the head (part A2), while
the handle is molded directly to the body.
Take care at Step 2. It's easy to get the photo-etched parts on the wrong side of the track units. I must admit that the instructions confused me a bit regarding the
assembly of the etched pieces. I thought the dashed line called for cutting on parts PE-9 & PE-10, but in reality they are to be folded. As a result of my confusion
one of the assemblies had to have the parts glued
back-to-back because I had cut the PE part at the fold point. The method in which the tracks and their bogey units are assembled is ingenious.
You can leave adding the tracks (parts D1 & D2) until the end. The most frustrating part of the bogey units comes with the supporting beam for the
tracks/idler/sprocket/bogies that runs from front to back between
the rear drive sprocket and the front idler. This is a two part assembly and the seam it produces after gluing is, to badly quote Saddam Hussein, the
"mother of all seams"! It is very difficult to get at to remove, and any scraping/sanding damages the molded on detail. On top of that the plastic is
soft and easy to damage, which doesn't help matters at all. My first attempt at removing the seam resulted in the topside detail becoming little prominent buttes,
sticking up well above the top surface of the beam. I resorted to trimming the detail from the top, filling/sanding the seam and then re-attaching the trimmed detail.
Looks much better this way but it is PITA to do.
At Step 3, forget about adding the tracks units and don't bother with adding the delicate etched tow loops. Save them until the end to prevent damage while the
remainder of the build progresses. I thinned the exposed outside edges of the skid. I also thinned the edge that abuts the body to get better alignment of the hinges.
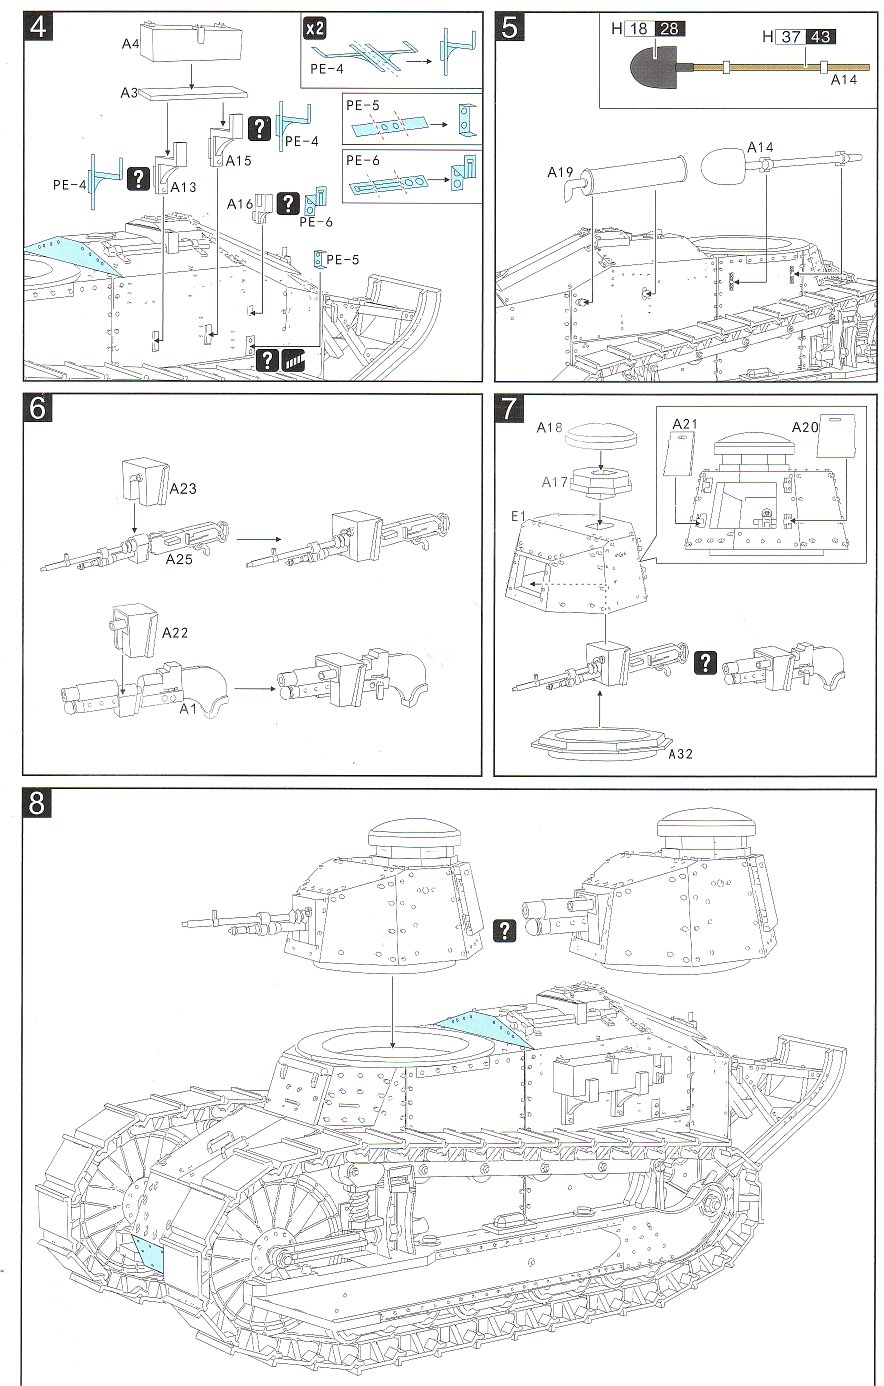
Step 4 is where the instructions offer the option of using the plastic or etched toolbox brackets. I chose to use the plastic brackets. This decision was made with the thought that
the etched replacements would not completely fill the locating slots in the body and I'd be left with a fiddly job filling the gaps. Since I was planning on
using PE-5 I sliced off it's molded on locating point.
For Step 5, the shovel and muffler were left off to be painted separately and added later.
Step 6 is where the decision on armament is made. I chose the 37mm cannon option, sending the machine gun parts to the spares box. Flyhawk has a nice deep opening
already done for the cannon muzzle saving me from having to drill it deeper, though I did slightly deepen the opening for the sights.
The turret is assembled in Step 7 and attached to the body in Step 8. The octagonal base for the commander's cupola (part A17) was modified to add the four thin
observation slits - front, rear, right & left.
This was the first kit in quite some time that I lost a piece of photo-etch to the carpet monsters (one of the driver compartment handles). Luckily there are
two kits inside the box so it was a quick fix.
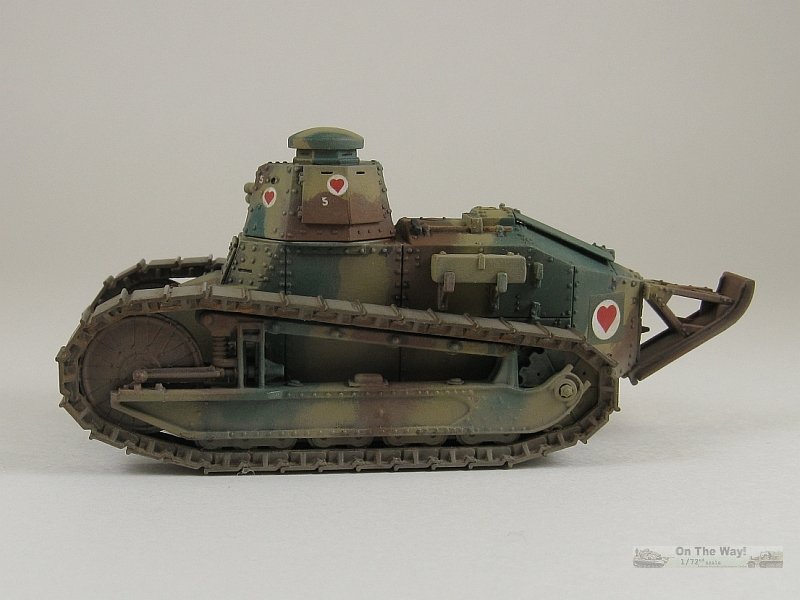
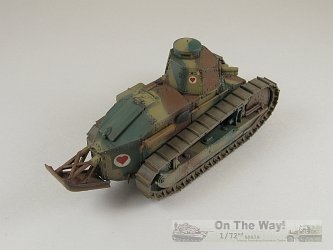
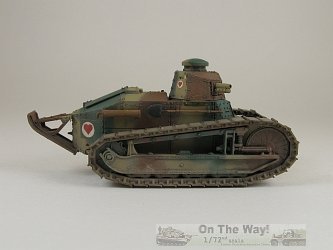
Conclusion
I'm impressed. Outside of a few minor (and I do mean minor) fit
issues the kit went together very easily. Engineering is excellent and the kit makes into a great display model even when built out-of-the-box.
Those wishing to add more detail could look at chains, replacing the springs on the suspension, and maybe some stowage on the rear skid.
References
[1] The Renault FT Light Tank: Osprey Vanguard 046, Steve J. Zaloga, Osprey Publishing, London 1988 ISBN: 0-85045-852-8
[2] French Tanks of WWI: Osprey New Vanguard 173, Steve J. Zaloga, Osprey Publishing, Oxford 2010 ISBN: 978 1 84603 513 5
[3] Renault FT and US Six-Ton Tank M1917: Armor Photo Gallery 15, Witold J. Lawrynowicz, Model Centrum Progres, Warsaw 2006 ISBN: 83-60672-00-9
[4] odkrywca.pl
[5] landships.com
[6] landships forum (FT idler construction thread)
[7] Wikipedia (discussion on FT idlers and other FT items)
[8] tanks-encyclopedia.com
[8] Wikipedia (general article)
Review sample purchased by the author.

|