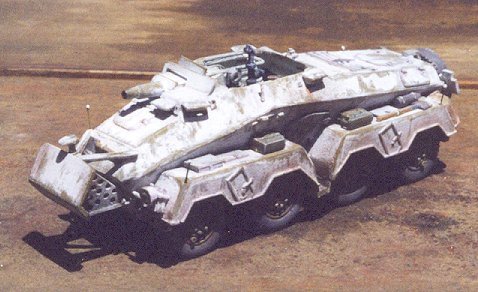
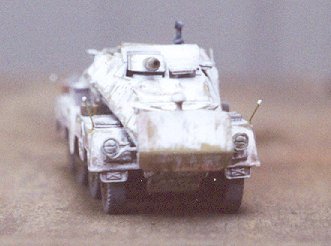
Sd.Kfz. 233
Manufacturer: Fine Scale Factory (Kit No. TL 007)
Well, I finally finished this awesome kit from Fine Scale Factory. When I first received it, there were no instructions included in the box, so I couldn't build it right away, but once I got my hands on some, plus some additional reference photos, it didn't take long. This was my first model from Fine Scale Factory, and I must say, I am very impressed. Even though I had some difficulties during construction, I am very happy with the final result, and I look forward to building my other FSF kits very soon.
Before I get to specifics about the construction, first some general observations: the number of parts is incredible for a resin kit; only surpassed by companies such as ARMO and MarS, and they are all very finely molded. The interior fighting compartment is completely detailed; the side hull hatches can be posed open, as can all of the vision ports. The gun is elevationally positionable; in fact, I didn't even glue mine in, so it can be moved up and down. All pioneer tools are separately molded, and in fact, along with the AA MG-34 which is included, they appear to be copies of ESCI parts. The smaller parts, such as the shovel and axes, need some careful cleaning and trimming.

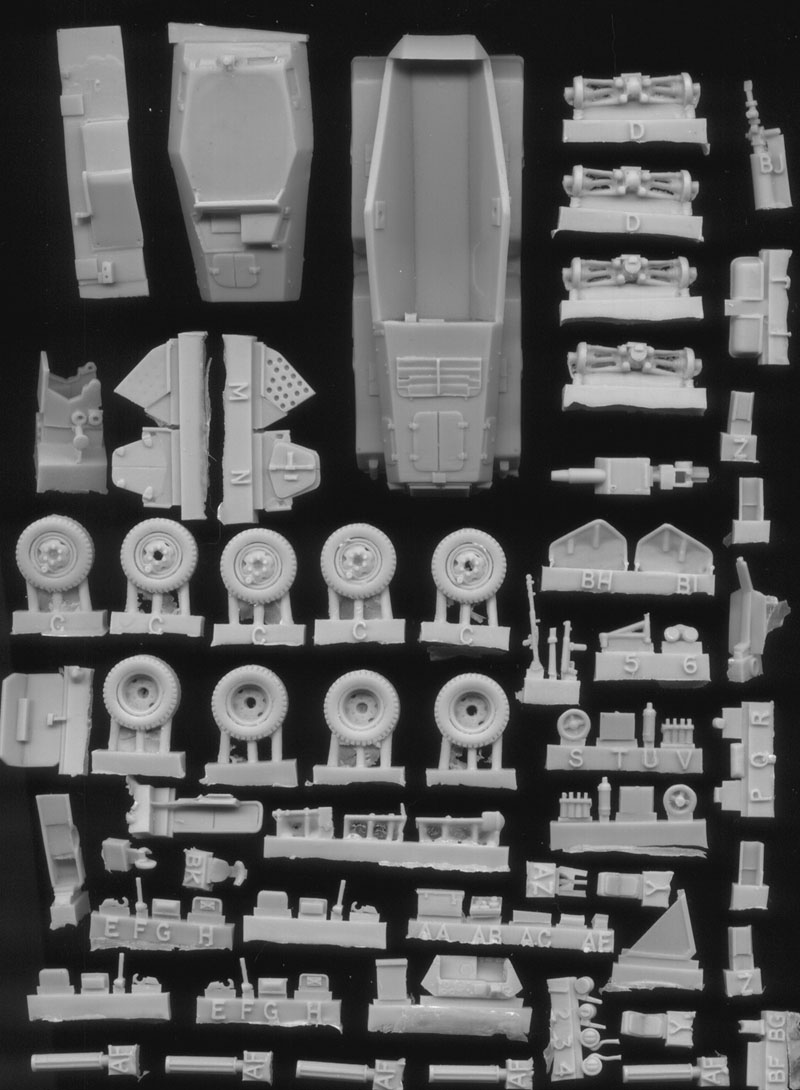
The above thumbnail is a link to a larger photo of the parts.
The quality of the resin is very high; there are very small attachment points to the resin pour blocks, most flash is very thin and easily removed, and there were no air bubbles needing to be filled. Take care when removing the flash from the fenders, because in some areas, the rounded-bead edges of the fenders can be mistaken for flash.
The main weakness of this kit is the instructions. The detail and number of parts are so abundant that it is impossible to construct this kit without some form of reference material. FSF forwarded the instruction sheets to me when I requested (they were inadvertently left out of the box), but additional reference material is a must. The kit instructions are composed of two sheets of hand drawn figures with German notations. Most of the parts placement diagrams show a drawing of the vehicle's hull, with detail parts being noted only by the letter of the part, with an arrow pointing in the general direction of the hull where the part is to be attached. For most of the kit, this was completely adequate, but some of the parts still could not be placed without additional plans. It didn't help any by having extra copies of some of the more confusing parts. The drive train is a good example; the kit included four of them, when as best as I can tell, you only use two. If only two had been included, I would be more comfortable thinking that I found the right placement for them.
The best reference for this kit would be to purchase a 1/35th scale version of this vehicle, but I'm not certain that one is available in that scale. I was able to glean a couple of photos off the web, but interior views would have been very helpful. A friend of mine forwarded to me some scans of scale drawings of the 233, which I believe he got out of an old Fine Scale Modeler magazine. They were invaluable. I found a Museum Ordnance Special (No. 11) for the Sd.Kfz. 231 8 Rad by Tom Jentz, which although is a turreted version of this vehicle, the book still had very useful close-up photos of the exterior of the hull. I also found several helpful photographs and color profiles of the 233 in various Concord Panzer books by Michulec.
On to the construction ...
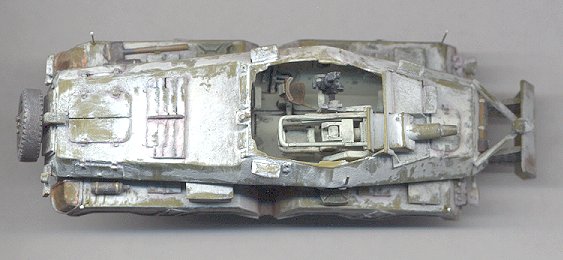
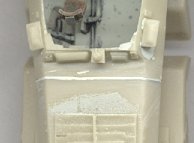
As was seen in the parts scan above, the kit has a full interior, with the upper portion of the hull molded as a separate part from the lower hull. I see this serving two purposes: first, it was necessary in order to get all the detail inside the vehicle; second, it should allow for FSF to market other versions of the 8 Rad armored car, if they should so choose. I hope they do.
 Construction logically began with the
interior. As I mentioned above, interior photos of this thing
would have been most welcome. Based on the meager instructions,
some photos of the 231 interior, and photos of the gun mount on a
Sd.Kfz. 251/9 Stummel, I finally figured out the proper parts
placement. The gun is beautiful, with a postionable breach
mechanism, and a superbly-detailed gunsight. I think that the
framework around the breach is a bit too large, as it seems to
take up much more of the vehicle's interior than I think it
should. An AA MG-34 is included, with a pedestal mount, which
based on photographs, should have been mounted on the right side
of the fighting compartment, to the right of the main gun. But as
one can see, there is no room for it in that position. I got out
of the dilemma by leaving the gun off entirely. I chose to model
a 233 with the 4th Panzer Division which I have seen in photos,
and it had no MG mounted.
Construction logically began with the
interior. As I mentioned above, interior photos of this thing
would have been most welcome. Based on the meager instructions,
some photos of the 231 interior, and photos of the gun mount on a
Sd.Kfz. 251/9 Stummel, I finally figured out the proper parts
placement. The gun is beautiful, with a postionable breach
mechanism, and a superbly-detailed gunsight. I think that the
framework around the breach is a bit too large, as it seems to
take up much more of the vehicle's interior than I think it
should. An AA MG-34 is included, with a pedestal mount, which
based on photographs, should have been mounted on the right side
of the fighting compartment, to the right of the main gun. But as
one can see, there is no room for it in that position. I got out
of the dilemma by leaving the gun off entirely. I chose to model
a 233 with the 4th Panzer Division which I have seen in photos,
and it had no MG mounted.
The hull side doors can be positioned open if the modeler desires, but the doors would require some thinning to make that happen. As it was, they required careful trimming and shaping to fit in the hatch openings. The locking mechanism on the right door had to be trimmed at the bottom to make room for the gun platform. The gun was built, but not yet installed onto its mount. This must wait until the upper and lower hulls are attached. In fact, I left the gun off until the entire vehicle was completed. It made it much easier to paint this way. Once all the interior detail was assembled, I painted it an off-white color (very light grey, actually), and completely weathered the inside of the vehicle (including the inside of the upper hull piece). I then attached the two hull parts.
 The fit of the two hull halves
could have been better. I found it easiest to line up the front
of the hull, and add glue working my way from the front to the
rear. This results in a substantial gap at the rear of the upper
hull piece, which I filled with some sheet styrene and putty. I
felt it would be easiest to clean up any filling here, rather
than up front where there are a lot of angular plates. This was
pretty much the only fit problem I had with the kit, but in
reality, this was almost the only place where 'fit' would even be
an issue.
The fit of the two hull halves
could have been better. I found it easiest to line up the front
of the hull, and add glue working my way from the front to the
rear. This results in a substantial gap at the rear of the upper
hull piece, which I filled with some sheet styrene and putty. I
felt it would be easiest to clean up any filling here, rather
than up front where there are a lot of angular plates. This was
pretty much the only fit problem I had with the kit, but in
reality, this was almost the only place where 'fit' would even be
an issue.
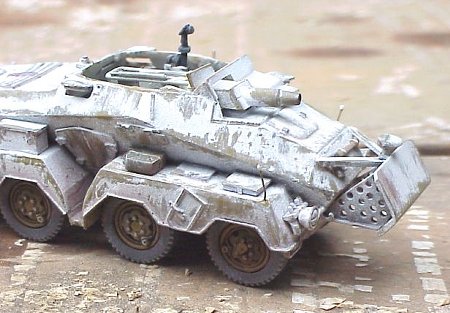
After the interior was complete, it was a simple matter to add the exterior details, such as vision port visors, storage boxes, the add-on frontal armor plate, headlights, and the spare wheel mount. The notek light mounted above the armor plate is a copy of the ESCI light from their Sd.Kfz. 251, and the slanted mounting plate on the bottom of the light needs to be removed.
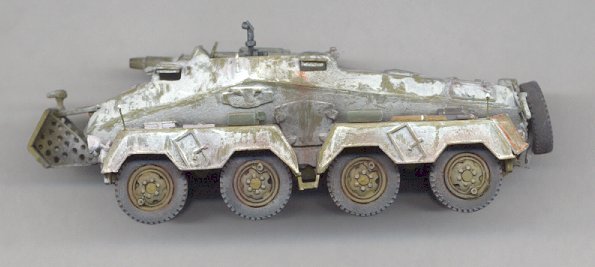
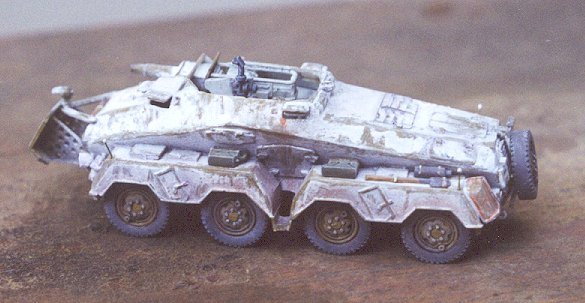
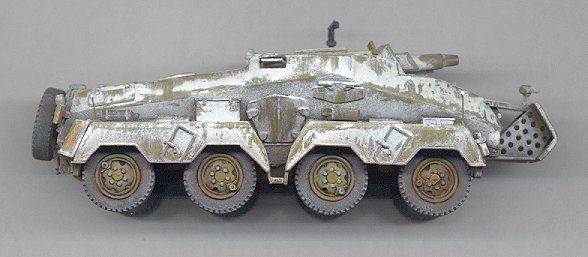
When all the major hull parts were attached, it was time for painting. I painted the wheels while they were still separate from the axles. I painted the base color of Panzer Yellow, and weathered it as normal, with washes and drybrushing. But I thought it was rather boring, so this is when I chose to paint a vehicle from the 4th P.D. in a winter whitewash scheme. This was a risk, because I have never done a whitewash before. I had in mind a method which I thought had potential, and after a test run on an old Leopard model, I decided to give it a shot. Although I feel that the final result is not great, I think that with further practice, it has many possibilities.
The whitewash I used is not actually paint, but Tamiya Flat Base (X-21). I "accidentally" came across this idea several years ago when I was looking for a good clear flat for my airplane kits. Imagine my surprise and dismay when I started spraying this stuff on one of my airplanes, and when it dried, it turned snow white! For those of you who are unfamiliar with this stuff, it is not a clear flat coat, but rather an additive for other paints to make them flat. When it is thinned some with alcohol, it sprays fairly smoothly, and gives this nice layer of flat chalk, which can easily be rubbed off with a towel. I used a combination of a paper towel, and a Q-Tip soaked in alcohol. As I said, although I wasn't quite able to pull off the result I hoped for, I am confident that with further practice, this will be an outstanding method.
After painting the kit, I turned to the wheels. Here, it was made very clear to me why dry-fitting is very important. I fit a couple of wheels to an axle, and checked the fit with the hull. While they fit just fine, it appeared to me that the wheel track (the distance between the left and right wheels on the same axle) was too narrow. Sure enough, when I looked at the scale plans, it was obvious that the axles were too short, with the result that the wheels would sit too far back into the wheel wells. So I had to find a way to lengthen the axles, which was not as easy as it may sound. I could have sliced them down the center, which would have required extensive re-working of the differential housings (or whatever those bulbuous things are in the middle of the axles). If I had some plastic rod of the same diameter as the hubs, I could have simply lengthend the ends of the axles where they protrude through the centers of the wheels, but I didn't. All my plastic rod was either too fat, or too narrow. My solution, which was also very time-consuming, was to cut off the wheel backing plates with a photoetched saw blade, and insert a plastic extension at the ends of the flanges, and then re-attach the backing plates:
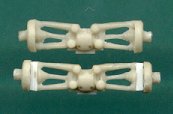
These extensions were each about 1.5 mm thick, and are not noticeable on the final model.
After this necessary task, I painted and weathered the axles, attached the wheels, and glued the four completed wheel assemblies to the hull. I was expecting all sorts of hassles with getting all eight wheels to touch the ground at the same time. I've had enough troubles with getting 4-wheel drive vehicles to sit straight, so I mentally steeled myself to come up with a way to deal with recalcitrant wheels. I started with the front and rear axles, and then did the interior axles. Imagine my joy and wonder when all eight wheels touched the ground perfectly with absolutely no tweaking or manipulation on my part. Amazing!
Final touches included adding the spare wheel to the rear of the hull. It's unfortunate that there is no tread detail molded onto the road surfaces of the wheels. There is detail only along the edges which are visible from the outside. All of the boxes and bottles seen on the finished model were included with the kit, but I felt I had to add some gas cans, because every single photograph I have seen of this vehicle shows numerous gas cans on the fenders and strapped all over the hull. I would recommend to FSF that future kits could include these gas cans, as well as additional stowage items, such as rolled tarps and such. The only additional detail I added were the "curb feelers" on the corners of the fenders. There were four unidentified parts in the kit, which looked like very small lights at the ends of long rods; I think that the instructions indicated that they should be attached at the corners of the fenders, but I have never seen any photos or drawings of these vehicles having lights in this position. So I simply used brass wire with the ends dipped in white glue.
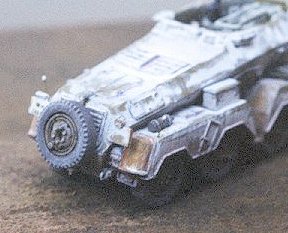 No
decals were included with the kit, which worked out well with the
vehicle I built. This 233 carried no crosses or other visible
markings outside the whitewash. I assume it had serial numbers,
so I added some from my spare decal box, but they are mostly
covered with whitewash. One other kit detail I omitted was the
the guard rails on the hull sides. These rails were included with
the kit, but removing the rails from the flash (not the other way
around, if you take my meaning) was an impossible task. It would
have been easier to scratchbuild them out of brass wire, which I
started to do, but thankfully I realized that this was another
feature lacking from the vehicle I was modeling.
No
decals were included with the kit, which worked out well with the
vehicle I built. This 233 carried no crosses or other visible
markings outside the whitewash. I assume it had serial numbers,
so I added some from my spare decal box, but they are mostly
covered with whitewash. One other kit detail I omitted was the
the guard rails on the hull sides. These rails were included with
the kit, but removing the rails from the flash (not the other way
around, if you take my meaning) was an impossible task. It would
have been easier to scratchbuild them out of brass wire, which I
started to do, but thankfully I realized that this was another
feature lacking from the vehicle I was modeling.
And finally, we get to scale. Based upon the measurements in the Sd.Kfz. 231 book, which should be identical to this vehicle, the width is spot-on for 1/72nd, but the length is about 2mm too short, which I think is about 1/74th. That's plenty good for me. One thought, however, I'm fairly sure that the fighting compartment is too narrow. Based on what I can see in photos, I think that the hull sides, right in front of the side hatches, should extend outward a little more, and hang over the fenders a little more than they do. Maybe by a millimeter or two. This is possibly why the inside of the hull seems to be lacking a little in space.
This is an outstanding kit, although I wouldn't recommend it for beginners. I would suggest to FSF for future improvements, to include more stowage, perhaps some photoetched parts (such as the front armor shield and brackets), and above all, better instructions.
I would like to thank Fine Scale Factory very much for providing this review sample, and I look forward to building their other kits as well.
| Back to Kit Reviews | Back to Home Page |
| Back to Fine Scale Factory |