Hey Bulldog!
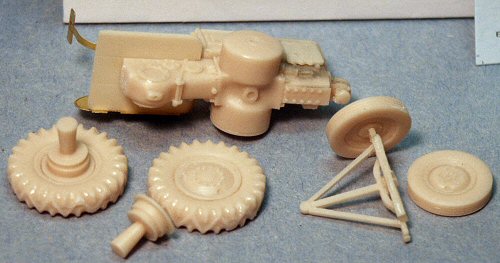
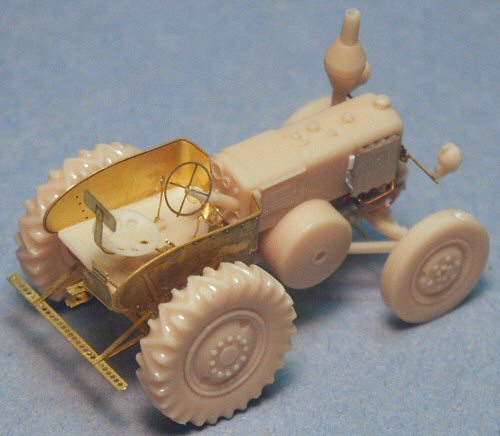
The Kit Parts The model kit consists of 20 amber colored, well cast resin parts, and 19 etched brass parts on a single fret. Casting of the resin is superb with no flash, no air bubbles found and relatively easy removal of the parts from the pour-plugs. [These comments also apply to the other five or more Extra Tech resin models I have.] Extra Tech has a history as a competent worker in resin and etched brass with good thought into ease of assembly.
In the above photo we see resin parts separated from the pour plugs and undergoing assembly with cyanacrylate (Super) glue. Note the smooth finish to the tires and the detail to the underside of the tractor engine. Instructions Extra Tech is thankfully one of the few manufacturers of small-scale resin AFV kits that believes in giving the modeler competent, well drawn out instructions. First is a sketch of all the parts showing where to separate the resin parts from the pour plugs. Each resin and brass part is numbered. Problems I encountered with the kit instructions are:
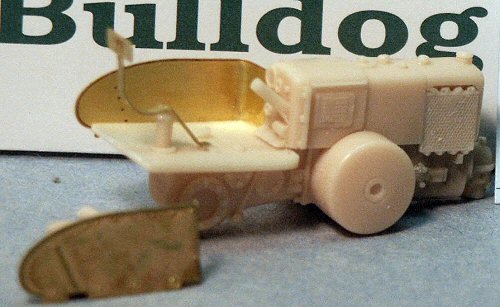
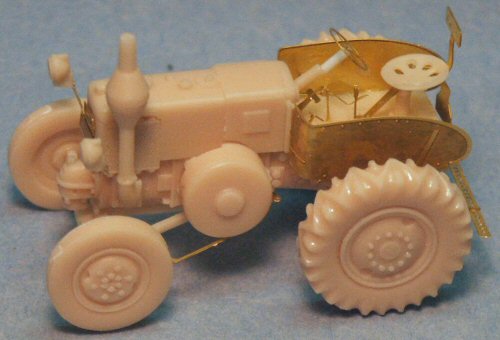
The left side of the Bulldog tractor almost ready for painting. This is before I found where the belt & pulley (Part B-11) is supposed to be so has not been added yet. Note that the frame holding the two headlights is very delicate. An alternative to the headlights is a Notec convoy light instead (suitable for a military tractor). Assembly Separating the resin parts from the pour plugs and then assembling this diminutive model was smooth. No major problems. As with all models, wash with warm soapy water and rinse and let dry well. Take cares to make sure the wheels are straight. Some parts you may wish to glue with 5-minute epoxy rather than super glue to give you time to work and adjust the parts. Bending the seat support (brass part B8) and the cab sides (B1 and B2) will require some test fitting and adjustment before gluing. The flat brass parts that are supposed to be round received several coats of white glue to give them a little bulk. Based on photo documentation I added engine wiring with fine copper wire, visible in the photo below. Some of the flat brass pieces should be thicker & round, such as the headlight bar (Part B3). If you cannot replace these with brass rod I recommend painting them with several light build-up coats of white glue to add thickness.
Markings & Painting Water slide decal markings are included for one Luftwaffe tractor and for one civilian agricultural or commercial tractor. Civilian markings are rare in our scale and I think are a refreshing change! This tractor was painted with Model Master acrylics. First the model was washed to remove dust and oils and allowed to air dry, then a dark forest green was used as a base coat. After drying for several days a black oil-paint & turpentine point wash was added to crevasses and panel lines. After curing for a day a final lighter green was painted in several thin light coats. Chips were added using the salt technique. Finally, Decals were added over a light coat of gloss acrylic floor wax for good adhesion and to prevent decal silvering, then given an acrylic dull coat. Weathering with flat acrylic earth colors and pastels was completed after gluing the model to the base.
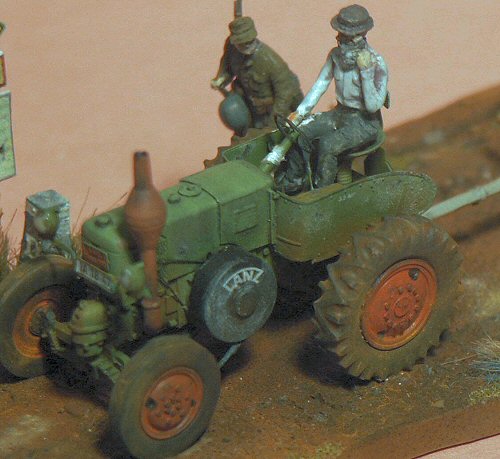
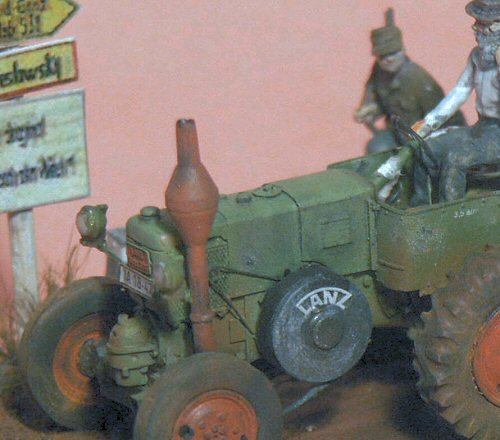
Above is the left side of the tractor with a bearded farmer heading back to the Fatherland. Left of the exhaust stack is the belt & pulley (Part B-11) that is not mentioned in the assembly instructions. Conclusions This is a well designed model that assembles well. I recommend it for novice through advanced modelers. Due to the good instructions it’s a good kit for beginners to resin and brass. It is a bit too dainty for wargaming.
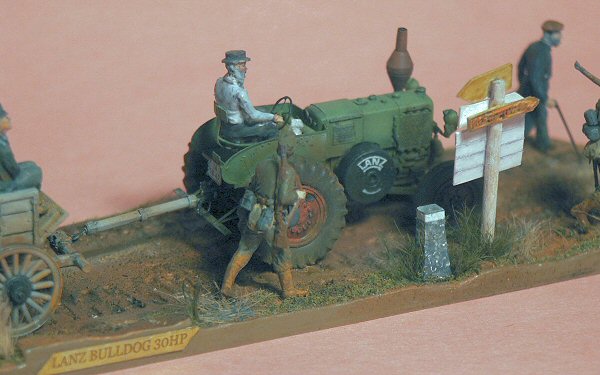
The right side of the Bulldog tractor pulling a farm wagon. [The farm wagon is a resin kit from LEVA Productions with Grante Line wagon wheels.] All the figures, both civilian and soldiers, are 1/72 scale styrene plastic from Preiser Co. Photos were taken with a Minolta Dimage-5 digital camera with a macro zoom lens and with a salmon colored background to contrast with the green tractor. Thank you very much to ExtraTech for providing the review kit. |