|
Caesar Miniatures
|
WWII German SIG 33 Heavy Field Cannon |
|||
| Kit #: 7202 |
Review by
- Al Magnus
|
|||
|
Caesar Miniatures
|
WWII German SIG 33 Heavy Field Cannon |
|||
| Kit #: 7202 |
Review by
- Al Magnus
|
|||
 |
|
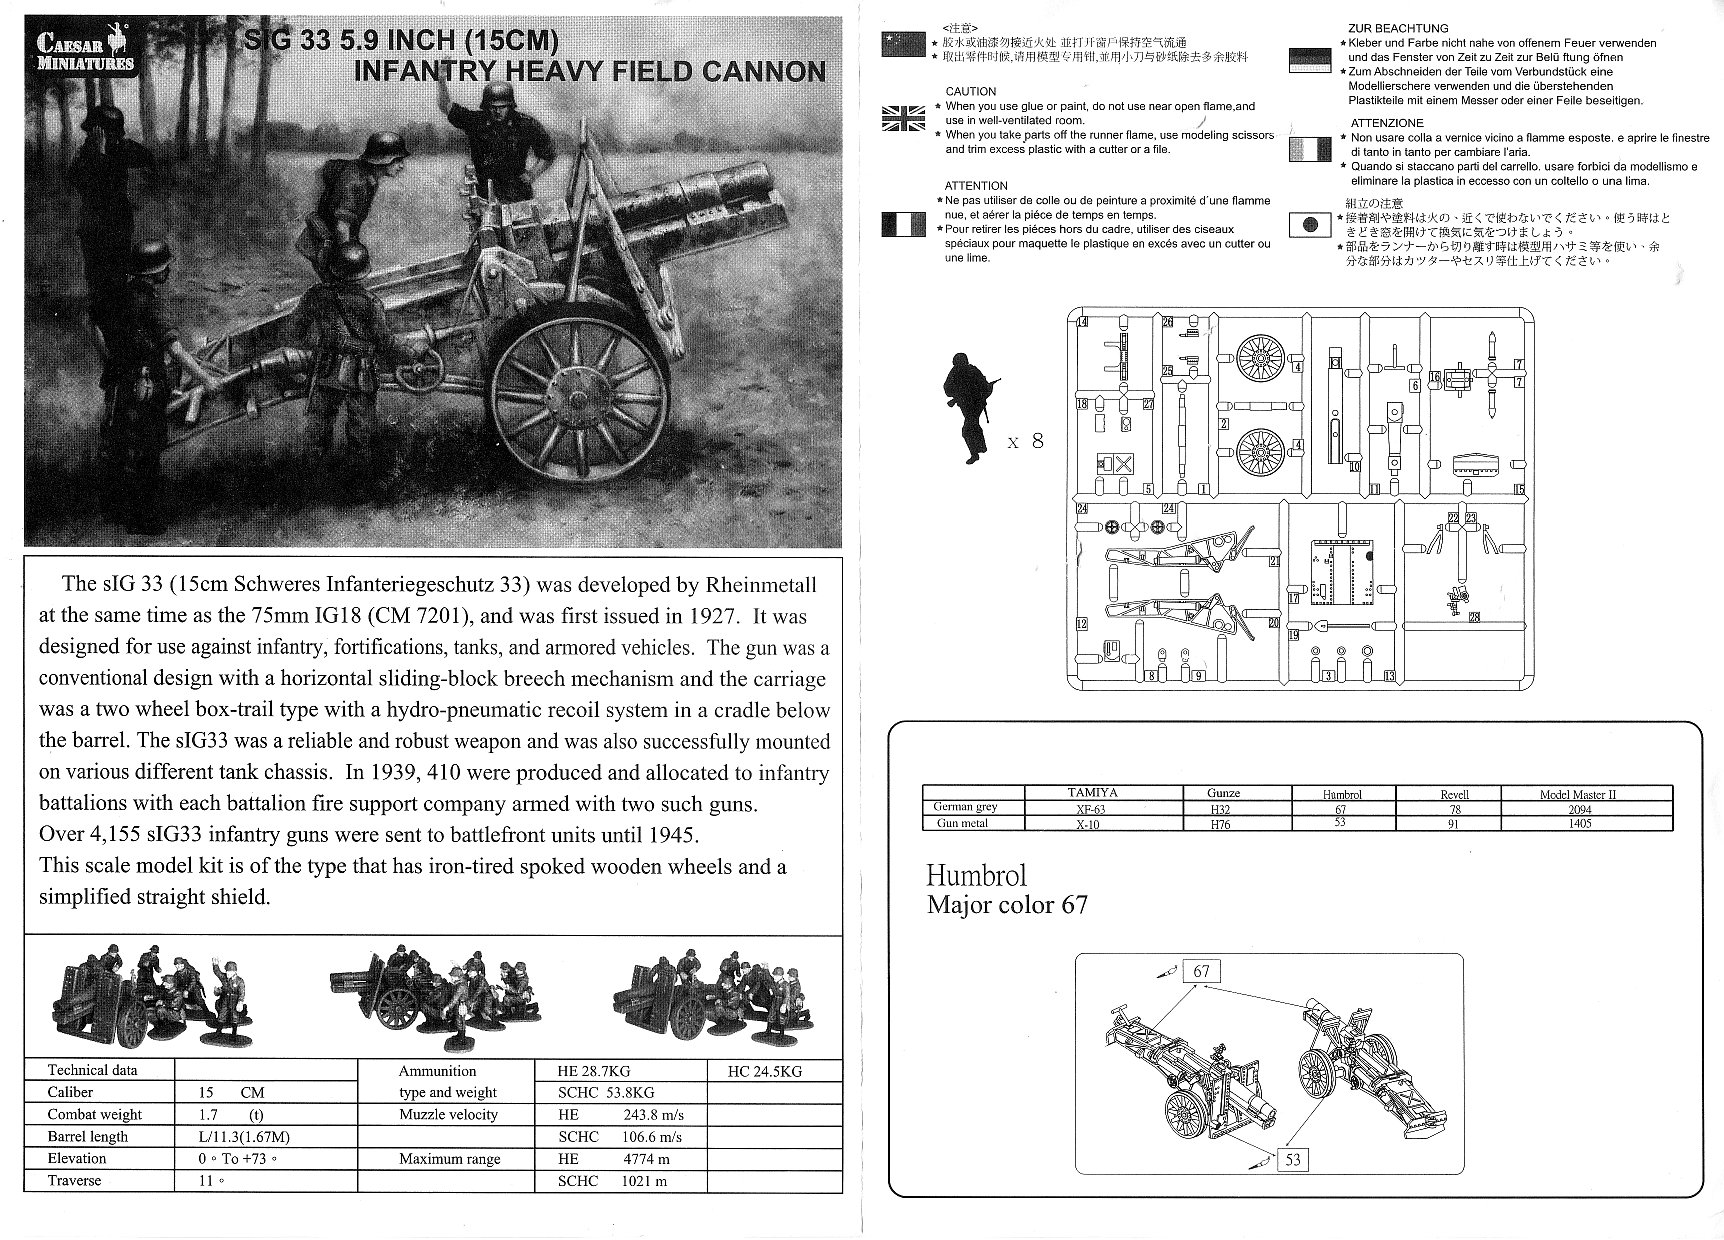
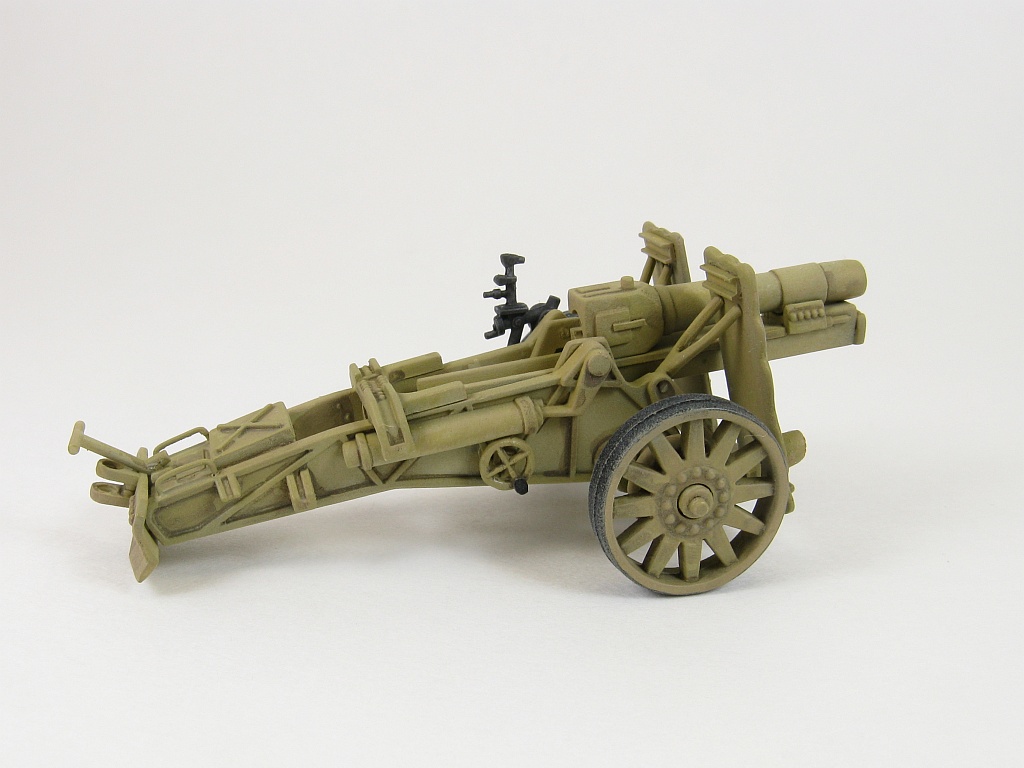
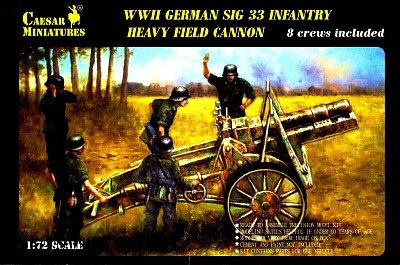
The 15 cm sIG 33 (schweres Infanterie Geschütz 33) was the standard German heavy infantry gun used in the Second World War. It was the largest weapon ever classified as an infantry gun by any nation. Approximately 4,600 units were manufactured during the war by Rheinmetall (gun’s designer), AEG-Fabriken and Bohemisch Waffenfabrik. [1] Inside the box you get one sprue consisting of 31 parts, an instruction sheet and a set of 8 crew figures (my kit was used and did not have the crew). There
is no decal sheet. The parts are well molded in a nice light grey & hard styrene plastic. Flash is non-existent and there are few mold seams to deal with.
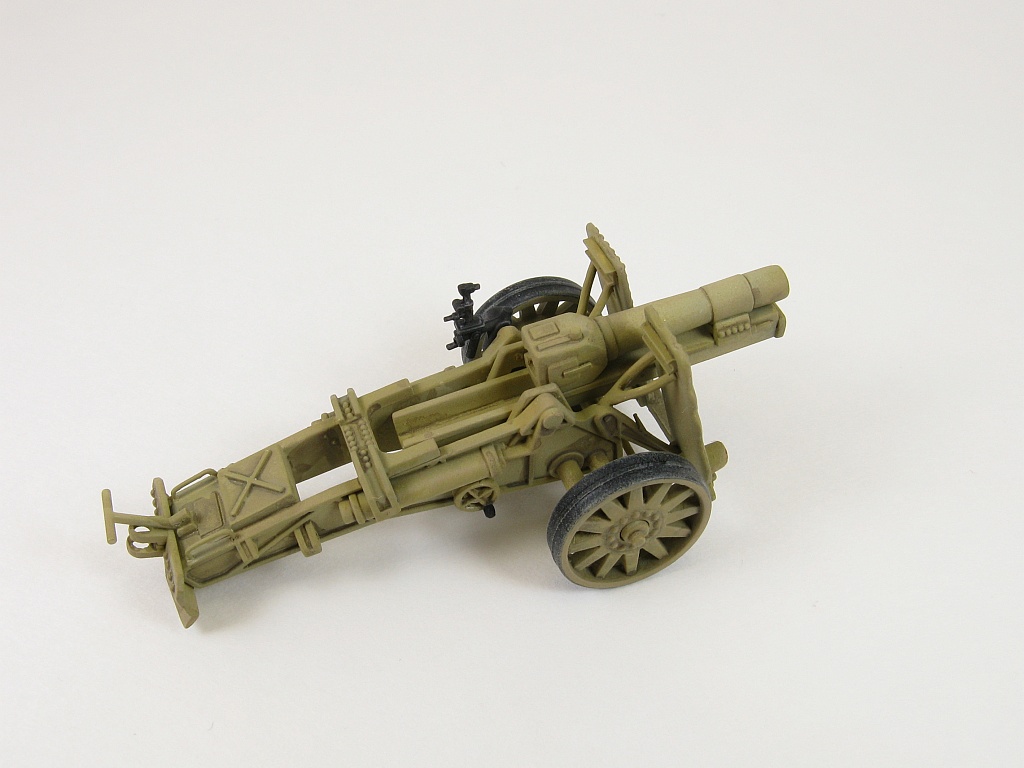
The wheels are reasonably well done. They could be improved with smaller bolts and the spokes could be a little less flat
on their faces. It’s hard to tell the tire type exactly. The lack of rim detail on the wheel makes them look for the most part to be steel tires versus rubber
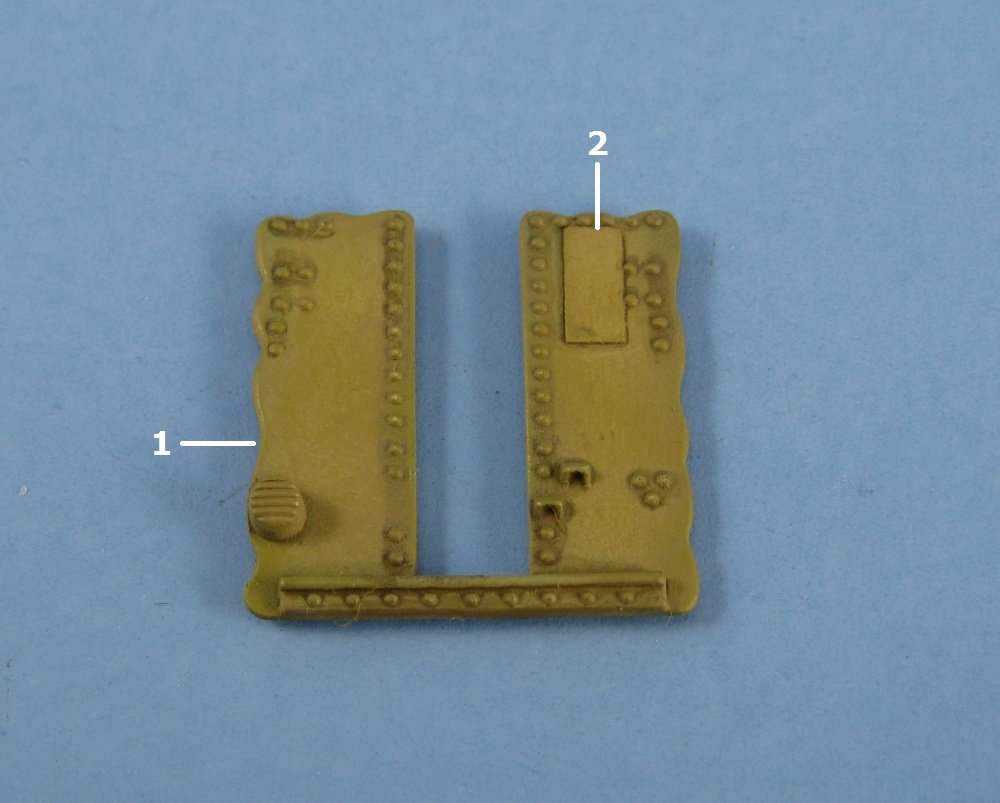
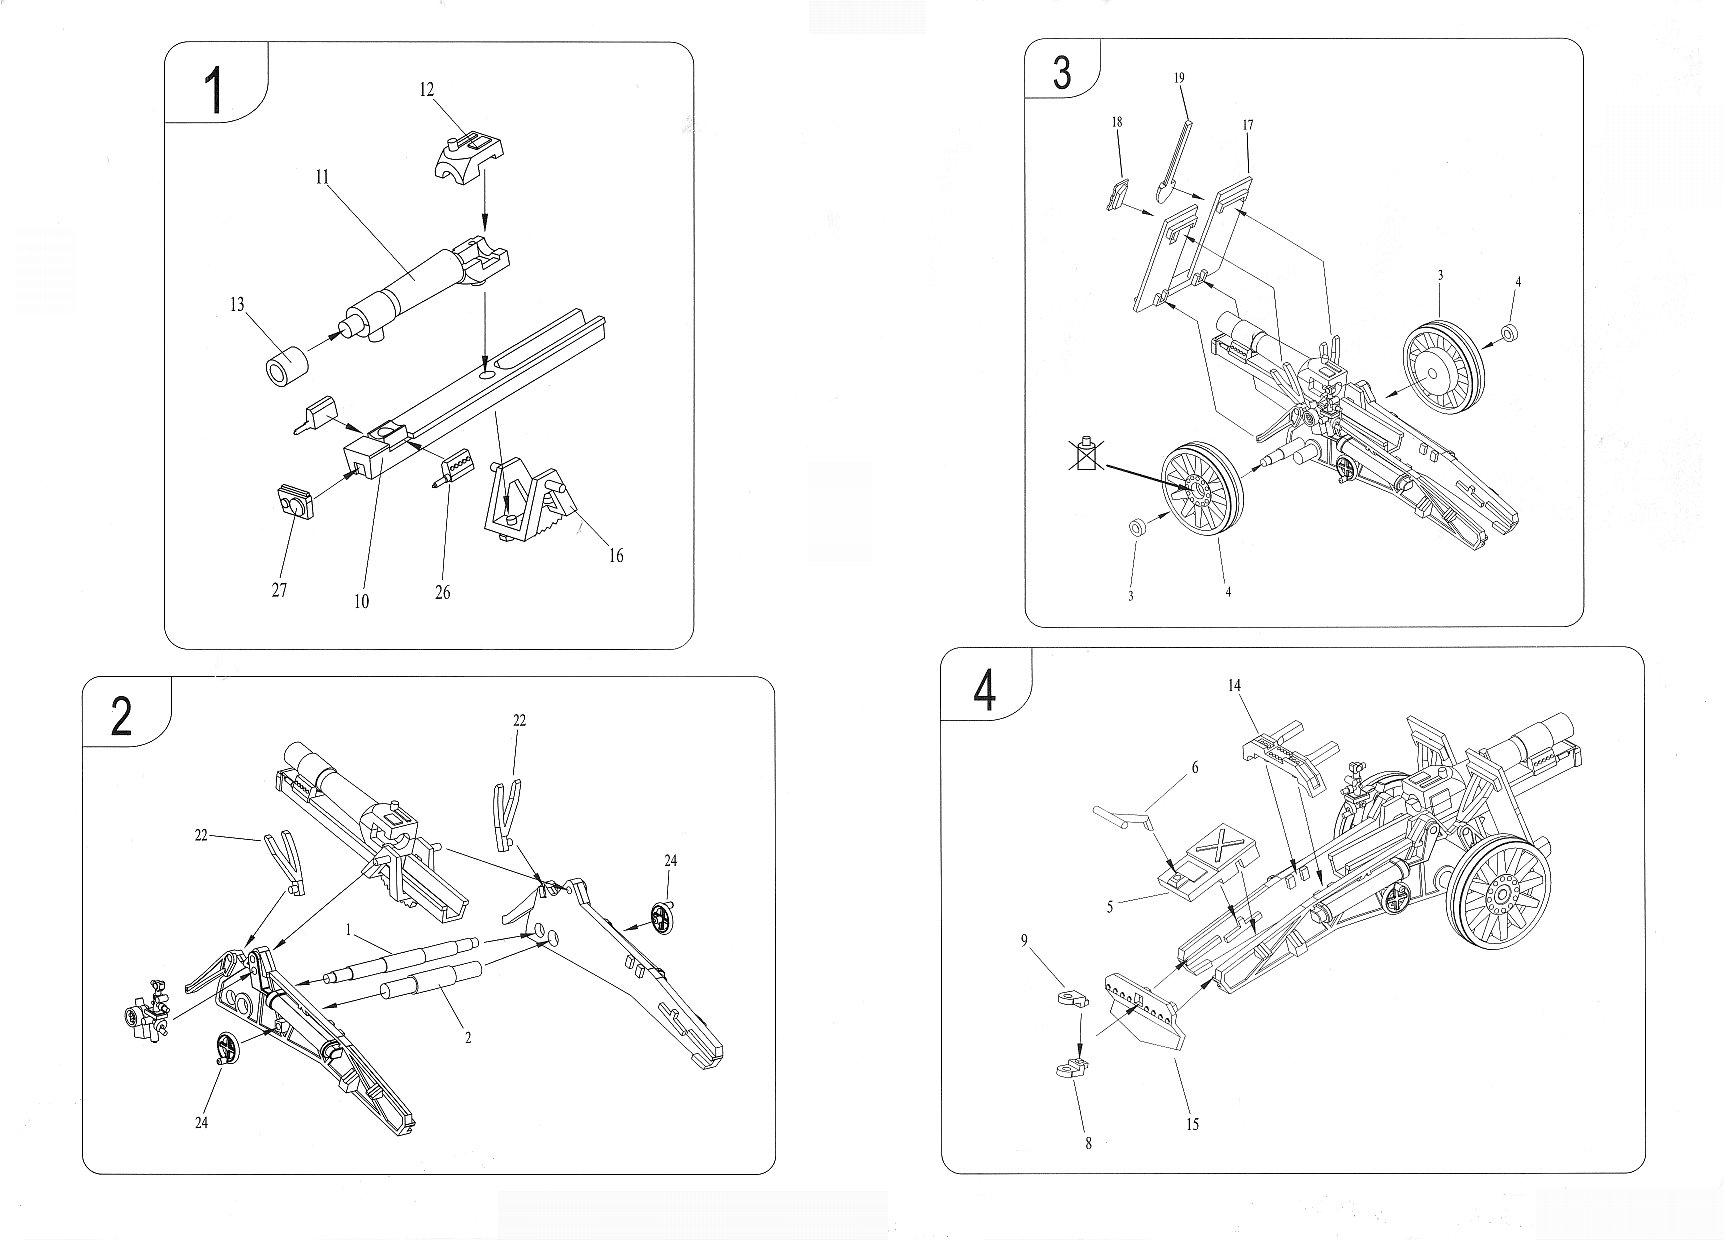
ones. Construction started with the shield. The kit’s shield is of
the late war style with straight edges. I wanted to have the more common scalloped shield so I went about scraping and sanding the scallops into the edge. I next thinned
the edges of the shield as it was much too thick. The kit’s sight cover (part 18) is scalloped but I could find no photographic confirmation of this so I replaced it with a small piece of thin
plastic sheet. Moving to the backside of the shield, there are some molded on inverted U-shaped protrusions into which one is to fit the braces (parts 22). Again I could find no reference to these so they were removed.
I then cut a small length of Evergreen U-channel and added one to each side at the top of the shield. There is a separate shovel to mount on the shield. It is not the best
and I replaced it with one from my spare parts box.
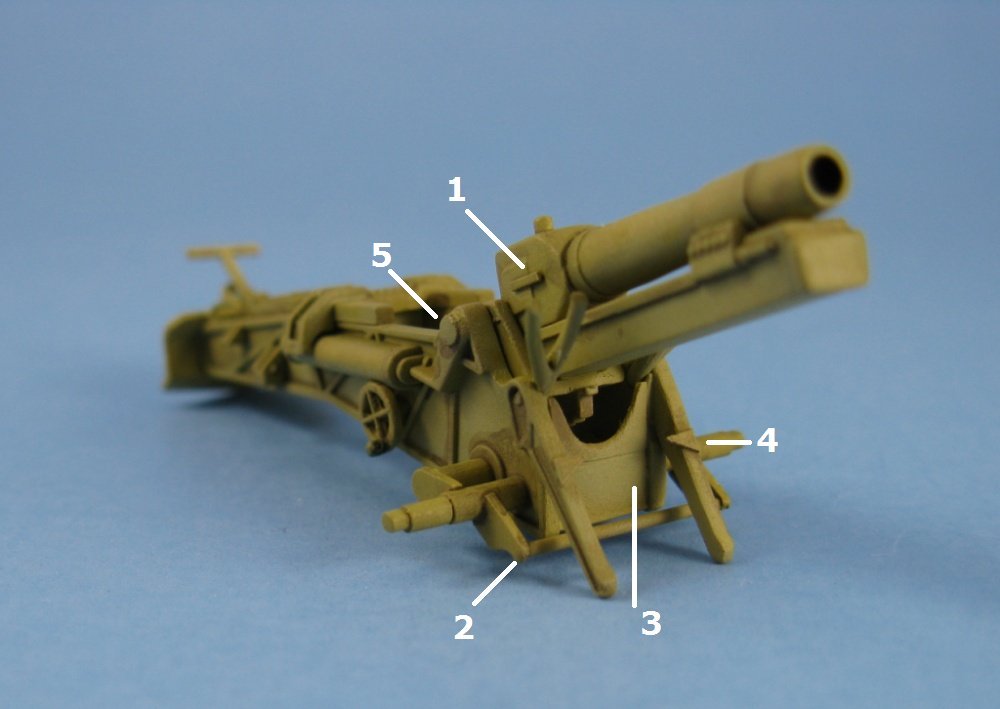
The shield was left as a separate assembly to be added following painting. The carriage followed. The upper shield braces (parts 22) are molded with a square cross section which is incorrect. It would be best to replace them
with scratch items but I just scraped their edges with my hobby knife to make them roundish. Reference [2] revealed that some extra work was in order here. Below the barrel
is another shield located between the carriage legs, which I added from some plastic sheet. There is also an extra brace and stabilizer bar running along the front just behind
the shield. This too was added with some plastic rod. Not totally accurate compared to the real item but it’s better than not having one at all.
Last was a pair of triangular pieces located on the lower shield braces. I’m not sure what their purpose is on the real gun. The holes located at the pivot points for
the barrel were covered with small disks punched from some plastic sheet. The aiming sights (part 28) and the
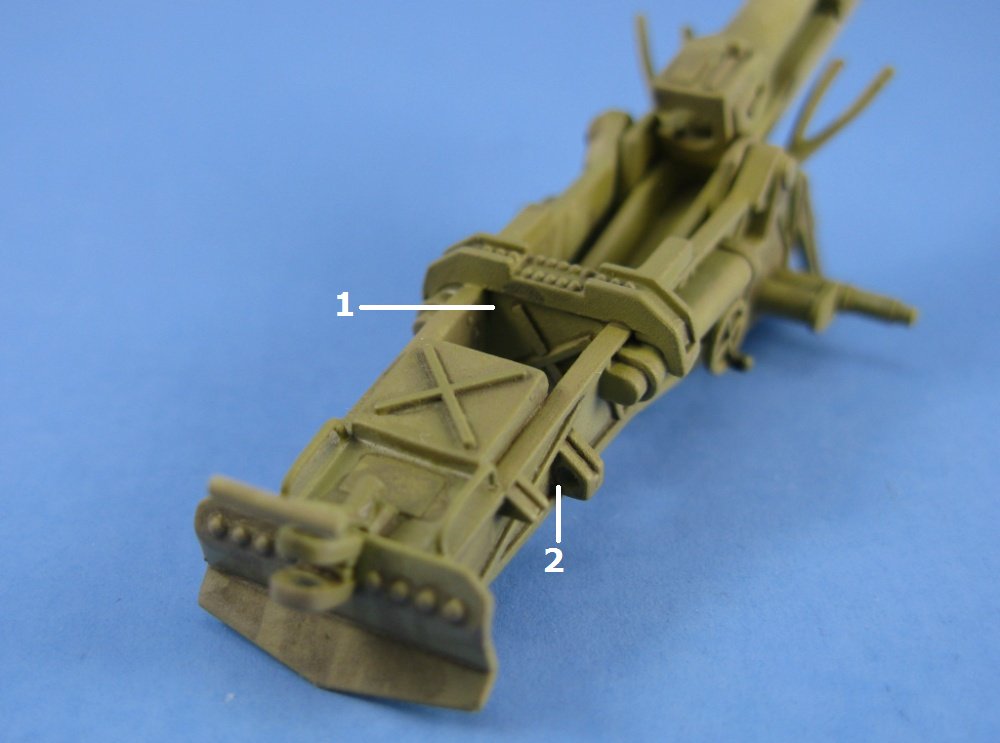
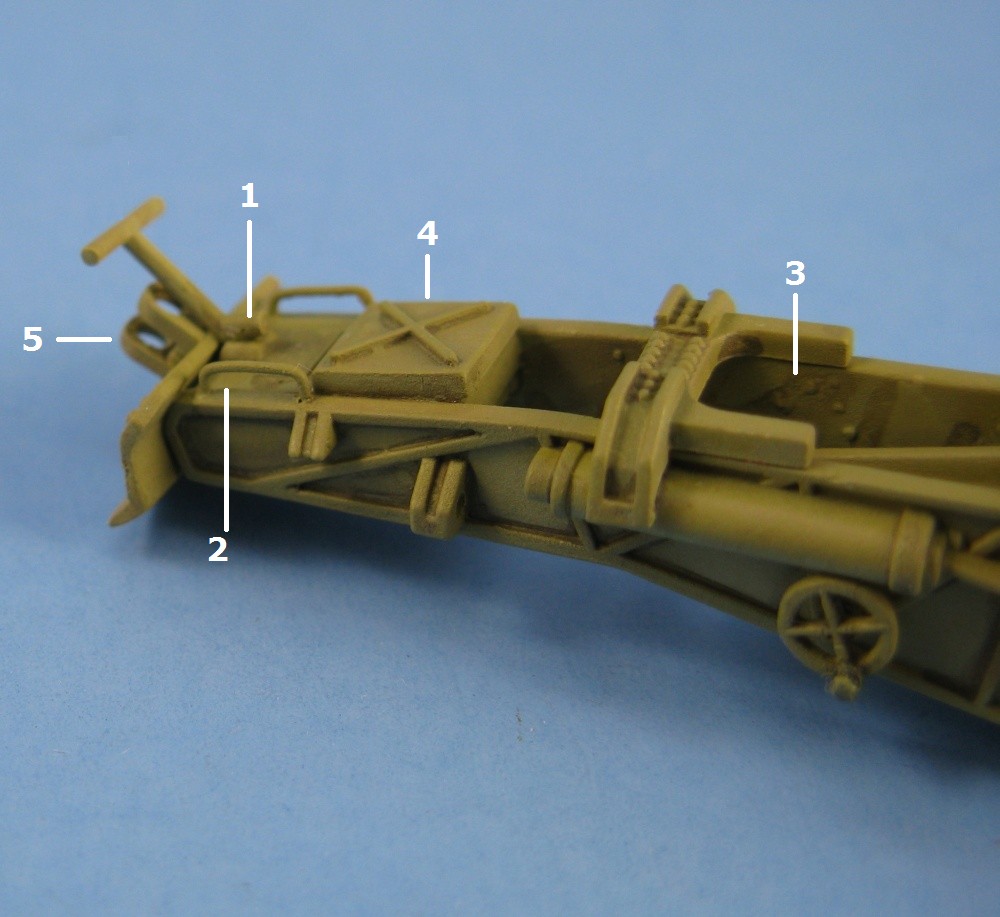
traversing & elevating wheels (parts 24) were left off to be added later. Adding the box trail parts completed the major part of the build. The cross brace (part 14) needs to have a missing panel added under
it. The panel also needs to have an X-brace added to the side of the panel facing the rear of the gun. I drilled a hole through the small triangular protrusions found on the
outside of the trail arms.
The box (part 5) is hollow so a bottom needs to be added to it. The T-handle (part 6) was modified to add a small extension to the handle where it attaches to the trail.
The eyes in the tow ring are a tad too small so they were drilled out and handles at the rear of the trail were added using some thin wire. Two pieces of ammunition are included. They don't look too good and if ammo is desired for the gun it would be best to obtain the sIG33 ammo
set from Thor Hobby. Once the trail was finished the traversing and elevating wheels were attached. They are a bit too large in diameter and touch the compensators on the
legs above them.
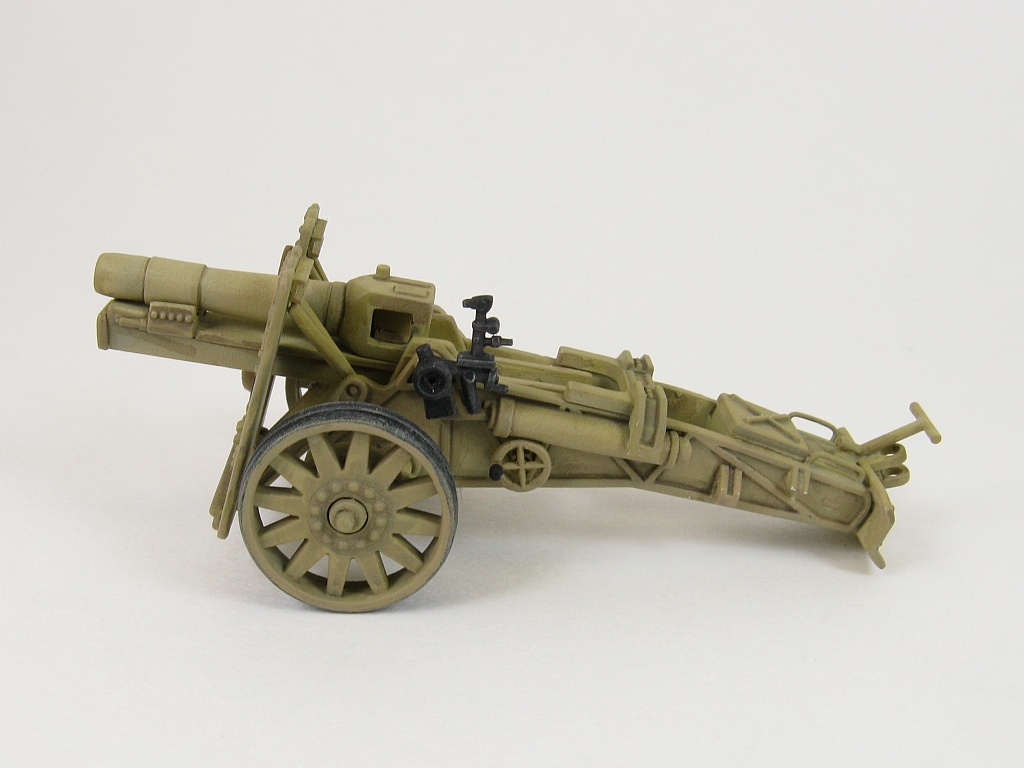
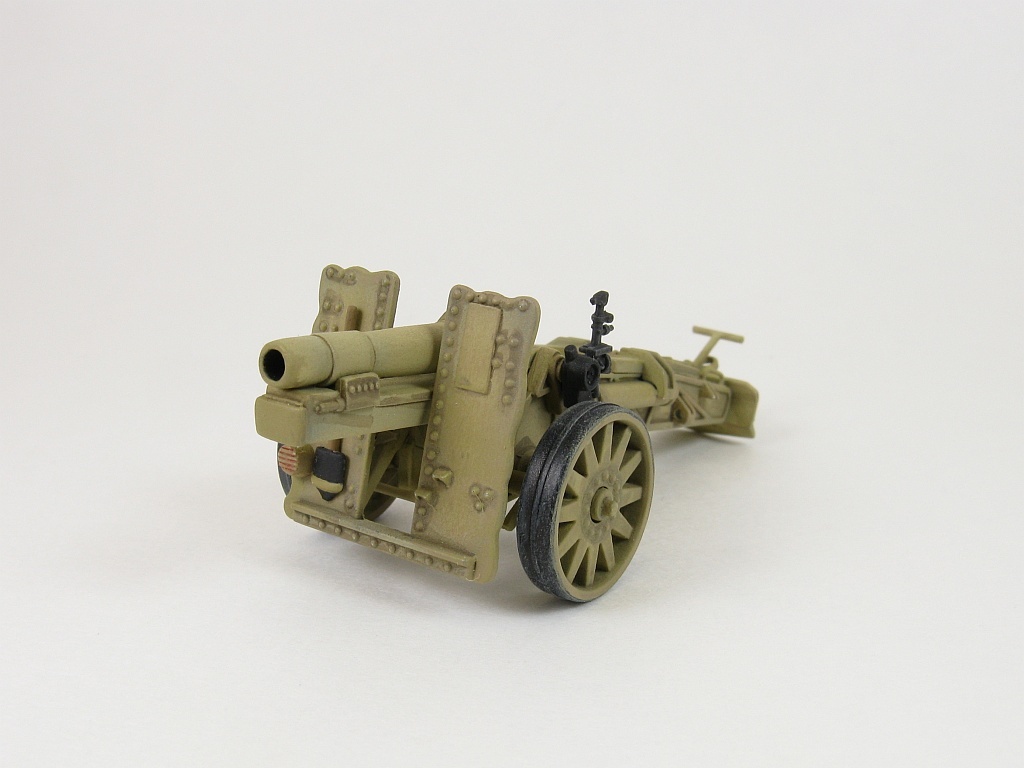
The seam lines inside the spokes are next to impossible to remove. And last, but not least, I added short extensions to the axles from some plastic rod. Now the gun was ready for painting. The instructions have you paint the gun in overall early war German panzer grey camouflage but since the kit depicts a late war version
you’d be better off painting it in the dark yellow/tan used later in the war and apply some brown and green on top if desired. If you scallop the edges of the shield as I
did then the panzer grey would also work. For this build I tried something different for painting the black on the wheels. Without any rim to allow me to flow black paint I decided
to try using a wide tip permanent black marker to colour just the surface of the rim that would touch the ground. Worked quite well and I'll definitely use this method
again if the need arises. With the painting done the separate assemblies could be joined: shield to the carriage, wheels to the axle, shovel to the front of
the shield and finally, the gun sights. Some weathering and a spray of clear flat finished everything off. Overall this is a nice kit. Construction is fairly straight forward and there were no major issues with the fit. The detail is
decent out of the box and only a little extra work is needed to detail the kit some more.
If desired, this gun could be used in whole on a self-propelled application such as on a 15cm sIG33 (Sf) auf Panzerkampfwagen I Ausf B, or cannibalized for other vehicles
such as the 15cm sIG33 (Sf) auf Panzerkampfwagen 38(t) Ausf H (SdKfz 138/1) Grille. References:
Review sample purchased by the author. |
| Back to Caesar Miniatures Kit List | Back to Construction Reviews |
Article Last Updated: 09 March 2012 |
Back to Home Page |