|
Attack
|
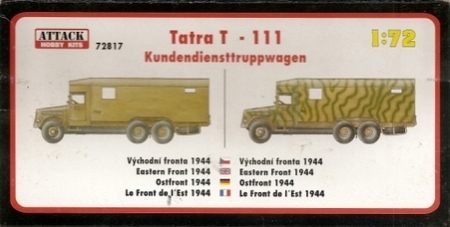
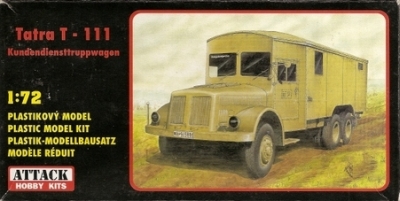
Tatra T-111 Kundiensttruppwagen |
|||
| Kit #: 72817 | Review by Neil Lyall - nlyall(at)bigpond.net.au | |||
|
Attack
|
Tatra T-111 Kundiensttruppwagen |
|||
| Kit #: 72817 | Review by Neil Lyall - nlyall(at)bigpond.net.au | |||
 |
|
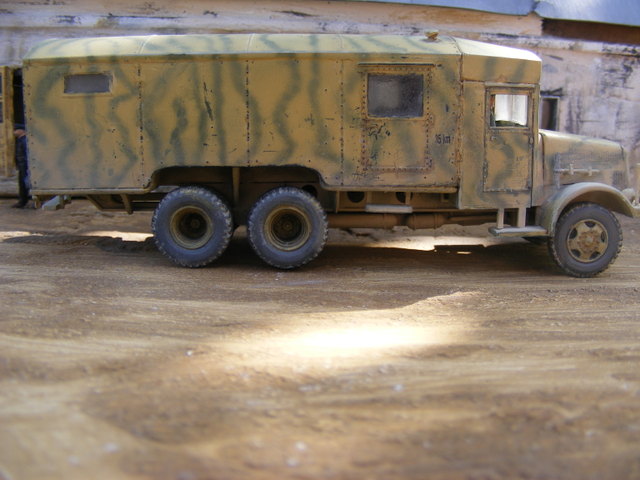
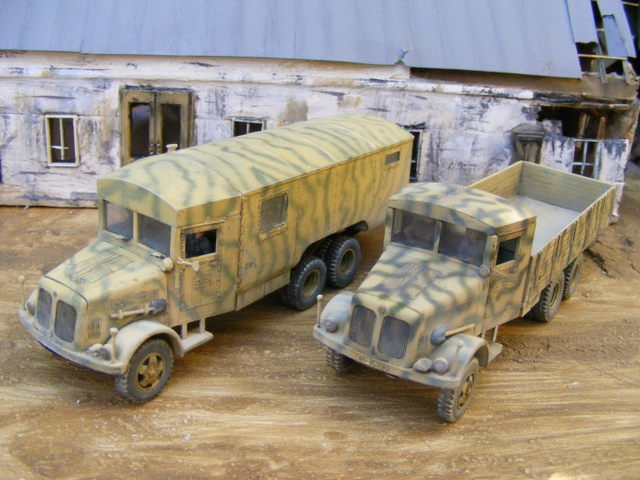
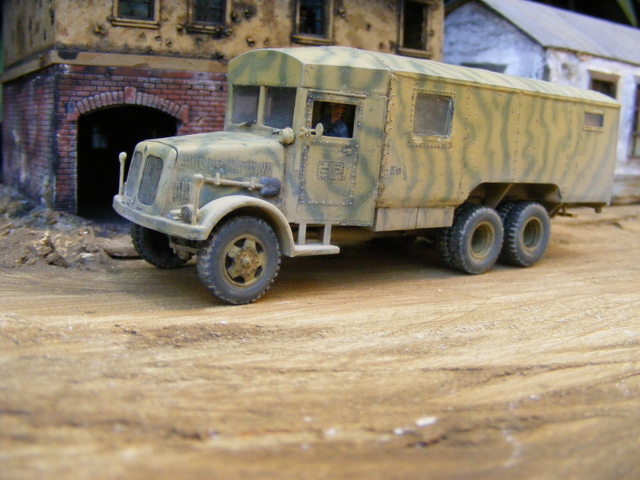
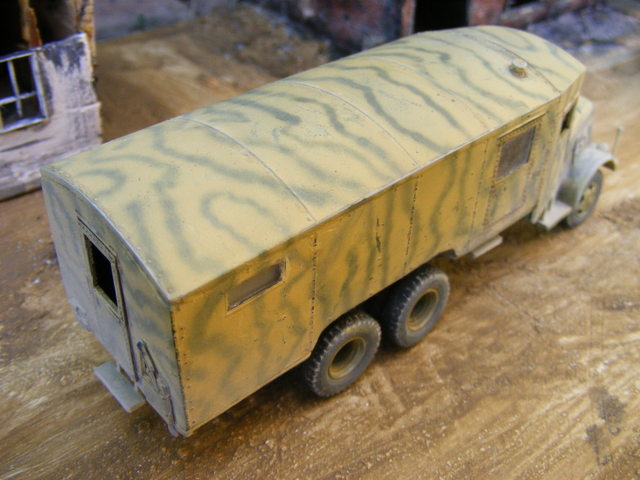
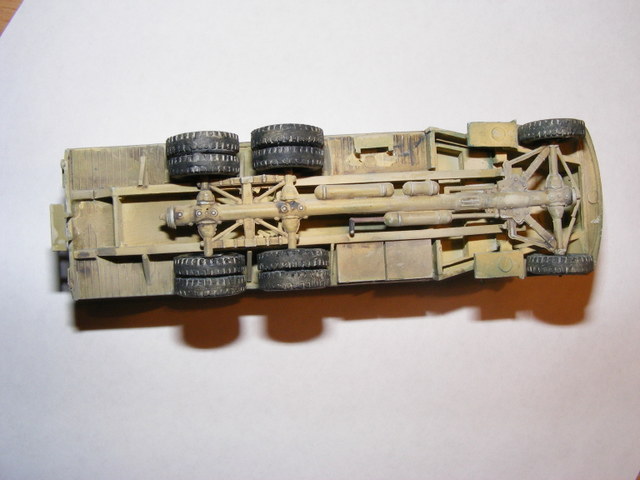
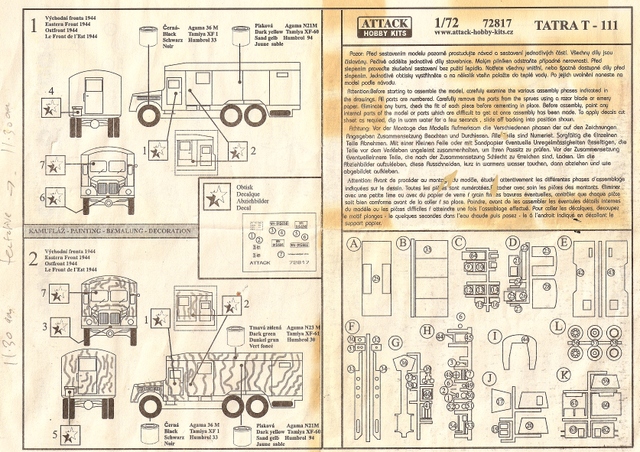
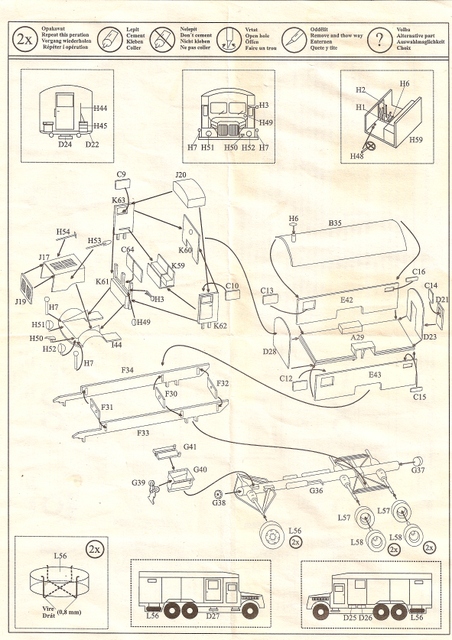
Brief Description of Contents The kit comprises over 70 parts, including a small frett of etched brass and clear plastic for the windows. Many parts are common to the Tatra T-111 open cargo truck (Attack 72836). The difference between this and the open cargo truck is the enclosed van body, & the drivers cabin roof. The chassis and drive train, and rest of the cabin are the same in both kits. The kit is cast in pale grey & black plastic, the wheels also being cast in one piece hard plastic. Decals as per box art, with two choices of WH number plates. Construction As with the open truck body, The entire drive train, axles, suspension, & exhaust is cast as one piece, and the piece supplied with this kit was badly out of shape. It had two large bends, making it resemble a long tilde (~) instead of being flat. The sprue it was attached to was also in the same shape, and I could find no stress discolouration where the two bends were, so it appears it was cast in this shape, or hardened in this shape. Fortunately the plastic is soft, rather than brittle, so I was able to bend it back to a flat shape. The cabin pieces are a fairly good fit, the radiator needs some fine sanding to ensure a flush fit. The driver's cabin doors are moulded shut. The bottom, sides, ends and roof of the van body were a reasonabley good fit, but all needed a fine sanding on the edges to get a flush finish and very light filling was also needed on most joins. The rear door can be assembled open, the side door is cast closed. I didn't like how high the van body sat up over the chassis. Comparing this to the two photos I have of this vehicle, one of which is a side shot, and to the instructions and box art, it was clear that the van body was sitting way too high in this kit, very noticeable over the wheel arches. I considered how to address this problem. There is no easy fix - and I couldn't just ignore the problem, it was visibly very wrong. In the end I sanded down the chassis (which is two long parallel beams that run almost the length of the vehicle) by a millimetre or so, then sanded down the underside of the van body floor, as well as sanding two deeper 'grooves' so the floor of the body would sit a bit lower on the chassis. This solved the problem. As a consequence I also had to sand down the underside of the drivers cabin roof by perhaps a millimetre to lower it to the right level to join the body. I didn't like to do this but it was essential, and less noticeable than leaving the body riding too high. Photo references are very handy to see the height the body sits on the chassis - Google if you have none. The two spare wheels are supposed to fit under the van floor, into cutouts in the chassis beams. However these cutouts are blocked by moulded supports on the van floor which attach to the chassis. No easy fix for this, unless you cut off the supports, I prefered just to leave the spares off. The rest of the kit went together with little problem. Some sanding needed on most pieces, particularly the wheels, which have a cast line right around their circumference. One trouble I found was the width marker poles on each front mudguard. The markers supplied are very not round, more of a flattened elliptical shape, and an attempt to file them resulted in instant breakage. The brass frett duplicates these, but is also not very useful as they are very flat, rather than round. I replaced them with lengths cut from a common household dressmaking pin, as the diameter seemed about right, and fastened the round knobs to the top with brush on super glue, and rebrushed them with generous amounts of superglue on subsequent days to get them solidly fixed. I also think the vents and flaps on the engine compartment look a bit softly cast, which makes it hard to accentuate and highlight their shape. Window wipers are not supplied, I made some from paint brush bristles cut to size, each being two pieces to represent a wiper arm and wiper blade, glued with white glue. I made small brackets for the shovel and pick from some thin flat rod. I added two crew in the cab from the spares box. The exterior rear view mirror is the sole piece of brass. I cut a small slit into the cab side to insert the bracket, held with super glue. Unfortunately I placed the external rear view mirror too low, it should be at top of driver's window, not the bottom. Accuracy I'm not an engineer, and have no technical specs for this vehicle, so I don't know how to scale this model is.
Painting The instructions say to use Humbrol 94, which they call Sand Yellow. I'm not sure if Humbrol have changed their colour mixes, my recently bought tin of 94 is medium brown. For this reason I created a Humbrol enamel mix to try to match the box art - basically Humbrol Matt 83 with a quantity of white added. The few B&W photos of these trucks seem to indicate they were painted a very pale yellow. (These trucks were produced and supplied to the German Army from 1943 to 1945). The paint guide supplied shows a version with green sprayed lines. I bought a tin of Humbrol Enamel Matt 117 as it's a lighter green and closer to the box art and I roughly followed the guide. I highlighted rivets by gently running the blunt side of an exacto blade over them to remove the paint, to indicate wear, and also used the blade to scratch paint around door handles and door openings. Conclusion This kit was a pleasure to build and I'm quite happy with it, but you do need to do a bit of filing and sanding to get it looking the same as on the box, in the instructions, and wartime photos, with regard to the height of the van body. This is a large beast of a truck, made in 6.5 & 8 tonne versions - as long as a Famo, but not as wide. If you just want one example of the Tatra T-111 family, the open truck version is the easier build, though for me this one has a great boxy look.
|
| Back to Attack Kit List | Back to Construction Reviews |
Article Last Updated: 15 February 2009 |
Back to Home Page |