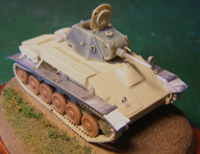
1.
Hull
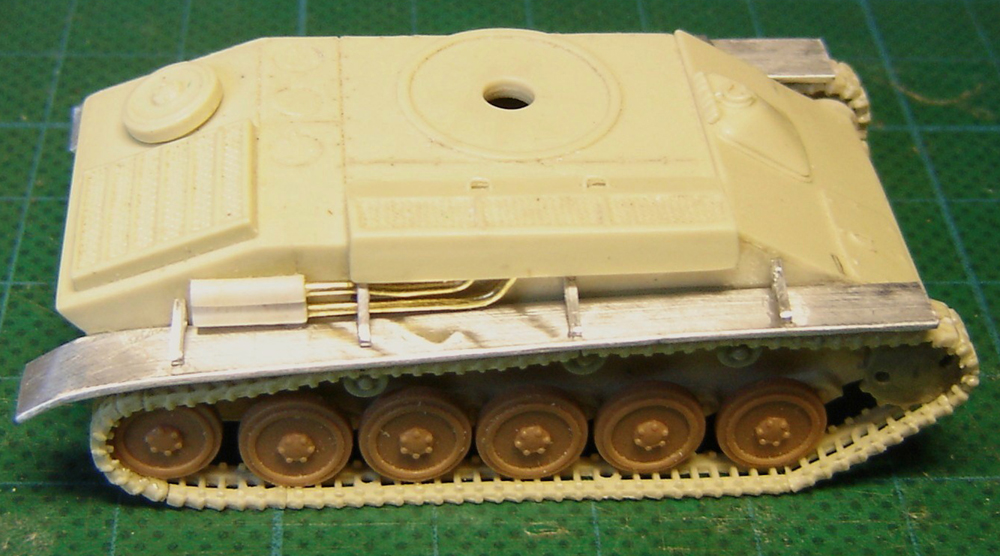
The hull is a one-piece moulding and comes without a floor in order
to allow a screw (included) to be used to fix the turret in position.
I chose instead to blank off the hull bottom with a ½ mm
plastic card floor. A length of plastic rod was then glued into
the hole, at the bottom of the turret, to put it in place on the
hull top and allow it to revolve.
The too thick mudguards were not convincing and were very carefully
cut off using a new sharp blade. A lot of sanding (wet owing to
the resin) was necessary to clean up the sides before putting in
place new mudguards and their supports. They were built from food
aluminium foil, this material being easily obtained, cut and bent
to shape.
Exhausts and their silencer are best replaced with copper wire/plastic
rod of a suitable diameter. Their ends were hollowed out for realism.
Note that AL.BY does not provide any manual or instructions of any
kind, at least not in my specimen.
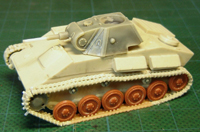
2. Running gear
Road-wheels look like copies of the old Matchbox Wespe and are rather
under-sized. Moreover 8 out of 10 were suffering from a lack of
material on their outer rim and I decided to replace the whole lot
with Matchbox Wespe roadwheels from my spare-box. On the real thing,
those wheels are identical to their T-70’s counterparts and
they were put to good use on my model.
Sprockets and idlers were kept as well as the resin tracks, IMO
also copies of Matchbox Wespe tracks. They were put into hot water
in order to conform to the running gear and take some sagging. They
came in one piece (L&R) and I had to cut them to L&L to
ease assembly. In the process, I broke several pieces that I replaced
with a length of plastic track of similar pattern, found in my spares
box.
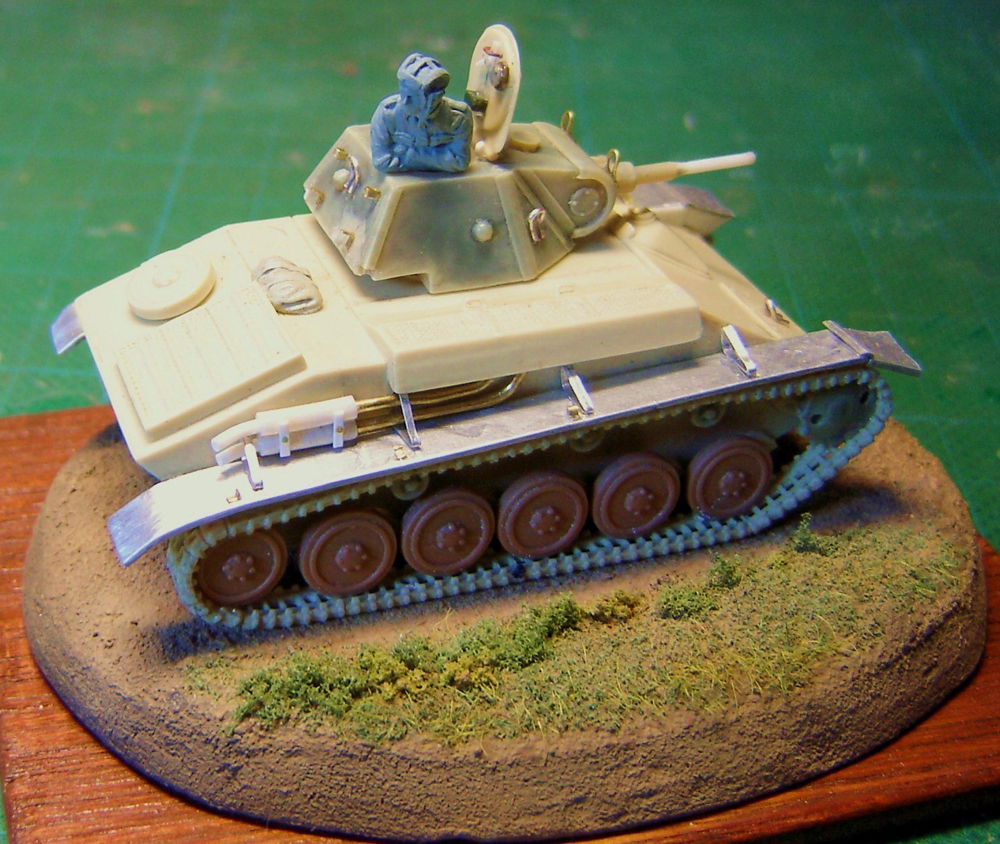
3. Turret
This is a s a one-piece moulding too, save for the commander’s
hatch which is separate and must be detailed if used in the open
position. That’s what I did and without much reference on
the subject, I used as a guide the inside of a T-34 turret hatch,
plausible if not 100% accurate.
4. Armament
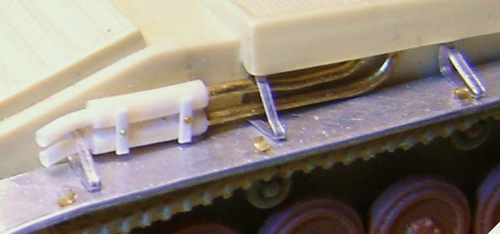
The gun tube was badly moulded and bent; it was replaced by a piece
of Evergreen rod that had its end drilled out.
5.Detailing
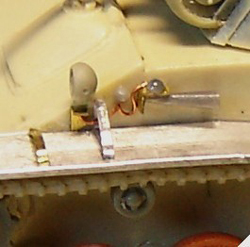
All lifting eyes, moulded directly on the vehicle , were replaced
with fine copper wire. Other small details omitted by AL.BY like
supports, light cable, horn, were scratch-built from remnants of
a PE fret and/or plastic, super-glued in place at the tip of a fine
needle.
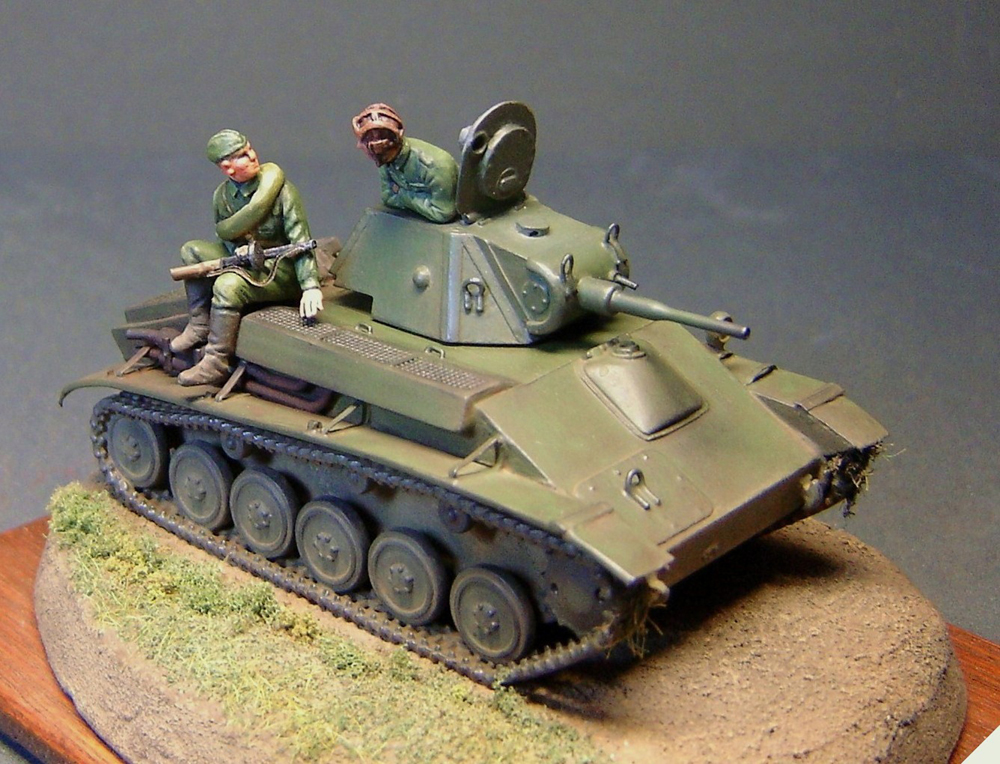
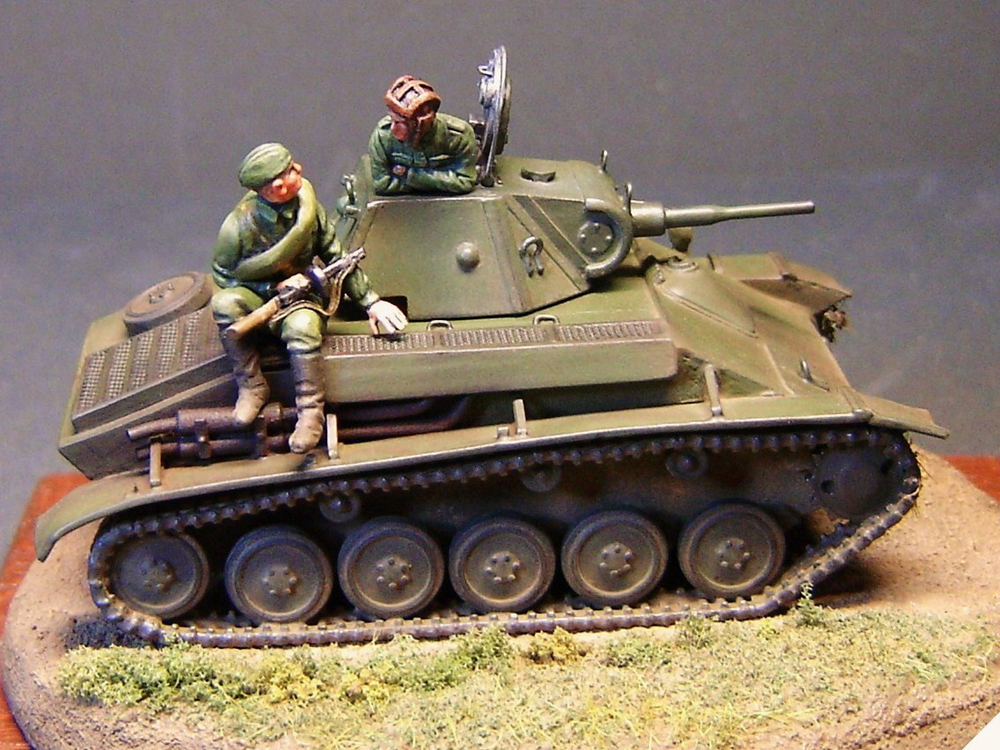
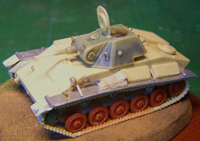
6. Painting and finishing
Brush-painted only, the model was firstly coated with a thin coat
of enamel light grey paint, followed by a light coat of green enamel.
After I had let it to dry thoroughly, the model received several
filters of green and ochre acrylics from Vallejo, mixed-up in different
proportions to give depth to the model and, last but not least,
pastels and graphite powder were used to good effect to bring the
beast to life. Figures are from Preiser, the commander’s head
being from Milicast.
7. References used
-Internet
-Steelmasters hors-série N° 32 Stalingrad Operation Blau
vol.1 (French language)
8. Conclusion
Like all resin kits, this one requires great care in cutting and
sanding parts. Cyanocrylate glue was used throughout assembly. There
are a few small holes to be filled with bits of plastic and superglue,
but nothing that can’t be mastered by the average modeller.
This diminutive tank can be turned into a nice model, provided that
one is willing to improve the basic kit with some replacement and
scratch-built parts. It may be difficult to get, like all AL.BY’s
production. I got mine many years ago from the well-known shop “le
16ème escadron” in Brussels, Belgium (no connection,
just a customer).


|