|
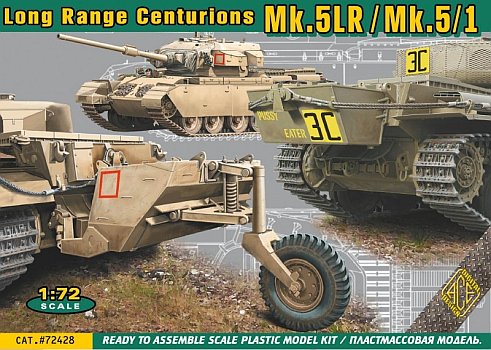
Given it was conceived during WWII, first fielded in 1945, and still continues in active service today in Israeli and South
African hands, the Centurion must rival the T-54/T-55 series for the title of longest serving AFV. Yet remarkably there had never been an Injection moulded
kit of the Centurion in 1/72 scale until ACE released several variants starting in 2016.
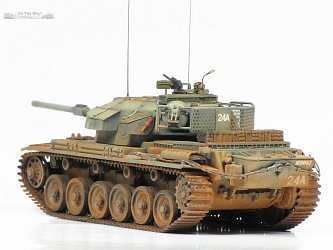
The Centurion Mk 5/1 was the primary MBT of the Royal Australian Armoured Corps from the 1950s through to the 1970s. From February 1968 until September 1971,
the RAAC deployed Centurions to South Vietnam, where they served alongside US and ARVN M48s.
The RAAC Centurions went through a number of changes during their combat service [1], and the ACE kit depicts some of these, but not others. Some points to note:
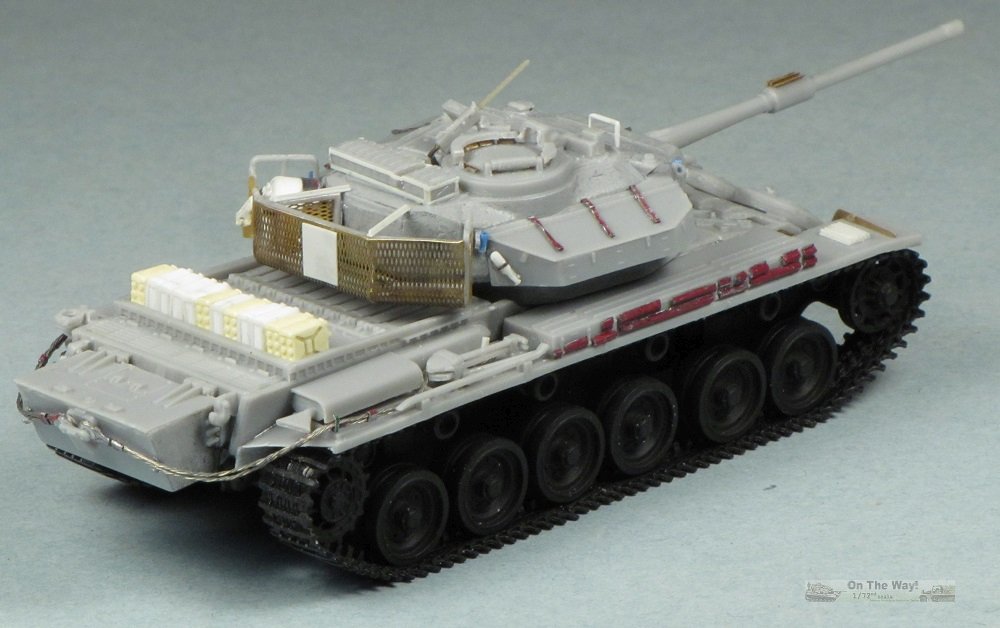
- Most obviously, a large external armoured fuel tank was added to the rear hull. This is provided in the kit.
- A turret basket was fitted. Later reinforcements were added as the basket was collapsing under the weight of all the stowed gear.
- The Centurions did have anti-bazooka plates fitted when the first deployed, but these were almost immediately removed. The instructions only show the plates
fitted to the Mk.5LR version. Updated instructions on the ACE website note that the beams that support the plates (part B20) should be omitted for the RAAC version.
- Smoke dischargers were often removed as they tended to snag on jungle foliage.
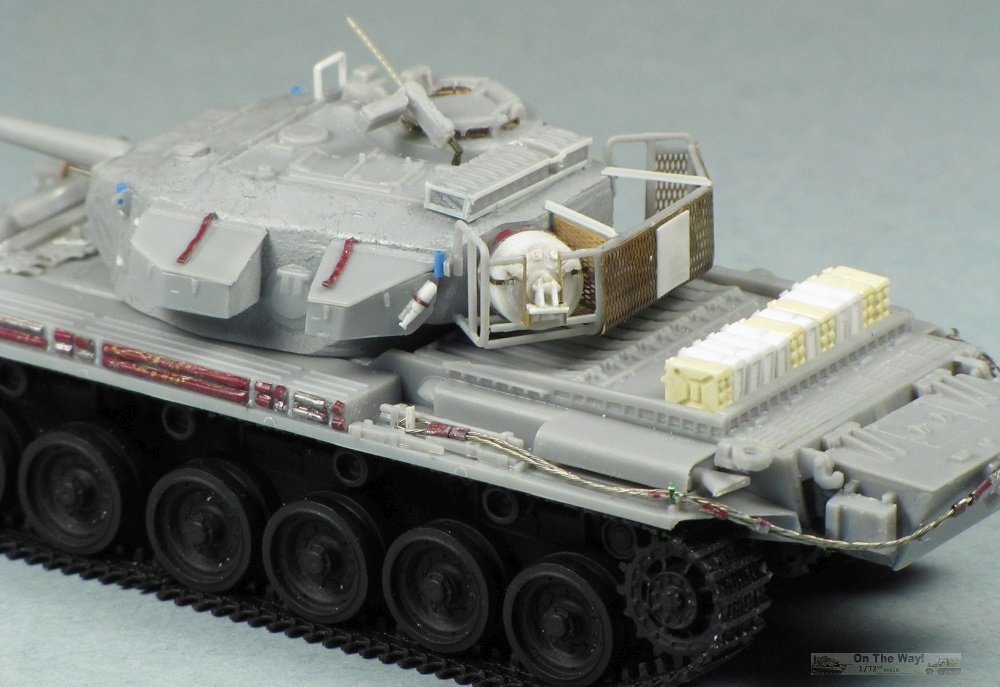
- The mantlet should have an additional 50-cal ranging MG added between the main gun and the 30-cal. The raised area around the ranging MG was partly cut away to
accommodate the additional MG.
- The front and rear fenders were normally cut away. Later portions of the fenders were replaced with thicker steel plate, but I don't have good reference on this.
- A spotlight was often fitted. The kit includes the brackets to stow the spotlight on the turret basket, but not the light itself, or its mount on the mantlet.
- The stowage bins on the fenders were externally reinforced with sections of 'star picket'.
- The glacis plate was up-armoured, and two spare roadwheels were stowed on it. This configuration is provided in the kit. In some cases, the wheel in front of
the driver was mounted slightly lower to avoid blocking the driver's view.
- The kit provides a row of 30-cal ammo boxes mounted on top of the turret. Later this rack was modified to accommodate an AN/PRC-25 radio set for communication
with US infantry units.
- Sections of pipe to mount a sunshade were added to the turret lifting lugs.
- Mud scrapers were added to the front fenders.
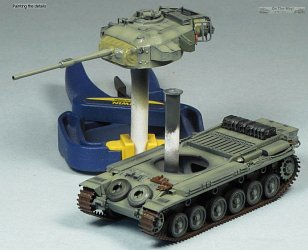
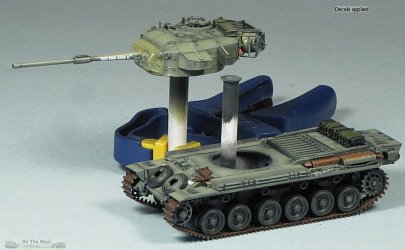
The kit
First off let me say I am hugely impressed with this kit. ACE clearly put a lot of research and effort into this project and it shows. This is not a simple kit
- the suspension alone has nearly 100 parts. All the tools are moulded separately. The parts break down is complex (for example the upper hull is made up of 4
separate pieces, not including the fenders, to allow for the many variations in these areas seen over the Centurion's long career).
Given this is produced as a limited run kit, there is some flash to deal with. This didn't affect the part detail, but does slow down assembly. On some of the
smaller parts, like the return rollers, holding the parts while cleaning up the mould parting lines was definitely a challenge. I also found I needed to enlarge
most of the holes to accept the corresponding mounting pins, and sometimes shave the male tabs down to fit their corresponding slots.
The kit provides two small photo-etched frets. One is generic to the Centurion, providing front fender braces, episcope covers, the gunner's sight guard, fire
extinguisher pull handle guards from the fender bins and the three metal strips added as counterweights on the bore evacuator of the 20-pounder gun barrel. The
other provides the stowage basket mesh and the searchlight stowage mount brackets for the Australian Mk. 5/1.
In addition to the Australian Mk.5/1, the kit includes parts for the unique Mono-wheel armoured fuel trailer, the type A 20-pounder barrel without the bore evacuator,
and the standard glacis plate with stowage bin and spare track mount.
The instructions consist of a double-sided A3 sheet and a double-sided A4 sheet with nice clear CAD-generated images. Note that there are some errors on the
instructions (for example the gunners periscope cover part C11 is identified as G18. ACE has published updated instructions on their website.
Hull
The lower hull is made up from several flat panels, as well as a couple bulkheads to keep everything square. The lower rear hull plate (D19) is moulded flat but
needs to have its upper and lower portions bent to their final angles. There is no view in the instructions showing the correct angles, and I didn't get this
quite right. I ended up cutting off the upper panel with the louvers after I'd assembled the hull and adjusting its position to allow the engine deck to fit
properly. I also omitted the 3 vertical dividers (D29) that fit between D19 and the upper rear hull plate (D17), as I couldn't get them to fit, and they are
all but invisible on the completed model.
I'd suggest waiting until the suspension assembly is complete before adding the fenders - there's not a lot of space between the fenders and return rollers.
I cut back the fenders front and rear to their typical Vietnam configuration, and added the kit pioneer tools and exhausts. The ends of the fenders were thinned
to scale appearance. I was a little too enthusiastic thinning the front left fender so I had to rebuild it from thin sheet.
For the reinforcements on the fender stowage bins, I formed lead foil over thin plastic rod to create a shape like a capital Greek letter Omega. Looking at
photos, the pattern of reinforcement changed from vehicle to vehicle - mine is probably a little more regular than most. On the right side I changed the layout
a little from the left side. I made a rough approximation of the mud scrapers for the front fenders (oh those fastidious Aussie tankers) with thin plastic strips
glued at right angles to form T shapes.
The kit provides 2 lengths of 3 links of spare track. I removed one link from each section an d fitted them on top of the hull next to the driver's hatch.
ACE provides two towing cables in the same rubbery material as the tracks. They're nicely moulded, but there's no easy way to get them to hold a particular shape,
nor to clean off the mould parting seams. I made new cables, using 5 strands of fuse wire, twisted together, and then adding the various ferrules, etc. from wine
bottle foil. The resulting assembled cables could be nicely formed around the back end, with some scraps of thin metal from a pop (soda) can used for brackets.
One distinctive item of stowage on RAAC Centurions in Vietnam was a set of plastic water cans stowed on the rear hull. These were often a mix of US and Australian
pattern cans [4]. Al Magnus very kindly sent me a set of O3D Miniatures plastic US water cans. Unfortunately the set only provides 5 cans, and at least 11 were
normally carried across the rear deck. I scratchbuilt 7 basic UK/Australian-style plastic cans, and used a mix of the two, with the more detailed O3D cans on the
outside! The O3D cans do a nice job of representing the raised bumps on the bottoms of the can, which are quite evident when the cans are stored on their sides.
I did find a couple of the US plastic water cans in plastic in the Trumpeter M113 ACAV kit (where they don't really belong). They're not as nice as the O3D parts,
and they are hollow on one side, but they could be used with some work.
Suspension
One of the outer bogie carriers (part B10) is indicated as not for use, and a replacement is provided on sprue G as part G11. Apparently the one particular part
B10 on the sprue consistently suffers from mould defects. There is no difference between parts B10 and G11, so there is no need to install G11 in a particular location.
Cleaning up the tiny roadwheel hub caps and return rollers was the most time consuming aspect of building the suspension. The sprockets are attached to the sprue
at four locations per sprocket, between the sprocket teeth. I found I lost several teeth in removing the parts from the sprue, and had to make replacements from
plastic card, carefully test fitting to make sure they'd engage the holes in the tracks.
I modified the idler mounts, since the stub axle to mount the idler was about 0.5 mm in length, and looked unlikely to hold under the tension of the rubber tracks.
I drilled the idler arm out and replaced the axle with a longer piece of Evergreen rod. Later, I had to go back and drill right into the hull and introduce a length
of paperclip as a pin, since my plastic reinforcement did not survive fitting the tracks. Note that the instructions and sprue show both idler mounts as part B12,
however the two parts are mirror images of one another.
Each rubber track length comes in two pieces, and there are only 3 tiny pins and holes on each end to hold the assembled track together. However I found the tracks
seem to respond well to superglue. Given most Australian tanks had the Bazooka plates removed, there's not a lot of room to hide assembly errors. I can see many
builders opting for resin tracks from OKB Grigorov if and when they become available.
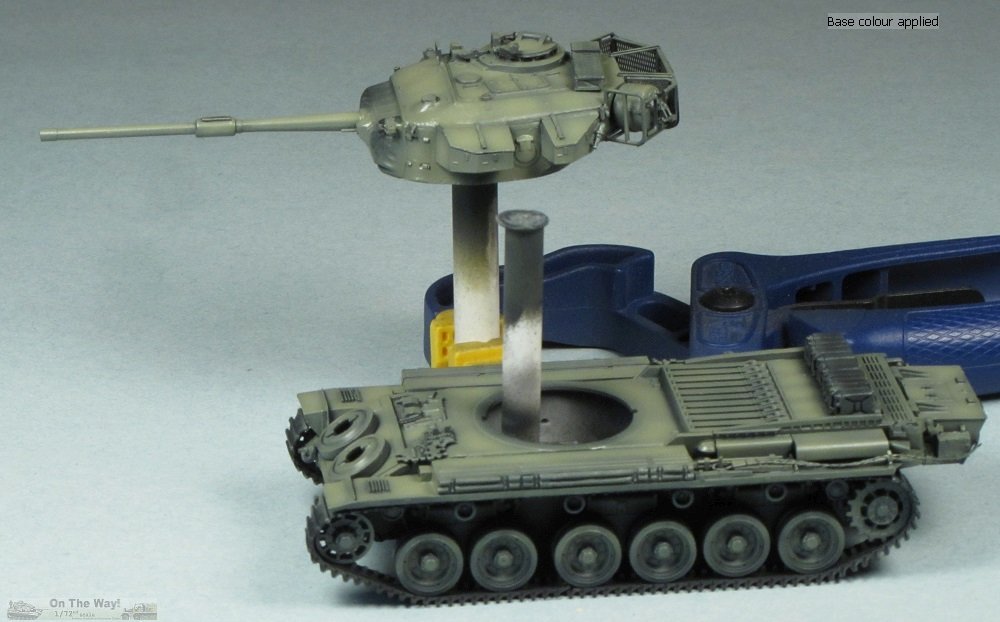
ACE recommends priming the wheels before adding the tracks, so I gave the suspension a coat of flat black enamel.
Turret
The turret shell is moulded in 5 pieces, offering good detail on all sides. I added some Mr. Surfacer for texture on the turret sides. I should have taken more
time to clean up the seams between the parts, and also between the top and bottom halves of the turret stowage bins.
I finally got some good use out of my Hold-and-Fold Bug tool folding the tiny episcope covers to shape, and despite launching a few onto the floor, I eventually
managed to get them all in place. It would have been nice for ACE to throw in a few spares to appease the carpet monster. The one piece that gave me the biggest
headache for assembly was the ring around the commander's cupola (D10). I found the thickness of the part made it clash with the photo-etched episcope covers. I
had to do a lot of scraping, filing and test fitting before I could get it in place.
One minor issue I noticed was a clash between the turret and the engine deck at certain angles (roughly when the gun is at 45 degrees to either side). This may
have been down to me assembling the engine deck wrong.
I added the coaxial 30-cal and ranging 50-cal barrels to the mantlet using hypodermic tubing, and added some lead foil detail to the mantlet cover. I used a small
bit in my Dremel to add some folds to the cover and then used a heavy coat of liquid cement to smooth out the finish. The kit is missing the mount for the spotlight
on the mantlet. I didn't have much in the way of clear reference photos on this, so I cobbled together something feasible from plastic strip and stuck it on.
The part of the kit I was dreading the most was the turret stowage basket, but it ended up going together well. The basic tubular framework is provided as 9 plastic
parts, to which are added 5 photo-etched parts. I took my time and assembled the plastic parts carefully with liquid cement. I ended up annealing the brass mesh over
a candle flame to take out some of the springiness, which made bending it to shape a little easier. The basket includes photo-etched bracket (P09/P10) for the
searchlight, however no searchlight is provided. I scratchbuilt one from Evergreen tube and scrap plastic, with a lead foil dust cover, then mounted the complete
assembly on the brackets.
I found fitting the basket interfered with the cable reel I'd already mounted on the turret. The instructions show the reel and basket both in place, but most photos
of the bin fully loaded look like the reel was removed, so that's what I did. Likewise, the spare track brackets (part D30) are shown fitted along with the basket,
but I suspect this would have interfered with stowing the searchlight, so I omitted the brackets, and relocated the spare track to the front hull.
I omitted the multi-part smoke discharger assemblies, and filled their mounting holes, leaving a raised strip that is evident in some photos. I carved away the
conduits to smoke dischargers moulded on the turret though I'm not sure if these were removed. The kit provides a two-piece assembly (parts E14/E15) to represent
the stowed 30-cal ammo cans and rack. The rack that holds the can is very faintly represented, so I scratchbuilt a new rack from thin strip. I also removed one of
the moulded 30-cal ammo cans and replaced it with a scratchbuilt AN/PRC-25 radio set.
The 30-cal MG has some nice detail, but seems a little on the large side. The pistol grip was indistinctly moulded on my example, so I replaced it with one from the
spares box, and replaced the overly thick barrel cooling jacket with a resin one (actually a shortened 50-cal barrel from Aires). The machine gun mount (G14) is a
bit crude, and doesn't fit very well around the body of the gun.
The kit was lacking UK-style fire extinguishers for the rear of the turret stowage bins, and I had foolishly given away the only ones from my spares box, so I had to
spend an hour or so scratchbuilding new ones. I added the sunshade mounts to the lifting eyes from short lengths of insulation stripped from wire.
The kit provides a photo-etched piece for the guard over the gunner's sight. I found this difficult to bend to the correct shape, plus I knocked it off after
installing it, so I ended up scratchbuilding a replacement from thin plastic strip.


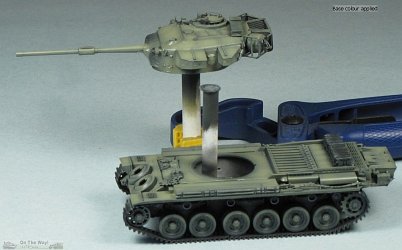
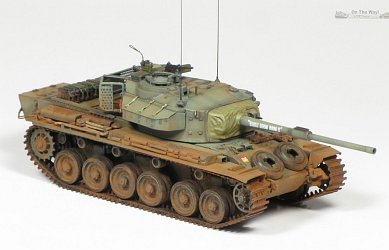
Paint
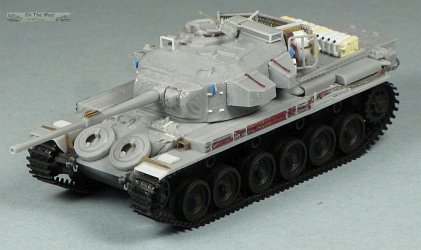
Painting started with a overall primer coat of black, followed by Testors Model Master Faded Olive Drab gradually built up in thin layers. This was then
followed by even thinner layers of a mix of faded OD lightened with radome tan, gradually increasing the proportion of tan in subsequent layers.
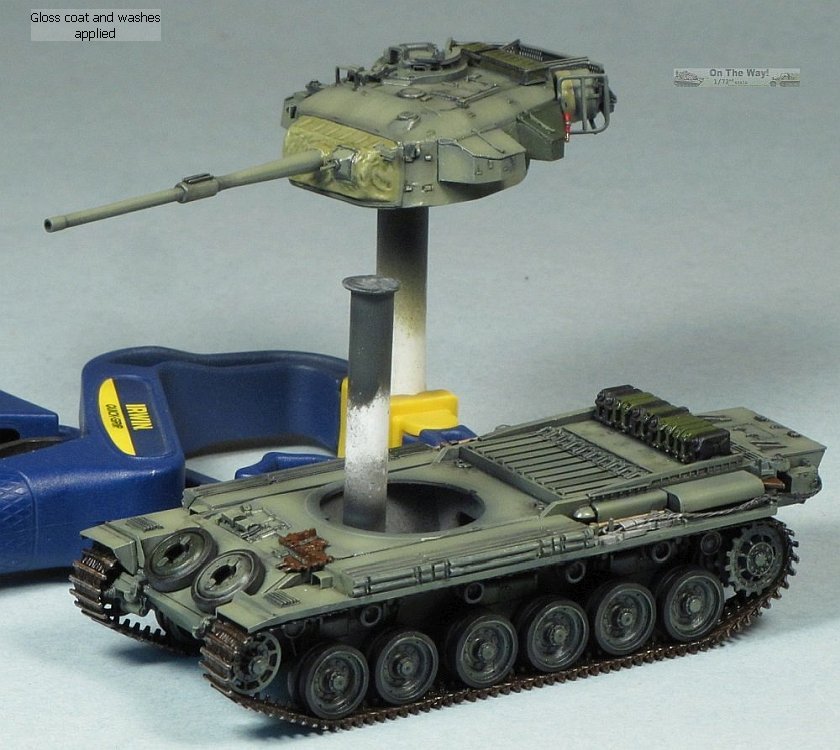
I brush painted the tracks, roadwheel rims, mantlet cover and fire extinguishers. Due to wear and tear, RAAC Centurions in Vietnam often had replacement
parts sent from Australia still finished in Deep Bronze Green, so I painted one of the turret bins, one of the spare roadwheels and one of the fender bins
in that colour.
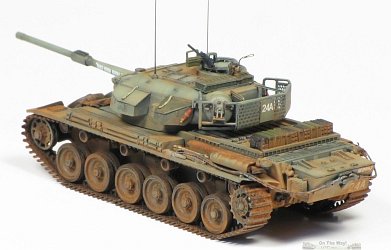
Decals
ACE provides a small sheet of decals with 3 options, identified as:
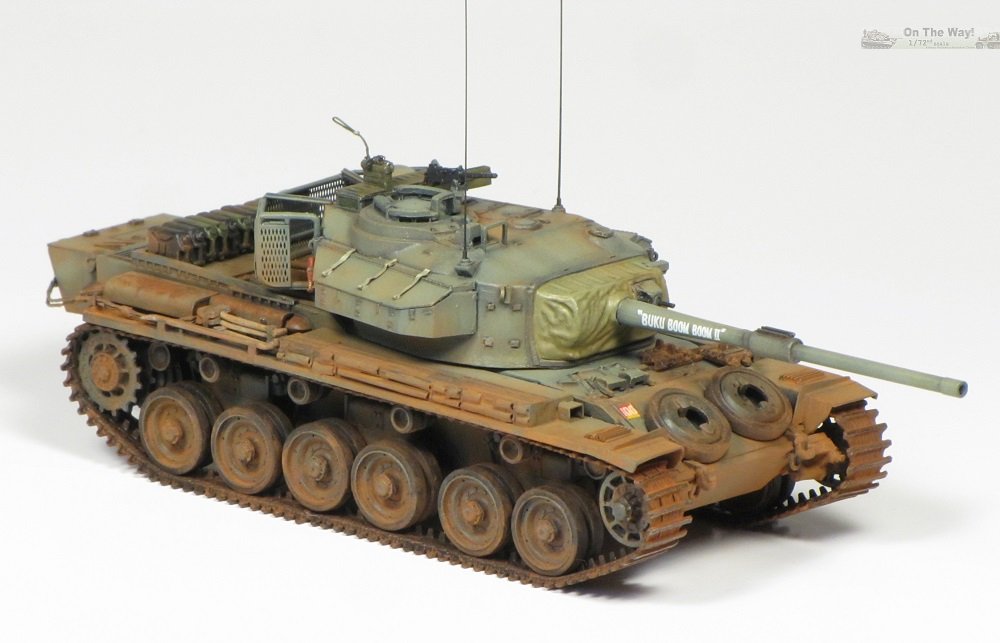
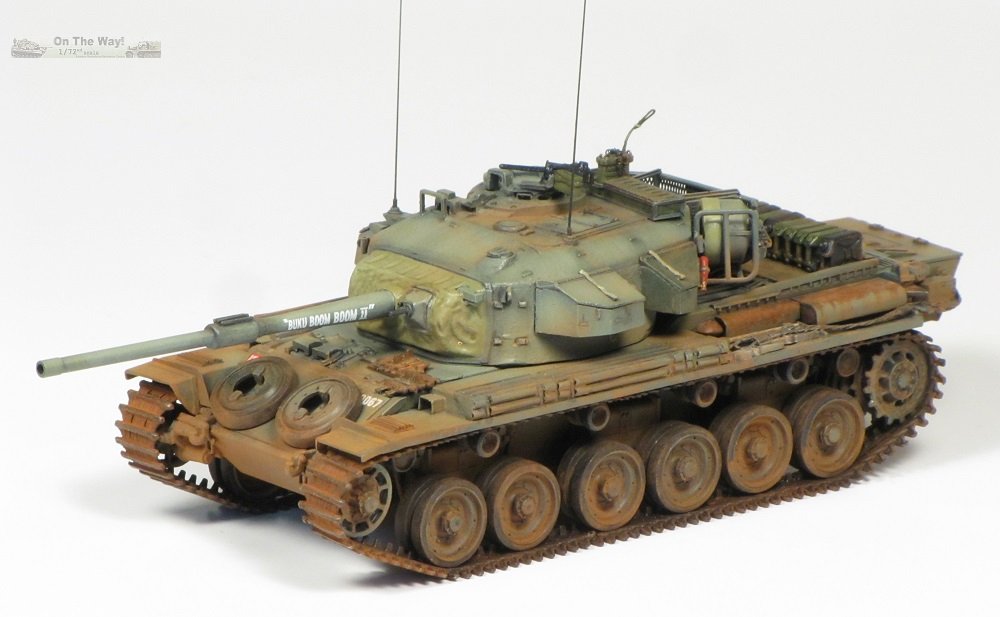
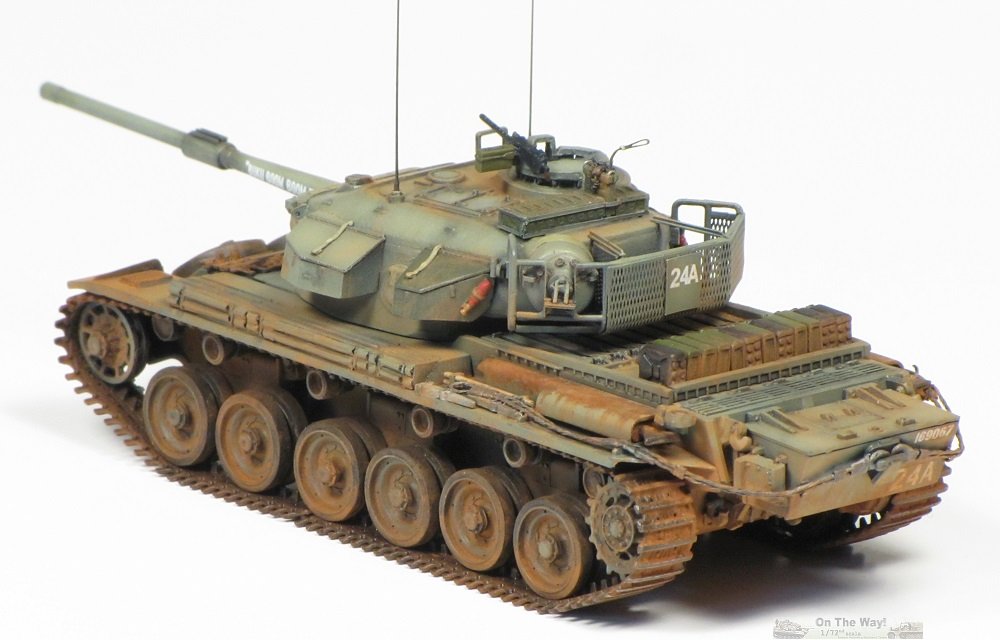
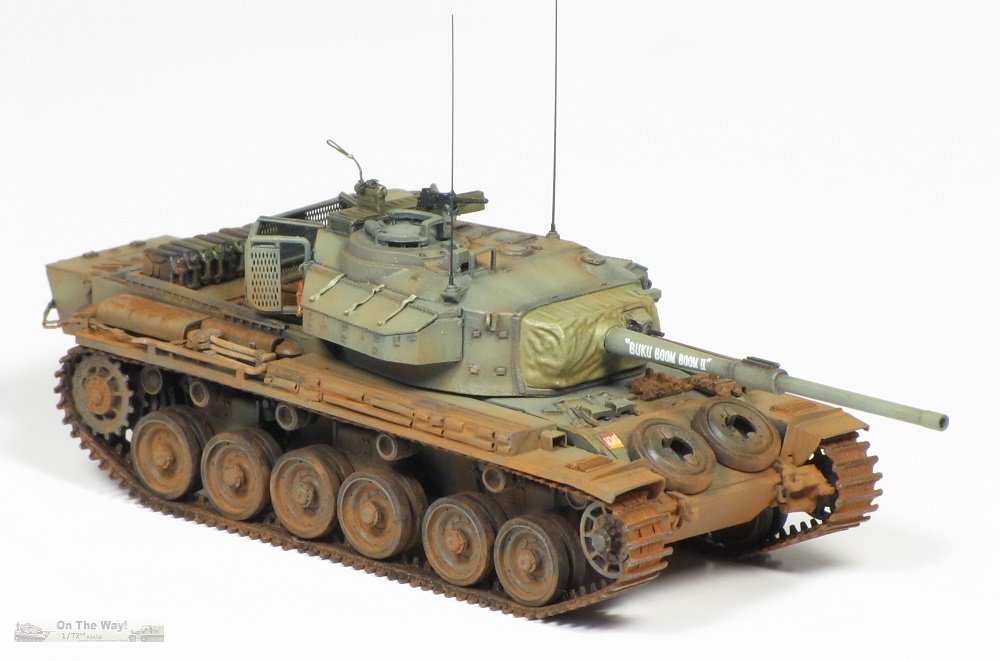
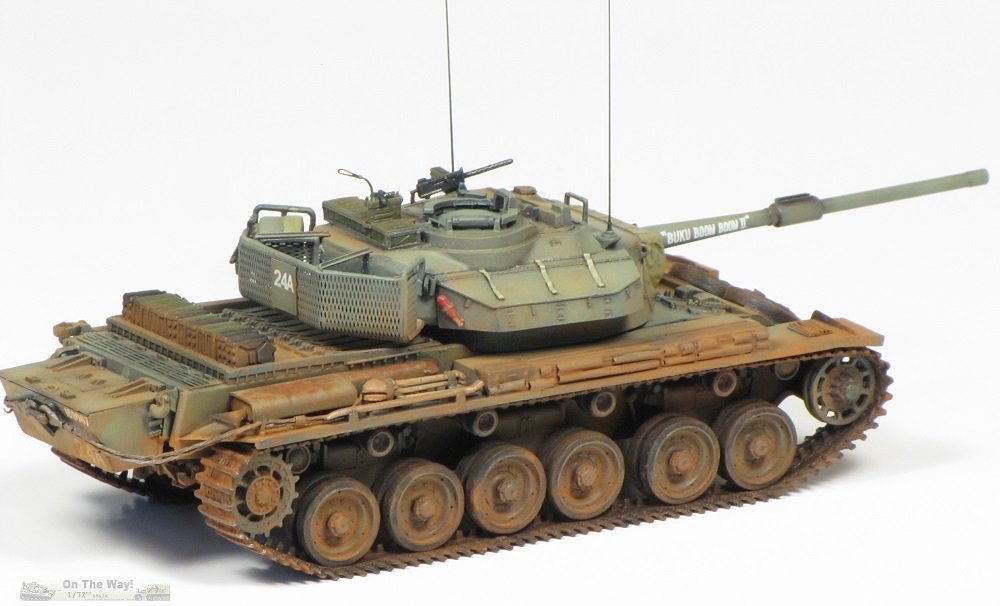
- Centurion Mk. 5/1 (Australia) C-Squadron, CS 24A, Troop Sergeant, 4 Troop, "B" Squadron, Vietnam, 1971 (ARN 169067, "Buku Boom Boom II")
- Centurion Mk. 5/1 (Australia) C-Squadron, 1stArmoured Regiment, Vietnam, 1971 (ARN 169039 "Pussy Eater")
- Centurion Mk.5LR (upgraded from Mk.2) C-Squadron of the Royal Hussars, Hong Kong, Mid 1960s
The decals are well printed, and went on well over a gloss coat. I chose option for my markings.
With the decals on, the final touch was a moderate application of Mig pigments Vietnam earth, concentrating on the lower hull and suspension.

Conclusions
I think this is a fantastic model, and applaud ACE for releasing it. It is definitely not a quick build, but will reward careful building with a
well detailed finished model. It would be great to have some stowage for the bin - I believe Real Models offers some printed ration boxes that would be
appropriate.
References
[1] The Evolution of the Australian Centurion in Vietnam by John Myszka
[2] Centurions - Final Australian configurations
[3] RAAC Centurion Mk 5/1 Walk Around on Prime Portal
[4] Armorama discussion regarding the use of plastic water cans on RAAC Centurions
Review sample purchased by the author.


Ace products are available at

|