|
Ace
|
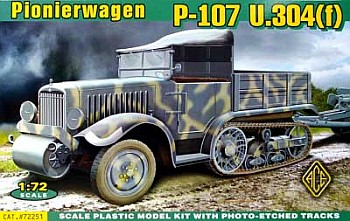
Pionierwagen P-107 U.304(f) |
|||
| Kit #: 72251 | Review by Neil Lyall - nlyall(at)bigpond.net.au | |||
|
Ace
|
Pionierwagen P-107 U.304(f) |
|||
| Kit #: 72251 | Review by Neil Lyall - nlyall(at)bigpond.net.au | |||
 |
|
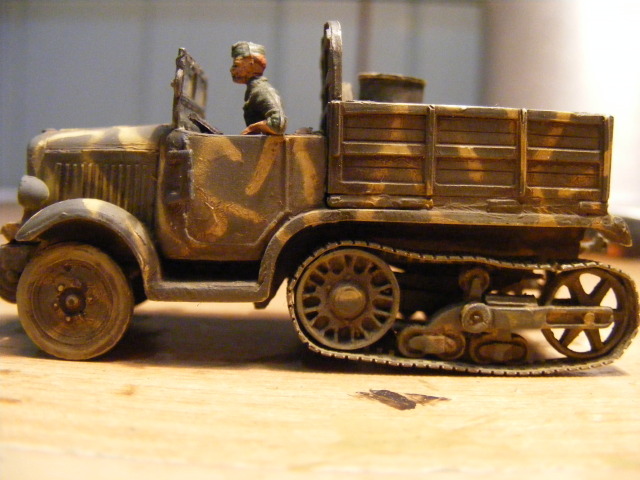
General Information The title of this kit indicates the version of this French halftrack that was impressed into German service after France was defeated in 1940. The French Army version of the vehicle (from before the fall of France) can also be constructed from this kit, the difference being two less parts.
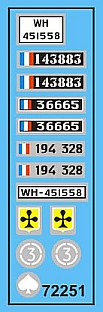
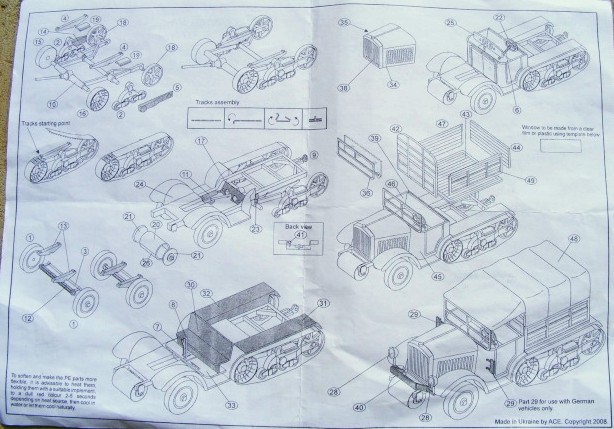
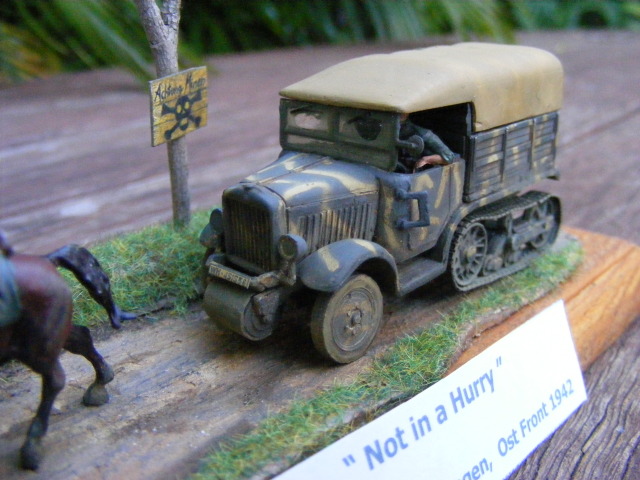
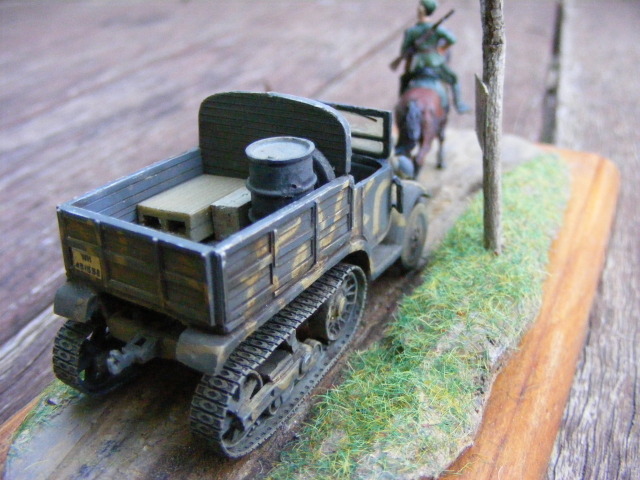
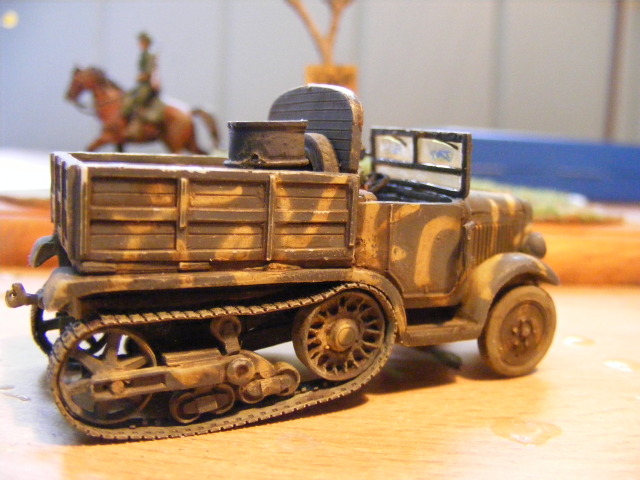
The Tracks & Wheel Assembly I find the Ace plastic melts very readily with the use of liquid glue, and needs at least two or three days to set hard. This means you need to use liquid glue carefully, to avoid accidentally disfiguring surfaces. I find the plastic bonds very firmly if given at least that long to set. If in doubt leave it for a week, to ensure maximum strength. This is important as the bogie assembly gets a lot of handing, and some light pressure when attaching the tracks, so it must be set hard, or you will find the wheels or other parts can weaken or drop off when handling or painting. Fine mould lines were around all the wheeled parts and these had to be carefully sanded flat. The PE tracks must be heated to red hot for a count of five seconds before you try to bend them to shape and fit them. The instructions advise this. I've tried fitting without the pre-heating and regretted it. If not pre-heated the tracks tend to kink and can then be almost impossible to get the kink out. Save yourself a lot of time and frustration and pre-heat them, as this softens the metal and makes it very much easier to bend and make smooth curves, and it takes the 'springiness' out of them. The tracks in this kit are double thickness, and as a result look quite good. The external face of the track (which is finely detailed) is one piece. The internal face of the track is two half widths, pre-attached to to each side of the external face which you simply bend and fold inwards 180 degrees, to create the double thickness. The guide teeth are only moulded where they can be seen - and need to be stood up with a sharply pointed knife blade, which is quite easy, though you may need a magnifier to help as they are quite tiny. I then wrapped the tracks around the sprocket and wheels with very little resistance. After minor adjustment and being sure they looked and sat right, I brushed on liquid superglue to the sprockets and wheels and applied light pressure for a few seconds to let it bond, and then added slight dips in the top edge of the track. This was a mistake. The tracks in real life were much like large rubber bands, they did not dip the way metal link tracks do. Once again refer to photos on the web to see how the track should sit, the box art also illustrates this well. Test the track length carefully, you will need to cut off or overlap one or two links to get the tracks looking tight. When fitting the completed half track assembly to the chassis, it resulted in a nose down look, which is wrong. I think I glued two parts in slightly the wrong position (2 parts numbered 23, which jutted below the chassis and caused the half track assembly to sit wrong when put in place). As these parts are on the underside and not visible I sanded them back. I believe the error may have been avoidable, if I had studied reference photos more carefully when assembling, to familiarise myself with the shape angles and positioning of the caterpillar tracks, and the front and rear sprockets, relative to each other. The instructions could have been a little clearer with the fitting of these also. The box art and instructions help, but you really need a good flat side view and rear three quarter view to ensure you have built and attached the track assembly so it looks right, or even better to refer to as you build it. The web has a lot of photos and diagrams of these vehicles. Chassis and Body Chassis construction was next. When fitting the mudgards that cover the track, some sanding was needed as they stuck out too far. Also where the mudguards joined the chassis just rear of the cab, there was a slight gap that needed a little filler and sanding. As it turned out the truck body covered most of this join, though the small gap on the outer edge would still have been visible, so it was worth the small amount of effort. The roller on the front was not perfectly round, so I filled and sanded it back too. The radiator had a slight cast line on top that also needed sanding back. The rear cab wall (between the driver's seat and the truck body) needed sanding also as it sat a little too high, when compared to the instructions and box art. Steering wheel and dashboard also needed careful trimming and sanding. The rear tailgate was also marginally too wide and needed a little sanding to fit exactly. I've detailed a lot above, but in all, the filling and sanding did not take long. The tarpaulin canopy is optional. It's very rare to get a really great looking canopy moulded in plastic, and this one is no exception. It's passable. Best result is to make your own canopy bars and canopy, but this can wait for another day. The instructions have the spare wheel crossed out, which seems odd, as a spare wheel is always a must. I placed the spare in the back tray, standing it up against the back wall. Photos of the artillery tractor version show the spare wheel attached to the very back of the vehicle, and one photo even has the spare on the cab roof. I'm also of the opinion that one headlight is fractionally larger than the other. Not sure if this is intended or an oversight, (or its just my eyes that have the problem). No window glass is supplied, but a template is provided. I made the front window glass with liquid Model Master Window Maker. Windscreen wipers were cut from a 3 inch house paintbrush bristle, and affixed with the Window Maker. As with all limited production kits you need to take a bit care removing the more delicate pieces from the sprues, and take care when cutting and sanding, as the plastic is not as hard as some of the other Western European & Asian manufacturer's kits. Painting Everyone has their own preferred paint types and methods. For this kit (and nearly all my kits) I spray with very thinned enamel paint, at least for the base paint. As my paint mix is mainly turpentine, it can act as a solvent, so I don't paint till at least a week after I have finished assembly, or preferably two weeks, to ensure the parts have fully dried and bonded. I find even tiny detail won't loosen if its left to set hard before painting. First coat was Humbrol Yellow 83. After a few days to let it dry, I then used Blu Tack, rolled into long thin 'snakes' and carefully pressed them to the model in the desired pattern. I then oversprayed the whole model with Humbrol 77 grey. When dry, I removed the Blu Tack which left the base coat yellow in place, as irregular camouflage stripes. I then used Raw Umber diluted in turps to highlight detail using an 00 paintbrush and to add some grime. I lightly drybrushed the half track assembly with light brown enamel, and then very lightly sprayed the underneath of the vehicle with very diluted light brown enamel, and also oversprayed a minimal amount of this on the lower sides of the vehicle. Then used two semi circles cut from the sticky edge of a Post It note to mask the track of the window wipers on the windscreen glass, then oversprayed the windscreen to make it look grimy also. Conclusion I don't measure up my models so can't comment on the accuracy of the dimensions of this one. It looks to be a good representation. Compared to many Eastern European kits, this one goes together with very little fuss, provided you are prepared to do a small amount of clean up and sanding of parts, and anneal the tracks before attempting to fix them. I also strongly suggest you use the web to check photo references of this vehicle when constructing the half track assembly to ensure you get it right. A flat side view and a rear three quarter view will assist. I made avoidable errors by attaching tracks that were too long, and then sagging them, which looked great, but was incompatible with the reality, as these vehicles had virtually no track sag. This was hard to undo (due to my use of superglue). I also attached the halftrack assembly to the chassis without referring to photos, resulting in a less than perfect angle and positioning, which I was able to rectify, after receiving comments alerting me to this fact. Don't let my mistakes deter you, if you like the look of this vehicle, with moderate modelling ability, you can avoid my errors, and build this kit into a neat little model.
|
| Back to Ace Kit List | Back to Construction Reviews |
Article Last Updated: 02 June 2009 |
Back to Home Page |