![]()
 |
ACE BRDM-1 with Tankograd BRDM Wheels |
|||
| ACE Kit #72117; Tankograd #72006 | Review by Doug Chaltry | |||
 |
| I
really don't know what took me so long to finish building
this model. Alexey at ACE Models
sent this kit to me for review over 20 years ago. At that time, I was spending
almost all of my free time writing kit previews for this
website, so I promised any manufacturer who sent me
review items that I would write an in-box preview as soon
as possible, but made no commitment as to when I could
write a construction review (see this
link for the kit preview). But in the case of this model, I
actually began building it soon after previewing it. At
that time, I had recently built the resin BRDM-1 from
ARMO, and when comparing the two kits, this ACE kit
proved to be the far superior model. Its detail is really
quite well done, particularly for a limited-run kit. I
was still riding high on my interest in the BRDM series
of vehicles, so I quickly started construction on this
kit. I assembled the hull, and spent a lot of time
filling gaps and squaring corners. But then I must have
gotten distracted by something, because the kit was set
aside, only to finally be resuscitated almost 25 years
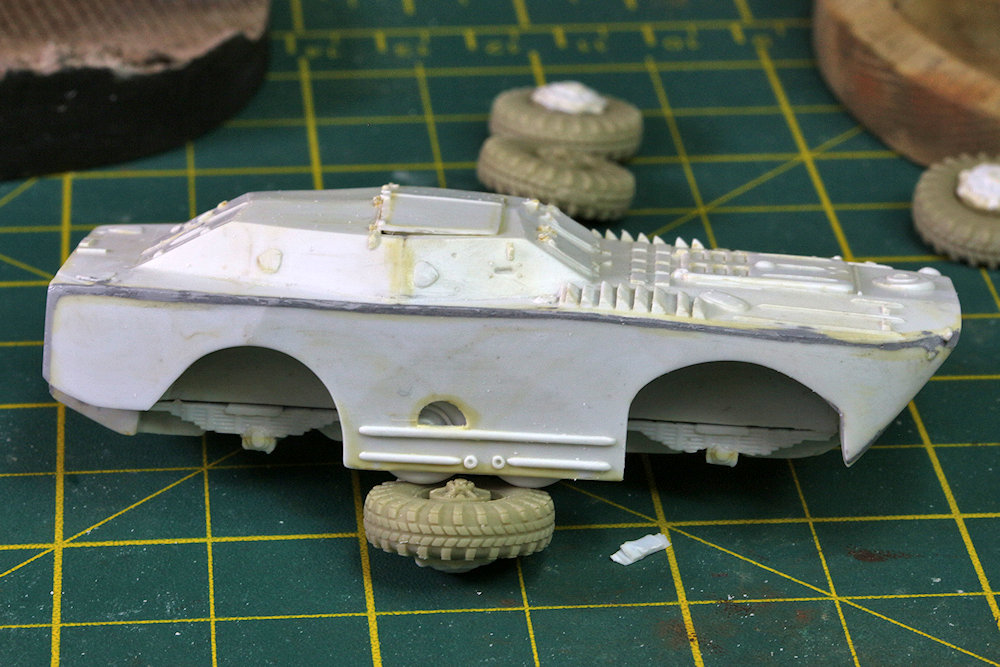
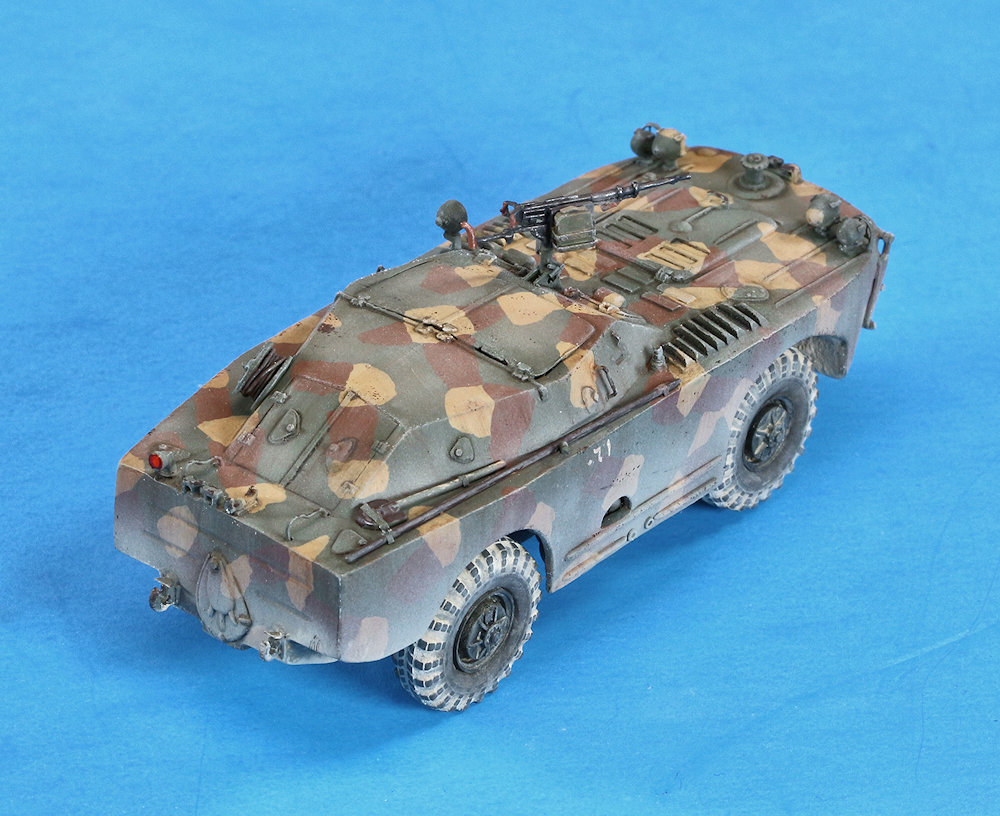
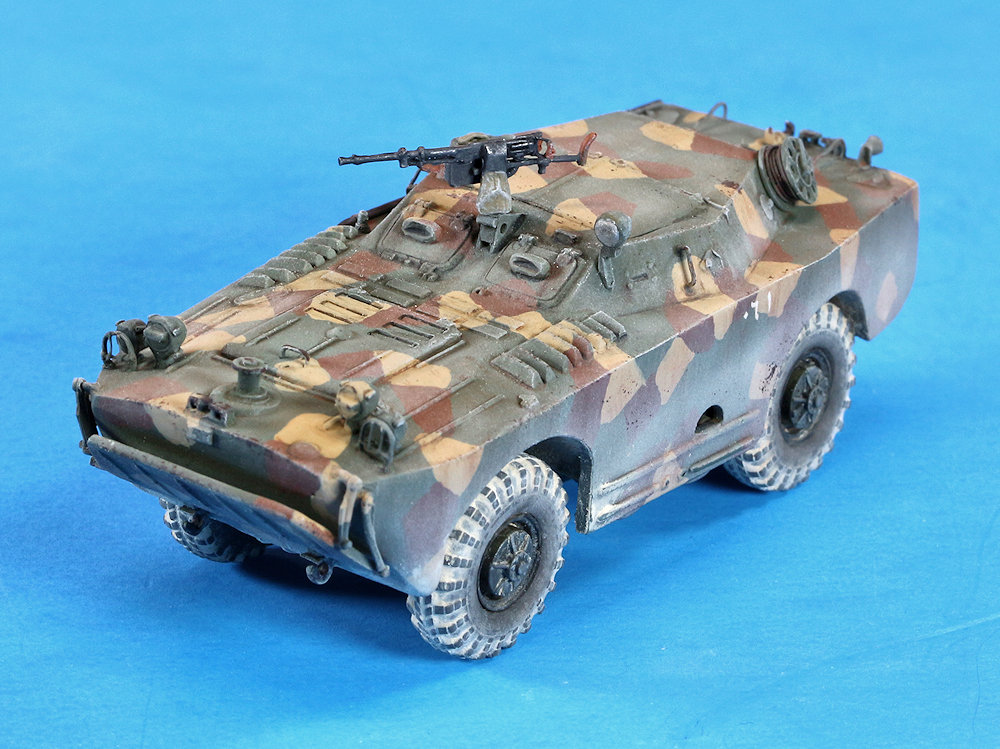
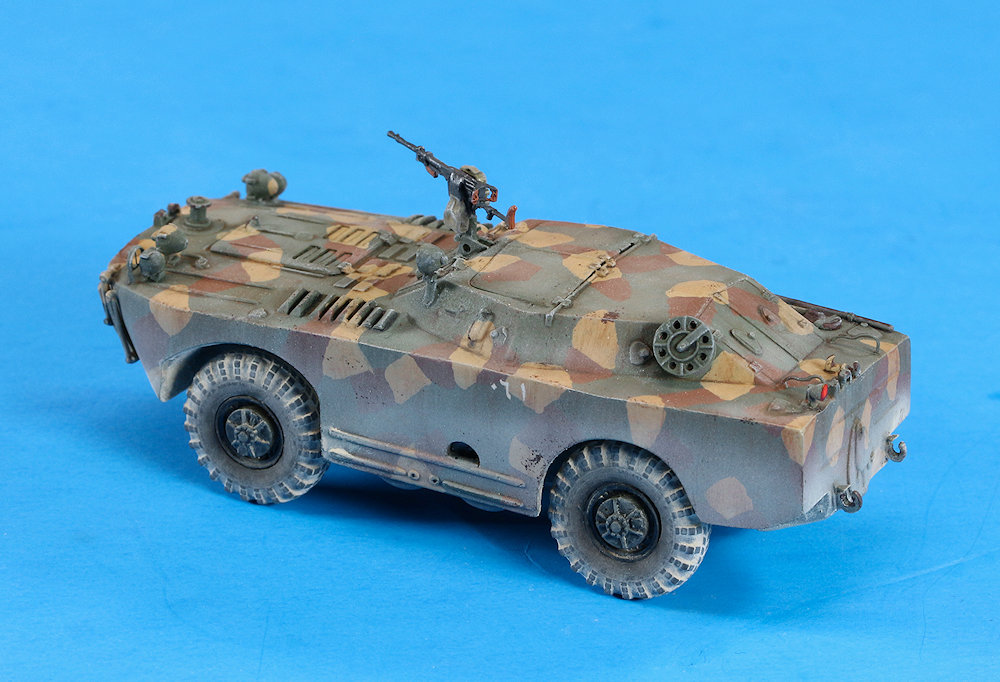
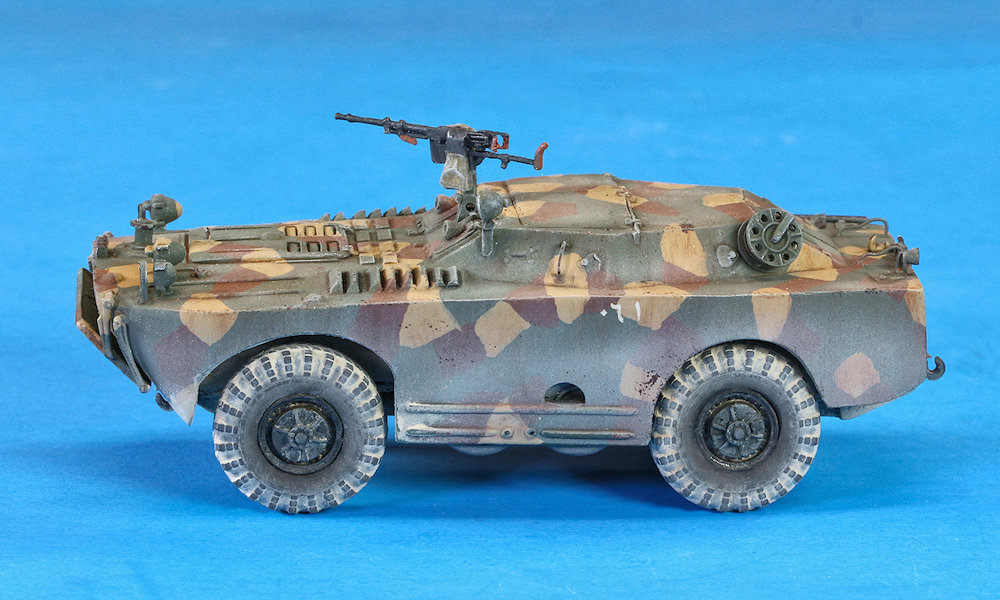
later. I have seen several reviews of the model over the years, and with few exceptions, the builders all complained about what a terrible kit it is. I won't sugar-coat anything; yes, this is a limited-run kit with all of the trials that go along with such, but considering the kit's accuracy and its high level of detail, not to mention that it's the only kit of the BRDM-1 to have ever been released in plastic, I think such complaints are unfair. If you buy a limited-run kit, then be prepared to build a limited-run kit. I have no complaints about the time spent cleaning up roughly molded parts and scratch-building replacements for some of the more delicate details. This was one of ACE's earliest releases; I think that at one point the kit may have been re-released with rubber tires to replace the original plastic ones, but I can't recall for certain. Regardless, it is long out of production and no longer in the ACE catalogue. For me, the weakest part of the kit were the tires. Not only do the wheels have too small of a diameter, but the tread pattern is nonexistant on the surface due to molding limitations. However, I had bought a set of replacement wheels from Tankograd that are labeled for both the BRDM-1 and BRDM-2. But my research has shown that the BRDM-2 tires had a slightly larger diameter than the BRDM-1, and the size of the resin wheels was more appropriate for the larger vehicle. Thus, the wheels are slightly too large for this model, though it's not really apparent. I did have to enlarge the front wheel well openings a small amount, but I would have done that anyway, as the shape was just a little bit off. I have no idea why, but I did not take photos of the Tankograd resin wheels during construction, but you can see them in the following photo:
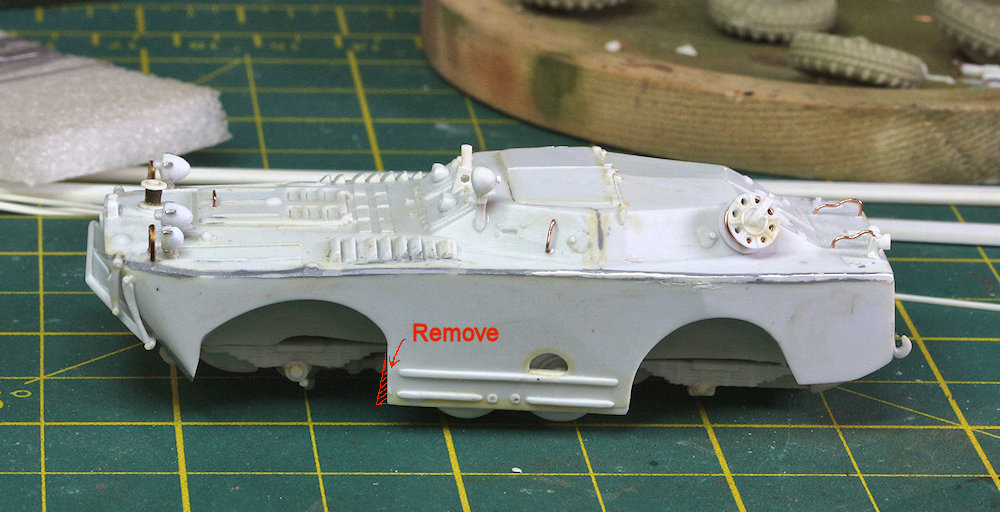
The Tankograd wheels are really quite beautiful. The wheel hubs come separate from the tires, and I had to do a little bit of carving to enlarge the opening in the tires so that the hubs could fit. But otherwise, they have a gorgeous tread pattern, and the wheel hubs are very finely detailed. However, they were not designed for this specific kit, so that in order to make them fit properly onto the axles in the wheel wells, I glued the plastic kit parts #4 to the insides of the wheel hubs, as can be seen on the wheels in the background in the above photo. I do not know if these wheels are still available for purchase. I cannot find a website for Tankograd, and Tracks & Troops no longer has this item listed in their catalogue. In the following photo you can see the extensive puttying I had to do to make all of the hull edges and corner square. I used several different putties over the years, hence the different colors. The photo also shows an area of the hull side to the rear of the front wheel well that had excess material on it, forming an angle that needed to be removed so that it was a straight line perpendicular to the ground. Removing this wedge of plastic also helped the slightly overlarge Tankograd wheels fit better into the wheel well. The hinged, mechanical arms that swing the front water splash plate upwards were much too long to attach properly, but were easy enough to shorten.
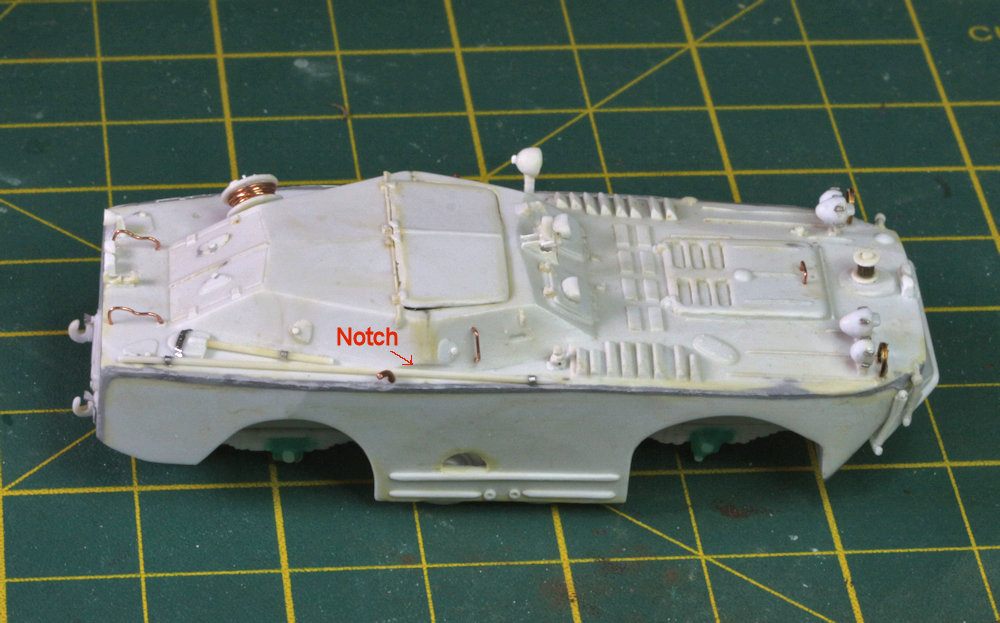
The following photo shows a small correction to make to the right side (only) of the fighting compartment. When I was trying to attach the long crowbar to the hull deck, it wouldn't fit alongside the fighting compartment. I looked at walk-around photos online and saw that there was a small notch cut out of the corner of the fighting compartment that allowed space for the crowbar (and a tow cable, not added here) to fit alongside the hull. It was quick work with a file and sandpaper to craft this notch so that everything then fit properly.
You can see in these pre-construction photos that I scratch-built a number of the smaller details, such as the headlight brush guards, the winch guides on the nose and rear of the hull, the machinegun mount, the crowbar, and a couple other items. Unfortunately, it's hard to make out what I scratched because the styrene plastic I used was the same color as the kit parts. The forward and rear towhooks in the kit have the wrong shape for this vehicle. Since I didn't have any replacements, I used a file and sandpaper in an attempt to reshape the kit parts, but was not entirely successful. Also, in retrospect, I attached them upside down. Here is a simple tip: when having to clean up very small parts, too small to adequately hold in one's fingers while grinding and sanding, I find it easier to clip a section of the sprue, leaving the part still attached, so that I can hang on to a larger piece of plastic while doing most of the clean-up work. When finished, I snip it off the sprue, clean that last little bit of sprue attachment point, and voilà! For some parts like headlights, I finish sanding off the sprue attachement after the part is already attached to the hull, if the attachment is strong enough (as with super glue).
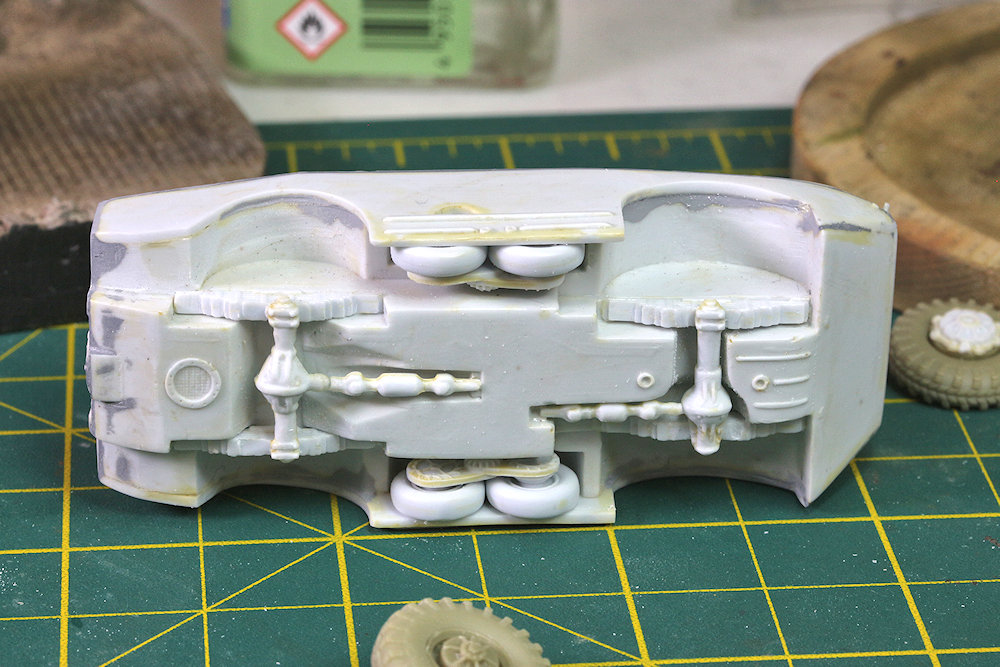
I have no idea what the underside of this vehicle should look like; I imagine it's something like this. Suffice it to say, there was a bit of grinding and sanding to locate the axles in the proper place within the wheel wells. Unfotunately, my eyeball was not good enough to get the front and rear axles level with each other. The completed model looks as though the rear end is jacked up a small amount. It's not too terrible, but it was a rookie mistake nonetheless.
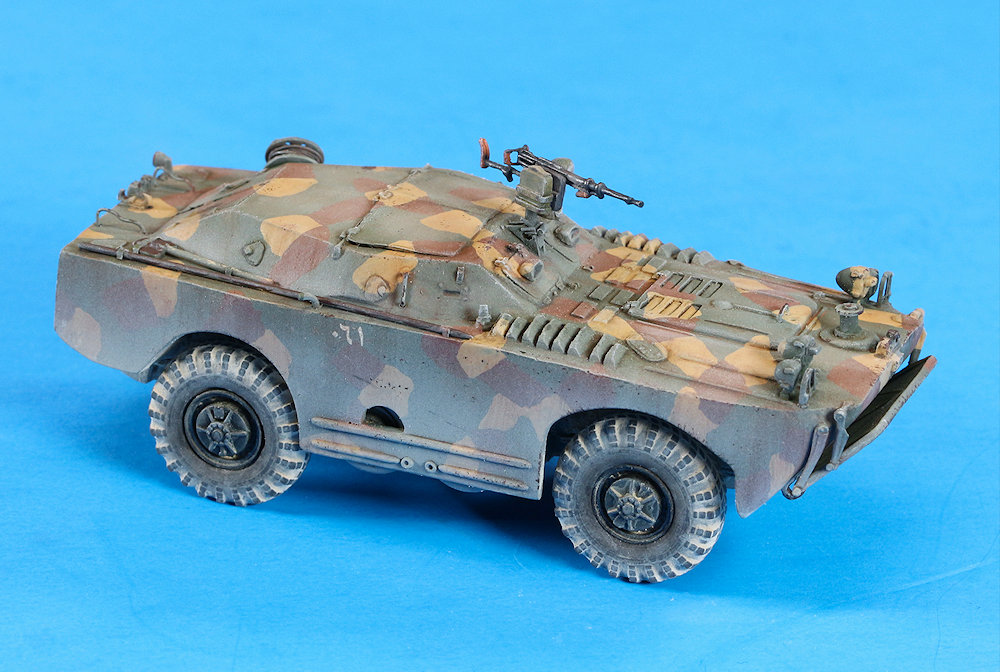
In the Preview for this kit, I had stated that the four auxiliary wheels in the center of the hull could be posed retracted (as pictured) or extended. I'm not sure why I said that because to pose them extended would take a bit of carving and resculpting to accomplish. But it could be done if one wanted it badly enough. I will admit here to not putting a lot of effort into cleaning up the underside parts, as I plan to secure this vehicle to a display base at some point, so the undercarriage won't be visible. And here is where we get to my disappointment in this model: my painting. I painted the model with ATOM paints from AMMO by MIG. I had picked this particular paint scheme (Syrian, 1973 Arab-Israeli War) because I was getting tired of painting plain green vehicles. But in retrospect, a simple monocolor paint job would have shown off all the details on the model to much better advantage. Now they get lost in the disruptive camouflage scheme (which I guess means that the camo works...?) But where I really went wrong was that I hand-painted the tan and brown camouflage patches, rather than masking and airbrushing them. Although the ATOM paints are formulated for brush painting as well as airbrushing, hand-painting simply lays down too thick of a layer of paint that never completely self-levels even when dry. It is definitely noticable on the completed model, even with all the extensive weathering that I did, and in fact, it made the weathering more difficult at times, because the thick camouflage paint grabbed onto the various weathering products differently than did the nice and smooth airbrushed green base coat. So that's a lesson learned for me: always mask the camo schemes for airbrushing.
In the end, I am satisfied with the final model, though not thrilled with it. The weathering does manage to hide some of the weakness of the hand-painted camouflage, but I guess that I'm most disappointed because I put a lot of effort into super-detailing the model, and it's very hard to see all that detail with such a cluttered paint scheme. Oh well. As always, I have learned a lot of lessons while building this, and got a lot of practice with new building techniques (I finally got a punch and die set!!) and weathering techniques. Some of them worked very well, others, not so much, which is just as much a lesson as the ones that worked well. If Alexey is reading this review, I'd like to thank you once again for providing the review kit. I had a lot of fun building it. And I would suggest to you that you consider updating this model with your "new" Digital Design technology and re-releasing a new, more refined version of it. Considering that there still are no alternative kits available to us in plastic, perhaps you might find a decent market for it. |
| Back
to ACE Kit List Back to Tankograd Kit List |
Back to Construction Reviews Back to Home Page |
| Article Last Updated: 19 January 2026 |