|
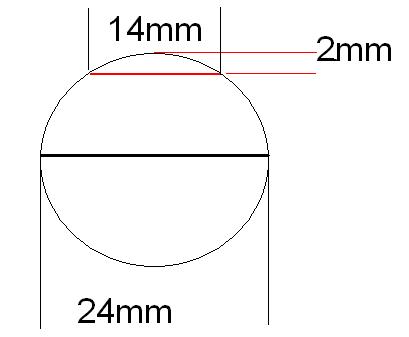
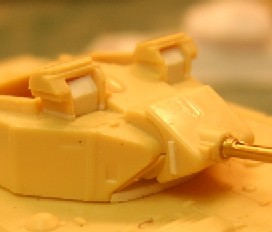
Turret corrections Our attention now turns to the turret. Although the turret is mostly correct in shape, the main changes are around the front and gun manlet, adding weak or missing detail. The first missing detail to be added is a small lip to the front of the turret. When I originally wrote this article I thought that the front lip extended the whole length of the turret front, but it doesn't. The lip stops short of going the full width. The easiest way to make this is to cut a 24mm circle measure 2mm in from the circumference, draw a straight line and cut, the width should be 14mm.
This is then glued to the bottom section of the turret in the centre. The curve of the lip then needs beveling inwards towards the turret on the top. Normally if the plastic is cut with a compass cutter then it usually leaves a slight bevel anyway and this only needs expanding. Next the gun mantlet needs widening. I did this by gluing a piece of 0.5mm card to either sid. Once dry I then cut it to shape and blended it in to the rest of the mantlet. Next two 3mm X 0.5mm strips of plastic need to be glued vertically, one either side, about 3mm from the front. In front of these add a piece of plastic rod of 0.5mm length.
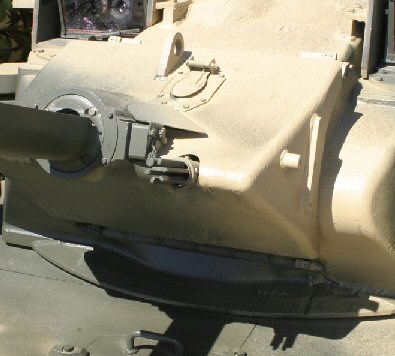
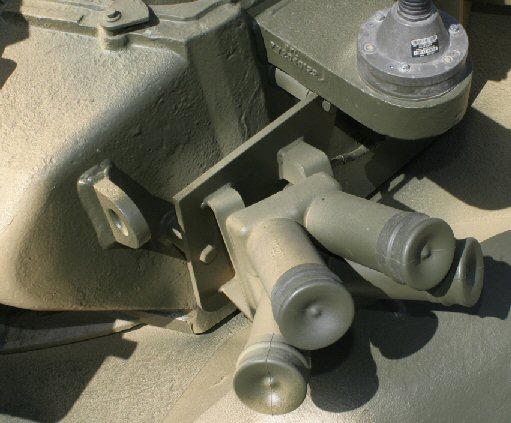
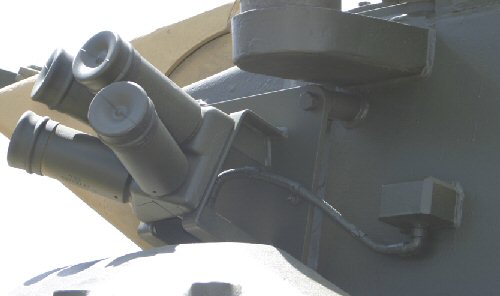
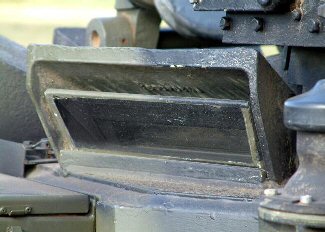
Moving to the front, the lifting eye needs replacing and at the same time you can, if you wish, rebuild the ejection port and deflector. The mantlet can now be added to the turret and the whole thing glued together. Moving to the turret sides, a lifting eye needs to be added in front of the smoke discharges. It is easier to drill the hole first and then cut and shape the eye. Make 4 of these as the other two need to be added to the rear. Moving back, the complete smoke discharger assembly needs throwing away and rebuilding from scratch. The discharges are mounted via 2 U-shaped brackets cut at an angle to a square-ish plate which in turn is mounted via two rods at an angle to the turret. I initially cheated and used the CMSC ones from one of their various conversions, but still had to make the mounting plate. However the whole thing can be done from scratch with a bit of trial and error on the angles. There are some very good walkarounds to help with this, the best one being at Prime Portal, by Dan Hay, which is of a BATUS vehicle.
Immediately behind and above the smoke discharges are the antennae mounts. The kit supplied ones are adequate. The CMSC replacements are only slightly better. Below the antenna mounts a small rectangle of plastic strip needs to be added and if feeling exceptionally brave, the wire for the smoke discharges emanates from here.
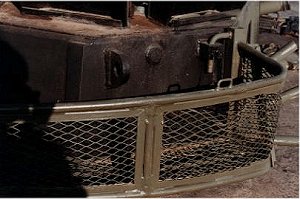
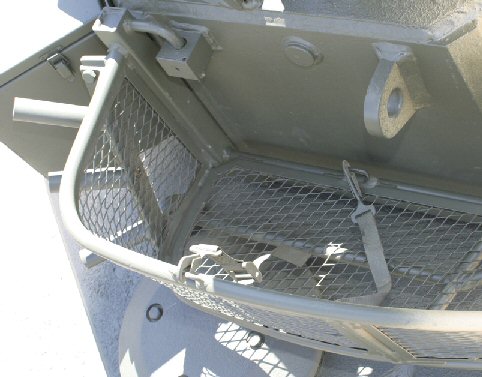
Moving further toward the rear is the turret basket. Although the kit one is the correct shape the mesh alignment is wrong. It should be diagonal and not vertical. The Extratech PE set corrects the mesh alignment, but it is too flat and could do with some enhancing. I used 0.33mm brass rod to add dimension to the upper and lower loops of the basket. I first bent 2 pieces to the correct shape using the kit basket as a template, one for the upper edge and one for the lower. I glued a piece of strip plastic either side vertically where the basket meets the turret. I then drilled holes top and bottom to accept the rod. Using the Extratech PE I then very carefully attached the rod to the basket around the rim and the lower edge, care being taken not to get glue on my fingers.
A small square of plastic then needs to be added inside the basket next to the 2 strips added earlier, then two small discs, and then the remaining 2 lifting eyes. To the outside of the basket where it meets the turret a set of cam pole holders need fixing. The two on the turret only have 3 positions and not the 4 as found on the hull. Now to the roof. The 7 fixed periscopes around the turret really need replacing, a tedious and fiddly job because of the shape, but well worth it. Better still if you have access to casting, then you really only need to make one and cast the others!
The periscope between the gunner and commander also needs to be either replaced or reshaped, as with the two hull roof periscopes. Next for correction is the main Raven or BGTI sights (depending on which vehicle you are making), but in any case the armoured covers are the same for both. The kit sights are too small in height, and need to be raised by 0.5mm at the same time. If the sights are to be built open then the optic section can be replaced, by removing the moulded on optics of the open sight in the kit and hollowing the mount out. The optics can now be replaced with a strip of 3mm by 2mm plastic cut at an angle at the top. A new cover will have to be made for the movable portion. By removing the locating lug on the turret and gluing 0.5mm to the bottom of the sight the altered sight will fit better. A small strip then needs to be glued directly in front of the sight between the sight and the moulded on turret detail.
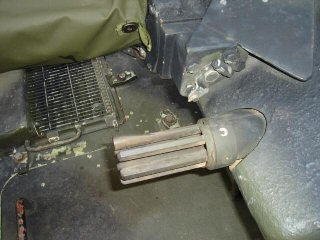
A strip of plastic needs to be attached behind the gun housing and then blended slightly to the turret roof. The final thing to do concerns the coaxial chain gun. The moulded one needs to be replaced with one made out of plastic strips. This is not easy and takes practice. With that done all that needs to be done is to attach the Rarden cannon if you can get hold of the brilliant PDI turned barrel. If not remember to drill out the kit barrel unless it has a cover on.
Back to Part 1: Building a Better Warrior |