Gran
|
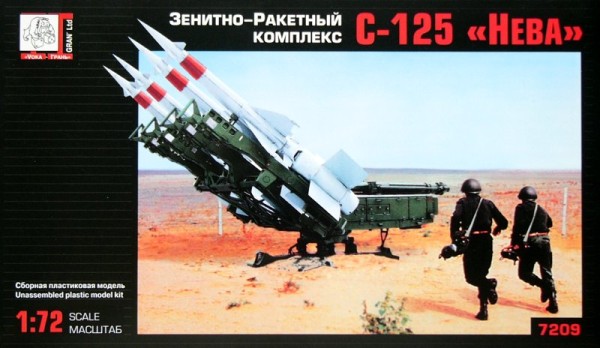
S-125 Neva |
|||
| Kit #: 7209 |
Review by
- Al Magnus
|
|||
Gran
|
S-125 Neva |
|||
| Kit #: 7209 |
Review by
- Al Magnus
|
|||
 |
|
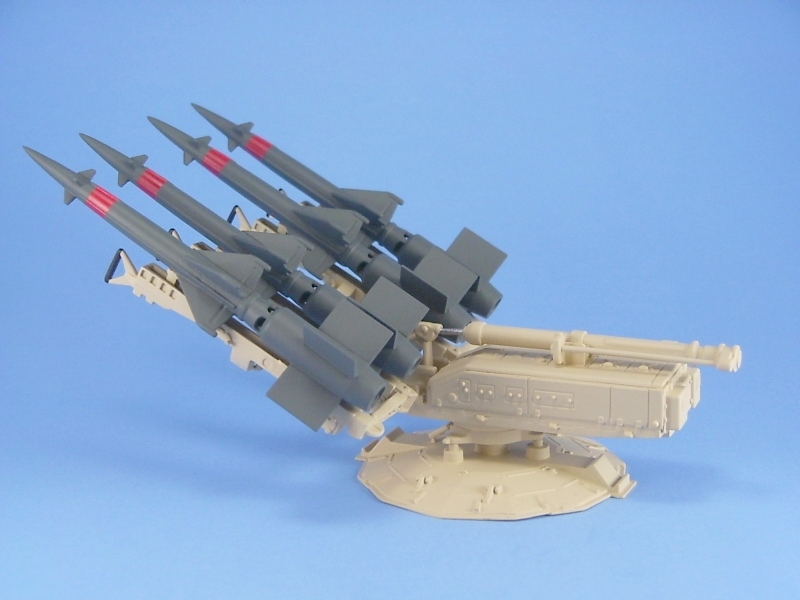
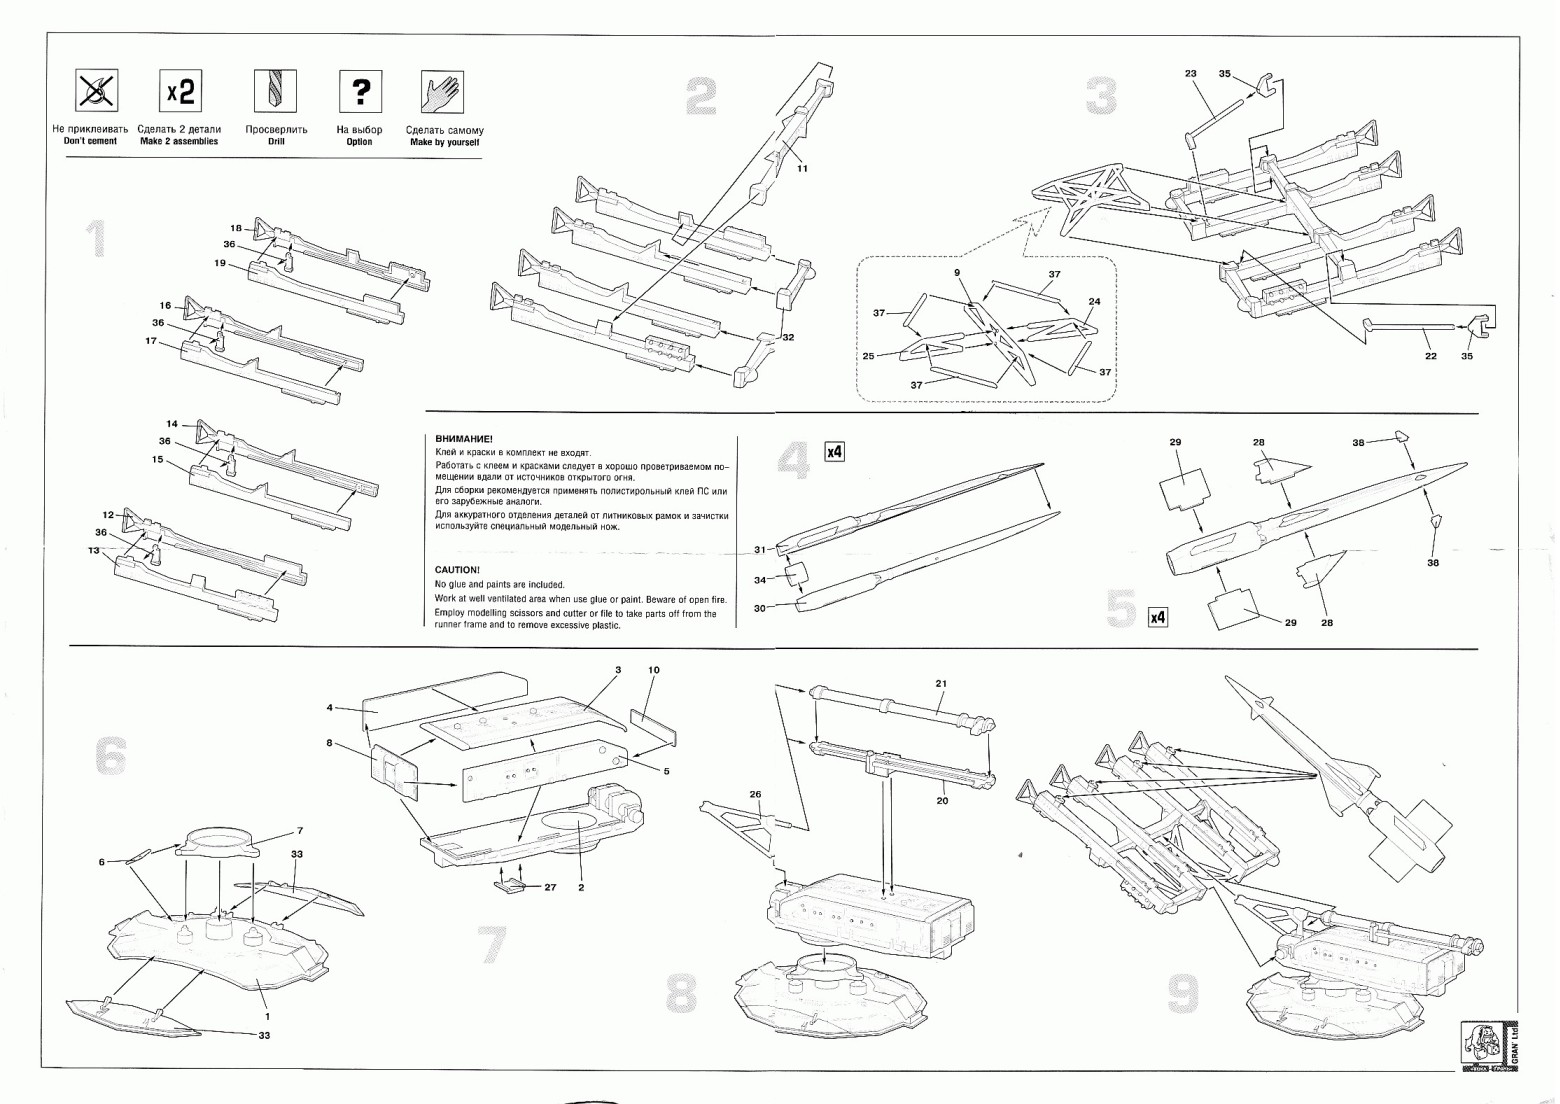
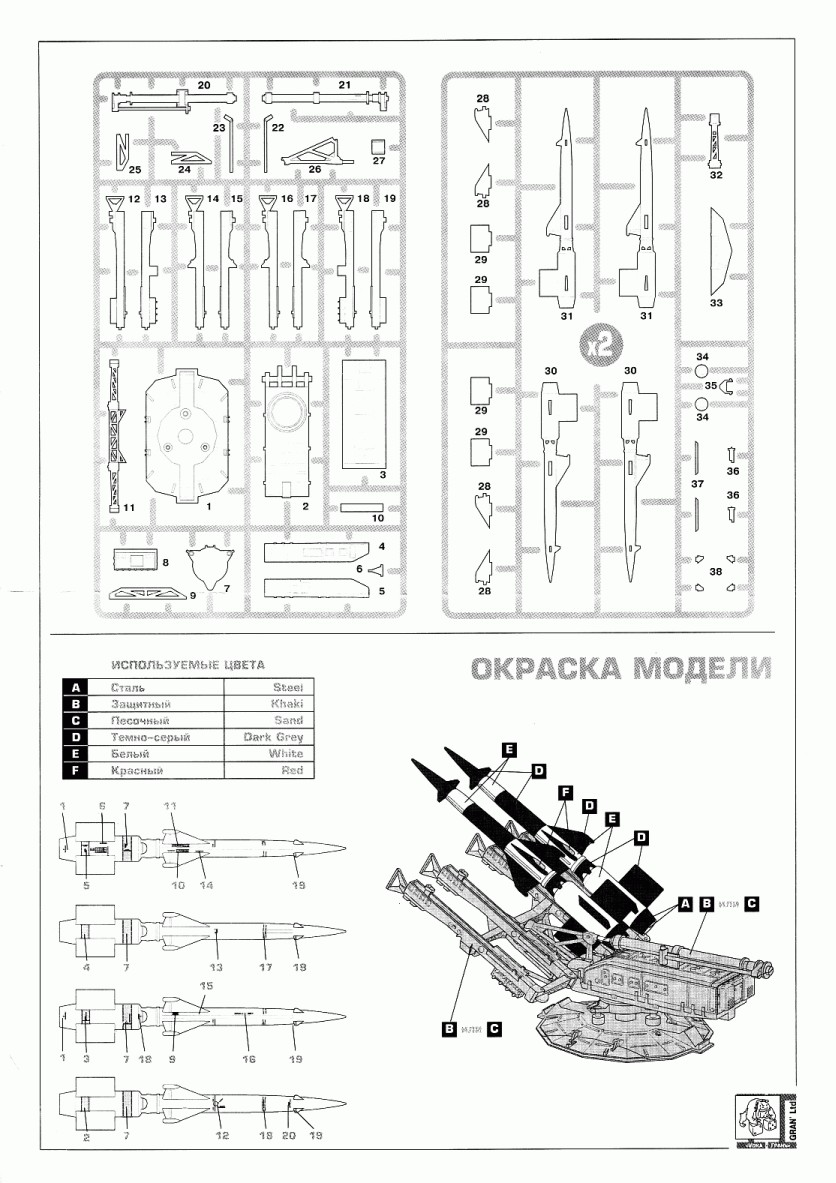
Contents consist of three sprues. There are two sprues, each with 25 translucent pieces molded in a fairly brittle plastic, and one sprue of 27 pieces molded in soft white plastic - giving a total of 77 parts altogether. A decal sheet is included and is printed by Begemot. They are glossy and well printed but the carrier film has a definite yellow tint to it similar to the yellowing you see on decal sheets that are decades old. Why are they so yellow, yet so tender in age? My guess is that the paper they were printed on has so much acid content that it is staining the carrier film. Hopefully it's not the result of Begemot being lazy and using inferior materials. As for the plastic parts, the disparity in quality between the sprue in white plastic versus the two translucent sprues leads me to believe they must be from two different sources. The two sprues of translucent parts (sprue on the right of the parts diagram below) are reasonably well molded, with little flash, though there are some fine striations on some parts such as the booster fins (parts 29, 30 & 31). The white sprue (on the left side of the parts diagram below) reminds me of what typically produced by Amodel. All the parts have prominent mold lines, plus quite a few pockmarks, striations and various bumps, lumps and nicks. Construction was broken down into 6 sub-assemblies: one each for the four rockets, one for the launcher and one for the launcher base. The missiles were the easiest part of the build. As mentioned above the parts fit quite well. The tops of the booster sections are see-through, so I cut out four plastic discs from some sheet to fill the openings. I also put a plastic tube in the rear of each sustainer portion to give some depth, though you can see next to nothing here once the body halves are joined Half of the fins are molded directly to the body halves, while the others come as separate pieces that have tabs that fit into slots in the body parts. The fins fit reasonably well except for the front most, which were a tad too small and had a penchant of pushing right through the slot. I decided to add all the separate fins to the body pieces first before joining the missile bodies together. Doing this would avoid problems trying to fit them into their corresponding slots afterwards. I must point out that the fins (part 28) are excellent. Instead of taking the easy way out and mold them totally flat, Gran has molded them with the angled/faceted leading and trailing edges. The biggest issue with building the missiles was with the translucent plastic. Because light could shine right through the parts, it was virtually impossible to tell what effect filling, sanding and scraping had during construction. It was most difficult to tell if seams were filled properly or sanded smooth enough. I did the best I could and decided to wait until the primer coat revealed flaws that needed fixing. The launcher and base were another problem altogether. Because they were on the soft white sprue, all the parts had to be extensively prepared before being joined together. Every part required scraping and sanding to remove the mold seams, flash, pits, bumps, scrapes, striations - you name it. These parts were atrocious. As a result of all the sanding and scraping to remove seams, anything that was supposed to be round became flattened. Most pieces were left as is, such as the brace for the launch rails (parts 9, 22, 23, 24 & 25). It would have been too much work to fashion replacements out of plastic rod and they are mostly hidden in their location underneath the launch rails anyway. I did replace the shaft for the hydraulic cylinder (parts 20 & 26) with some round Evergreen plastic rod. These parts were too exposed to not do this. The instructions are a tad vague on where some parts are to be located. Take your time here. Refer to as many pictures as you can on the web and from the instructions and you should get everything in its proper place. Part 27 is to be placed on the underside of the launcher but the instructions do not show the exact spot, just having an arrow pointing in the vicinity of the rear portion on the underside of the launcher. I just placed it in what appeared to be a good location and just accepted the fact that nobody I'll ever meet is going to know exactly where it goes anyway. After slogging my way through the entire cleanup over the course of a couple of weeks, and gluing everything together, I was ready to prime and paint. The first coat of primer exposed many flaws in the launcher and base, which required fixing. My decision to wait until the primer step to finish the missiles proved problematic. Though the paint exposed only a few flaws, removing them was a nuisance. Any sanding and scraping removed some of the paint so that the translucent nature of the plastic acted like a dark cave, leaving black spots that made it even more difficult to determine if I was actually accomplishing anything with my work. All I could do was prime, sand and scrape many times over until I was reasonably confident that things were acceptably smooth for the final coat of paint. Now came the actual finishing. There was no way I was going to use those yellowed decals. The suggested scheme for the missiles was primarily white, and I wasn't about to put yellow decals on a white model. I did think of bleaching the yellow out of the decals by exposing them to bright sunlight for a few weeks, but I wasn't comfortable that they would not yellow again over time after they had been on the model for a while. Paranoid - sure! But better safe than sorry!! So I consulted the "great electronic modelling library", aka the internet, to see if I could find camouflaged examples. As luck would have it, I found one picture that showed an overall dark grey missile. This was all I needed, and I proceeded to paint the missiles a dark grey (Aeromaster RLM 74) with wide red warning stripes (Floquil Caboose Red) on the nose. I also wanted the launcher to be something different than the usual dark green. Many of the pictures I found on the web showed a sand-coloured launcher, which was also a colour option given in the instructions, so I used Testors Sand enamel for this. A coat of Testors Gloss Cote followed, and finally a coat of Aeromaster acrylic flat. With the launcher complete, all that remained was attaching the missiles to the launch rails with super glue. There is a small indent on the forward part of the missile that is used to locate them on the forward support sticking up from the launch rail which helped, but the rear part of the missile was to sit on the rail directly with no location point to help with alignment. Thus it was a bit of a nuisance aligning the missiles so that their rear fins were spaced equidistant from each other and not have the missiles skewed on their launch rails. So, in the end, you get a reasonably nice rendition of an important Soviet/Russian SAM, but you're definitely going to have to put in some blood, sweat and tears to get a passable model.
Review sample purchased by the author. |
| Back to Gran Kit List | Back to Construction Reviews |
Article Last Updated: 4 February 2009 |
Back to Home Page |