|
This
is the first conversion set released by Zanus. When it arrived, it
was packed in a sturdy box to guarantee that all the fragile resin
pieces arrived in pristine condition.
All
the parts in my kit were crisply moulded and no air bubbles are present.
Flash is very limited. The parts in my sample were cast in resin of
two different colours. Some of them are really thin which makes them
fragile (e.g., the crane) and will require extreme caution to clean
up and attach. Having had bad experiences with my thick fingers in
the past, I will try to replace some of these delicate parts with
stronger metal ones.
|
|
What
do you get?
Zanus
labels this set as Bergepanther Ausf D/A, but after reading through
PANZER TRACTS No 16-1 on the Bergepanther, I can only say this title
is quite misleading but more on that later. Since I also have the
CMK Bergepanther conversion set, I was able to compare some parts.
First,
let see what is in the Zanus box :
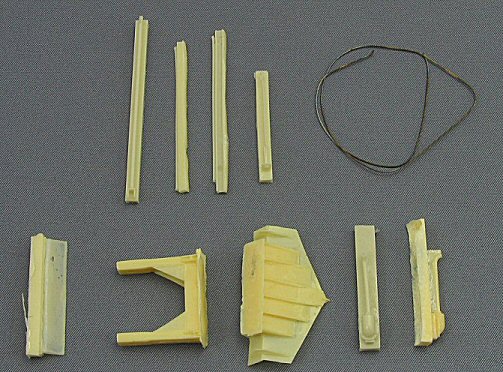
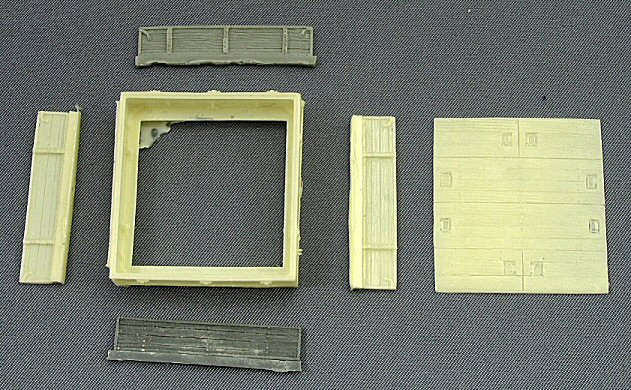
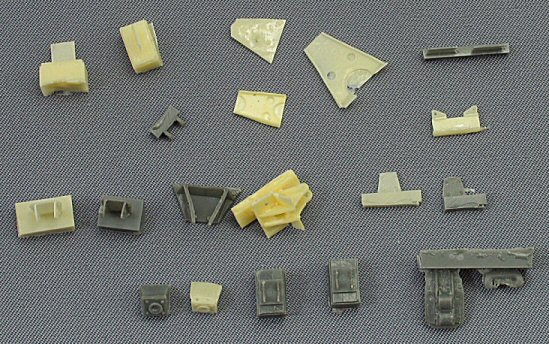
This conversion set comprises the parts needed to build the typical
rectangular box which replaced the Panther turret, the large spade,
the crane and the majority of numerous attachment points and small
fittings all around the hull (like the two pushing pads on the nose). |
|
 |
| The
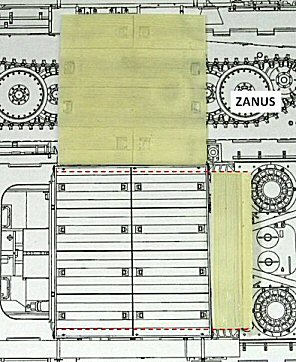
side walls of the central box structure or Ladebrücke are cast
in one piece which is a plus.
I was
able to check its dimensions against the drawings in Panzer-Tracts,
downsized to 1/72. The Zanus winch superstructure has the correct
length but being square, is not wide enough. In reality this box was
rectangular in shape.
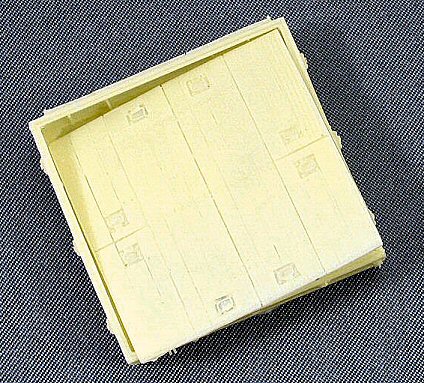
The wooden floor of the Ladebrücke is also cast in one piece,
but I didn't find a proper way yet to insert it into the superstructure,
due to the presence of a rim on both the upper and underside of that
box.
|
 |
The
spade provided is the earlier type, which is a pity since this was
used only in limited numbers. The later (and more commonly seen) type
had two plates welded to the top to prevent it digging in.
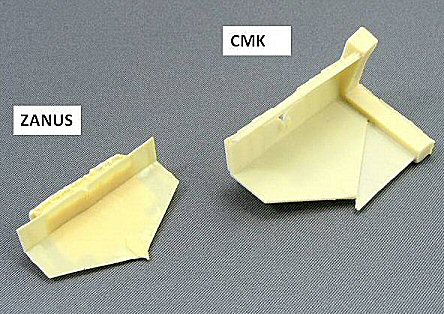
(Below
right) The Zanus spades' dimensions are perfect for 1/72; CMK on the
other hand, while being a later type, is too big and also hasn't the
correct number of support bars on them.
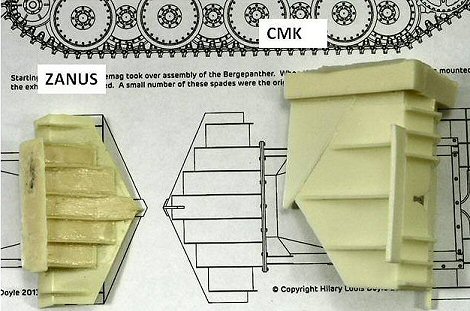
(below left) The Zanus spade support has the correct length, while
the CMK one is much too long. Unfortunately, the triangular supports
on the Zanus piece don't have the correct shape, while CMK lacks them
altogether.
|
 |
|
 |
The
mounting for the 2 cm Kw.K 38 gun (discontinued in August 44) is provided.
The gun itself is not included, which is not illogical because there
is no evidence that, apart from the prototype, it was ever installed
on a vehicle.
Zanus
gives you a choice between what they call an early and late type tow
coupling device. However after checking my references, a mid type
also existed. The earlier type used a tow bracket bolted to the centre
of the lower hull rear. The mid type was a tow coupling set in the
rear hatch while the later type added an extension device (Zwischenstange)
to the mid type.
The
crane provided is the earlier jib boom crane with base mounts on both
sides of the armoured body. The exhaust pipes are the longer type
needed to clear the spade.
|
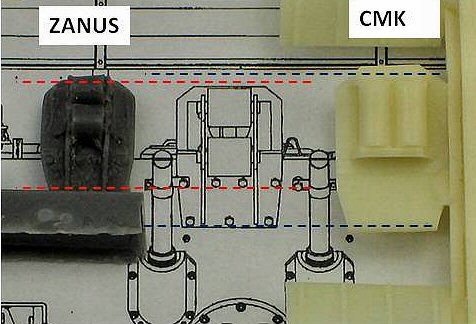
The
cable guide roller mechanism Zanus provides has some fine detail,
but is too small. The CMK part on the other hand (of which the other
side is shown, reason why the rollers are orientated differently)
is a tad too big.
You also get a length of metal wire. Although not mentioned on the
instructions, I suppose, it can be used to complete the winch and/or
the crane. However, this set provides no hooks, pulleys or the like
which would be useful for this purpose.
|
 |
Contrary
to CMK, the Zanus set doesn’t provide any interior details,
so you have only the option to build both the forward crew compartment
and the Ladebrücke in a closed configuration.
The
big unditching beam often carried on the side of the central box is
not provided. However, this omission can be easily corrected by using
some square styrene.
The AA MG mounts often seen on later vehicles on top of the two periscopes
covers are not included in the set either.
Variants
possible
After
examining all the parts in this conversion set and comparing then
to the drawings in Panzer Tracts, I can give an overview of the different
Bergepanther Ausf D/A variants that you can or cannot build :
•
The Bergepanther Ausf D is quite different from the version provided
in this set. Between June and September 43, 42 vehicles were converted
from new tank hulls (12 by M.A.N. and 30 by Henschel), only equipped
to tow disabled vehicles.
• In October and November 43, Henschel finished 40 Bergepanther
Ausf A, based on the special Bergepanther hull with the Ladebrücke.
However, these vehicles were delivered to the units without winch,
crane or spade, which were not ready for production. It was equipped
with the early tow device, i.e. the bracket bolted to the centre
of the lower hull rear, which is provided in the Zanus set.
• Next came Daimler Benz who completed 40 vehicles in February/March
44. Following the same principle as Henschel (i.e. with Ladebrücke,
but without winch, crane or spade), they installed the mid type
tow coupling. Since this device is missing in the Zanus set, building
this version is not possible.
• Demag then took over assembly and delivered 123 completely
equipped Bergepanther Ausf A (with winch, spade, crane and extended
towing device) between March and September 44. During that time,
they adapted the design of the spade to the stronger type. So, using
this Zanus set, you can only build a vehicle assembled by Demag
with the early spade.
• To make things even more complicated, starting in June 44,
the Seibert company delivered the so called "Bergepanther Ausf
D (Umbau Seibert)" based on existing Ausf D tank hulls. This
conversion was a simple one, very similar to the first Bergepanther
Ausf D constructed in 43 and again not possible with this conversion
set. At least 61 vehicles were thus equipped for towing disabled
vehicles.
Which
kit to use?
Zanus
doesn’t give any advice which Panther Ausf A kit is best suited
for this conversion, which could give you the impression that either
Revell or Esci could be acceptable.
However, the reality is quite different! The Bergepanther Ausf A has
no MG Kugelblende but used instead the same MG port as the Panther
Ausf D.
So, from
a modellers point of view, in fact you do need an Ausf D hull to convert
it into a Bergepanther Ausf A (are you still with me?)! Since you
don’t need the turret, this means you can also use the hull
of the Ausf D tanks kits made by Dragon and Zvedza. The Revell Panther
Ausf D/A is also a possibility because it gives you the option between
a Kugelblende and the MG port.
On the hand, the Esci Panther Ausf A provides only the Kugelblende
and therefore cannot be used for this conversion.
|
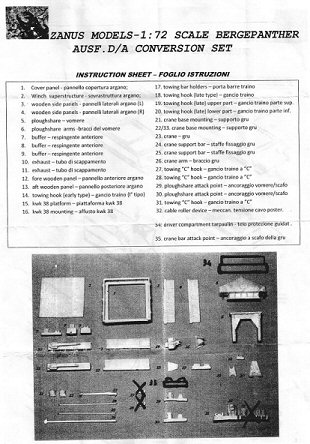  |
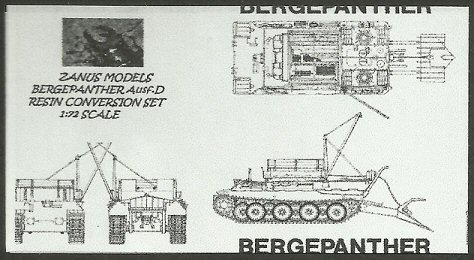
The
instructions contain a picture and the associated list showing all
the parts present in the box. While this is very useful to identify
everything, the image is rather blurry; some parts even are a simple
drawing made with a thick felt pen.
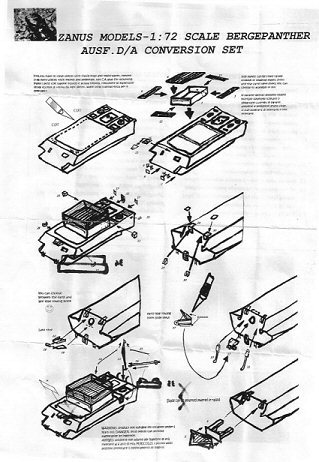
The assembly
notice itself is one A4 page with very simplistic drawings. While
these give a general idea where everything should go, because of the
possible options offered, you’ll certainly need additional references
to know exactly what to do. |
Conclusion
This
conversion set is very useful and dimensionally more correct than
the CMK one. However, clearer instructions and some explanation on
the different possible variants would have been welcome.
Highly
recommended
References
PANZER
TRACTS No 16-1 Bergepanther Ausf D,A,G by Thomas Jentz & Hilary
Doyle and Lukas Friedli. This Panzer Tracts book unravels the different
versions of the Bergepanther, with superb scale drawings and sharp
black & white photos. Highly recommended.
Review
sample supplied by ZANUS Models
|