|
A Brief History
The ZIS-2 was a Soviet Anti-tank gun designed to replace the older and rapidly becoming obsolete 45mm guns that the Soviet Army
used to equip its anti-tank units
at the start of German invasion in 1941. Its 57mm projectile, coupled with a long gun tube to increase muzzle velocity, made it more effective against the newer
German tanks when it entered into service in 1943. It was also adapted for use in a self-propelled configuration on the Komsomolets armored tractor.
By war's end it too was becoming obsolete, being only enable to engage newer German tanks from their flanks or rear. Captured guns were impressed by the Germans
and designated 5.7cm PaK 208(r).
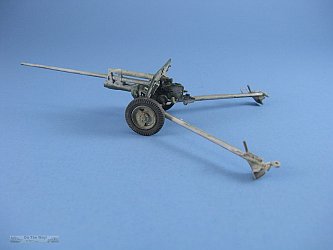
The Kit
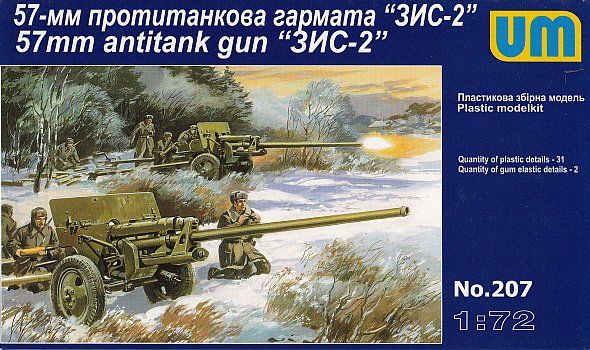
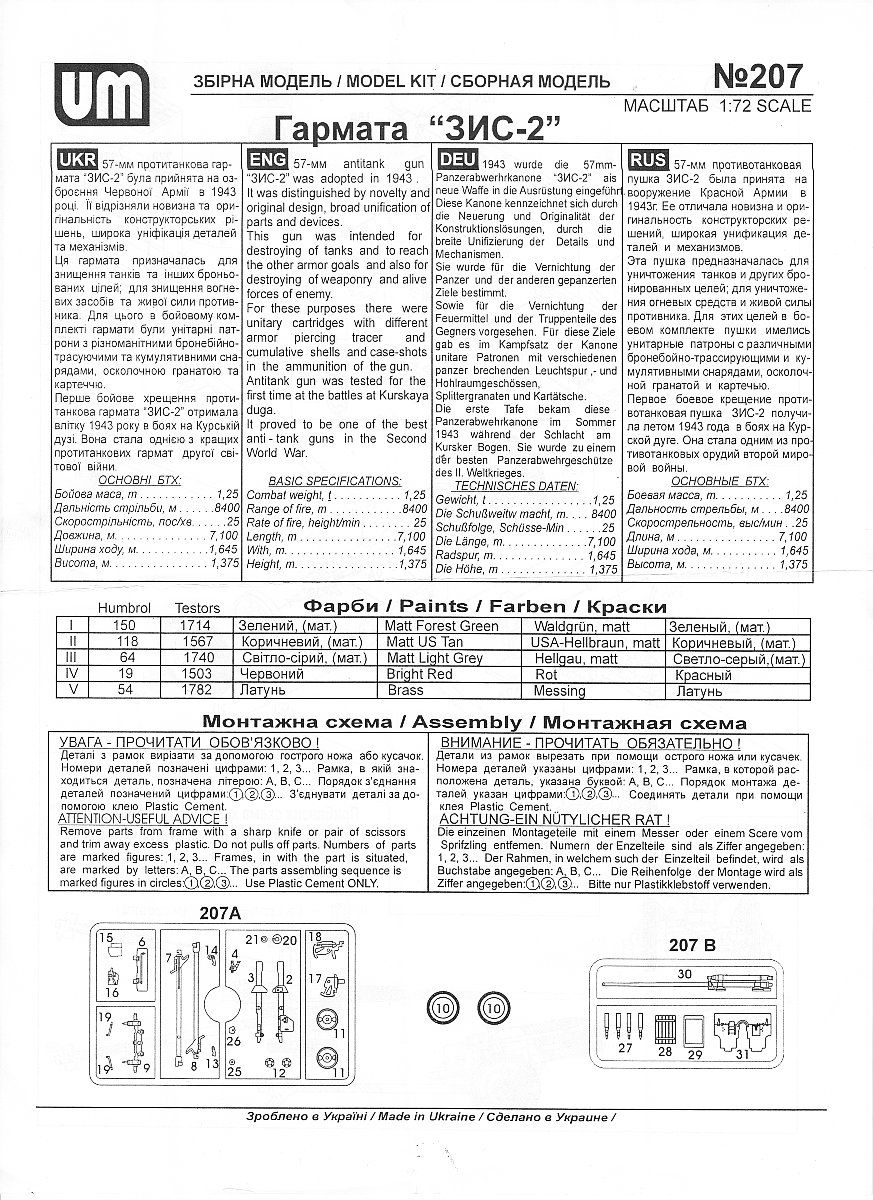
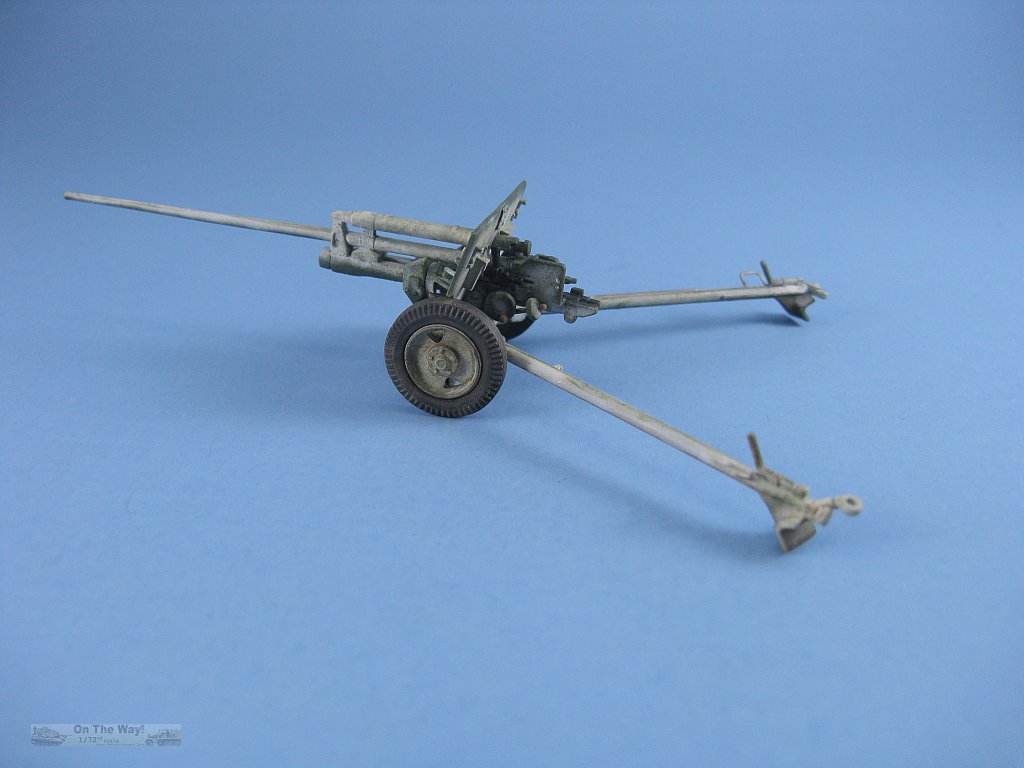
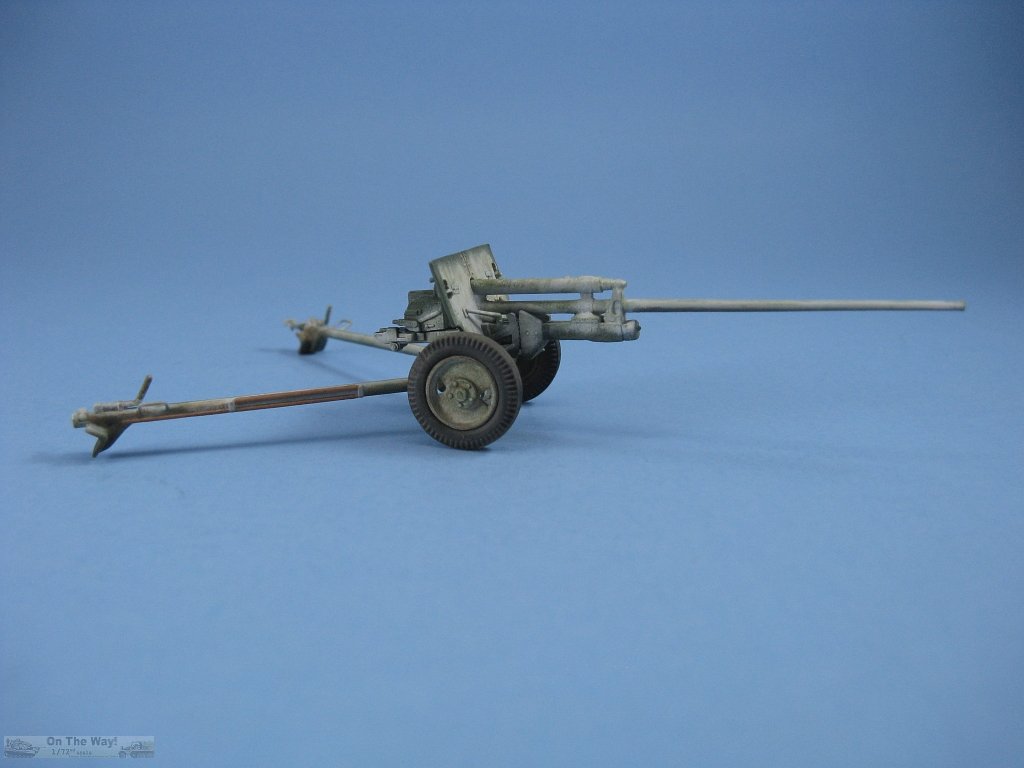
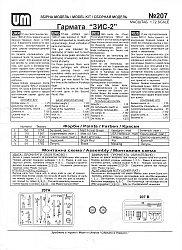
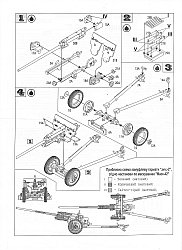
Inside the box are two sprue frames with a total of 32 parts and a two sided sheet with the instructions. Contruction cover a meager four steps in the now common
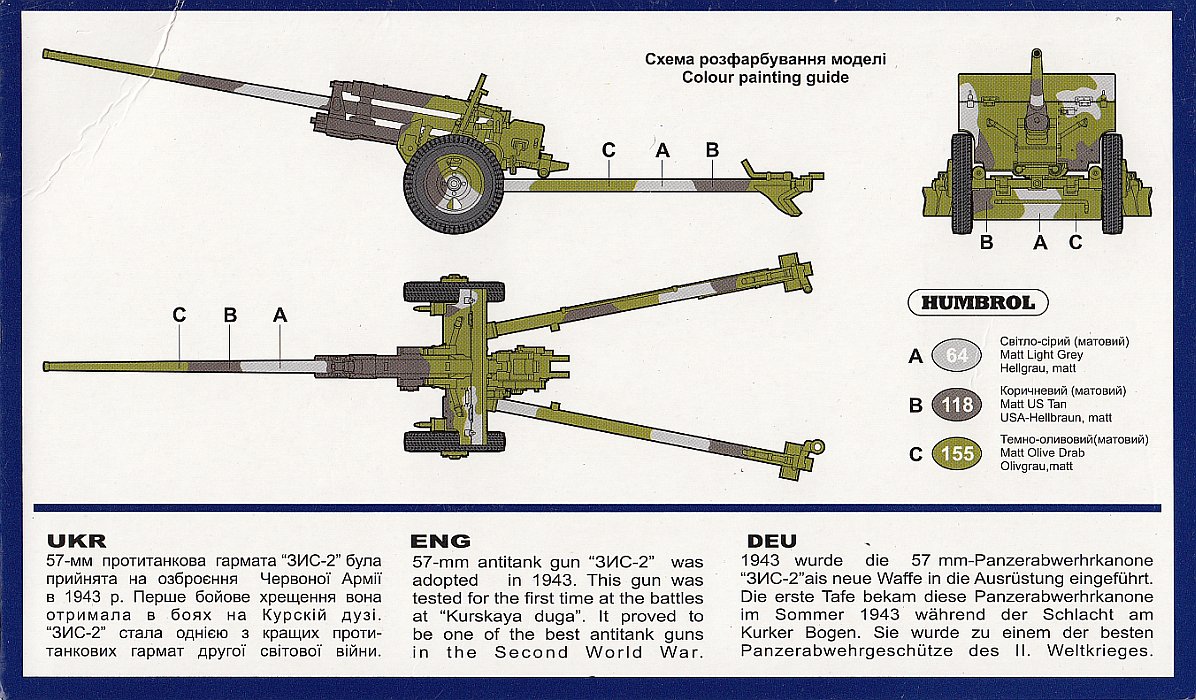
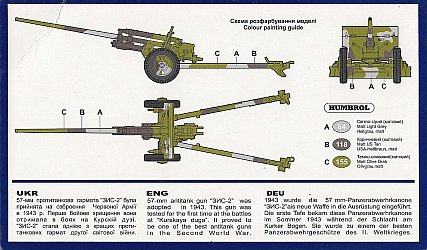
exploded diagram style. The rear panel of the box contains a painting guide. No decals are present, and really aren't needed.
This kit is identical to the Skif kit, with UM reusing Skif's kit number, box top artwork, build diagrams and sprues (still has the Skif name and kit number on sprue A).
You can read Doug Chaltry's preview of the Skif kit here.
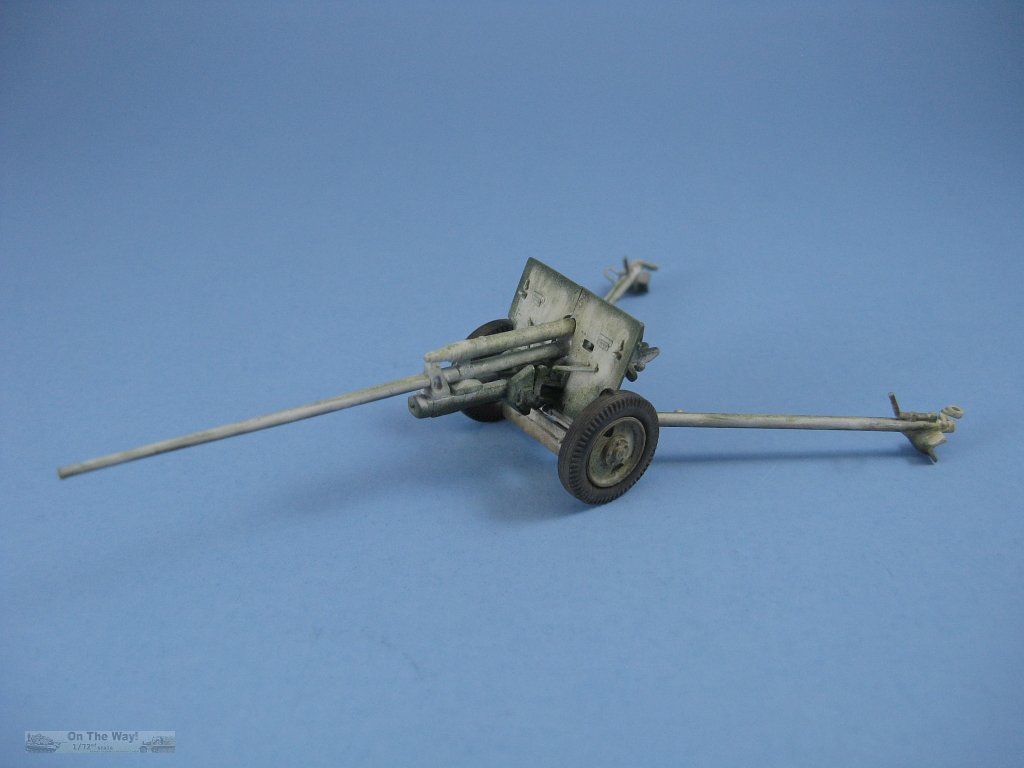
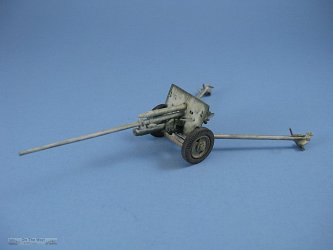
The plastic in my kit was typical UM - green coloured (actually in two different shades) and soft. The softness doesn't play well with sanding as it produces feathered
edges that are only removed with a quick swipe of liquid glue such as MEK, Tenax or the like, though drilling proved quite easy.
A pair of tires are molded in a softish vinyl/rubber material. Overall kit detail is decent but the thickness of some
of the pieces is reminiscent of the older ESCI releases.
A modicum of flash is present, plus a few sink marks, especially on some of the thicker parts such as around the trail
spades. The trail's legs are commendably round, while the gun tube is less so (it was on the sprue of lighter coloured green plastic).
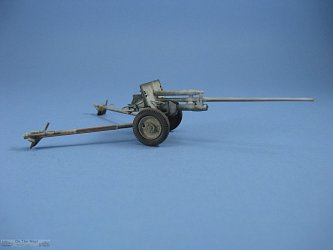
Problem areas to look out for during the build are:
- At step 3 the wheels' mounting is incorrectly diagrammed. Flip them around so that the raised portion slides
onto the axle, leaving the convex wheel face facing outward. Doing this will require shortening the axles so the wheels don't stick out too far from the shield.
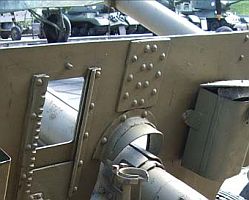
- There is a small gap between the barrel (part 30B) and the recoil slide. Sanding down the locating tabs on the bottom of the barrel
assembly plus gluing a thin slice of plastic to the underside of the recuperator support closest to the front of the slide removed the gap.
- The gun sight (part 4A) is too large and contacts the shield if mounted as directed. I flipped it end-to-end and
cut off the angled portion and repositioned it. It may not be totally accurate, but at least the gun sight fits where intended.
- The mount for the (traverse?) control wheel (part 21A) is incorrectly positioned. The wheel should be located higher
and closer to the gunner's protective guard. I cut off the locating point, added a shaft to the wheel and glued it at a rising angle so it sat close to the
gunner's protective guard.
- Part 6A (lower splinter shield) has tabs that don't match up to corresponding slots in the axle (part 9A) so the slots
were widened to get a better fit.
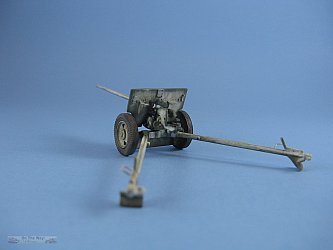
Some additional work was performed to make the kit more presentable, using [1] as my primary reference. This included:
- Cutting off the gunner's protective shield, thinning it, opening up the holes and reattaching it to the recoil slide
- Thinning the splinter shield's edges
- Adding grab wires fashioned from thin wire to the trail legs
- Removing the plastic found between the trail legs and the handles
- Drilling holes for the muzzle, gun sight as well as the two round nubs found on the inside of the trail legs that represent
the travel lock latch
| 6. Filling the seams along the bottom of the cradle, then drilling three holes | 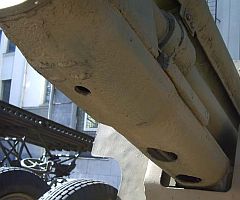 |
| 7. Adding a pair of rivets to right side of recoil slide part 3A | 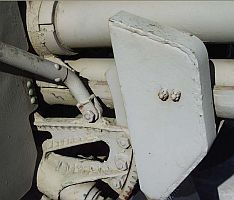 |
8. Adding another box container to the left rear of the splinter shield
near the gun sight opening | 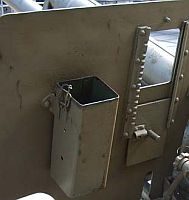 |
| 9. Adding a vertical groove to the front top center of the splinter shield plus a corresponding rectangular joiner to the rear side along with rivets
to both front & back. I only added a few rivets as there wasn't enough room for required amount of Archer rivets. |
 |
A note on scale
According to [5] the scale of this kit is rumoured to be somewhere between 1/65 to 1/68. Doug Chaltry's preview here on OTW
(previously mentioned above) has an addendum from John Elwen stating his barrel length measurement make it close to 1/72. Using my digital calipers I get a
barrel length of 58.5mm. Reference [4] has the gun at L/73, so 57mm*73mm equals 4161mm. For 1/72 this gives 57.8mm for barrel length. Thus, my measurement at
58.5mm makes it approximately 1/71 scale - close enough to 1/72 for me. But, one item is definitely out of scale - that being the wheels. Compared to period photos
they come too close to the lower edge of the splinter shield. Either live with it, as I did, or try to source something smaller. As far as I know, there are
no after market replacements specific to this kit. Maybe a truck wheel from a 1/72 GAZ will make a good replacement?
Conclusion
Overall an acceptable kit considering its age. The low parts count and decent fit make it easy to assemble. Some detail work is need to make to look better, but
nothing too onerous. The only aspect of the kit I detest is the rubber tires.
References
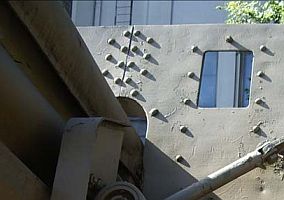
[1] svsm.org (walkaround - round style trail legs)
[2] primeportal.net (walkaround - riveted box style trail legs)
[3] axishistory.com (5.7cm PaK 208(r) thread)
[4] wikipedia
[5] Internet Modeler (preview of Skif kit)
Review sample purchased by the author.
UM products are available at

|