|
Trumpeter
|
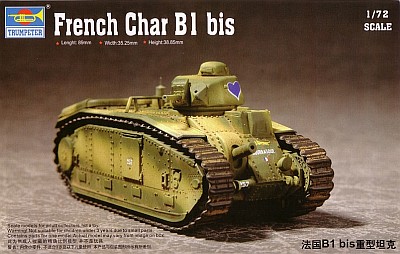
Char B1bis |
|||
| Kit #: 07263 |
Review by
- Al Magnus
|
|||
|
Trumpeter
|
Char B1bis |
|||
| Kit #: 07263 |
Review by
- Al Magnus
|
|||
 |
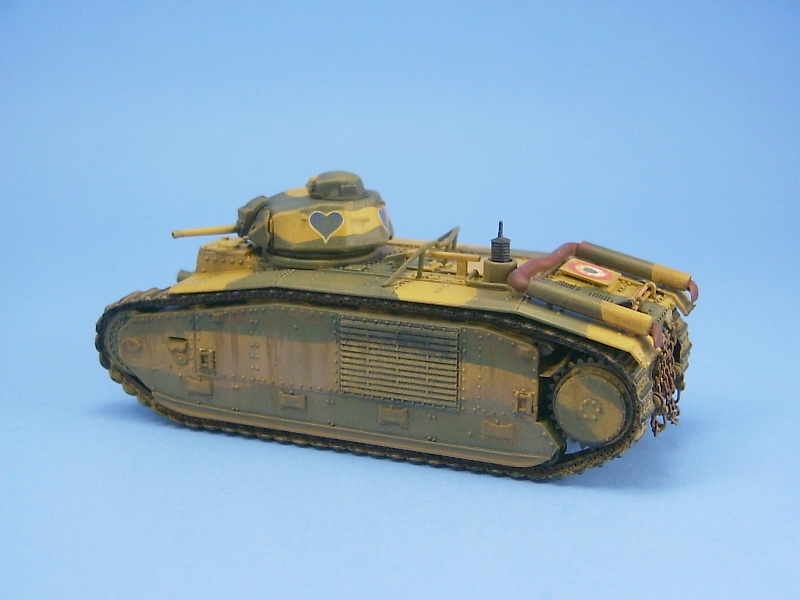
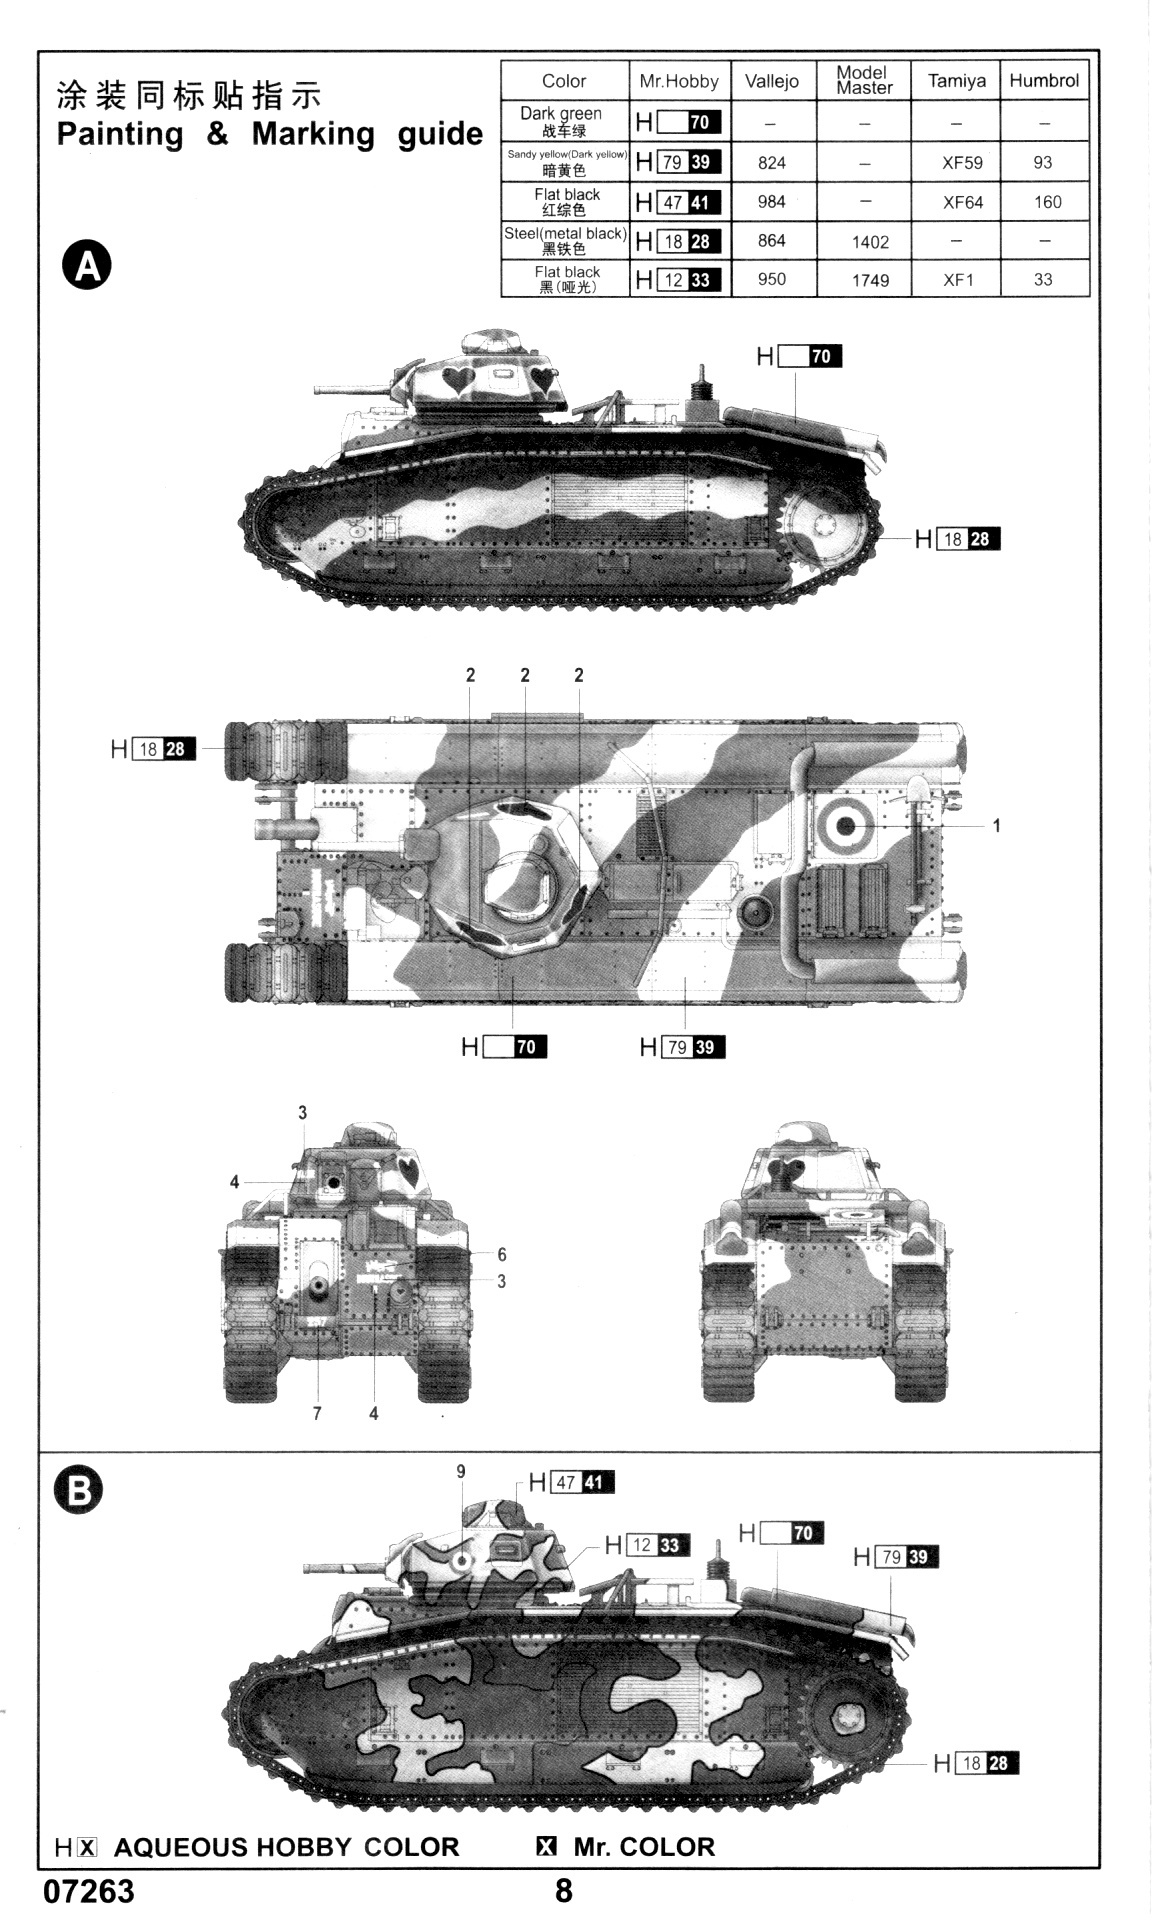
| The kit contains 58 parts molded in a nice light grey plastic that is the perfect hardness, plus two soft rubber band style tracks molded in black. Also included is a nicely printed decal sheet and instructions. It appears that this kit is heavily inspired by the Tamiya 1/35 scale version of the Char B1bis. For example, there are three rectangular holes on the underside of the body which are identically placed when compared to the same holes as found on the Tamiya kit (I wasn't sure if they should actually be there so I filled them in when I built the kit), and the parts look very much alike, and in some places appear to assemble in the same manner. The instructions give no indication as to what units the markings are for, but a web search revealed that Trumpeter had just copied the first two options as found in the Tamiya kit, that being:
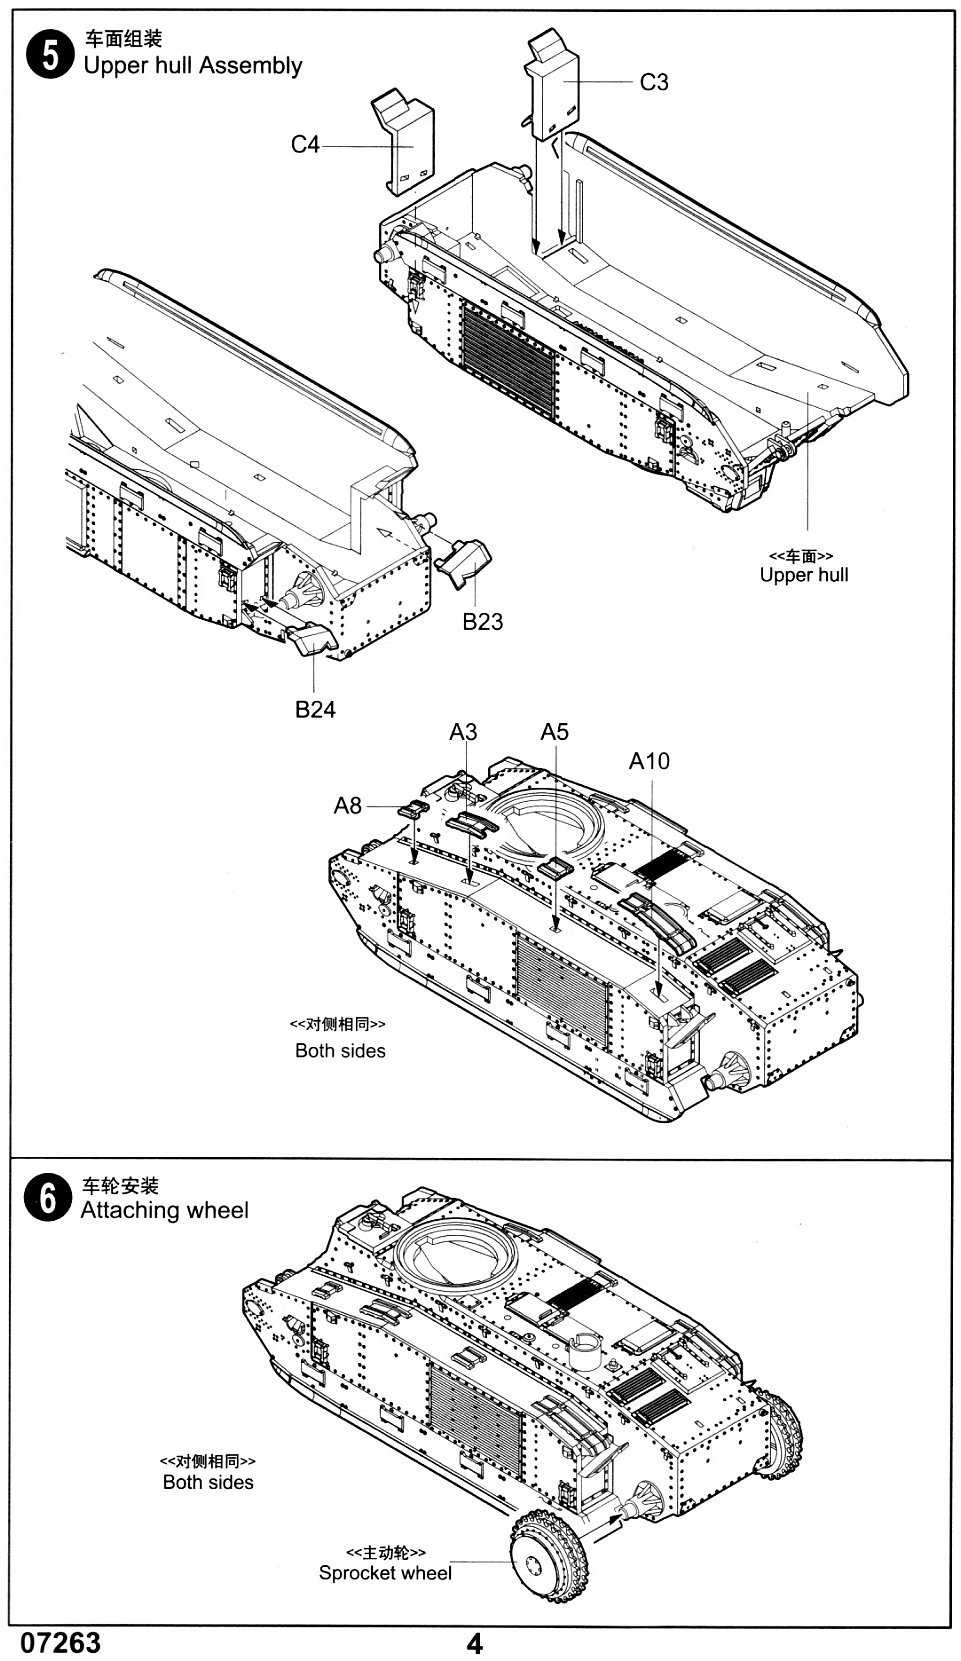
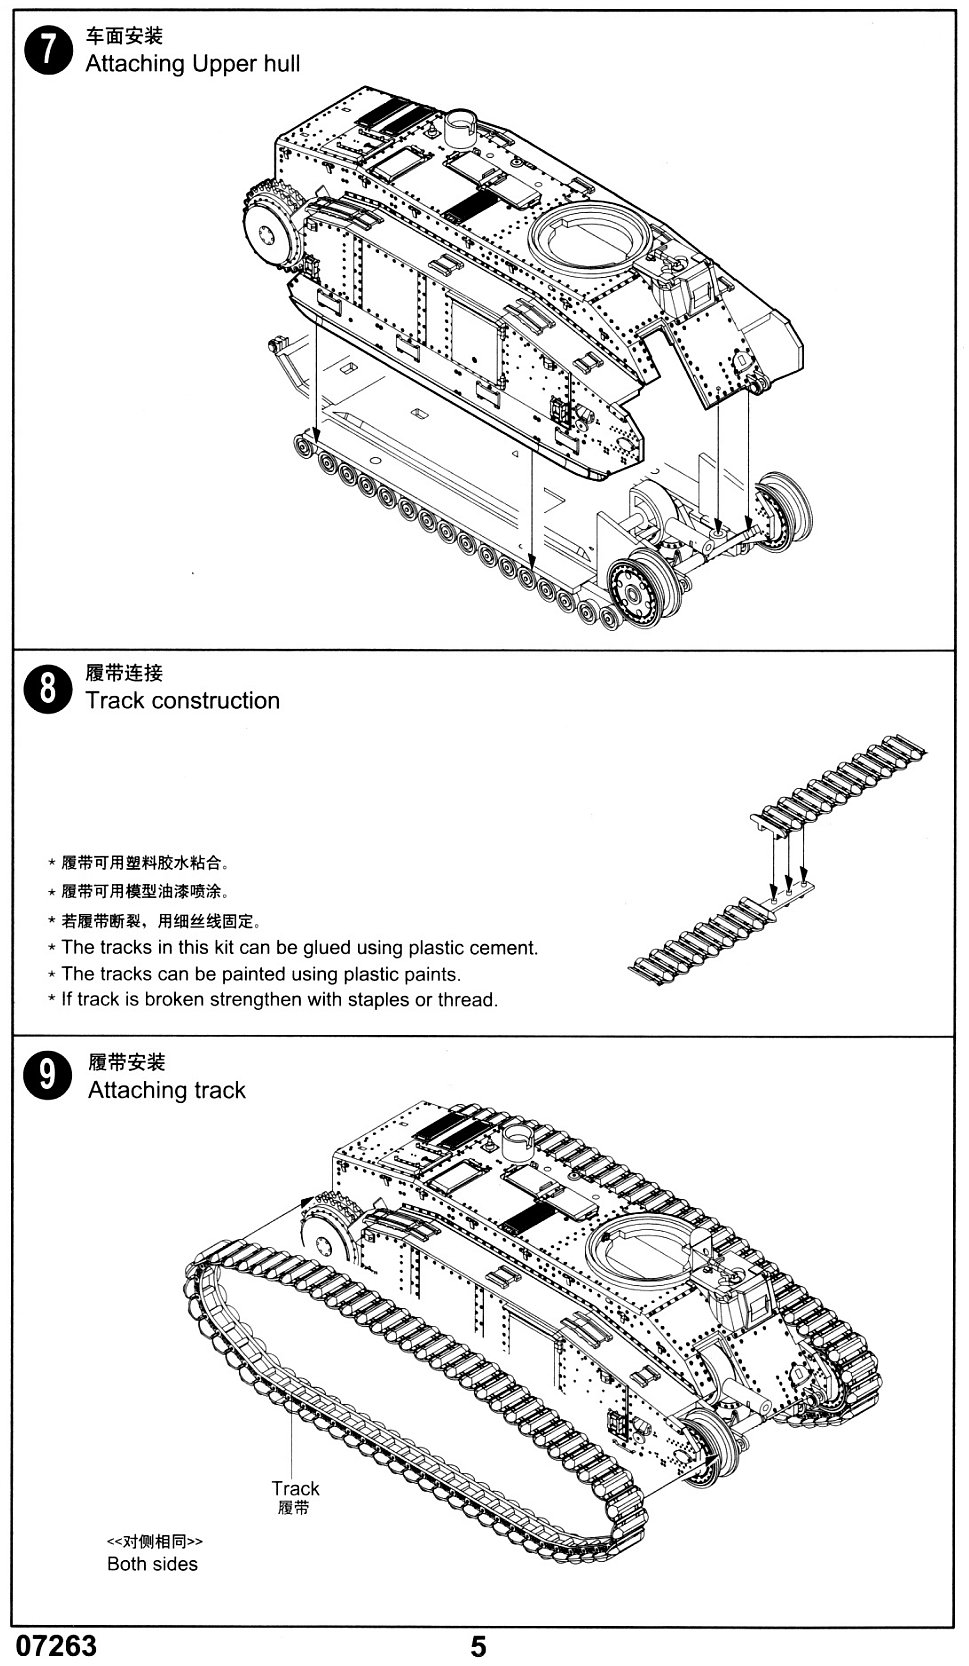
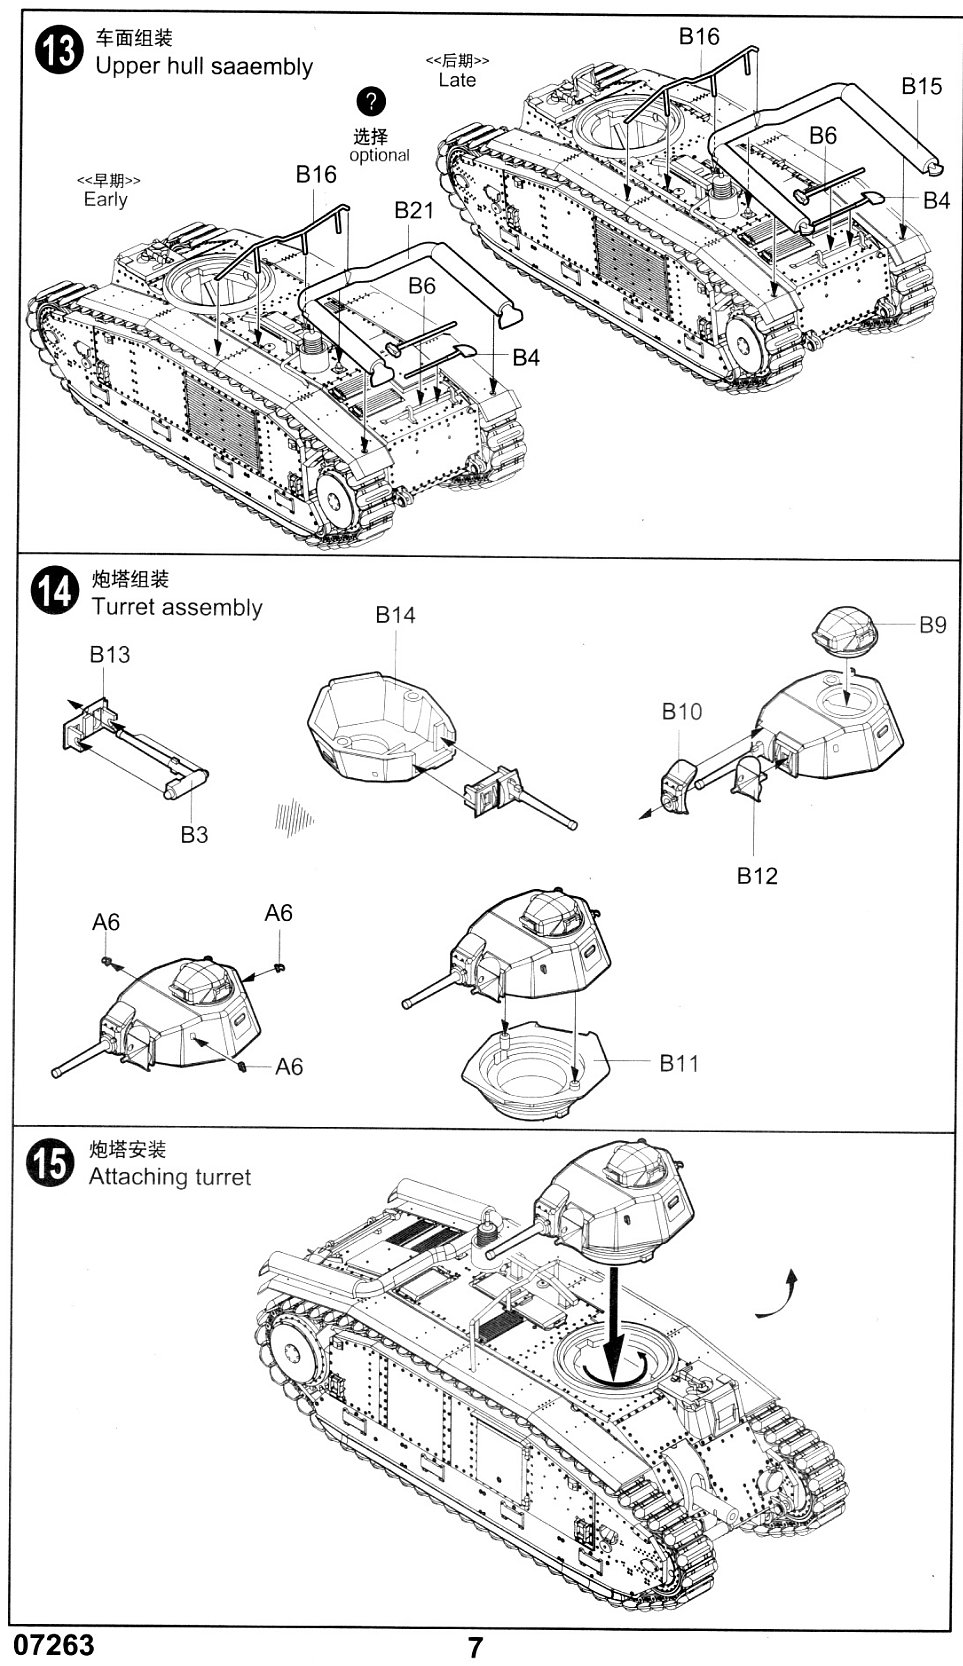
The instructions are a major disappointment regarding decal placement. The first option, serial number 257, was well illustrated and the decal placement covered most of the images. Missing was the location for the second white serial number 257, so I followed the Trumpeter and Tamiya box art and added it to the crew access door on the starboard side of the tank. I also discovered later that there is a miniscule heart on the decal sheet that should have been placed on the cover of the front headlight (I didn't notice this on the box top picture of the Tamiya kit until after I had finished this build). As for the second option, the modeller is pretty much left in the dark as to where the decals are to be placed. The instructions show where to put the roundel and vehicle number on the turret but the remaining markings for the vehicle name, serial number, and so forth aren't shown on the diagram, so I would suppose the modeller would have to assume that they go in the same places as for tank 257, or locate a set of Tamiya instructions and follow them. Part B1, which mounts the front left idler wheel, has a large ejector pin mark to remove. The locating peg at the front of the lower hull (part A1) got in the way of a tight fit with the upper hull piece so I trimmed it off. The barrel for the hull gun is molded as a one piece hollow barrel, a nice touch that saves the modeler from having to drill open the end. I drilled out the holes for the turret gun muzzle and the two small holes in the upper front of the turret gun's mantlet. I suggest that you add the hull gun cover (part B19) to the lower hull at step 4. My test fitting found trying to add it after the hull pieces are joined in step 10 was most difficult. Adding it at an earlier step allows you to get it in place without any interference with the hull and its gun. I found the spacer located under the lower end of the exhaust pipe was a bit too long and didn't allow the pipe to sit well and stopped it from attaching to the mount point on the hull just aft of the radio antenna. I just sanded them down a tad and the problem disappeared. There were a couple of major items that needed modification. Trumpeter has incorrectly molded the driver's visor and the kidney shaped periscope cover on the top of the driver's position. They have molded it in reverse, with the periscope tube on the outside of the hull as opposed to the inside. If you look at the inside of the upper hull you can see the kidney shaped cover there. Quite odd actually.
The cover was quite easy to fix. I carefully trimmed off the handle and sanded the area smooth. Then I fashioned the kidney shape cover from some plastic sheet and glued it in place. The final touch was to add the small bump on the top of the cover from some plastic rod. The driver's visor correction was more complex and a lot more work. At first I thought of just removing the whole visor but cringed at the amount of work it appeared to be. So with a sharp Exacto knife I cut off the bottom portion of the visor at the point where it breaks towards the body and sanded the area smooth. I then vertically notched the remaining potion of the visor, first by making slanting cuts with the knife to start the notch and then finishing it off with a flat file used on its edge. Once I had the notch to the point I liked it, I filled it in with a piece of rectangular plastic rod and then sanded/scraped it flush to the original visor, filled and sanded the area smooth. After all of this there are a few rivets to be added just beneath the visor. I have my own method of adding rivets that I use when I have only a few to do. It is slow work but if you're careful it works well for a small number of rivets. I take a piece of heat stretched sprue and some gel super glue and add the rivets by dipping the tip of the stretched sprue into the glue and then carefully, and lightly dabbing a drop where I want it. Right after I have the drops of glue in place I set them with some super glue accelerant flowed onto the drops from the side. I do this so the drops aren't affected by gravity and flatten out while they set on their own. So after all this work, the change, though not perfect, is dramatic and looks much closer to what it should compared with the original Trumpeter effort. There is a set of four tiny holes in the rear end cover of the upper body, which on the Tamiya kit are for some hooks plus some chain to drape over the hooks. There weren't any hooks in this kit, and since I thought it would look cool to have the same look to my kit as was found on the Tamiya kit, I opened up the holes slightly and inserted some hooks fashioned from thin copper wire and then added some chain. The chain I use is from a fine necklace that I purchased from my local Walmart jewelry department. The kit also lacks the tow hooks which I scratch built. There are two options for the fenders: early or late styles. The instructions do not specify which to fender option goes with which marking option so I chose the early style on the assumption that the tank was an early version because its serial number was lower than the second marking option. You also have the choice of early or late exhaust pipes and I chose the early option to match the fender choice. Referring back to the Tamiya kit I also noticed that tank 257 had the early style exhausts while 481 has the later style, so it would appear that the early style fenders and early exhausts should be the ones to use for 257 while the later style options would be the ones for 481. I left off the fenders during painting so I could weather the tracks and add them to the tank afterwards. With the fenders out of the way I found the routing of the tracks was much easier. I started the tracks at the midpoint of the upper run which would hide the join once the fenders were attached. As for the rubber band tracks themselves, they are not too bad. They are just a tad too long and need trimming, but this is much more preferable than the other option - being too short. The tracks attached well with Testors Super Glue. Watch how you place them along the long run at the bottom. Make sure they square up with the wheels as it is quite easy to get a wave in the run due to the flexibility of the tracks. The decals are some of the best I have seen come with a kit. They are nice and thin and don't leave a noticeable edge once I settled them down with a good soaking in Microsol. So in conclusion, to me the Trumpeter Char B1bis appears to be a scaled down knockoff off of the Tamiya 1/35 scale kit. It is a nicely manufactured model kit with only a few items that need to be addressed to make it more accurate.
Review sample purchased by the author. |
| Back to Trumpeter Kit List | Back to Construction Reviews |
Article Last Updated: |
Back to Home Page |

.jpg)
.jpg)
.jpg)