|
Revell
|
www.onthewaymodels.com |
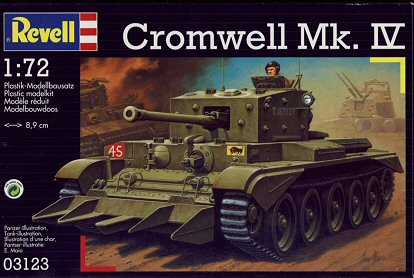
Cromwell Mk. IV |
|||
| Kit #: 03123 | Article
by Danilo Carli - 172normandyafv(at)gmail(dot)com
Edited by Marc Mercier |
||||
|
Revell
|
www.onthewaymodels.com |
Cromwell Mk. IV |
|||
| Kit #: 03123 | Article
by Danilo Carli - 172normandyafv(at)gmail(dot)com
Edited by Marc Mercier |
||||
 |
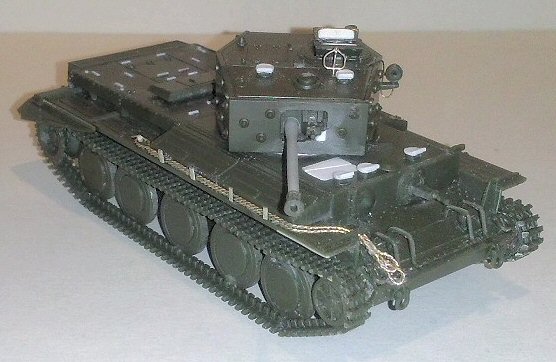
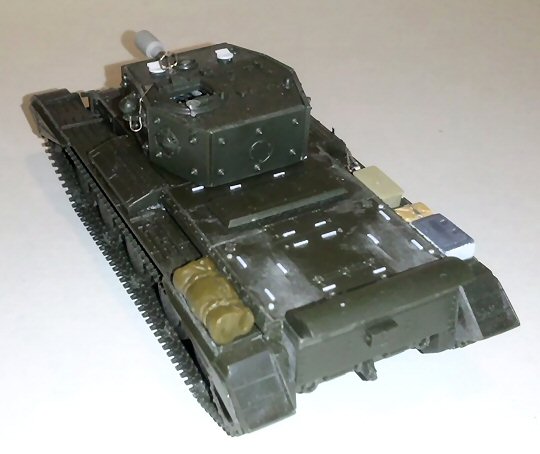
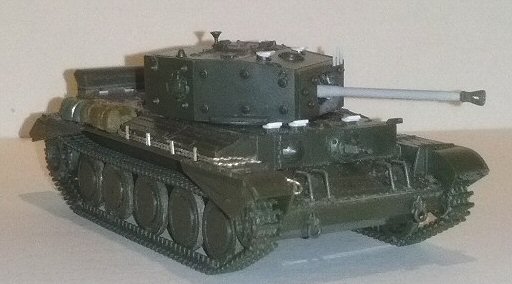
The kit is composed of three dark green plastic moulds in a clear polyethylene bag. Flash free, the pieces are well done. The instructions are extensive and look like a newspaper. The decal set colours and printing is high quality. The kit is dimensionally correct (certainly within my tolerance range) and well detailed. It gives us also a Cullin hedgerow device, which I’ve never seen on an operational Cromwell tank. The kit looks very well made to me even though the tools are moulded on, there aren’t any optional parts and only the tank commander's hatch is open. Speaking about the Cromwell tank, I’ve found a good amount of confusing (and sometimes contrasting) info about the development of this tank and the hulls used. First of all, on the same hull, two types of engines were used and the difference was noticeable in the name of the vehicle: Centaur (A27L type) for one and Cromwell (A27M) for the other. This wasn’t the only difference of course and to simplify our lives, some Centaur tanks received the Cromwell tank engines. Despite the fact that “only” 2,494 Cromwell tanks (and 1,841 Centaur tanks) were built, these were armed with three different types of weapons (the OP tank could have a dummy gun) in nine marks: 6pdr = Mk I/III, 75mm = Mk IV/V/Vw/VII/VIIw and 95mm = Mk VI/VIII. Those tanks were built by different production plants which had their own particular features; producing seven, slightly different, hulls (type A, B, C, D, E, F and welded). Sometimes a different Mk didn’t indicate a new version, but a reworked tank of a former version: The Mk III was a re-engined Centaur I. The Mk V was a reworked and up-gunned Mk I. The Mk VII was an updated Mk IV. The Mk VIIw was an updated Mk Vw. The Mk VIII was an updated Mk VI. On the basis of the sources used, also a single all welded tank (including the turret) was in service with the 7th AD. I know, here I should speak only about the kit, but I think this introduction is needed because a question rose almost immediately: which Cromwell tank batch has Revell given us? After having consulted the available sources, I think to be correct stating that the kit proposes us a Mk IV with the C type hull as built by English Electric (batch serials T189400 – 190064). Luckily the Revell kit could be easily modified to a D/E type hull as built by Leyland or by Fowler, which was quite similar to the C type and differed only on the engine deck (batch serials T187501 – 188082 which comprised both 75mm Mk IV and some 95mm gun armed Mk VI). Speaking about the conversions possibility of this kit, the close support Mk VI C/D/E is also quite easily feasible (the T185xxx serials CS tanks seen in some photos weren’t Cromwells but Centaurs). Despite all this complications, from a 1/72 modeller perspective, what we can see in NWE campaign photos are Cromwell tanks armed with a 75mm or a 95mm gun. Both these weapons could be found on a C, D/E or F type hull while welded hulls had only 75mm guns. B hulls of the reworked early marks are very rare in the photos I’ve seen and I’ve found only three operational tanks (not counting the Centaurs) with their straight sloped forward fenders. These different hulls were mixed within the same units. For example, at the start of the Normandy campaign, the 1st RTR was composed of 45 Cromwell tanks and 12 Firefly tanks. The Cromwell tanks were 8 x welded hulls, 32 x C hulls and 5 x D hulls. To extricate myself in the Cromwell marks jungle (hoping to have understood correctly) I used the Osprey New Vanguard “Cromwell cruiser tank 1942-50”, HMSO book “Cromwell tank” and the book “Combat camera 1, Cromwell & Centaur”. A good walk around on the net is here. |
|
The
kit is very good and is one I could have built out of the box…
I say “I could have”, but I didn’t. Here is what
I did to add some basic detail to my Cromwell troop. •
Usually I don’t care too much about the pictures on the box
or the instructions; anyway if someone uses them as a reference he
has to pay attention to the photo in the first page of the instruction:
the lateral rear plates are inverted and the lifting hooks are showed
up side down! |
|
 --------- --------- |
|
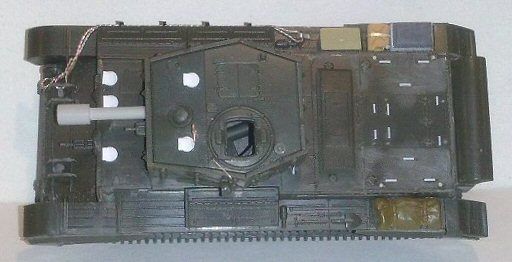
Hull •
The driver and gunner periscopes were also covered with their covers
(see above). |
 |
 --------- --------- |
|
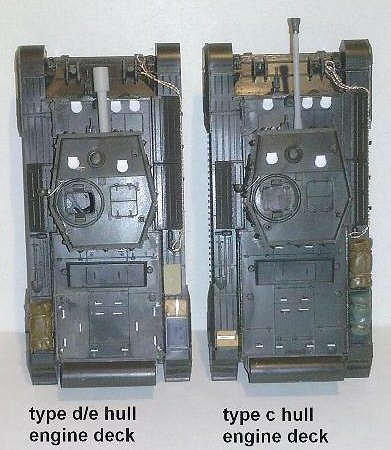
Special features •
The D/E type hull (see intro) had a slightly different engine deck
layout. To adapt this I filled the rear panel lines and engraved the
new ones 0.5 mm forward of the engine oil dipstick covers. The new
panels had a different handles and locks layout. |
 |
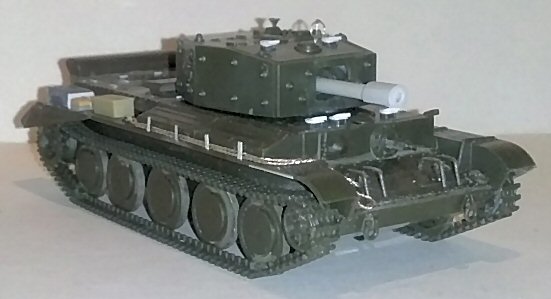
Wheels and tracks The
sprockets teeth number was asymmetrical and this must be kept in mind
when the two halves are assembled or the teeth will not be aligned. |
 |
 --------- --------- |
|
Decals My boxes
are of the second edition, which provides a well made set of decals: The
first edition kit had a different set: The
Cromwell tanks production begun when the camo colour was S.C.C.2 brown
with a black disruptive scheme. Then the second colour was omitted,
while the main colour was maintained after April 1944 when the official
colour was changed to the S.C.C.15 green overall, so both colours
are correct. Actually
I’m awaiting the Vallejo 71024 arriving in my town: as far as
my supplier told me it should be the first “out of the bottle”
S.C.C.2 brown and I hope it will. The kit gives us a very well made standard tank. Highly recommended, it can be easily improved with very little work. A good amount of available aftermarket sets will help. Some
useful notes to improve it furthermore: the ARV cupola was introduced
in 1944 and eventually retrofitted during the campaign on some tanks.
The hull rear plate often received a further box fixed by welding
or bolting, at least one 2nd Welsh Guards Cromwell (C Sqn) had a Sherman
Firefly V bin while some 7th AD had a homemade rack. The same 7th
AD tanks had a rear turret rack (possibly made with the exhaust cover
mesh). At least one 7th AD Cromwell had a Crusader turret bin on the
rear plate (no markings are visible) while some 2nd Welsh Guards had
homemade bins which looks like the NWE Sherman ones. NWE campaign
photos witness a large use of camo nets, often with hessian tapes. |
|
|
Preview sample purchased by the author.
This
model can be purchased from
|
|
| Back to Revell Kit List | Back to Home Page |
Article Last Updated: 25 March 2015 |