|
RPM
|
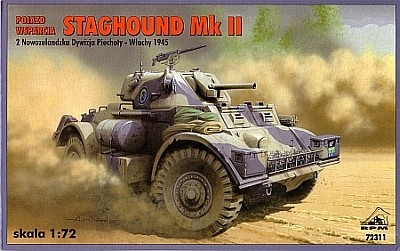
Staghound Mk II |
|||
| Kit #: 72311 |
Review by
- Al Magnus
|
|||
|
RPM
|
Staghound Mk II |
|||
| Kit #: 72311 |
Review by
- Al Magnus
|
|||
 |
|
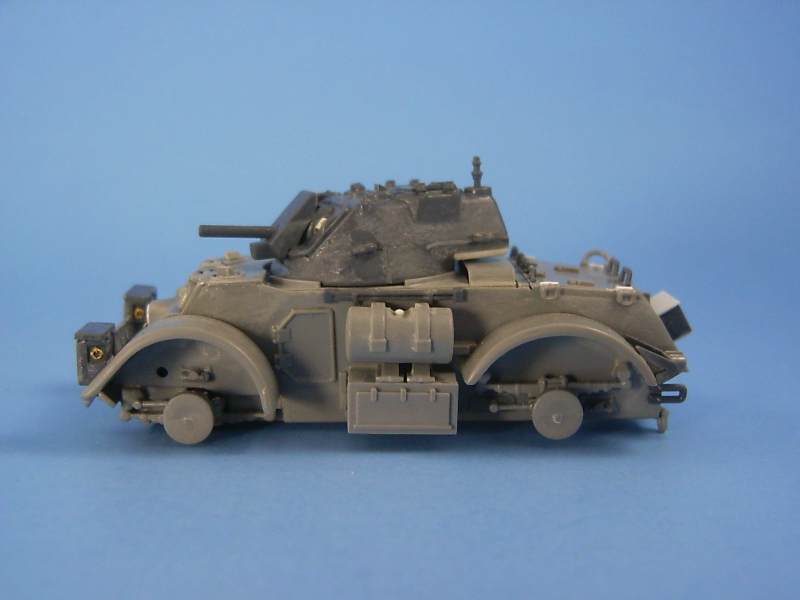
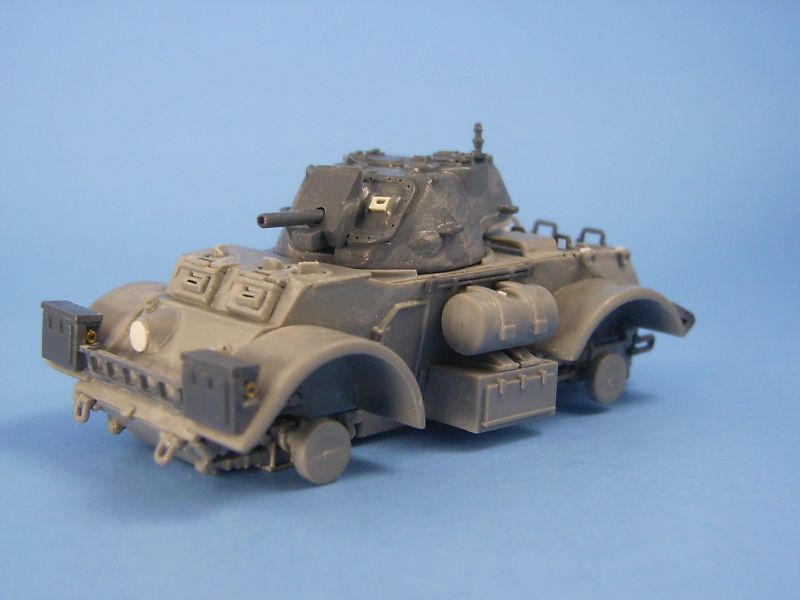
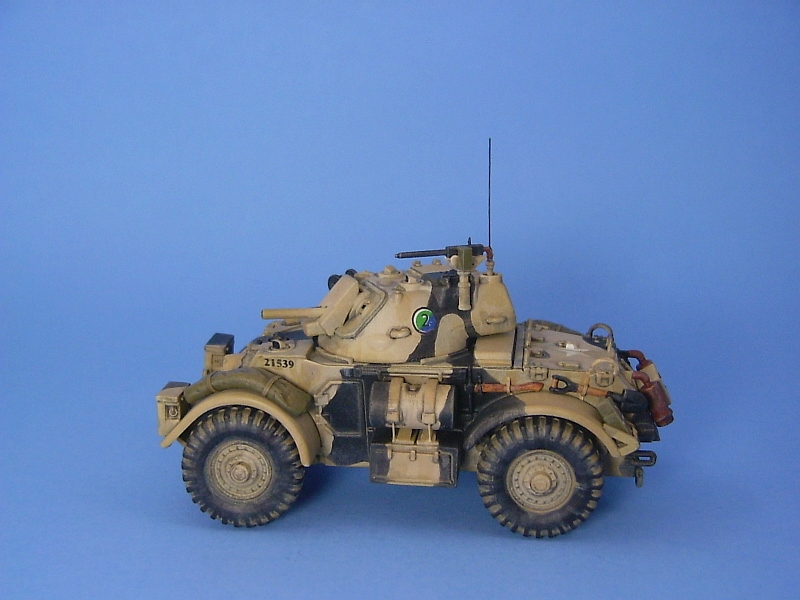
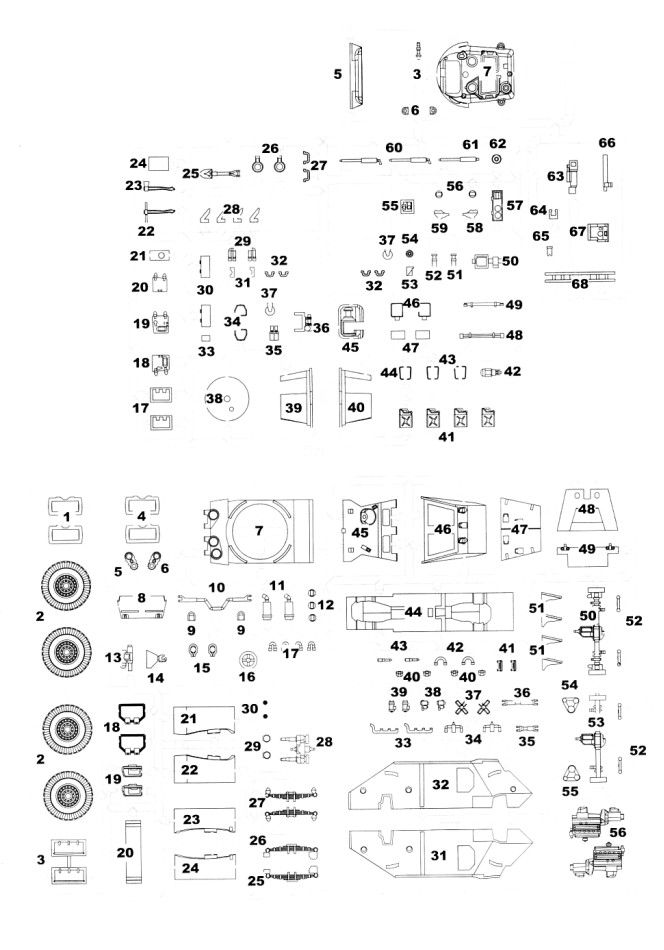
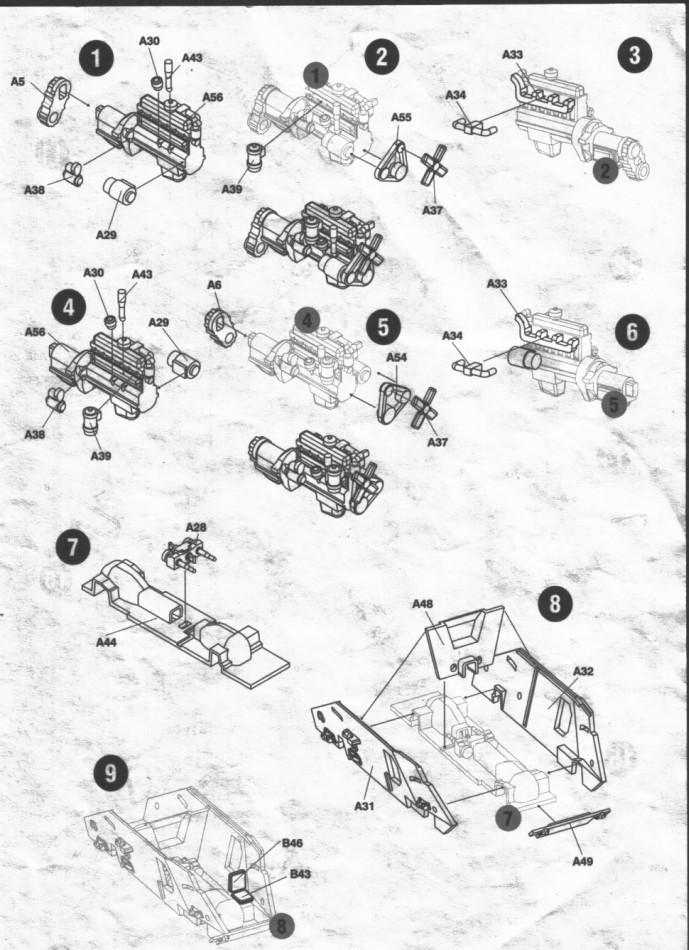
The kit comes on two sprues containing a total of 172 pieces molded in medium grey (sprue A) and dark grey plastic (sprue B). There is an instruction sheet and a small decal sheet. In general this is a typical RPM kit. The moldings are well done but the parts are way too thick which forces the modeller to thin many of the pieces if they want to have things look reasonably realistic. Choices will have to be made as to what merits replacing and what can be lived with. The fit of the parts is suspect as is usual from RPM and the modeller will need to test fit everything and make necessary adjustments before gluing. There are a lot of parts for detailing the interior of the crew compartment and the engine compartment. Since there is no option to build the engine deck in an open position, if the engines are built the deck will need to be modified to display them. I didn't have much confidence with how well the interior parts would fit, and since a lot of them were also quite thick plus you won't be able to see much of the interior anyway through the doors and visors, I consigned the engines and all of the interior pieces to the spares box. Some prominent fit problems with the hull to look for are:
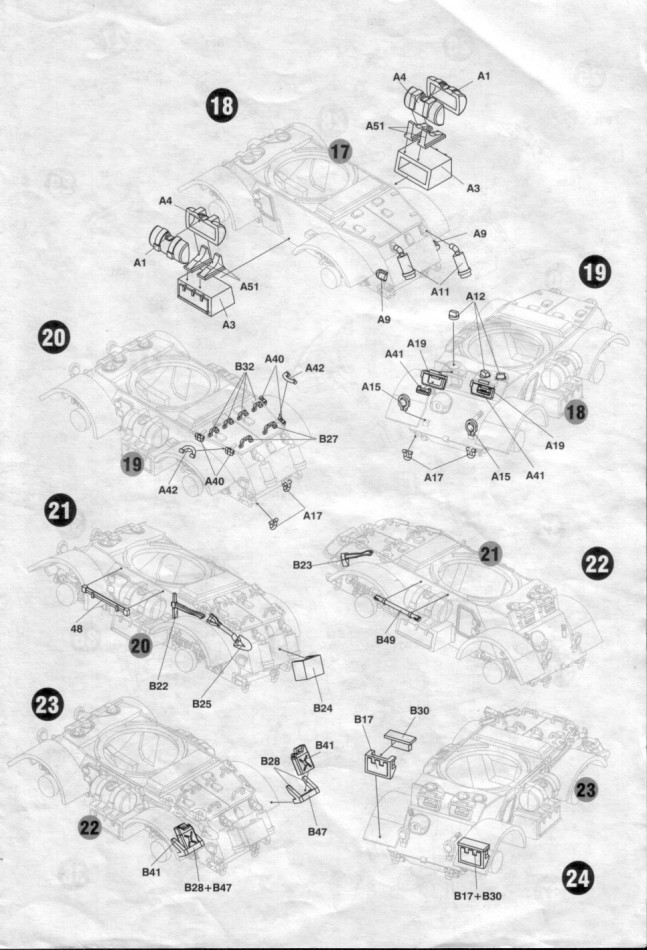
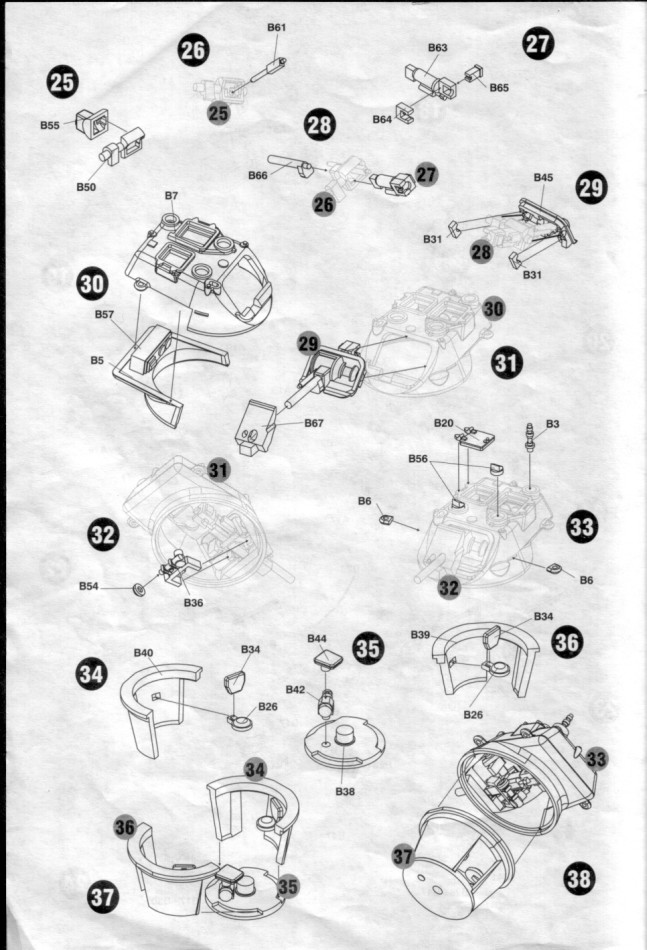
Whether you build the kit with or without the interior, you'll need to ignore the instructions and add transfer case (part A28) to the bulkhead (part A48) at Step 7 before Step 8 or you'll have problems fitting the bulkhead into its assigned location. Because of the thickness of the parts and the way the hinges for the engine covers are molded there will be a gap between the hinges and the deck itself. I filled the gaps with a short piece of thin plastic rod. The panel below the mufflers was also thinned with some scrapes of the hobby knife. The stowage boxes (parts B17 & B30) are hollow so I added bottoms to them to make sure that you couldn't see the empty undersides after they were glued to the fenders. The three periscopes (part A12) for the driver and gunner located on the top front of the deck were molded rectangular but the back sides should have a slope which I added to each with a few swipes of the file. The hollow box like structure (part B24) that fits between the mufflers is much too thick and instead of building a new one I took the easy way out and made a closed topped storage box from some plastic rod and sheet as a replacement. At this point I was getting tired of all the thinning I had to do on this kit. The brackets on the rear fenders that hold the jerry cans are also too thick, and instead of manufacturing new ones I decided that they would be acceptable as they were. The carpet monster reared its ugly head a few times. I lost the axe (part B23) and somewhere along during the build one of the semi-circular loops that goes on the top rear of the engine cover (part A42) got knocked off. With the axe AWOL, I fashioned some loops from brass strip to indicate where it would have been located on the right rear of the body and while I was at it I also fashioned some loops from brass strip to put around the handles for the shovel and pick axe. For the missing engine cover loop I fashioned a replacement from some copper wire. The headlamps were poor so I replaced them with spares from the parts box and fashioned brush shields from brass strip. The MG port on the front hull is supposed to be blanked off according to the box art and the painting diagrams but there is no part on the tree or indicated in the instructions to cover the hole for the missing machine gun. I punched a circular cover from some plastic sheet and glued it over the opening. I didn't add part B68 which goes across the front of the body between the two bins on the fenders. This appears to be some sort of carrying bin. The kit part is all molded square but I'm pretty sure that it should be rounded. I didn't feel like making a replacement and it too was left off the kit. Tarps were added to clutter the look a bit. They were made from rolled pieces of Tamiya two part epoxy putty. In the past I've had problems with this method of creating tarps and the like from Tamiya putty. I used to use water or alcohol to try to stop the putty from being so sticky while I worked on it, but a fellow modeller in my local club suggested I use talcum powder instead. This worked like a charm. Using talc is very similar to rolling out pie dough with flour and the putty doesn't stick at all to the surface you're rolling it over. To get the tarps to sit properly as they hardened, it let them sit on the fenders with a piece of waxed paper underneath so they wouldn't stick to the model. Thin strips of thin lead foil were added to replicate straps. The turret needs a fair bit of work to look acceptable. The bustle is much too thin in profile so some plastic was added to the bottom, the seams were filled and then the bustle was shaped to a more accurate profile. The turret is molded too smooth so I textured it to make it look more like a casting and the prominent casting seam was added. The seam was added with thin bits of heat stretched sprue glued to the turret and then scraped with a hobby knife and sanded to flatten it from its round shape. Texturing of the turret was done by spreading liquid glue over the surface of the turret and then taking a piece of sprue and rubbing it into the glue. Once dry it can then be sanded to reduce the prominence of the texturing. I found that cutting off the rear lifting hook eased the effort required to do the texturing. I glued them back into their proper places after all the major work was complete.
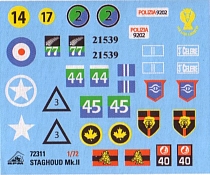
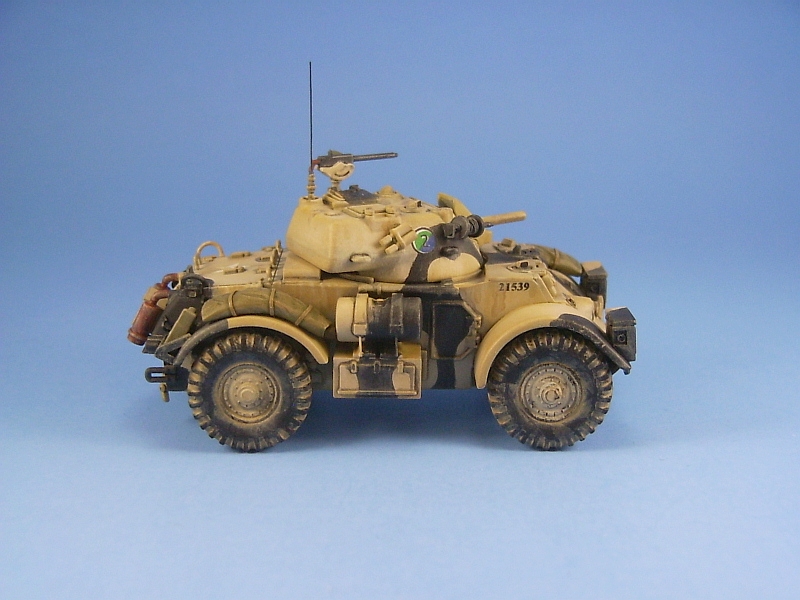
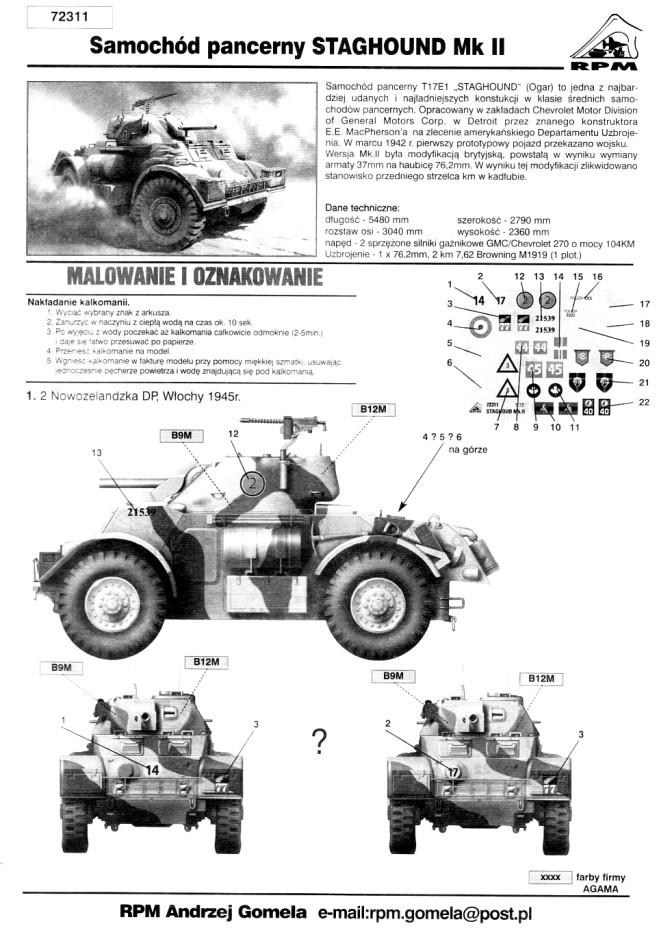
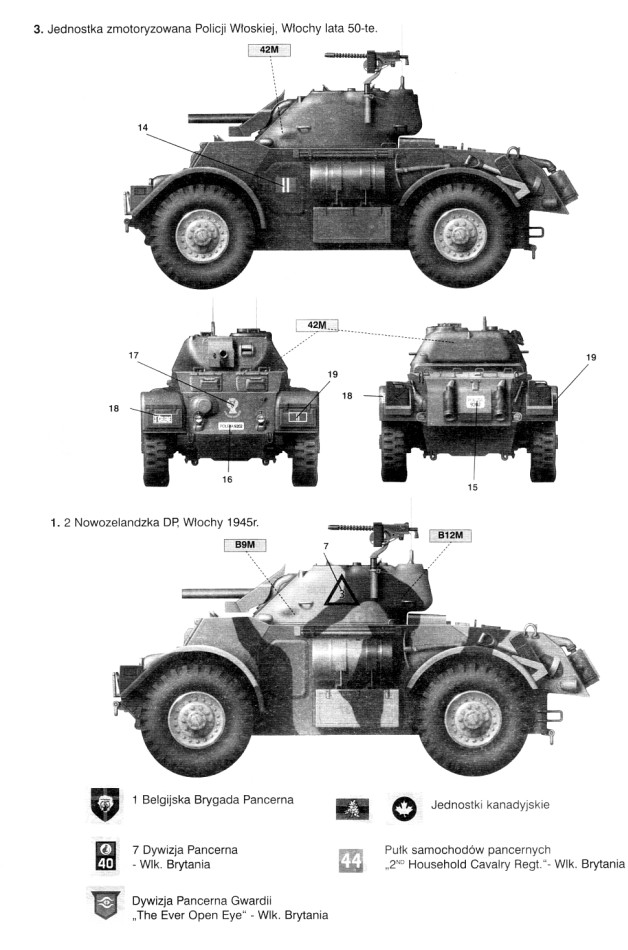
The wheels and tires are excellently molded and are easily the nicest part of the kit. The painting instructions were a bit confusing because the colour codes listed were not familiar to me. A query to the Braille Scale forum on missing-lynx.com revealed that the paint manufacturer is Agama (thanks to Milan Vins from Track & Troops for the answer), and a web search places them in Czech Republic. But if I'd had been paying closer attention I might have figured this out on my own where Agama is mentioned at the bottom of the painting guide ("Doh!", as Homer Simpson would say). Further research pointed to the camouflage as most likely being light mud with black disruptive bands (the Agama colour specified was a Dark Navy Blue). So armed with this info the kit was sprayed Testors Model Master Sand 1706 (FS33531) enamel for the light mud colour, and Testors Flat Black 1749 enamel for the disruptive pattern.
All in all building this kit required a bit more effort than I had originally planned. This kit makes a good starting point but some extra effort will be required from the modeller to make the finished model more accurate.
Review sample purchased by the author. |
| Back to RPM Kit List | Back to Construction Reviews |
Article Last Updated: 04 July 2009 |
Back to Home Page |