|
|
www.onthewaymodels.com |
Sturmtiger |
|||
| Kit # MV004 | Preview
by Stephen Brezinski
- sbrez1(at)comcastl(dot)net Edited by Rob Haelterman |
||||
|
|
www.onthewaymodels.com |
Sturmtiger |
|||
| Kit # MV004 | Preview
by Stephen Brezinski
- sbrez1(at)comcastl(dot)net Edited by Rob Haelterman |
||||
|
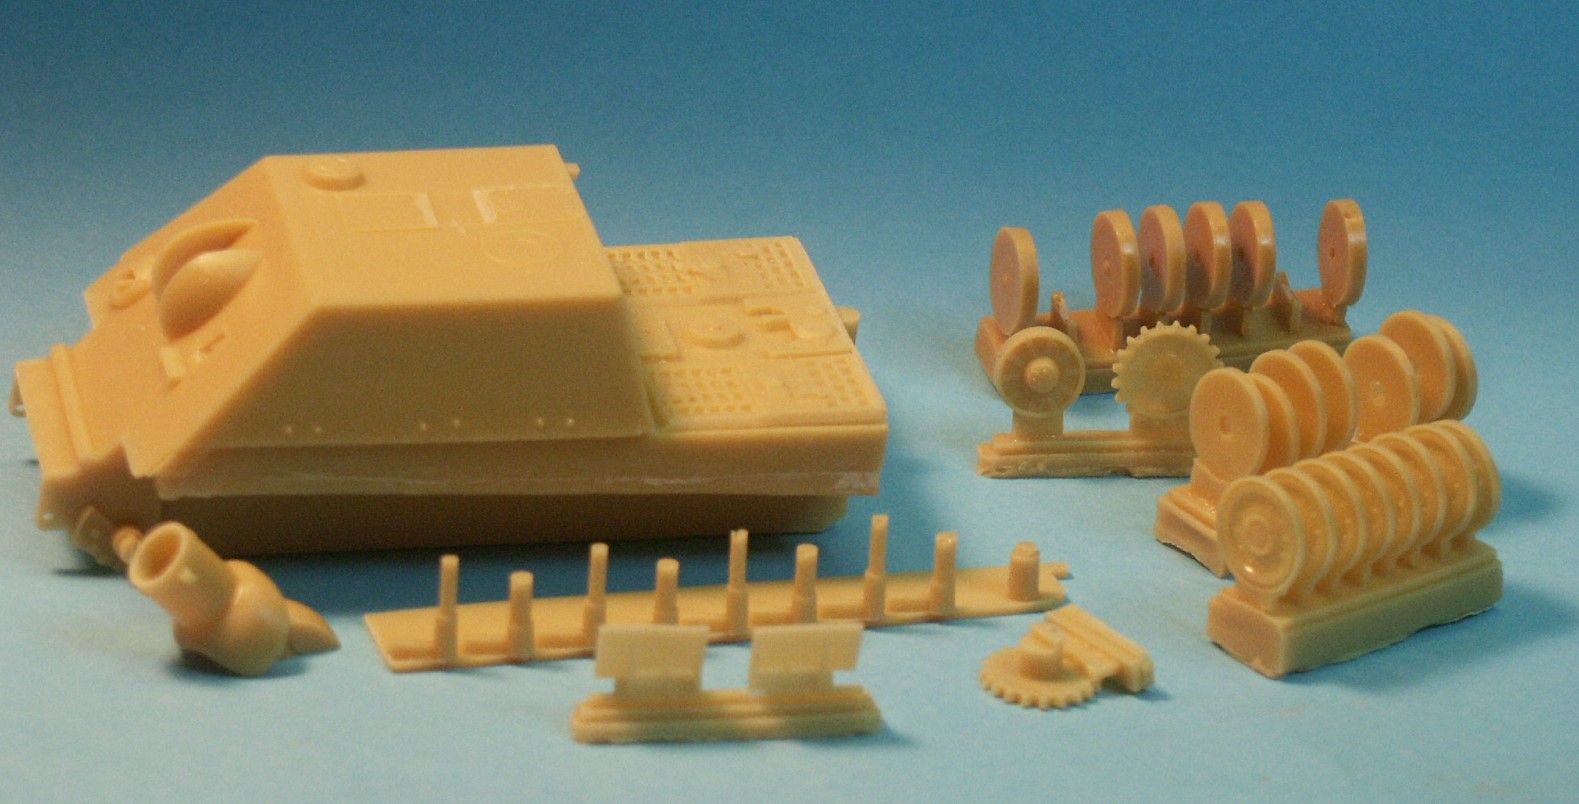
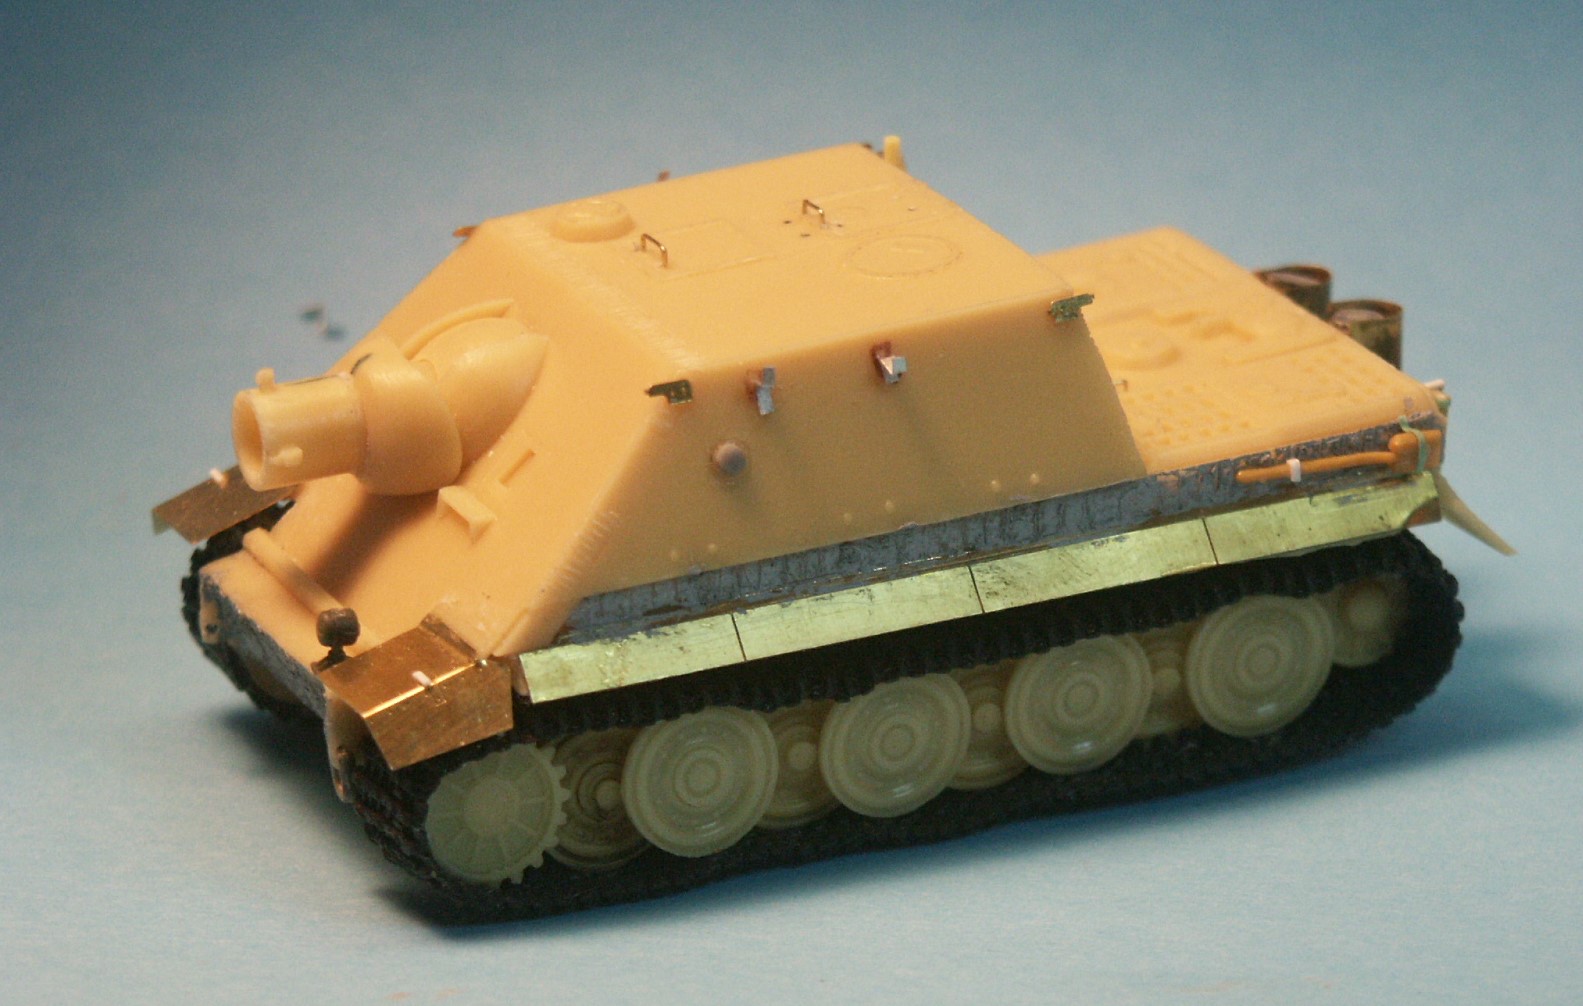
This cast resin and etched brass model kit, I will argue, is one of
the worst resin model kits produced. This is one of Planet Models
first resin kits and unfortunately is based on the early Hasegawa
Tiger 1 model kit no. 31136/MT36 with steel roadwheels. Unfortunately,
the copied steel rimmed roadwheels come with a resin copy of the original
Hasegawa torsion bar suspension from their Tiger
model kit 31108/MT8. The torsion bar suspension part and the wheels
just do not work well together. At the time this kit was released
this was the only 1/72 scale Sturmtiger model based on the only 1/72
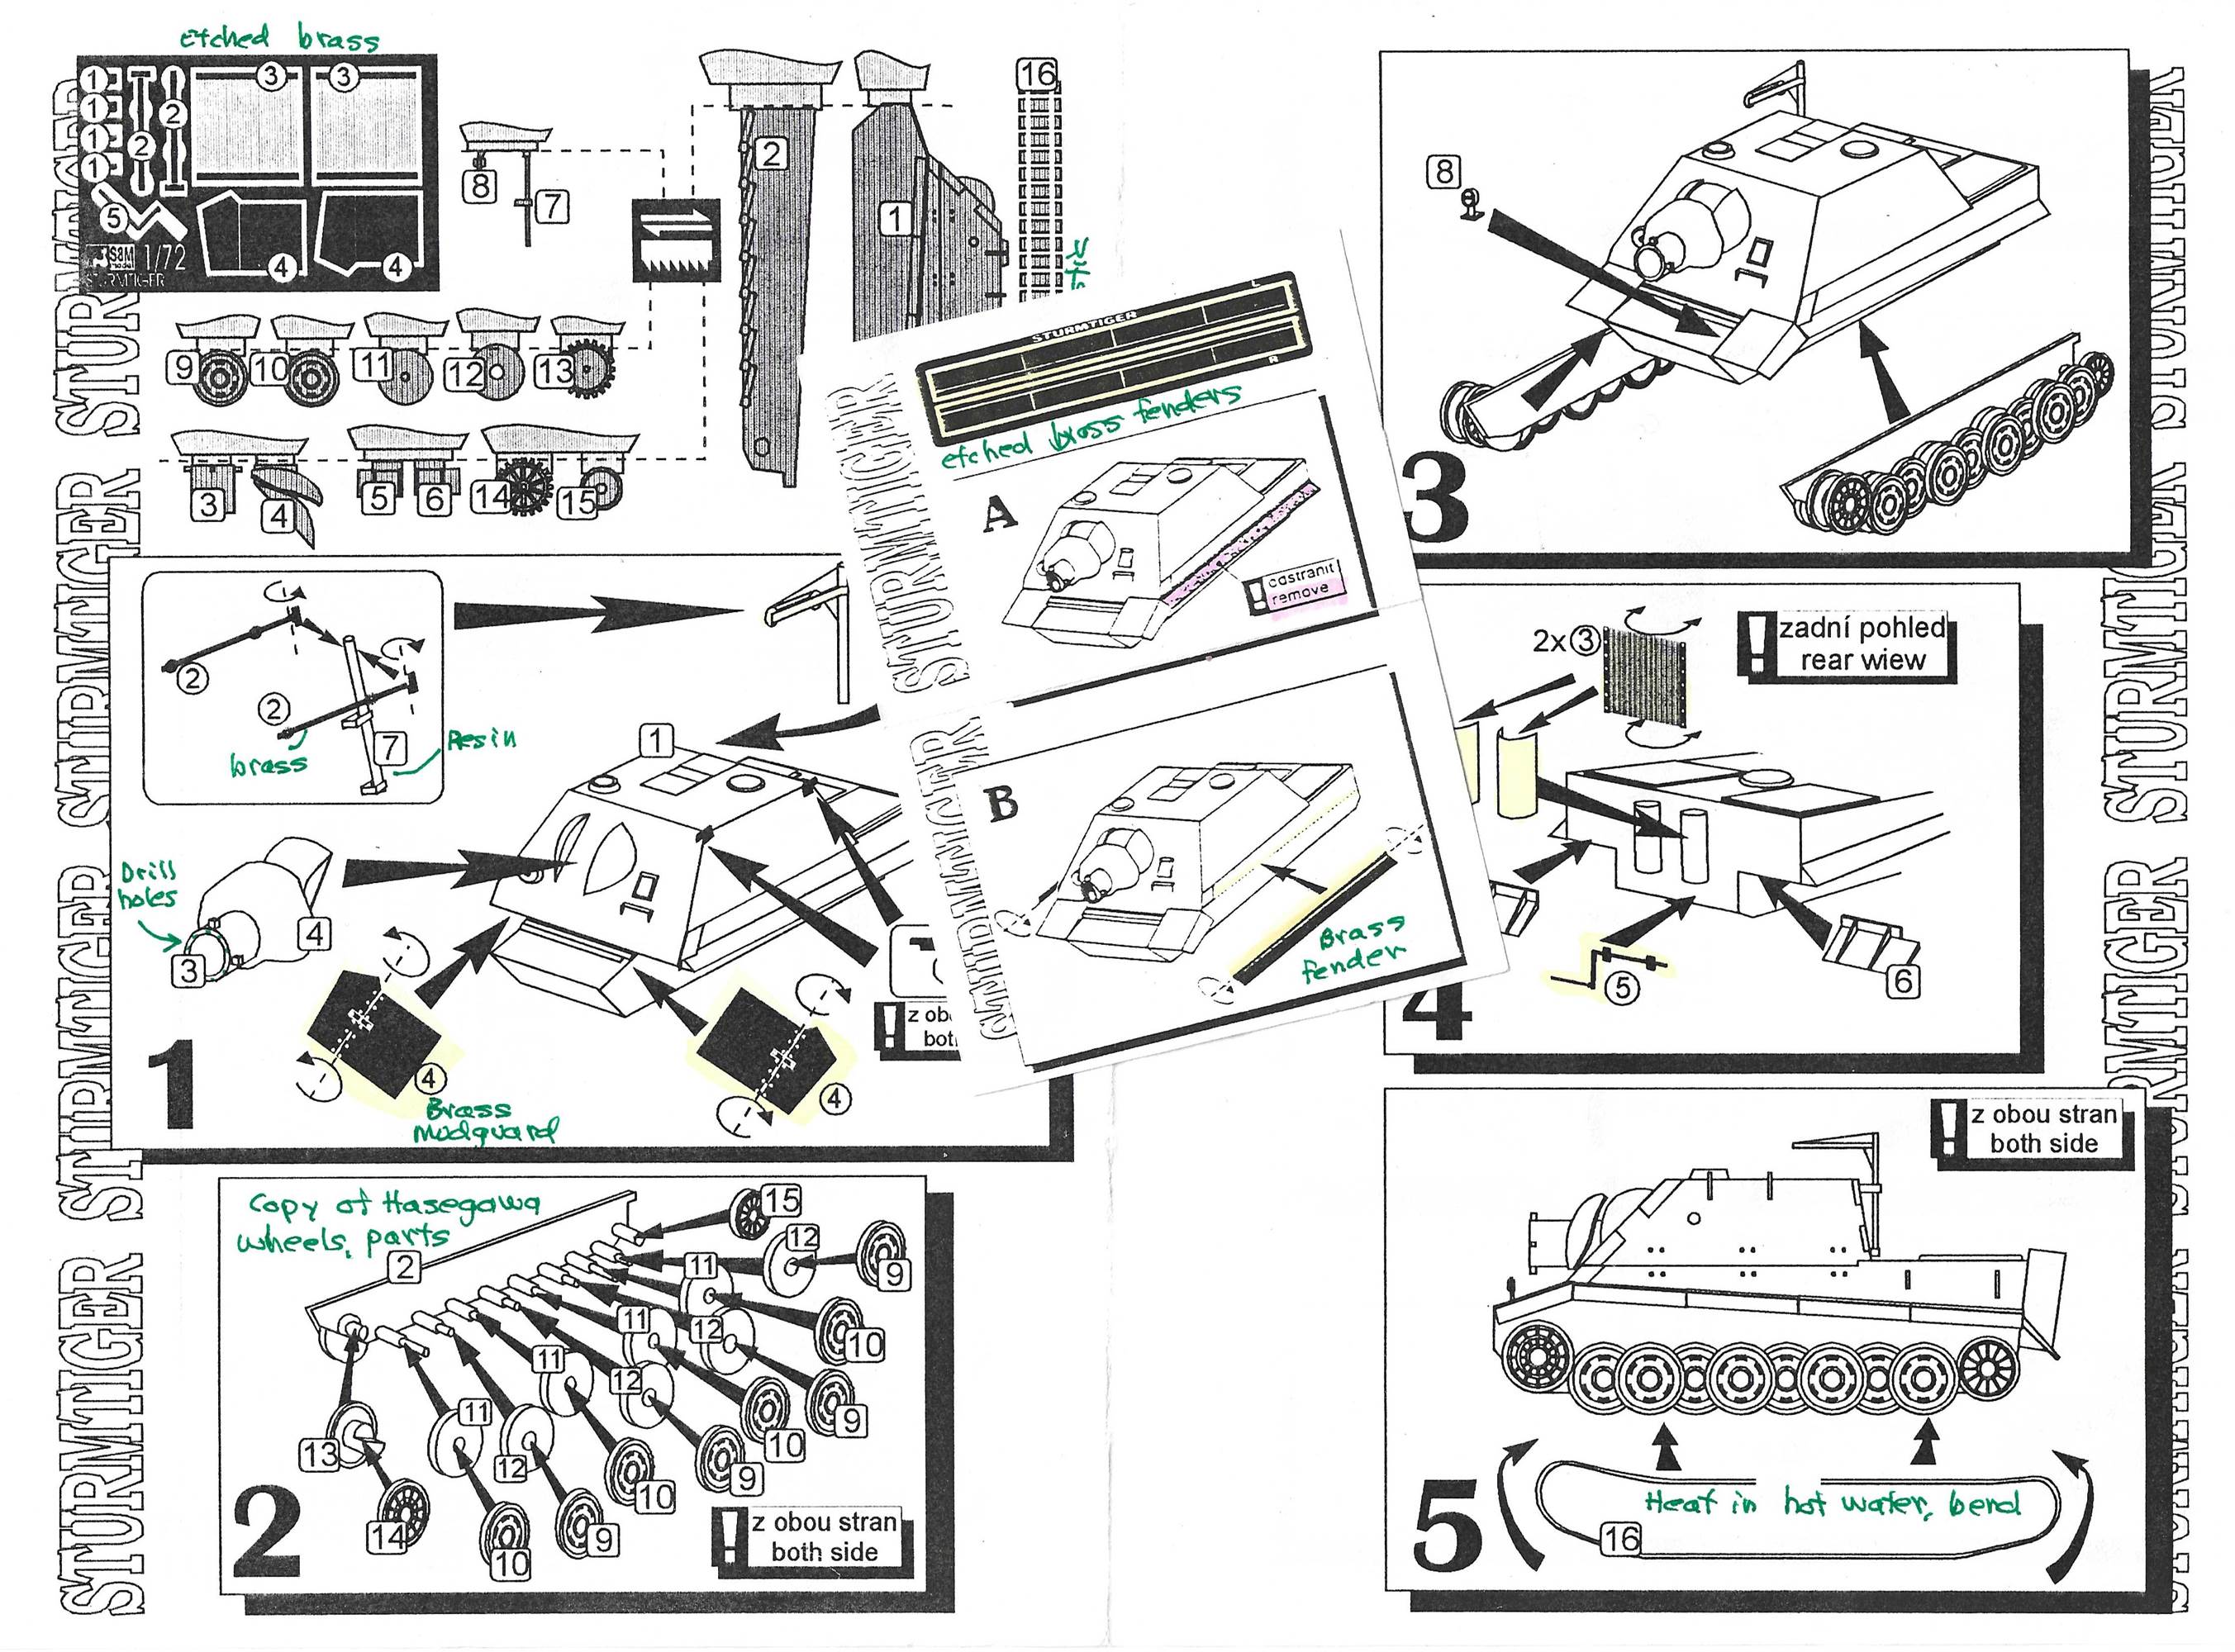
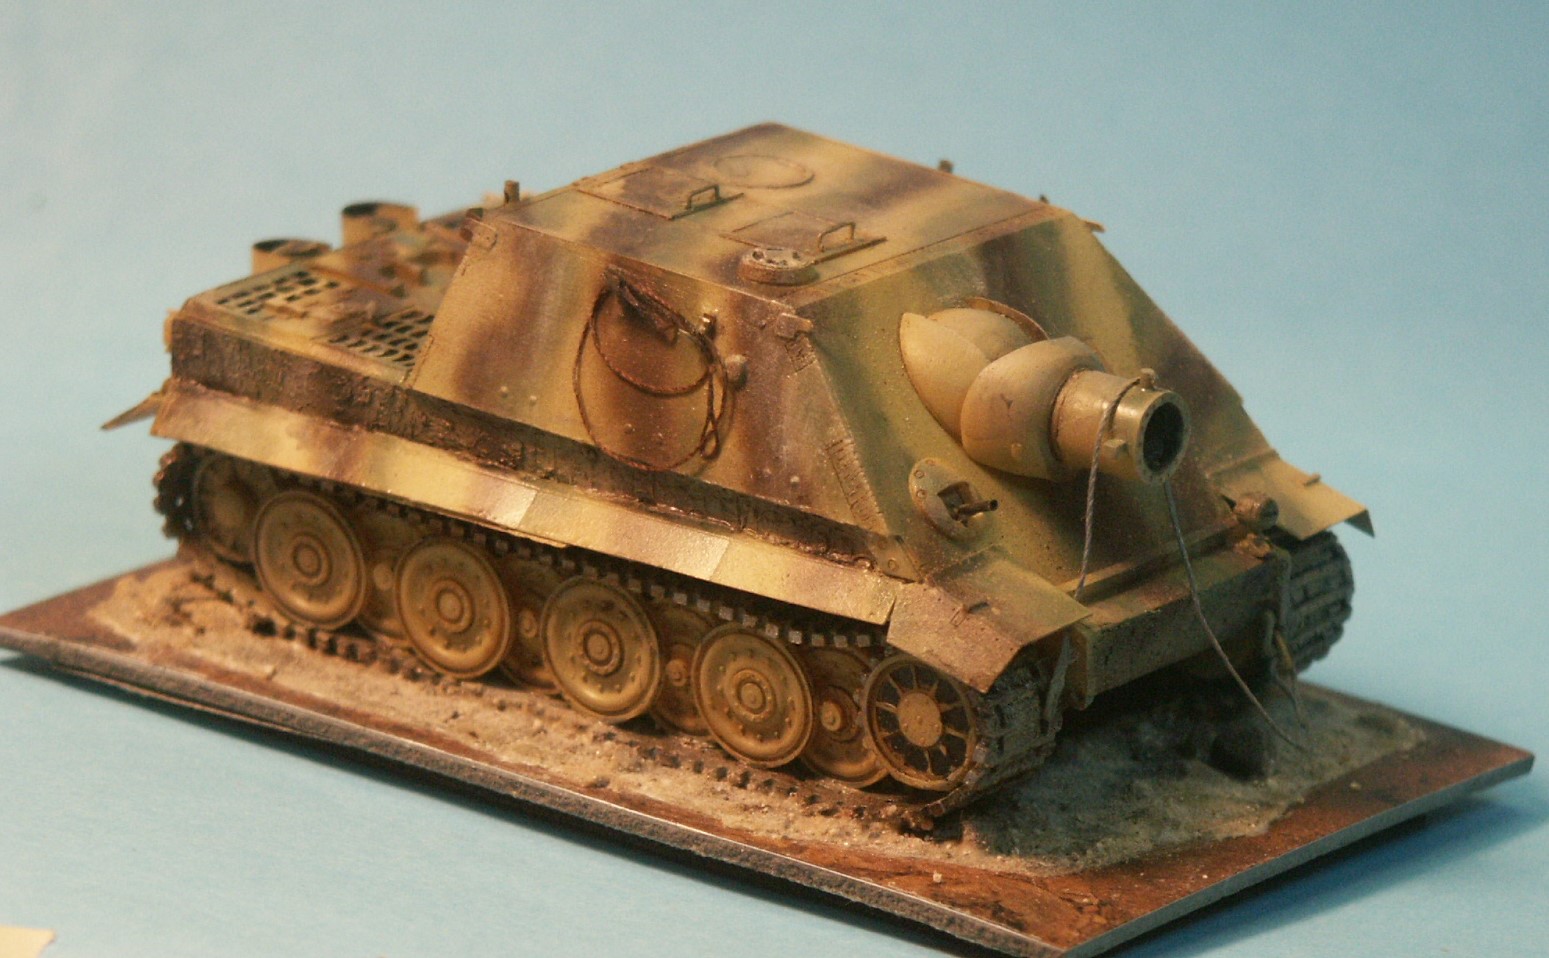
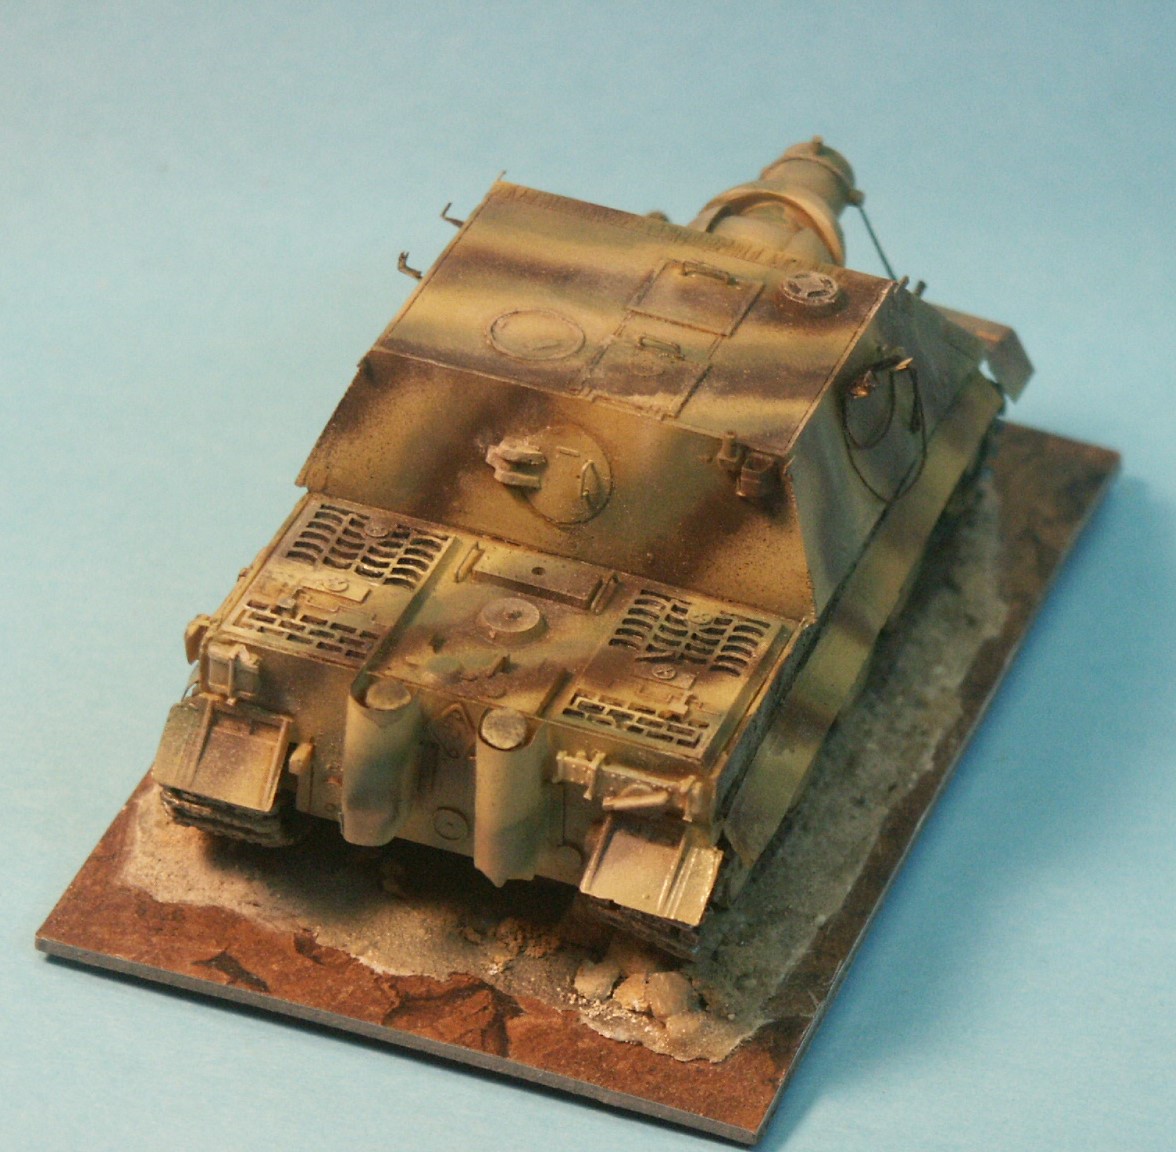
plastic Tiger 1 model kit at the time. The Sturmtiger was armed with a 38-cm rocket launcher that breach-loaded from the interior; no it was not a muzzle loader as one of my references claims. There were rocket exhaust vent holes around the end of the barrel muzzle (see reference photos). With a small pin drill, make these holes as best you can. Notice
the sequence and placement of the roadwheels starting behind the sprocket.
Planet and Hasegawa, in Step-2 and Step-3, would have us put the outer
roadwheels immediately behind the sprocket on axle-1. The first outer
roadwheel however in Step-5 is on axle-2, which is where it should
be. This confusion and contradiction are caused by Hasegawa using
the same lower hull side with the axles from their first Tiger release
(with rubber tired roadwheels) in their later kit with the steel tired
roadwheels. The later Tiger uses fewer roadwheels. I recall building
the Hasegawa steel tired Tiger 1 years ago and having to do major
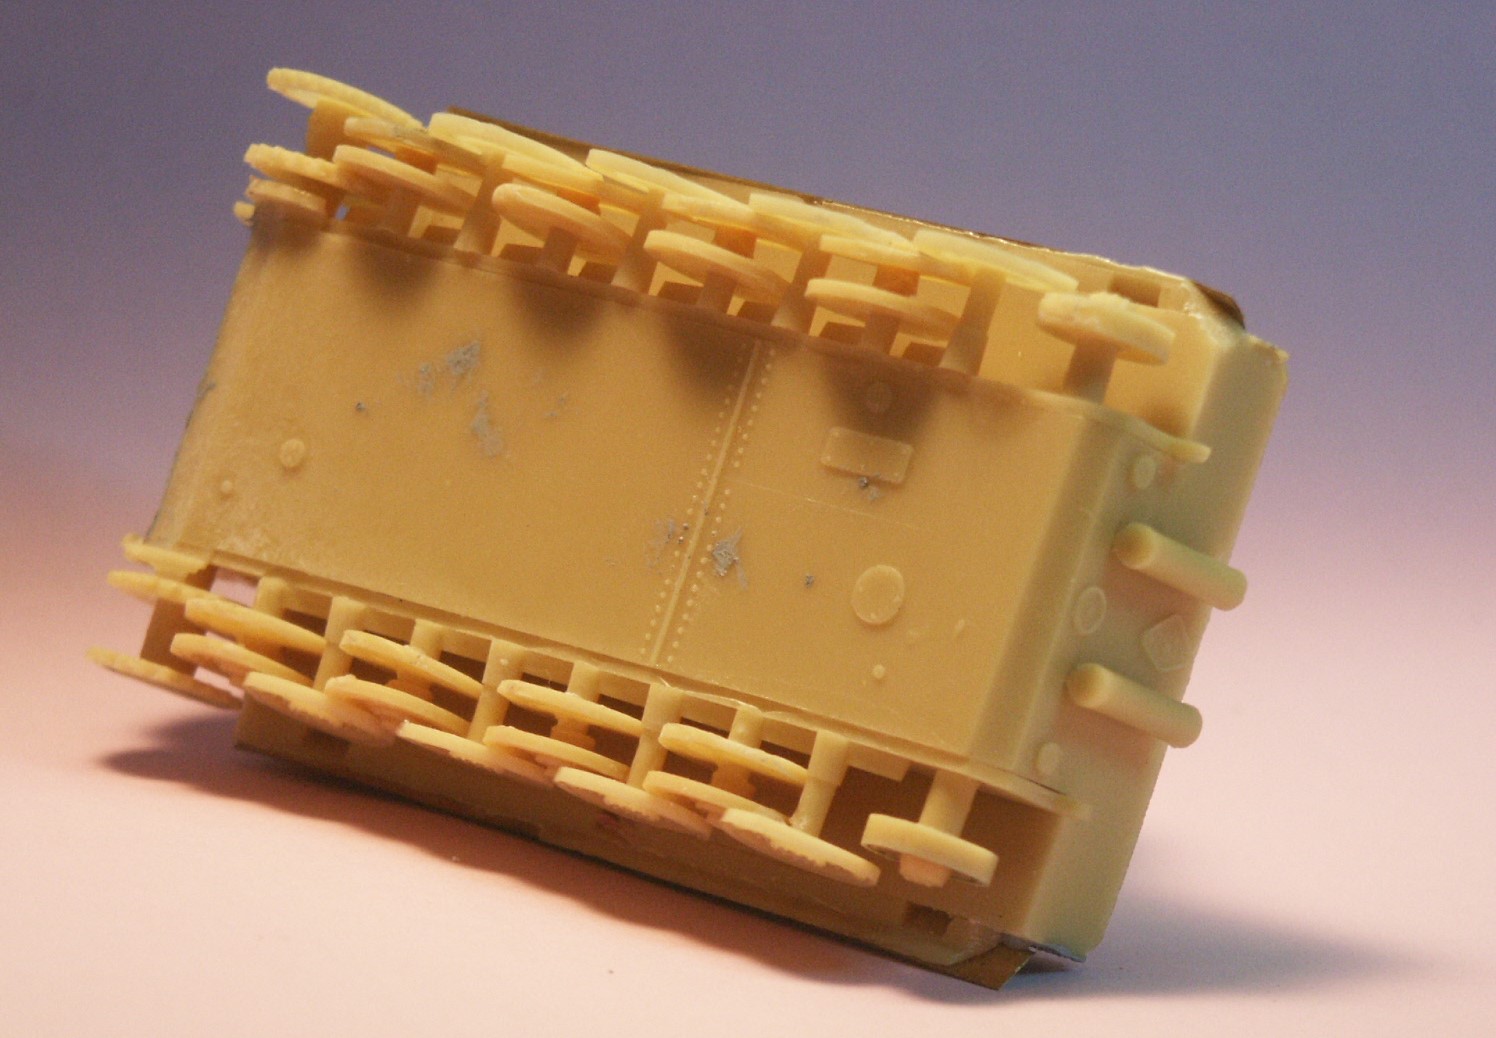
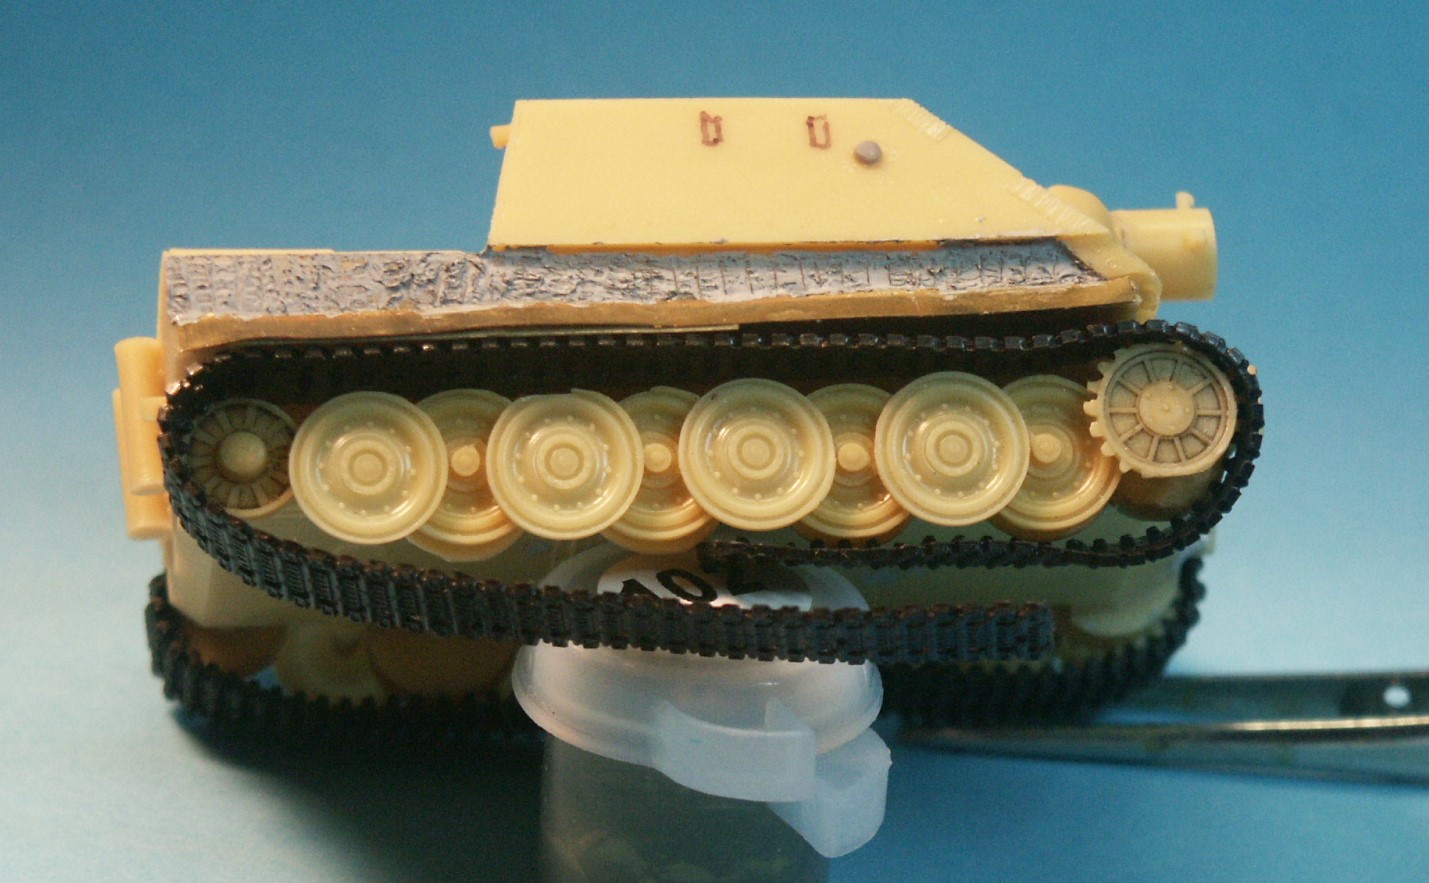
surgery to get the axles and wheels correct. Several of the resin roadwheels were broken when removing them from the pour blocks. Many of the inner roadwheels I left off as they cannot be seen after assembly. Some replacement track stolen from a Dragon or Trumpeter Tiger kit would be an improvement, but if we are going to do that, then we also can replace the roadwheels and sprocket wheels. But that is putting a lot of money into a kit when we can buy the (in my opinion) much superior Dragon or Trumpeter Sturmtiger model.
Here on the port side I used a track taken from a Dragon Tiger I model kit. This track is more accurately detailed, more flexible and glues down with regular super glue to the wheels: a significant improvement over the Planet kit track. I have been mixing tracks a lot with my models lately because I like to compare the tracks that the comes with the kit with how it could be better, more accurate, just by turning the vehicle 180 degrees. Do not do this for a model built to enter into a model show contest though. The model was finished in a three-color camouflage as portrayed in the instructions and in several historical photos. None of the wartime photos show Sturmtigers in the field to have crosses or unit markings so I did not add any to the model. I am usually pretty forgiving when reviewing a model kit but this one I recommend passing up unless you wish a challenge. I bought one of these 20 years ago when it was the only Sturmtiger available in 1/72 and soon after got another as a gift. To spread the joy, I gifted one to a friend. He mailed it back! To be fully honest, the upper hull is not bad, and casting quality is very good. The suspension and tracks are very poor. I do not believe that this resin model kit is produced anymore but can likely be found in collections and eBay type sites, so if you wish to buy my extra kit please contact me. Kit purchased by the reviewer.
CMK/Planet
kits can be purchased from
|
| Back to Planet Models Kit List | Back to Construction Reviews |
Article Last Updated: 08 December 2020 |
Back to Home Page |