| From
Wikipedia:
Alongside the Bren, Scout and Machine Gun Carriers, the Loyd Carrier
was used by Commonwealth troops in WW2 to tow guns and transport troops.
It was based on the chassis, engine, gearbox and transmission of a
15 cwt 4x2 Fordson 7V truck and parts of the Universal Carrier (track,
drive sprockets, and Horstmann suspension units). The Army tested
the Loyd Carrier in 1939 and placed an initial order for 200 as the
Carrier, Tracked, Personnel Carrying. Total production of
the Loyd Carrier was approximately 26,000.
By far the most notable use of the Loyd was in the TT (Tracked Towing)
configuration where it pulled the 6 Pdr anti-tank gun from the Normandy
landings of 1944 through to the end of the war.
Both Belgium and the Netherlands brought Loyd TTs from the British
Army; they were still in Belgian Army ownership up to at least 1963.
A Belgian variant was the CATI 90 (Canon antitank d'infanterie automoteur
90mm), a self-propelled gun in use from 1954 to 1962.
Loyd
carriers were available in three "numbers" which were available
in two "marks", all manufactured during wartime. As far
as I can tell, they were externally identical to one another. The
biggest differences depended on the role of the vehicle.
- The
Tracked Personnel Carrier (TPC) was equipped with a front bench
seat and seating for troops on the track guards. Frontal and full
side armour fitted.
- The
Tracked Towing (TT) was equipped with five single seats and ammunition
stowage on the track guards. It was used for towing the 4.2 inch
mortar and hauling the QF 2 pounder and QF 6 pounder anti-tank guns
and carrying its crew. Frontal and front quarter armour was fitted.
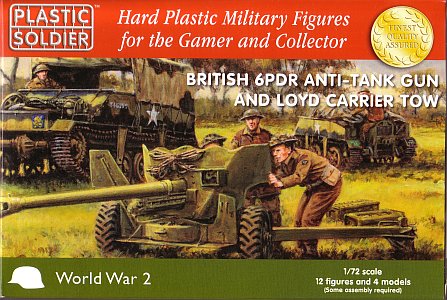
I guess this is the vehicle we have in the kit, even though only
four figures are provided.
- The
Tracked Cable Layer Mechanical (TCLM) was a vehicle for Royal Signals
Corps work. No armour was fitted.
- The
Tracked Starting and Charging (TS&C) vehicle was equipped with
a front bench seat, 30 volt and 12 volt DC generators driven from
the gearbox layshaft and battery sets to support armoured regiment
tanks. No armour was fitted.
- The
Tractor Anti-tank, MkI was used to tow the QF 2-pdr anti tank gun.
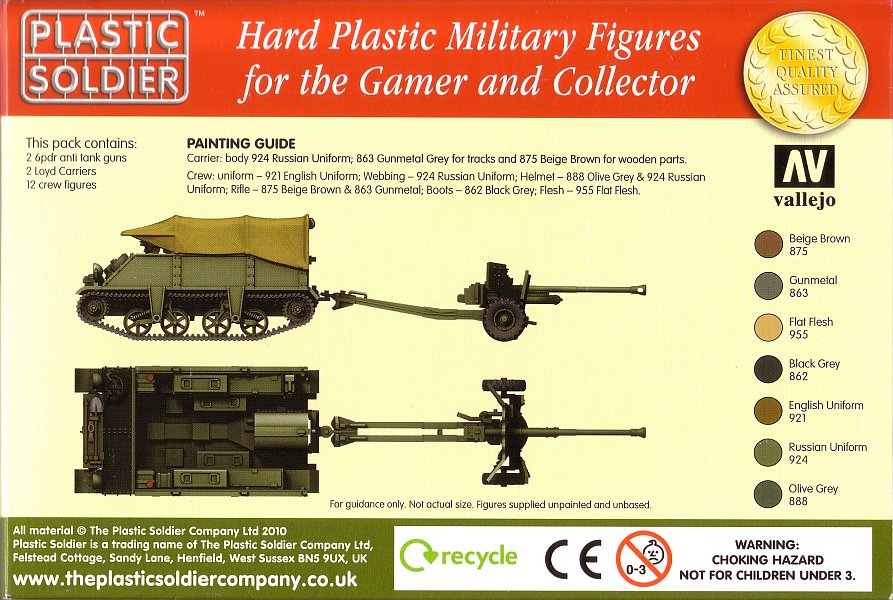
The Kit
(Note: This review only covers the Loyd Carrier. A review of the gun
can be found here.)

The parts are a medium grey colour, molded in a softish, injected
polystyrene like, greasy plastic; it's easy to bend parts while removing
them or positioning them. An instruction sheet is included, even though
it is not always very clear where to put parts (which aren't numbered).
Some parts also seem to be optional, meaning that I didn't find them
in the manual. A case in point is a second tow coupling (if that's
what it is).
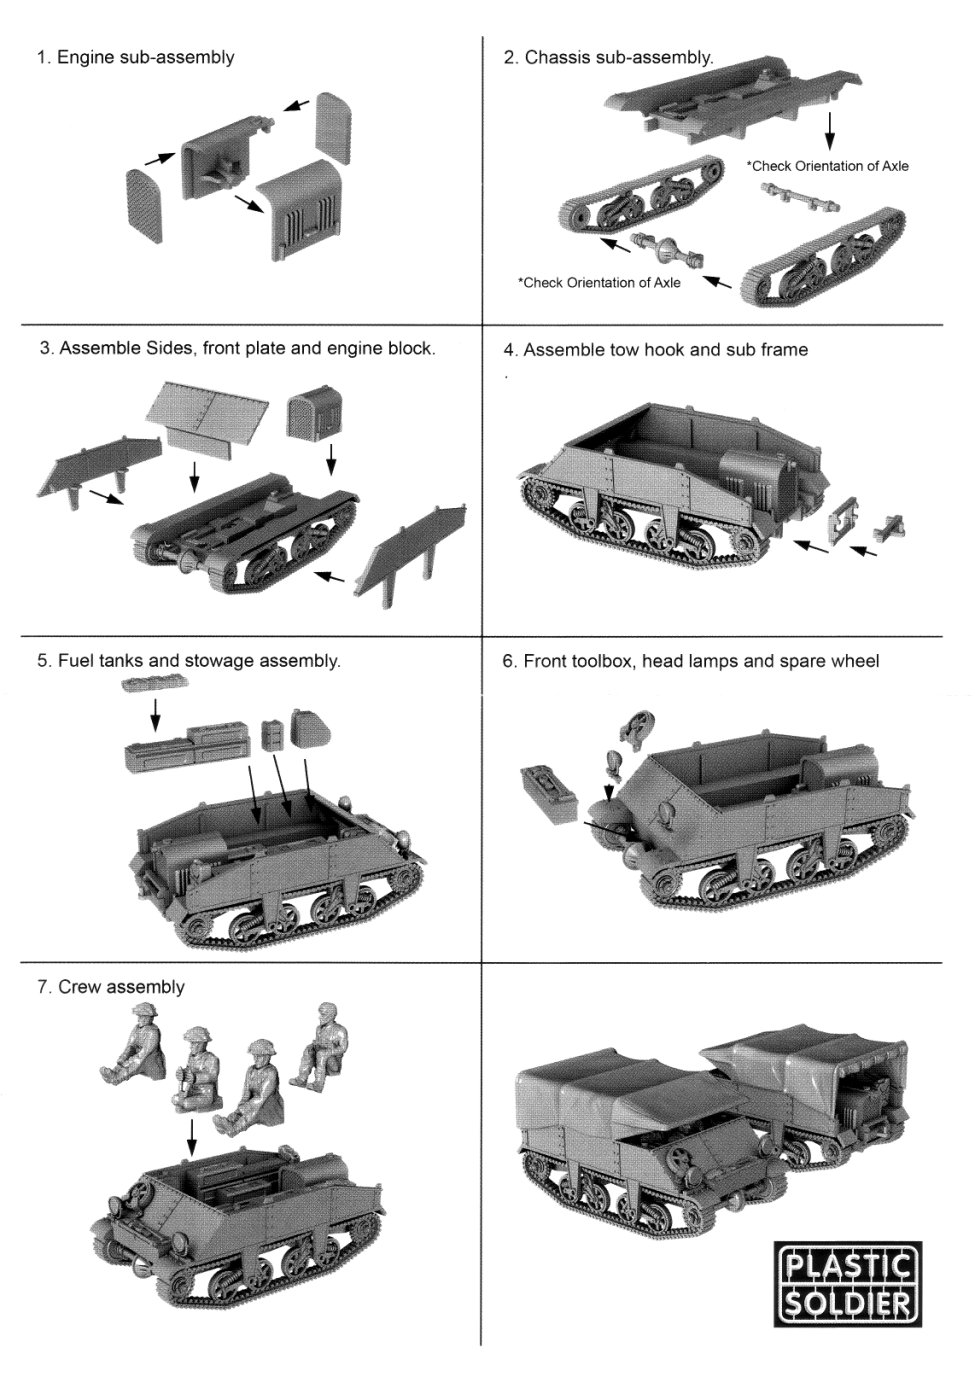
The suspension (single piece track
units and connecting axles) can be built as a separate unit. They
will fit without glue, which makes painting easier. The single track
units are not bad, but the teeth are "double wide" (almost
impossible to correct) and the track faces are rather simplified,
even though the real carrier didn't have the most elaborate of tracks
either.
In the fifth step "something" is supposed to be fitted on
top of the rearmost boxes. I do not quite know what that "something"
should be. I also guess that somewhere between step 5 and step 7 boxes
need to be installed on the right hand side of the fighting compartment.
(In case you were wondering, no, it's not in step 6.) While we would
expect that side to be just the mirror image of the left hand side,
some parts are only given once, so this won't work. It's also not
quite clear on which side to put which fuel tank (if that's what they
are). They are handed, so a choice needs to be made.
By the time we reach step 7 it
also seems extra boxes (and a jerrycan ?) have sneaked into the fighting
compartment. In the same step it is quite clear where the driver figure
should go, but not as much where the other three lads should sit.
Personal modifications/additions/...:
- I decided to build my vehicle as
a Beute, as seen here.
- There are some badly located ejector
pins at the rear of the side walls. These were hidden with extra
jerrycans.
- Only the driver figure was used.
His head was severed and a more Teutonic head was grafted on. The
figures are not bad, by the way.
- The spare roadwheel was not used,
as it didn't appear in the picture I based my work on.
- The hood was installed (even though
my reference picture didn't have it) and tie down straps were made
from stretched sprue. If the modeler chooses to install the hood,
this is something that needs to be added to have a convincing look.
_t.JPG) _t.JPG)
_t.JPG)
_t.JPG)
_t.JPG)
 _t.JPG)
Review sample exchanged with Marc
Mercier for an S-Model Chenillette UE.
Plastic Soldier
Company products are avilable at

|

.JPG)
.JPG)
.JPG)
.JPG)
.JPG)
.JPG)
.JPG)