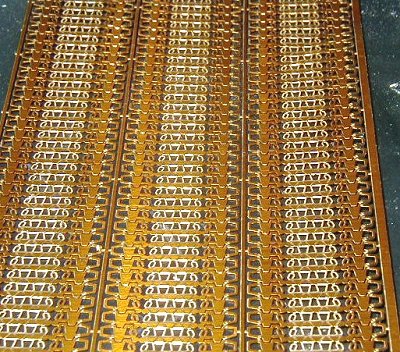
Panzer IV Photoetched Tracks
Manufacturer: PART (# 72068)
by Augusto Versiani - augusto.versiani(at)pobox.com
Introduction
I had no experience with photo-etched parts. It came first from the price, as I am trying to keep some money in my wallet, and second to avoid more work that will slow down my assembly pace which is already unacceptable low. But I came to a problem that makes this step inescapable. I have many Hasegawa PZ IV-family kits in my closet and I had to find some solution to replace those horrible tracks. The first option was sacrifice a Revell kit for the tracks, but it was against my beliefs. So the other possibility was, for the first time, to try etched parts. I tried to find someone with previous experience in this field, and to discover from the two companies (Extratech or Part) which was the better and easier job. I had no success in this matter so I took the risk on my own choice, and ordered two Part samples.
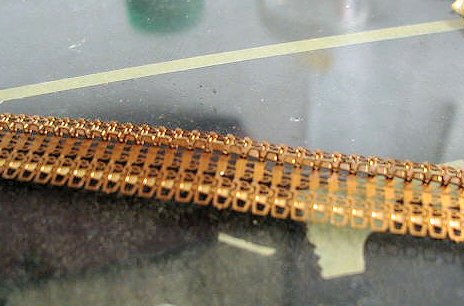
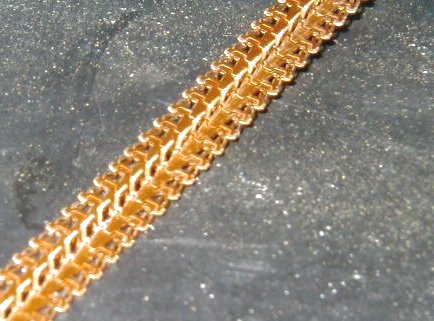
As I said, I have never worked with etched brass before, so I must say that I was very concerned about my capability to do the job. But the work happens much more easily that I could imagine, and the final result was, in my opinion, that best tracks that I ever saw. See the photos and judge for yourself.
Tools
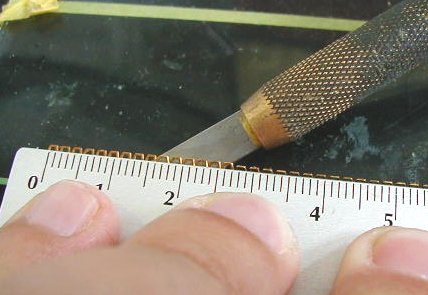
I used a brand new Xacto blade, an aluminum ruler, Tamiya stirring stick (but any squared flat tip stick will do the same job) and a piece of glass.
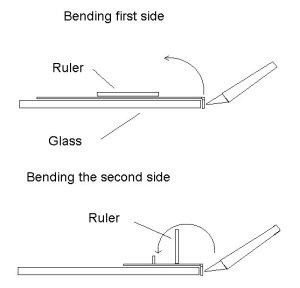
Steps
I tried different approaches, but this one goes better:
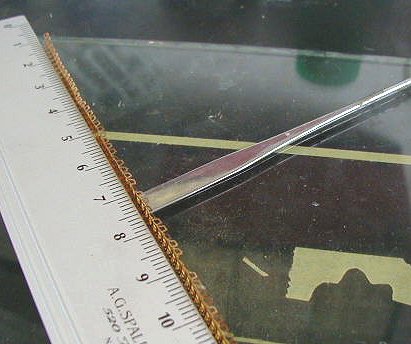

Conclusion:
I added some photos of the assembled track, and others with it side by side with Revell and Hasegawa tracks for comparison. The total length of each two parts that form one side track has about 15 links more the Hasegawa rubber one, so you will have enough for spares. On the photos that you see, I did not attach the raised ice cleats. They are not seen on the lower and top surfaces when the tracks are attached and the additional thickness (barely noticeable) is not worth the painful job of attaching them. I will use them only in the most visible places like around sprockets and idler wheels.

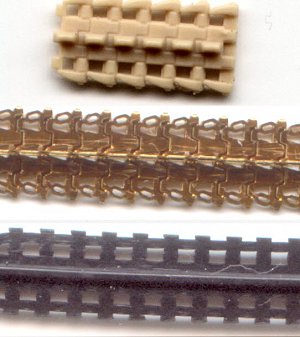
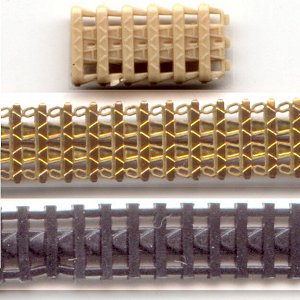
The real problem with this track is the 3d effect. Being so thin it can appear out of scale. So which is the best solution?
So if you are like me and have some moral restrictions in sacrificing a model just for the tracks, go to the PART sample. If not, the decision will be which is more important to you: thickness scale or details.
Recommended for every one, even with no previous experience with etched, like me. I think that they will be great on the model. The only problem is that the Revell sample doesn’t appear that great anymore and I foresee hard days for my wallet again.
| Back to PART Photoetched | Back to Home Page |