|
A Brief History
The Gneisenau was one of Germany's capital warships. Launched in 1936, the ship was declared operational in September 1939. Seeing a variety of surface actions
during the early years of the war, Gneisenau was the object of numerous RAF air raids whenever it was docked in port. The raid on the night of 26-27 February 1942
damaged the ship to the point where major repairs were needed. In early 1943 Hitler stopped all work on the Gneisenau whereupon the turrets were removed to become shore
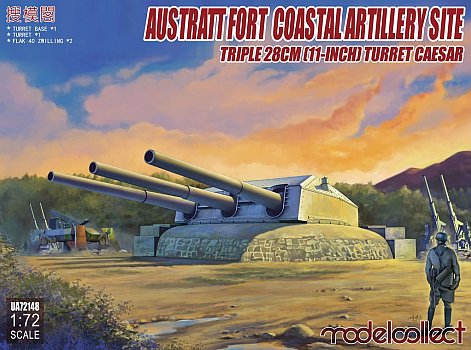
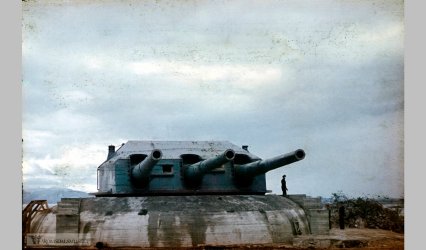
defensive batteries. Turret Caesar, armed with triple 28 cm SK C/34 (11-inch) guns, was installed in Austrått Fort near Trondheim, Norway, to protect
the entrance to the fjord. It was manned by Marine Küsten Batterie Orlandet.
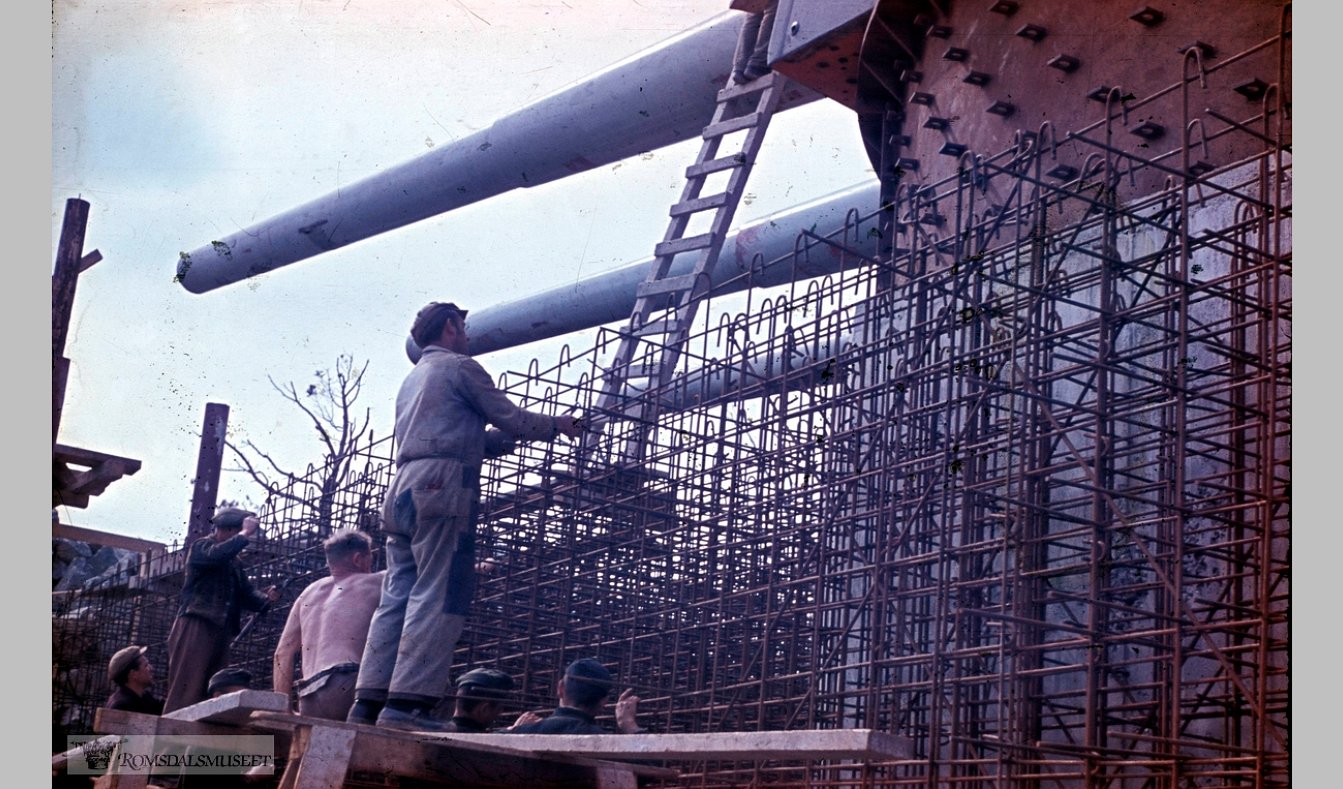
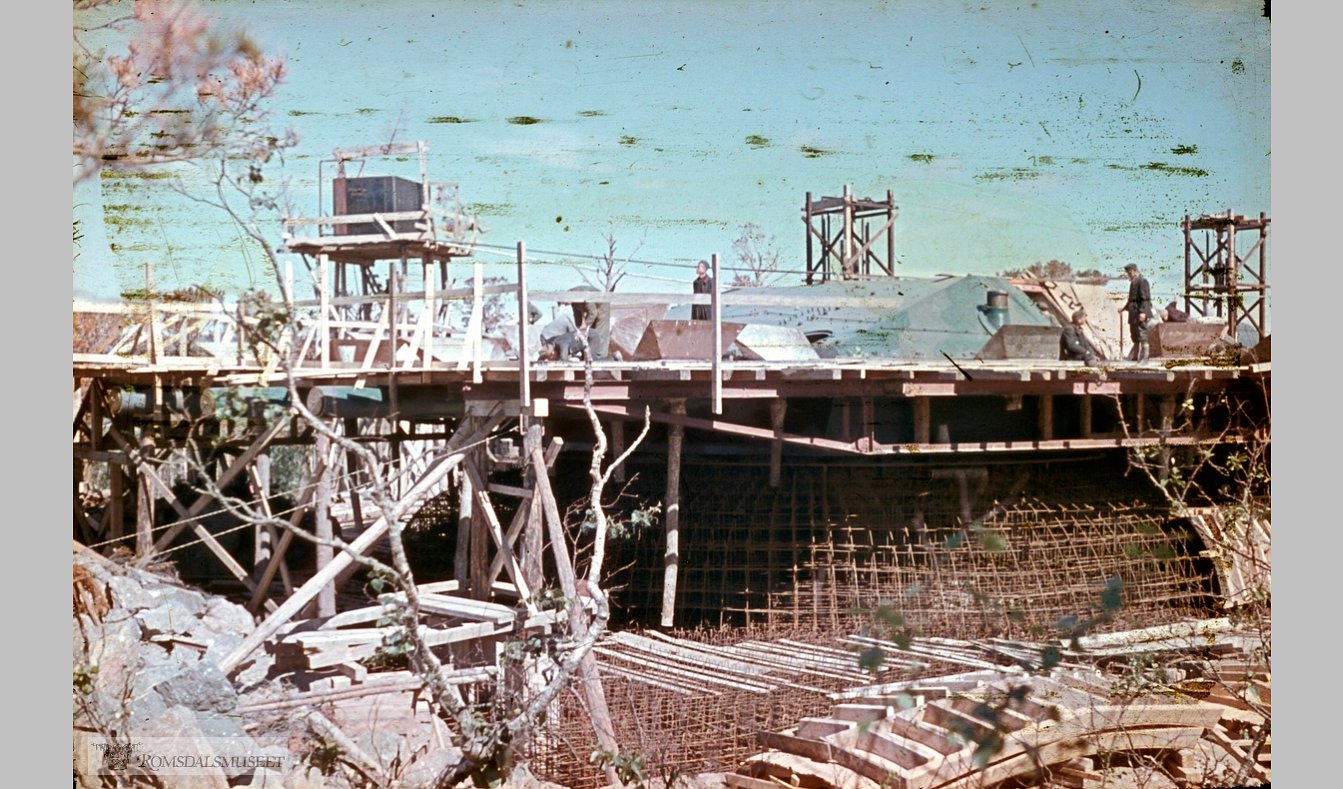
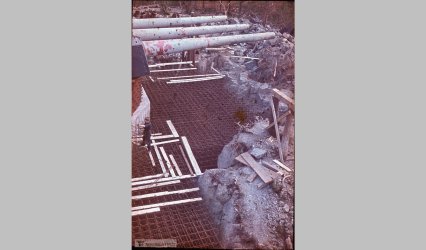
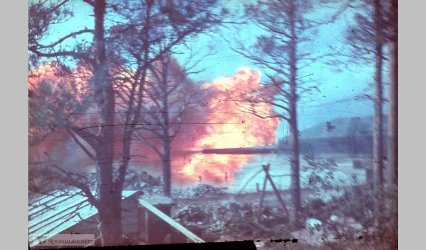
Construction used around 650 Serb forced labourers, to eventually build a five story complex of tunnels and bunkers. In August 1943 the guns were test fired. At the time
of the German surrender in 1945 the fort saw no action.
Post-war, it was taken over by the Norwegian Navy until its decommissioning in 1968. In 1991 the site became a museum.
The Build
This review will deal with the turret and guns only. The pair of included 12.8cm Flakzwilling 40 guns have been previously
reviewed here.
This kit has such a litinay of issues I decided to remedy those problems that I felt were the most egregious and ignore the remainder.
The first item ignored was the rivets. The real gun's rivets are round with flat tops and square depressions. The kit's rivets are just rounded bumps.
There are too many and too
much trouble to fix. Someone with more talent than I might remove them and print 3D replacements, or perhaps, try to reduce their height with sandpaper
and drill their centers to look more realistic.

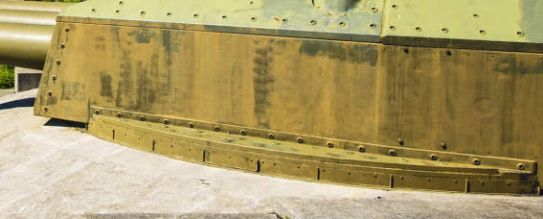
Also ignored was the number of rivets on the stiffener that runs along the base of the gun. The kit has 16 bolts. The real gun has 15. Doesn't bother me but
those desiring the utmost in detail will need to remove them and add them again with the proper spacing.
Ok, now on to the real meaty issues. I've divided them into sections based on their location.
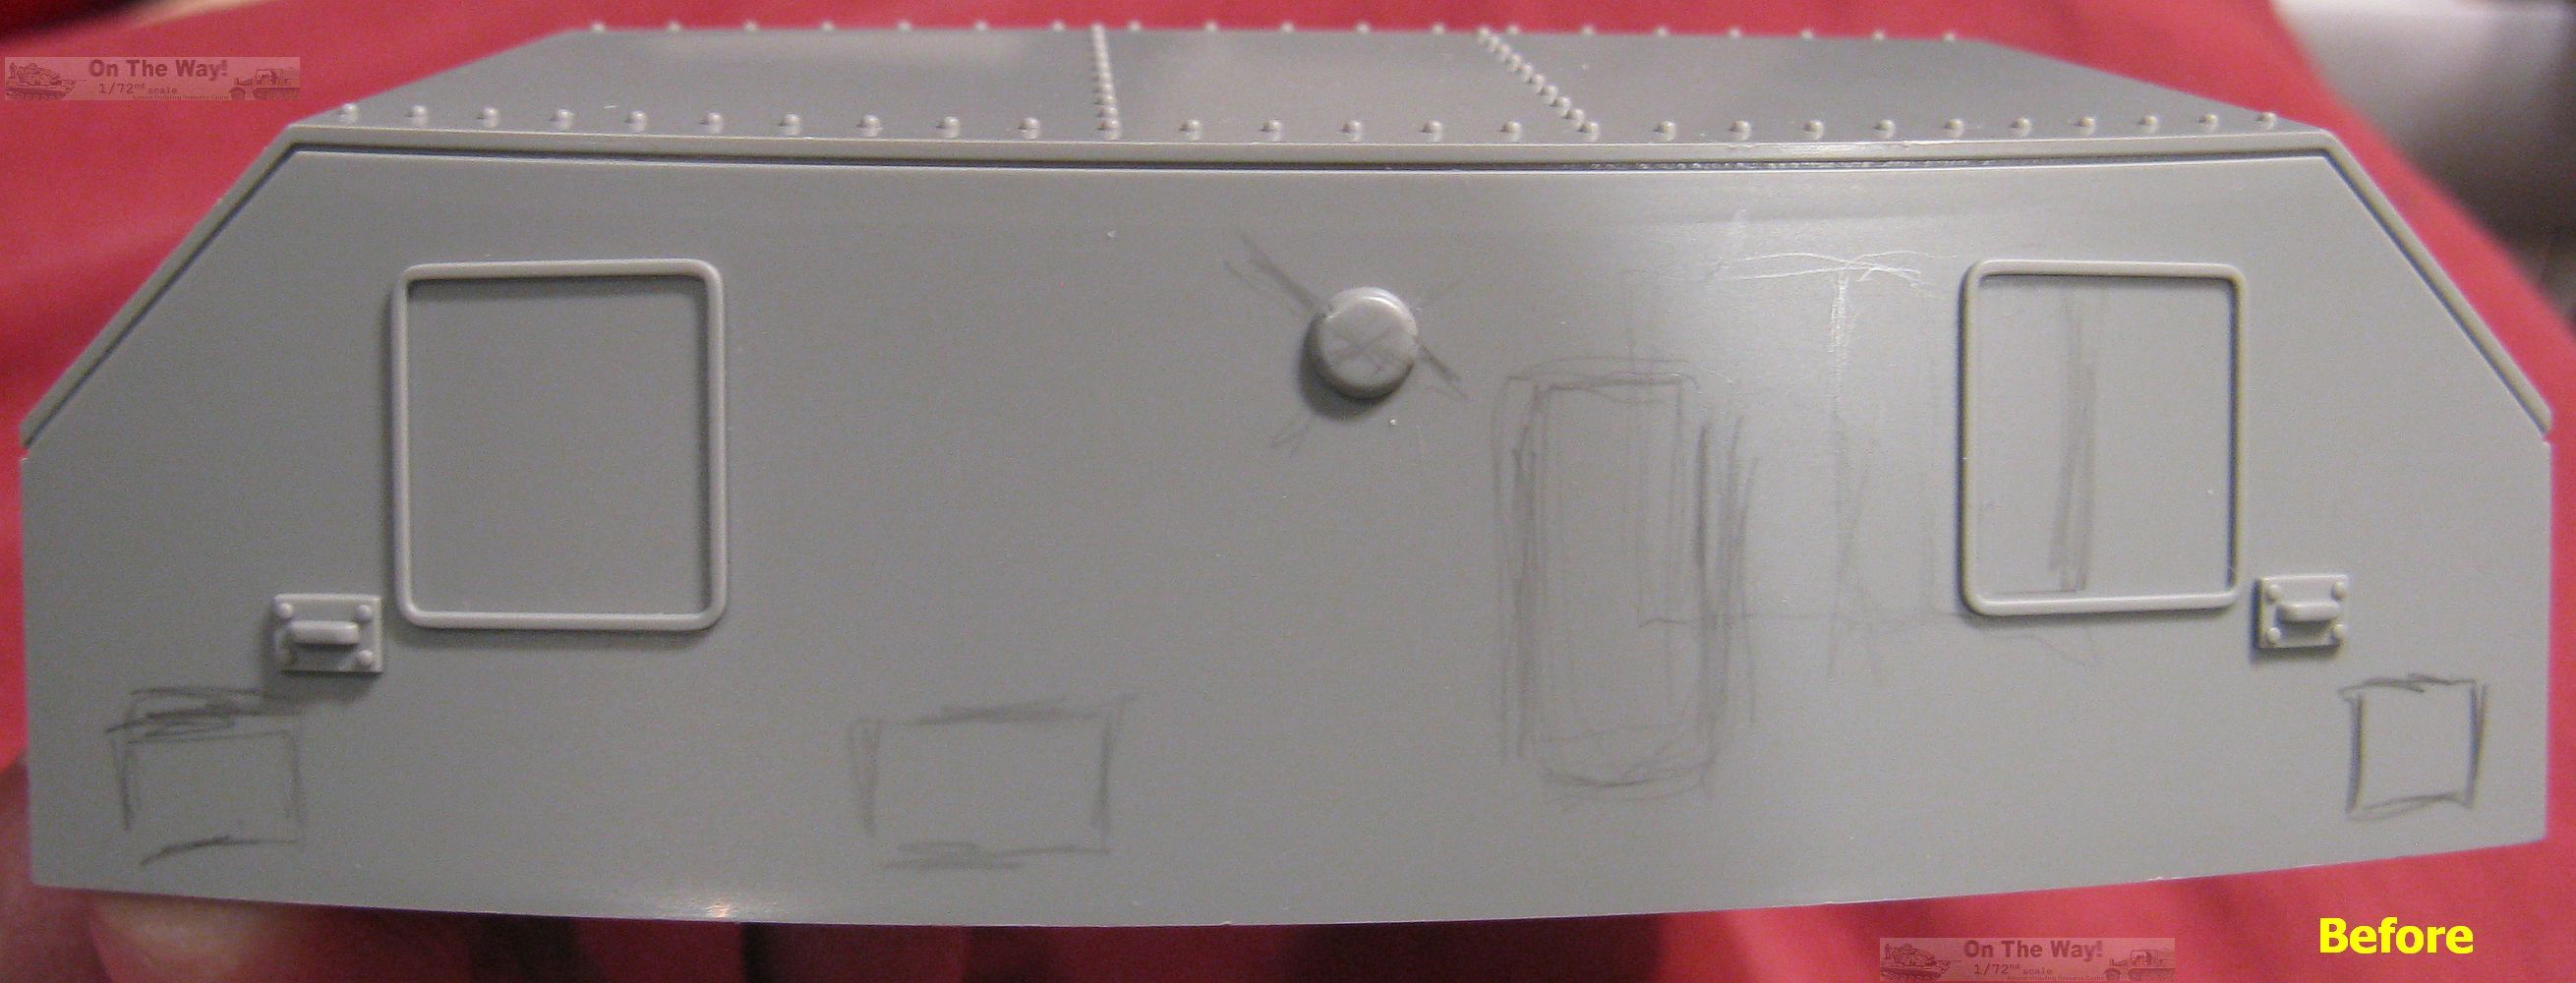
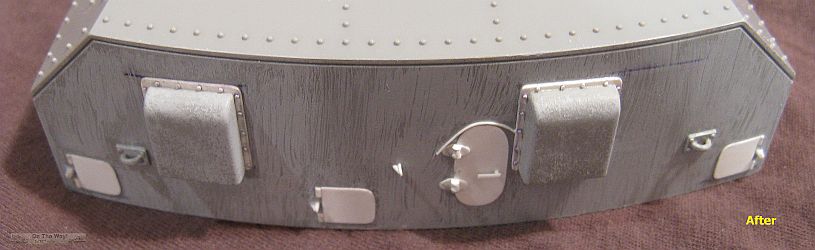
Turret rear plate modifications
Regardless of which version the modeller wishes to do, as it sits currently in its museum guise, or as it was during the war, the rear plate is completely
inaccurate and needs a litany of changes.
- Remove round bump. This appears to represent a light installed for tourist safety.
- Redo both lift rings. I found two suitable replacements in my parts box.
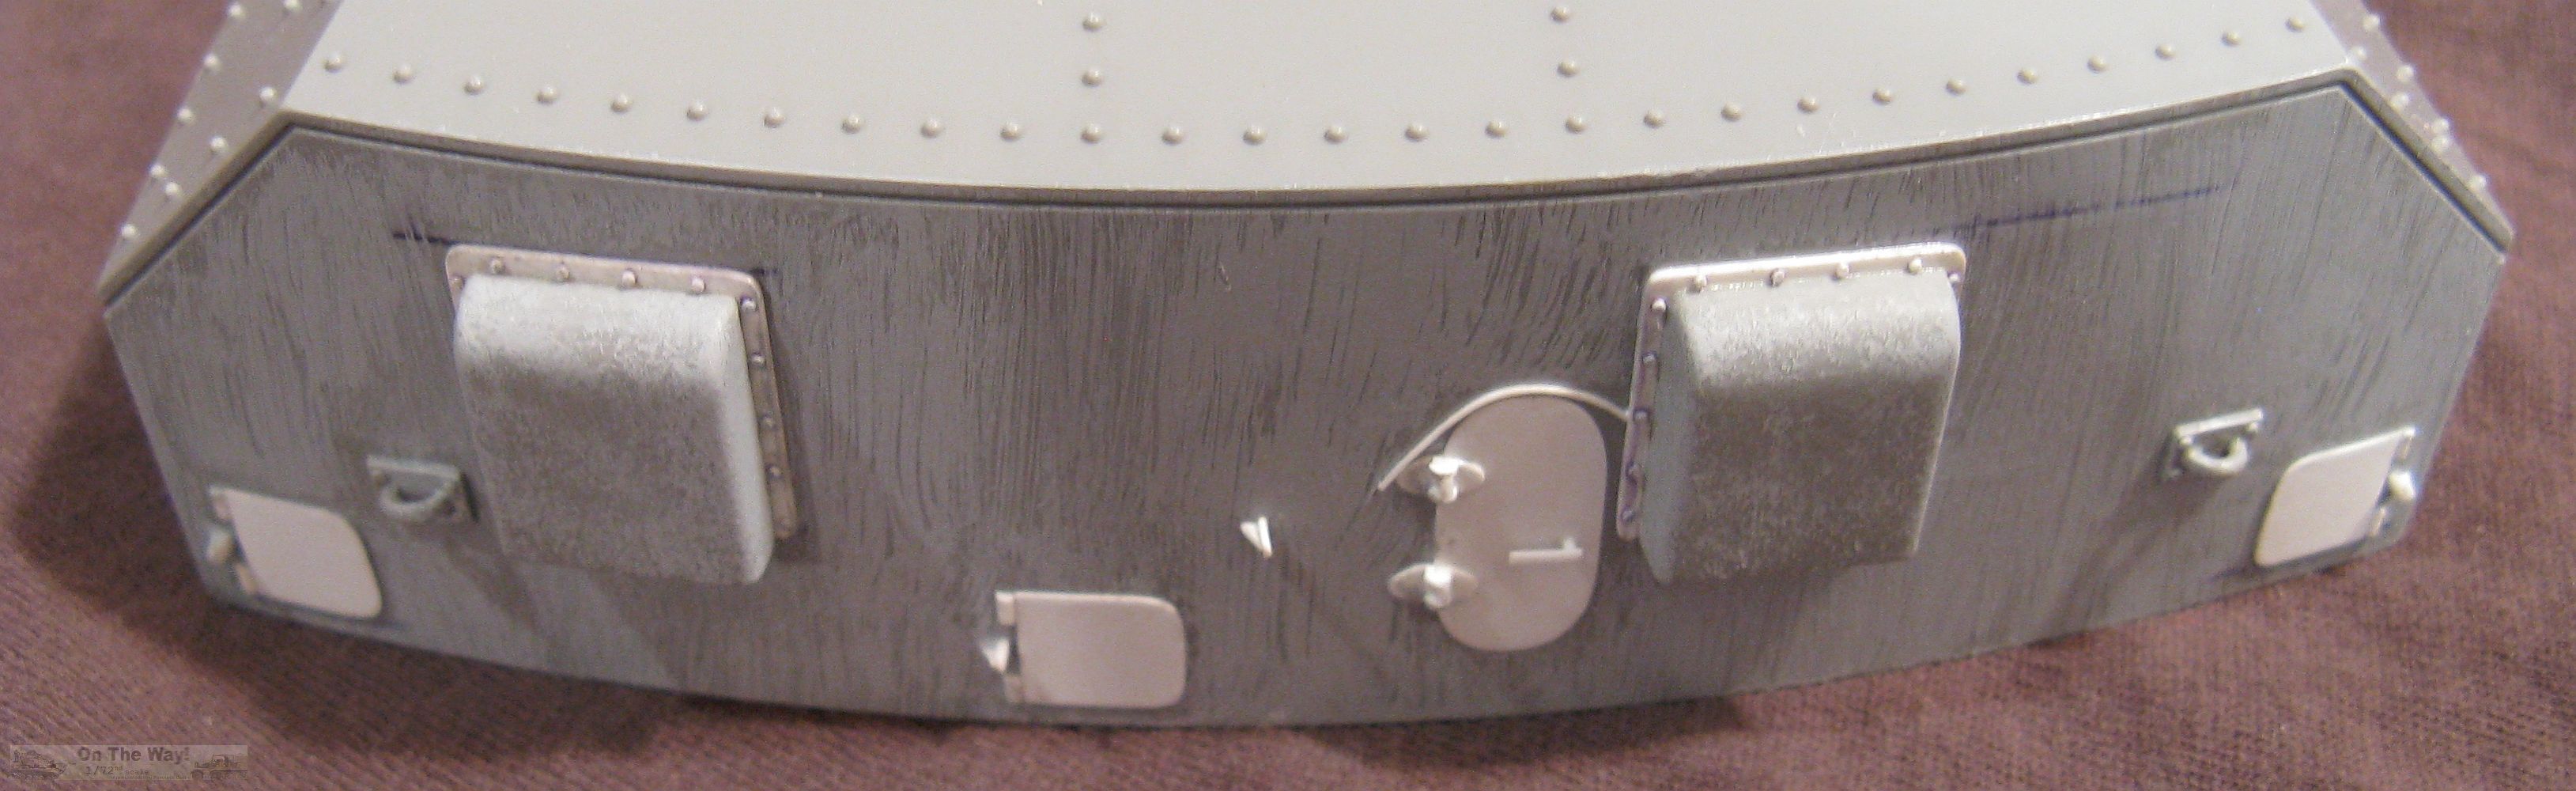
- Add 3 ammunition access panels along the bottom edge, along with their hinges and stops.
Notice that they are not equidistant from each other. I chose to make mine from thin plastic card. As I write this review I realize that mine are a tad too long. Guess I
should have better calibrated my Mk.I eyeball!
- Add a rectangular, with rounded ends, rear personel door, plus its hinges and a stop. I chose to make mine from thin plastic card.
Current photos
of the turret show a drip rail but I'm uncertain of its presence during wartime. I decided to add it as it was not a difficult change.
NOTE: For those wishing the utmost in accuracy, all of the rear doors sit flush to the rear plate, so these would be represented best by being scribed into the plastic.
- There are a pair of molded on collars for the rear vents. Unfortunately the right vent is not in the proper location - it needs to be
moved substantially to the left towards the turret's centre line. Seeing as it would be next to impossible to move the molded on collar along with the vent, I saw no
choice other than to remove both collars and scratch build new ones, plus add rivets missed by Model Collect.
- Add a handle to the personel door. Its configuration is just a guess on my part. Current photos show a modern push bar style safety handle.
|

|
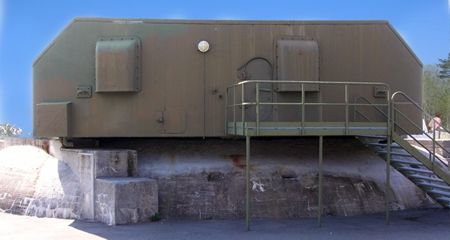
Photo of the rear plate
|
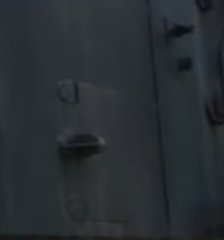
Photo of an ammunition door and its stop
|
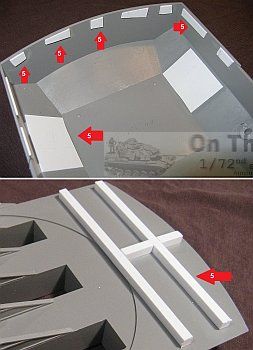
Turret front plate & interior modifications
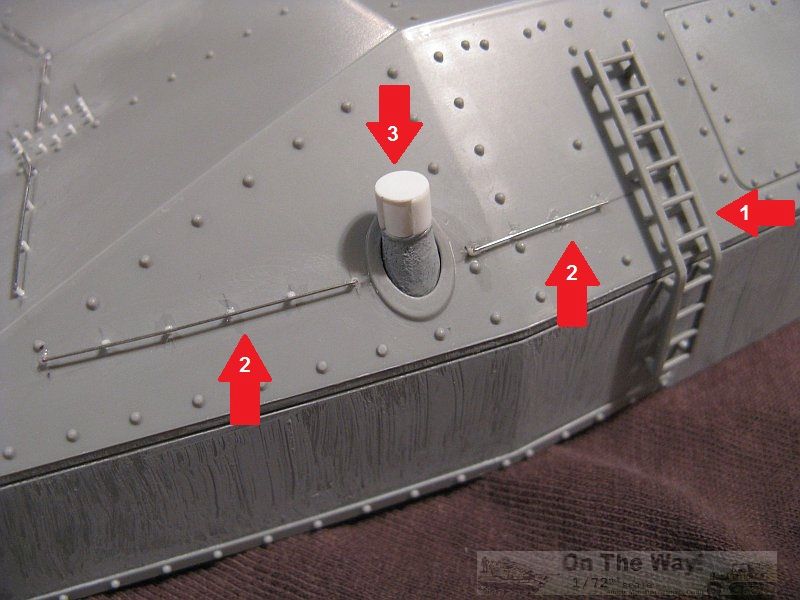
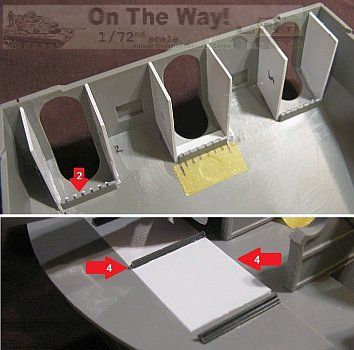
- It seemed to me that the slots for the barrels, as represented by Model Collect, were much simplied. I thought it more likely there
would be some panels just inside the openings to seal the interior from the elements.
I found a closeup photo of Gneisenau's turret hinting at their presence (orange arrows w. black 1 - top photo). An interior photo of this turret
under construction on the cruiser from ref. [2] shows them even better (yellow arrows w. black 1 - middle photo). So walls were constructed from plastic sheet. A
contour gauge was used to determine their profile and transfered to cardboard. The first panel was cut out, checked against the turret and adjusted until it fit as desired.
It was then used as a template for the other five panels.
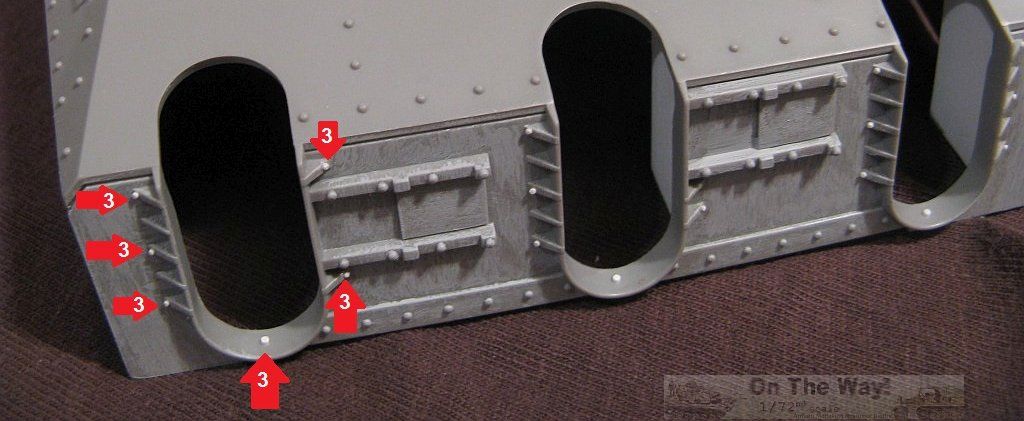
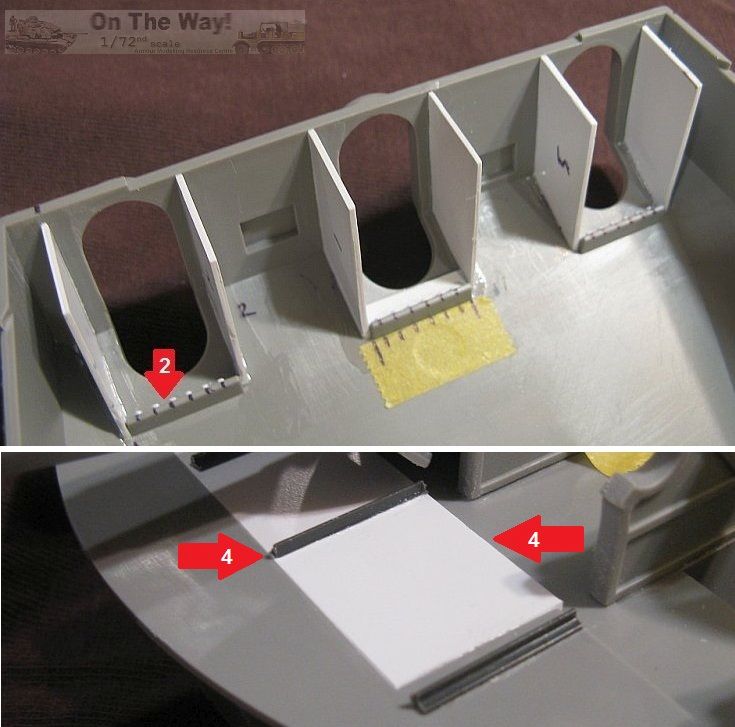
- Add rivets to the inside support brace that runs across the top of the gun openings. (red arrow w. white 2)
- Add more rivets to bottom of gun openings and their side braces. (red arrows w. white 3)
- Part of the forward floor needs filling to avoid a gap under the panels. I also added locator strips to provide support for the
panel sides. (red arrows w. white 4)
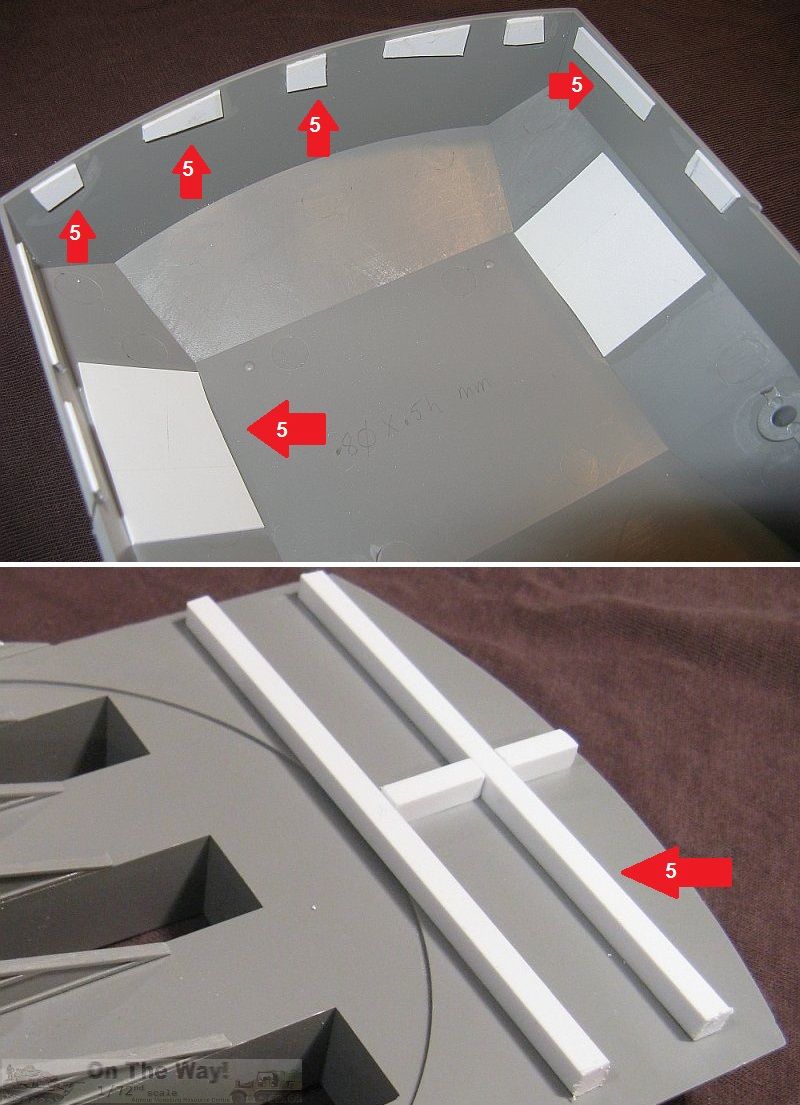
- The rear overhang is flimsy. Braces were added to it and braces to the inside surfaces of the side plates to give extra support.
(red arrows w. white 5)
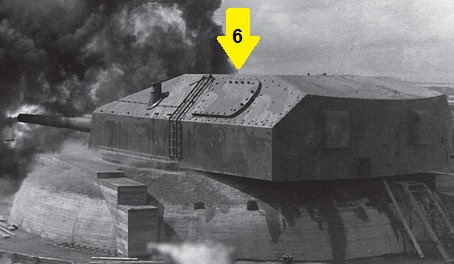
- Also, the backsides of the cover plates for the missing range finder were covered to prevent the ill fitting cover plates from
falling through. Unfortunately I wasn't paying proper attention here as I mounted the cover flush as per the kit, where it should
actually sit proud above the armoured plates. (photo below with yellow arrow w. black 6)
|
.jpg)
.jpg)
|

Front plate modifications
|
Interior modifications pt.1
|
Interior modifications pt.2
|
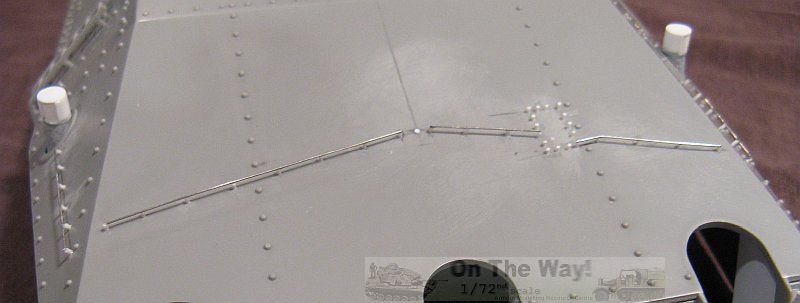
Turret roof modifications
- Only a single modification here, adding a run of what appears to be a railing that spans the width of the turret. Holes for the posts
were drilled and plastic rod inserted, glued and then cut to height.
To ensure each post was cut the same height, I fashioned a tool by taking a piece of plastic strip and drilling a hole close to the end. Each post was pushed through
the hole and trimmed flush to the tool. The rails are lengths of guitar string super glued to the post tops.
|

|
Turret left & right side plate modifications
-
Part 15, the ladder, is present as two copies, but unfortunately each is too short to run up the
side the required distance. Replacement ladders will need to be sourced or scratch built, or you can do as I did, use the kit ladders and live with the
fact they're slightly too short.
- Add another set of rails fore and aft of each air vent, employing the same method as done above for the roof.
- The air inlet vents are featureless. I cut off the top portion, added a ring and fashioned some hollow tops. Texture was added
with some Mr. Surfacer o the lower portion.
|
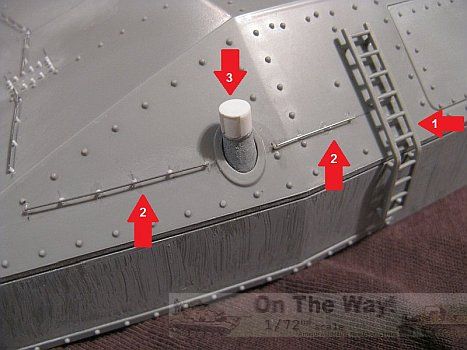
Photo of left side plate
|
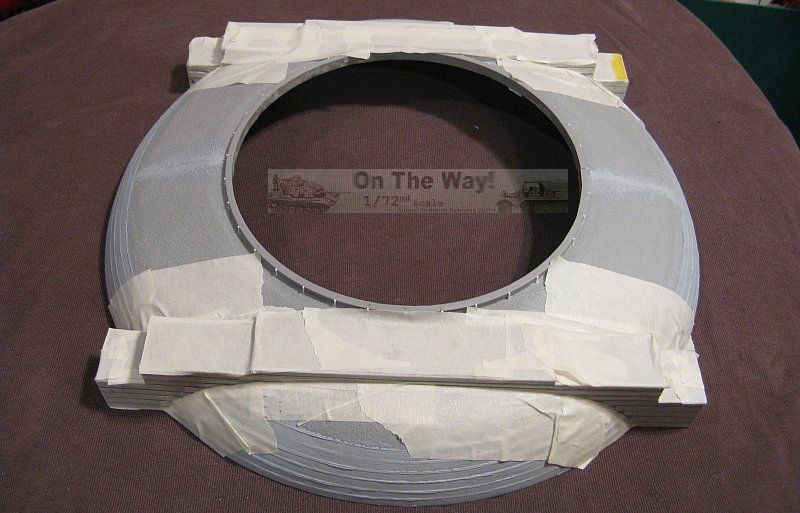
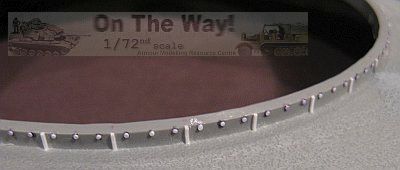
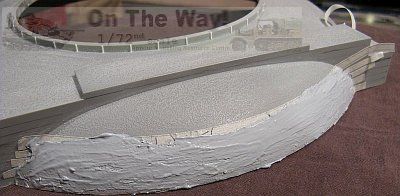
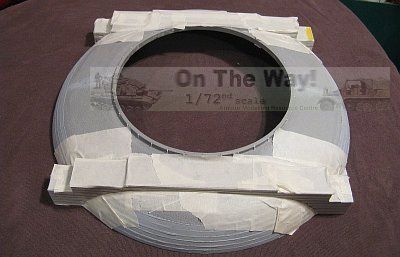
Base modifications
- The base comes as two pieces. Where they meet isn't very sturdy, so plastic strips were added to the rear side to
strengthen the join.
- Add spacers to raise the turret and prevent it sitting flush on top of the base.
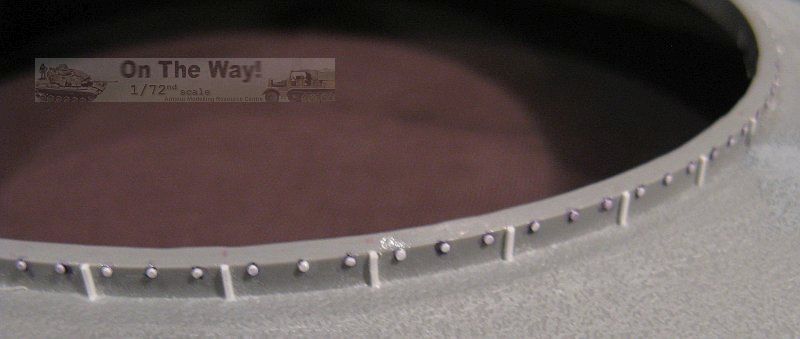
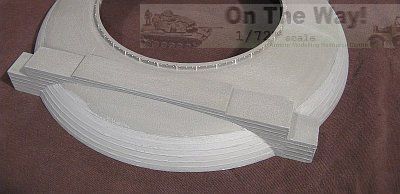
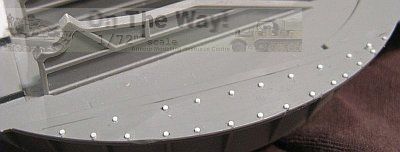
- Add vertical stiffeners & bolts to base ring. As best as I could determine, the stiffners were located at 10° intervals.
I cut out a circle
of the same diameter as the turret ring, and marked the intervals, using the base's join line as center. After taping the cardboard to the ring, each stiffner
location was marked and a piece of plastic strip was glued
at each mark. A template was created from a piece of cardboard cut to match the distance between the stiffners and then marked with locations for the three bolts.
Placing the template between each stiffner allowed me to mark the
bolt locations. Disks to represent the bolt heads were punched from plastic sheet (all 108+ of them) and glued at the marks.
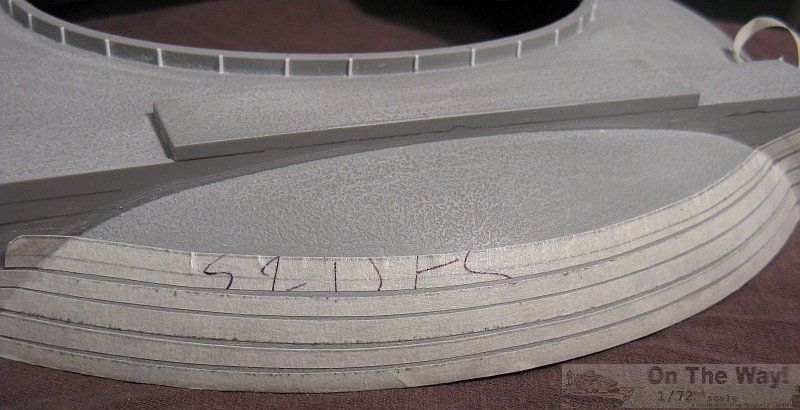
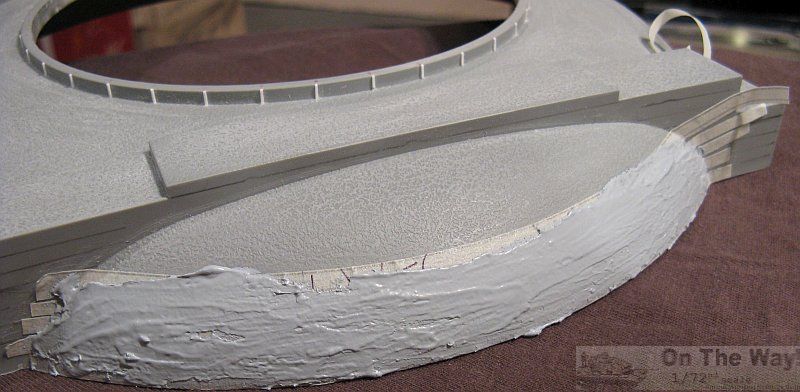
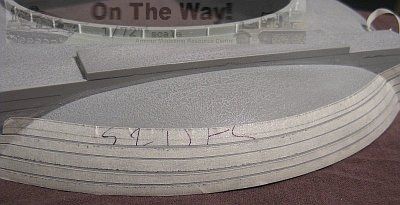
- The kit's base is rather bland lacking the numerous thin layers of concrete pours seen in period photos. I attempted to replicate
these somewhat using Tamiya putty. Lines were taped off and putty, thinned with lacquer thinner, was applied. The tape was immediately removed and the putty left to
dry overnight. Following that, thinned putty was slathered between the raised lines.
|
|
|
Other items
- Parts E6, E11 - E14 not used.
- Remove molded on eagles from the face of the muzzle covers. Replace them with small T-handles.
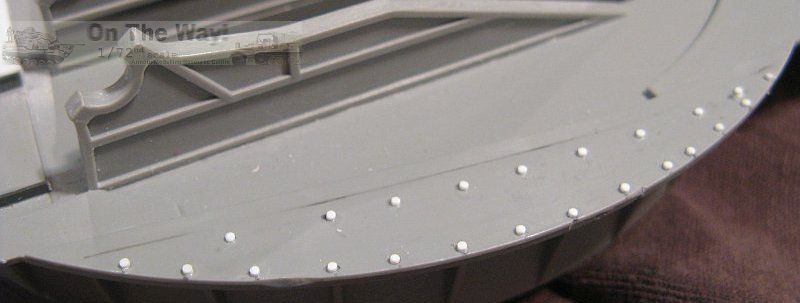
- Turret's base plate needs additional rivets.
|
.jpg)
|
Camouflage
The painting guide depicts an overall green camouflage. This is accurate only for the post-war turret in its current incarnation as a museum in Norway.
Reference [1] has
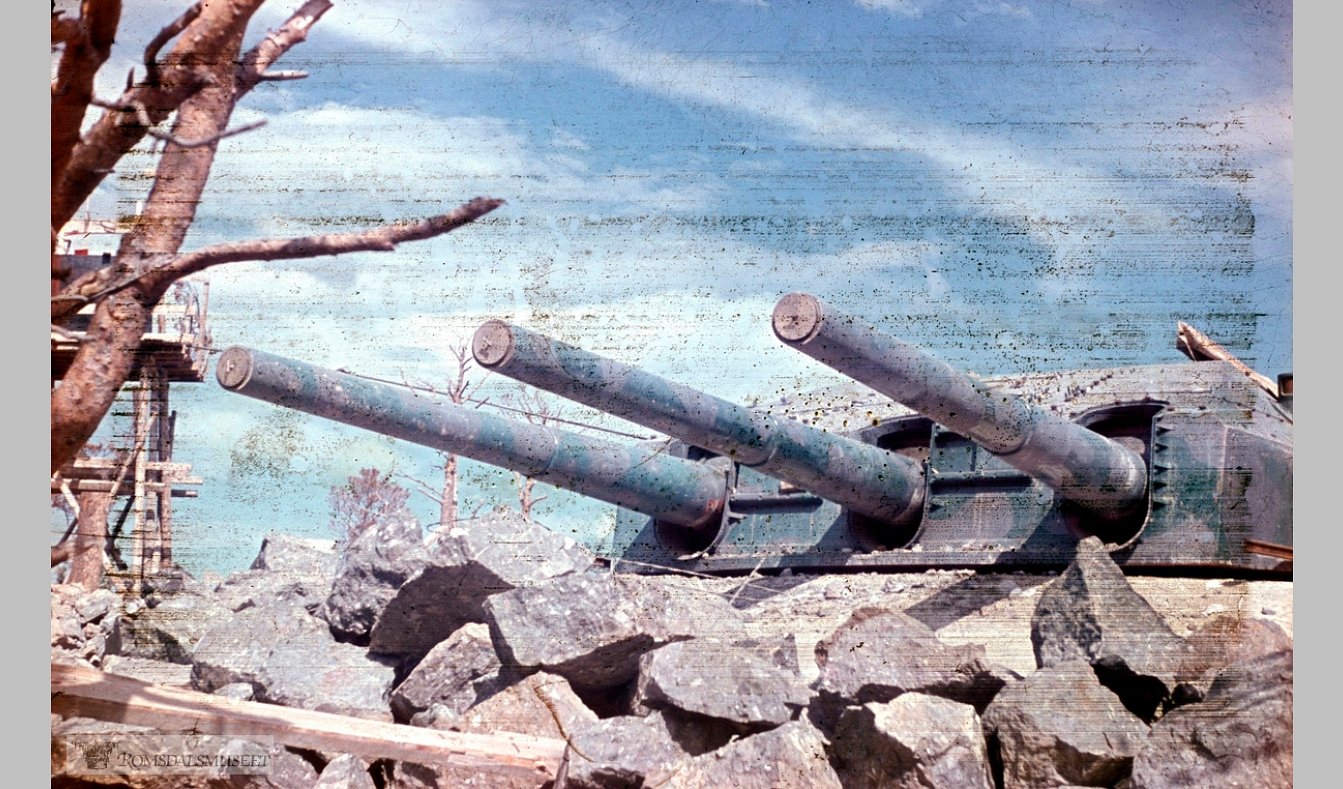
a set of period colour photographs taken while the turret was under construction, which I present below. As can be seen, the camouflage changed as
construction progressed with the emplacement.
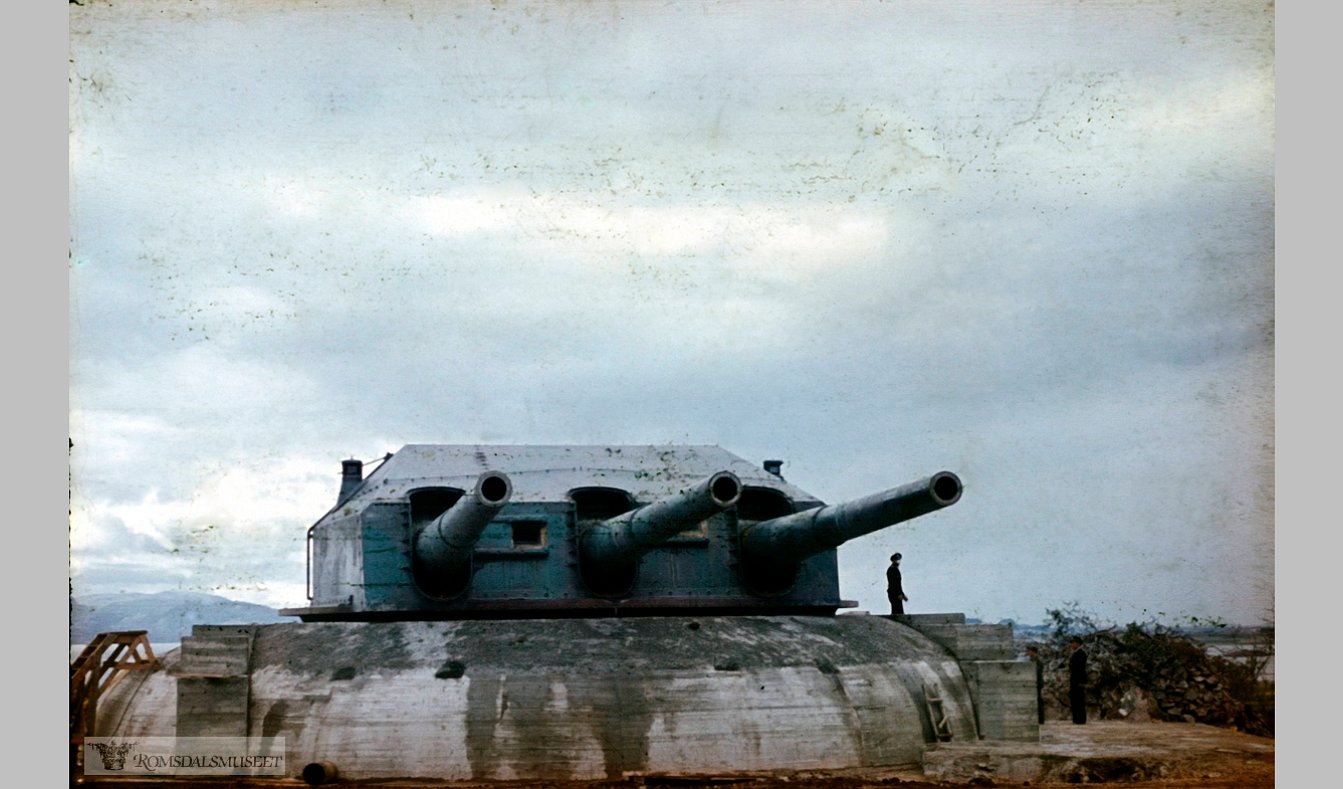
These two photographs show the original dark grey turret & light grey gun barrels. I assume that this would have been not long after the gun
had been transported to the site. Rather interesting is how chipped the paint is, especially on the barrels, and how conspicuously the underlying red-brown primer shows.

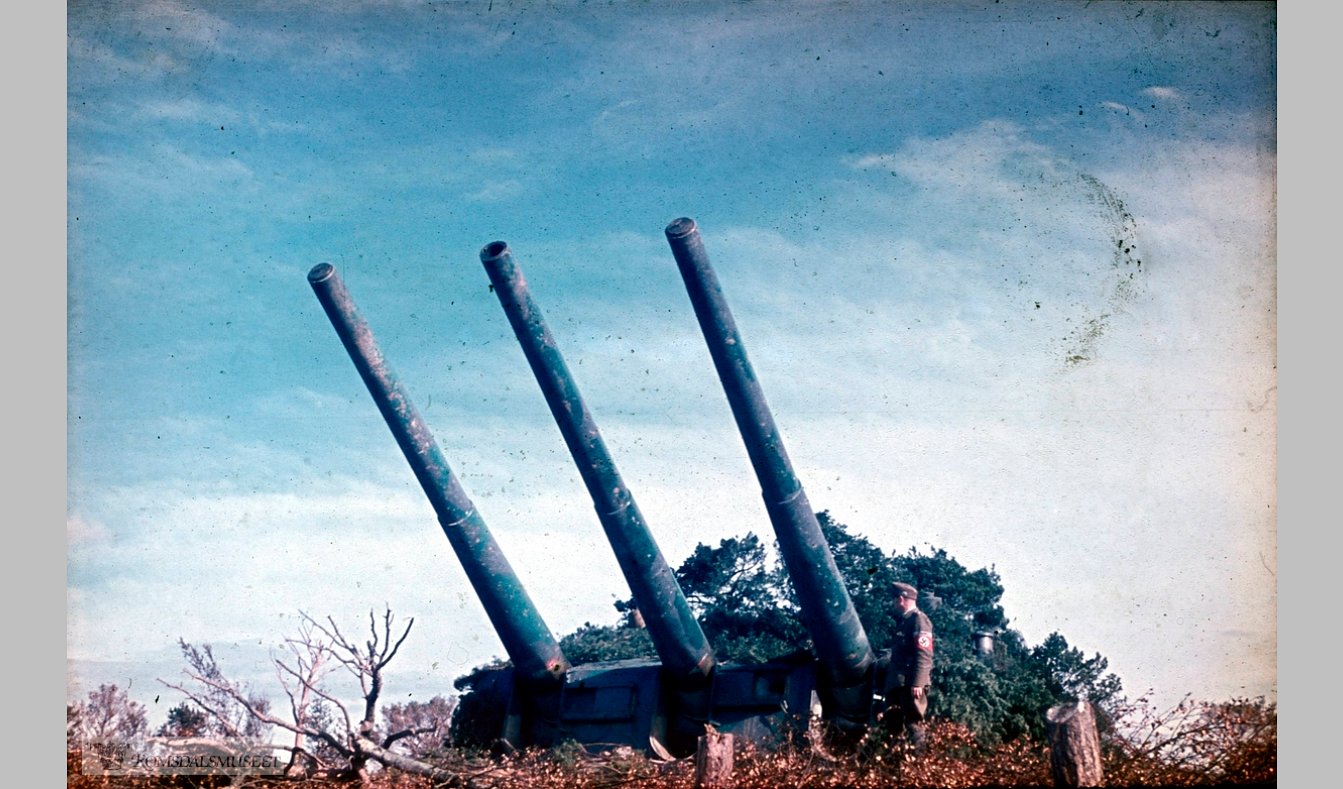
The five photos below show that the turret and barrels were eventually repainted in a medium grey overall with patches of hard edged medium green. It's unforunate that
the person taking the photos only bothered with the front aspect of the port side.


Conclusion
A very lazy effort on Model Collect's part. If they had done a simple google search they would have seen the correct layout of the rear plate.
A slightly deeper search would
have revealed other missing detail that should have been added, such as the ladders and the partitions inside the front plate. As far as I have seen, there were
no 12.8cm Flakzwilling guns at the site during the war, so why they are included is a mystery to me. Maybe they are included as filler to make the kit feel more
substantial to the buyer, or to jack up the price?
Overall, I can not recommend this kit.
References
[1] Romsdalsmuseet
[2] Gneisenau site
[3] Arne Granfoss travel log
[4] deutschland-class.dk
[5] Schlachtschiff Gneisenau, Marine-Arsenal 2, Siegfreid Beyer, Podzun-Pallas-Verlag, Friedberg 1987 ISBN: 3-7909-0314-0
[6] German Naval Artillery vol.1: Gun Power 17, AJ Press
Review sample purchased by the author.
Model Collect products are available at

|