|
The kit is the re-edition of the old ESCI kit. Having a little knowledge about the Quad family I already knew that although named "Morris" by Italeri, the vehicle depicted in the box is a Canadian Military Pattern (CMP) Field Artillery Tractor (FAT), widely used in North Africa and in Italy.
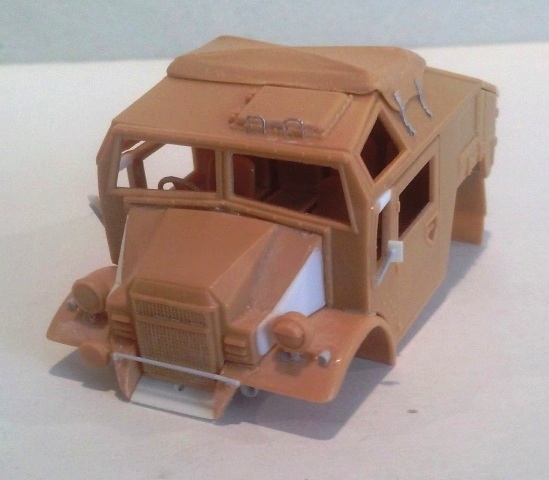
Two light orange-brown plastic moulds and a little transparent plastic sheet for window glasses composes the artillery tractor part of the kit. The instructions are clear and the back of the box has three colour profiles to help the modeller having a better idea of how the finished model will look. The moulds look very well done with a detailed chassis and basic interiors. The large doors can be glued opened and a British driver in warm environment attire is given. A four vehicles decal set is given, for three FATs in the MTO and one in Normandy. The first impression is very positive. The dimensions of the built model are quite correct, being just a millimeter too high.
CMP FAT
|
1/1
|
1/72
|
kit |
Length
|
14 ft 1 in
|
59.6 mm
|
59.5 mm |
Width
|
7 ft 6 in
|
31.75 mm
|
31.5 mm |
| Height
|
8 in
|
33.9 mm
|
35.1 mm |
| Wheelbase
|
101 in
|
35.6 mm
|
35.3 mm |
Body 7A
|
1/1
|
1/72
|
kit |
| Length |
124 in |
43.8 mm
|
44.9 mm |
Width
|
87 in
|
30.7 mm
|
30.6 mm |
| Height
|
67 in 7/8 |
23.9 mm |
26.0 mm |
Based on the CMP 101" wheelbase 4 x 4 truck chassis, the Field Artillery Tractor was built by Ford and by Chevrolet with some little differences in the chassis, while the bodies 7A1 or 7A2 were the same for both producers. The 7A1 body had a rigid roof where the two ventilators were placed and had the cab11 with single radiator mesh. The 7A2 body had the open top with the fabric cover and the ventilators were placed on the sloped rear roof and had the cab 12 with the horizontally split radiator mesh. Said this, it is easy identify the type given by the kit in the last one.
After cab 12 FAT, the new cab 13 FAT with the 7B body was introduced. The cab and the body were very different from the earlier series, so there is no way to misunderstand.
About the vehicle class, the WD prefix for the wheeled tractors was H. On the original ESCI kit the decal set gave two WD numbers with the prefix L, but this letter was for the Lorries. Ford WD numbers are the following batches: H4538694 - H4541693 and H4541694 - H4542693 for 4.000 vehicles. Also in the Canadian batch CH4207001 - CH4208000 there are some cab 12 FAT (being CH4207357 an example) mixed with cab 13. WD numbers for Chevrolet Quads are in the batches H4546194 - H4546693 and H4593648 - H4594497 for 1.350 vehicles. I didn't find other batches, anyway I know from the photos that other Chevrolet batches existed and the following numbers are from those: H4413307, H4618410 and H4620933.
There are some sources of information on the net. Here and here information can be found.
A highly detailed walkaround is here.
As said, two producers made the FAT, the ESCI/Italeri moulds "mostly" depict a Ford Gun Tractor (FGT). "Mostly" because, based on what I found:
- the differential housings are of the split type (Chevrolet had the "banjo" type, only very few early Ford had the banjo type on both axles or on rear only axle).
- The vents at the sides of the radiator have the louvers (Chevrolet had round holes each covered with a mesh).
- The radiator grill pattern depicts the woven wire placed with a horizontal and vertical pattern (most of Chevrolet had a diagonal pattern).
But two details are wrong:
- The front suspension springs are attached to the chassis frame sides as for Chevrolet. Ford ones were attached under the frame (the spring positions look the same).
- The external horn is missing. This is surely correct for Chevrolet which had it on the engine inlet manifold while Ford should have it externally to the rear of the bumper behind the front left wheel. I saw it only in a restored vehicle photos because in my Ford wartime photos the detail is not visible, so I trust the owner correctly restored its vehicle.
No producer badge is depicted, although it would be very tiny in 1/72. Ford had a rectangular badge while Chevrolet had the same crossed badge still used today. Both were carried on the radiator.
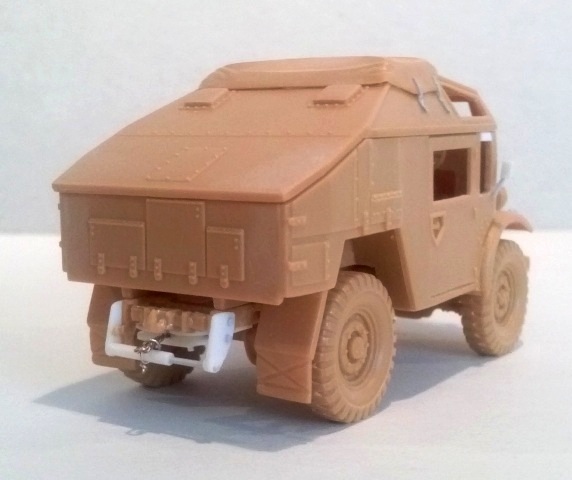
Dimensions of the 7A2 body are quite correct about length and width, but the height is a bit excessive (about 2 mm). It wouldn't be a real problem if this didn't change some shapes. Instead, the doors look a bit too narrow and the trapezoidal part of the sides between the doors and the rear wheels look too much pointed. Also the forward windows needs to be modified or it will give a bit wrong look to the side segments placed forward the doors. Further comparison with the photos showed me the bigger problem of the kit: the bonnet is not correctly depicted. The original vehicle bonnet sides were straight and its central portion was a little narrower. A bit of correction was needed, here is what I made. I choose to make a FGT, which requires an easiest improving job.
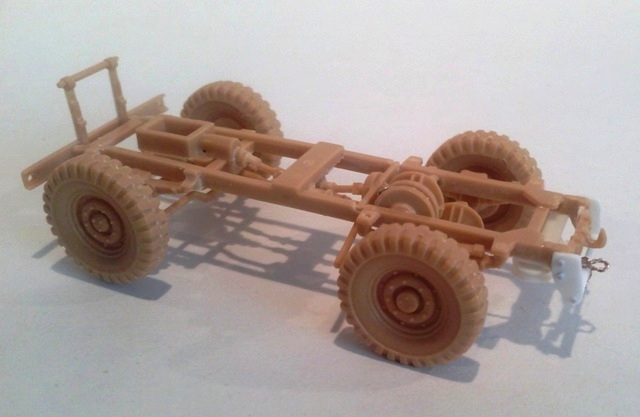
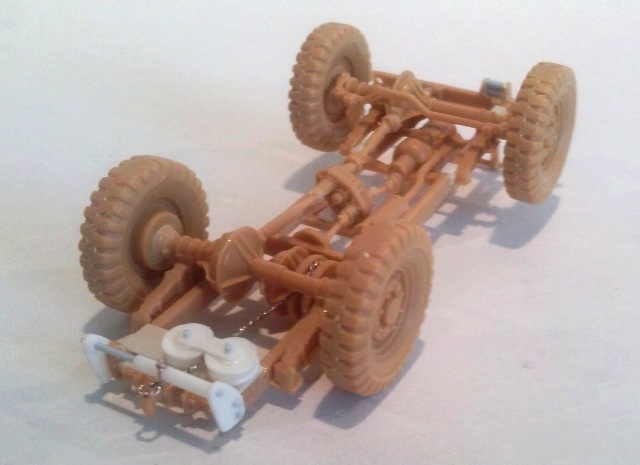
Chassis
- I changed the front leaf springs attachment for a FGT.
- The bumper was a "C" metal profile; I filed the ending to the shape required. Two holes were drilled at the bumpers end
- On the forward bumper what look to be another exit for the winch cable is oversized. I reduced it and made the two horizontal rods with stretched sprue.
- The pin in the mid of the front bumper should be larger and holed: it was for the starting handle. If present in the vehicle reproduced it should be made with a thinner plastic piece.
- The hooks 28B were not used and the interlocks were sanded down.
- The different axle track is a correct feature. In 1/72 the 70 ½" front axle track is 24.9 mm and the 69" rear one is 24.3 mm. Being the wheels wide 3.9 mm, this means that the front axle overall width should be 28.8 mm and the rear axle overall width should be 28.2 mm. While the rear axle overall width is correct (28.4 mm), the front axle overall width is 29.9 mm, being a millimetre too much wide. This means the width is 0.5 mm too much wide on each side. I choose to leave it as it is.
- The wheel base measured on the assembled chassis is 35.6 mm, which is correct for a CGT (which was 101") and also for a FGT (which was 101 ¼" and should be 35.7 mm).
- The 10.5x20 wheels dimensions look correct. The 7A bodied Quads had the run flat tyres, this meaning they didn't had the spare wheel. At least one Quad between the few cabs 12 photographed in Netherlands in 1945 witness the presence of a spare wheel, I suppose this could means that in the while the tyres of that Quad were upgraded to the pneumatics as for the 7B cab 13.
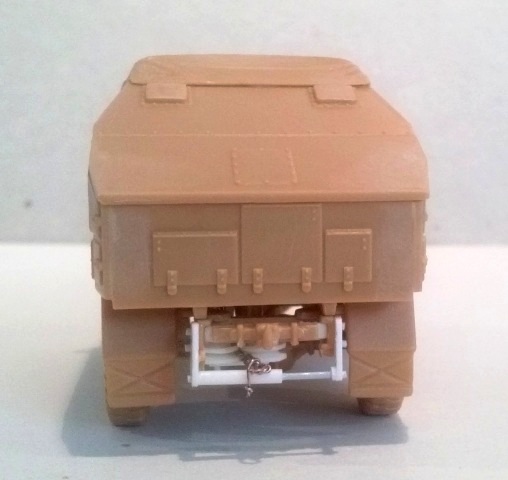
- Just under the hook there is the exit point for the winch cable. In the photos I've seen I didn't find the type depicted by the kit. Basing only on the photos available I replaced the kit one trying to make the type certainly used. I didn't had every detail photos so I think some could be missing and the lower mounting bracket of the pulleys is deductive but present in similar gears.
- In the chassis winch I added a home made towing cable fastened to the roller like in some photos.
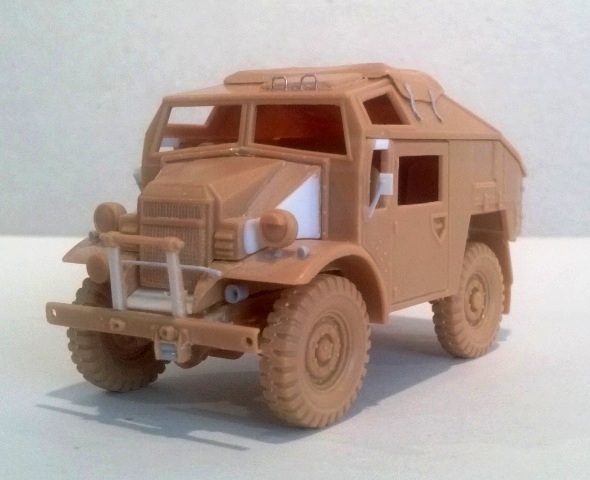
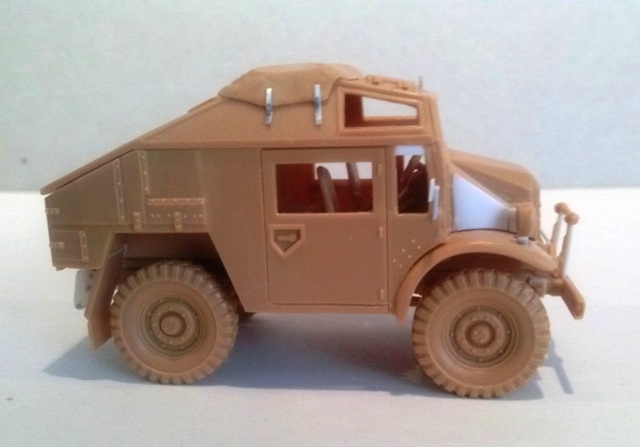
Body
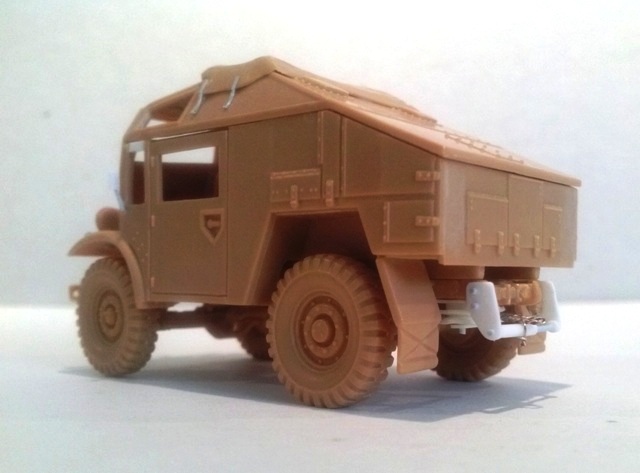
- The body height is a couple of millimetres too much height. I filed away 1 mm of plastic from the lower edge. A new line was engraved in the doors at 1 mm above the new lower edge (not needed if the model depicts an early 7A1 cab 11 which had the doors length finishing at the lower body edge). Although I didn't correct the vehicle total height, I restored a better look of the body (see the trapezoidal sections just rearward the doors).
- I added plastic shims to the bonnet sides. When the glue was dry, the plastic was shaped in place to have the new straight sides. The central portion is a bit wider. After having weighed about, I choose to left it as it is. With the new bonnet sides the thing is not so noticeable and it didn't look me worth to be corrected. May be this was not the more correct way to solve the problem, but I think the final look works. In absence of an aftermarket dedicated set, an alternative way could be the use an IBG cab 12 truck bonnet, but I've seen the kit just in photos and I couldn't tell it for sure.
- Not for mine, but for a FAT in North Africa and in Italy (or in NWE but coming from there) a little cylinder needs to be added on the left side of the bonnet.
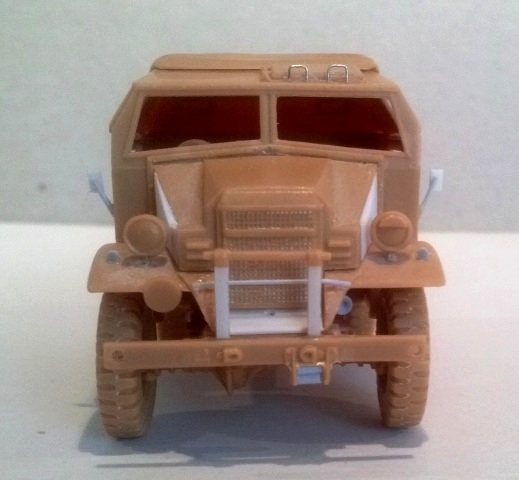
- On the mudguards the lights now need to be placed just a bit farther from the bonnet or they touch it. The bulged base was filed away and new holes were drilled.
- The position lights were added with two piece of stretched sprue shaped as a half egg before being cut off from the rod.
- The plate just below the radiator was doomed and the starting handle hole was drilled in the middle near the upper edge. I filed away the kit part and made it new with thin plastic sheet.
- I added a stretched sprue transversal rod in front of the radiator.
- I added a holed rounded piece of plastic to reproduce the horn in the front left wheel housing, hoping the type is correct: the only photo were I could see this detail was taken at a restored vehicle.
- I confess: I didn't change the driver pedals (Ford pedals were round).
- In front of the roof hatch there were two handles, I made them with thin metallic wire.
- The forward side windows lower edge was lowered to the doors windows lower edge.
- The doors window has a central frame, I removed it. In the original photos you can see it but it is an optical effect due the overlapping of the window glasses. The forward one was surely sliding while about the rear glass my photos show always in the same fixed position. The forward edge of the rear glass was protected by a very thin rod which could be simulated by painting.
- The fabric cover has a stiff look and needed an adapting job to avoid an unnatural and thick effect. When glued in place I added the four belts which kept it in position.
- On the rear sloped roof initially there was a frame; as far as I know it was the bracket for the gun traversing platform. During the Italian campaign it was discontinued and another frame which looks made in the unit workshops began to be used to stowe items. There were more patterns made with welded rods. Sometimes some plates were fixed to the rods. In early 1945 the 1st Canadians Corps went from the Italian front to the Netherlands and some of these Quads were photographed there.
- Last to be added, the rear view mirrors. The kit ones suddenly disappeared, but their scratch building is very easy. The FAT mirror arms were hinged at the base and the mirror could be positioned on the basis of the driver needing, so I choose to change their position just to have something different.
Decals
The set in my box was slightly out of centre and the colours non well saturated, giving a blurred look, so I couldn't use it. Four vehicles are depicted. The only one I have the photographic reference of is:
- H4618410 "C1" of an "unknown unit" in Italy, 1943. It had the frame on the sloped rear roof described above. The "unknown unit" should be the 146 Field Regiment, Royal Artillery.)
The others (I didn't find any photo of), are:
- H535144 5 ID, Italy 1943. The WD number to me looks a figure too short for a CMP Quad.
- H4113522 50 ID, North Africa 1942. I don't have a full WD number list, but 4113522 looks falling very near a 15 cwt Bedford truck batch.
- H4244856 7 AD, Normandy 1944. The unit is the 3rd RHA and from the photos I've seen they had both Morris Quad Mk III and CMP Quad cab 13 (which I though this WD number is more appropriate). I didn't find photos of CMP Quad cab 12 tractors in this unit, but I can't exclude having found a photo of a 7th AD CMP cab 12 lorry.
About my Quad, evidences of its use in Normandy look vey hard to find. Anyway I found some of them were serving with the artillery units of the 2nd Canadian Infantry Division and 4th Canadian Armoured Division (which I think will be my choice when I'll find the decal).
Conclusions
The correction is quite easy as well as the conversion into an earlier 7A1 body cab 11. I don't know the IBG cab 12 truck moulds but I strongly suspect that the swapping of the required parts is possible, so also the conversion in a Chevrolet CGT is possible (giving us in exchange a Ford truck). I consider this old kit positively, although in my opinion the upgrade of the decal set could be an easy improvement. Being still the only CMP FAT Quad plastic kit (after 40 years!) an aftermarket resin set could be helpful.
Preview sample purchased by the
author.
This model can be
purchased from

|