www.icm.com.ua |
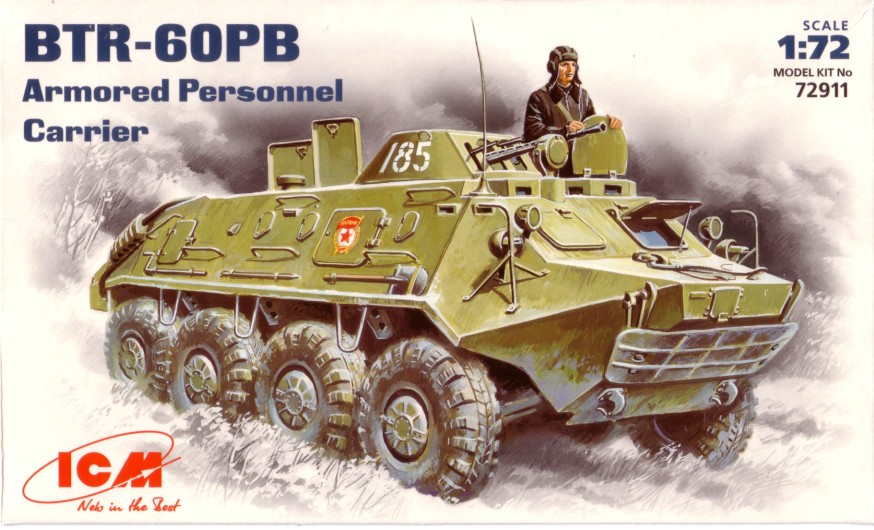
BTR-60PB |
|||
Kit # 72911 |
Review by
- Al Magnus
|
|||
www.icm.com.ua |
BTR-60PB |
|||
Kit # 72911 |
Review by
- Al Magnus
|
|||
  |
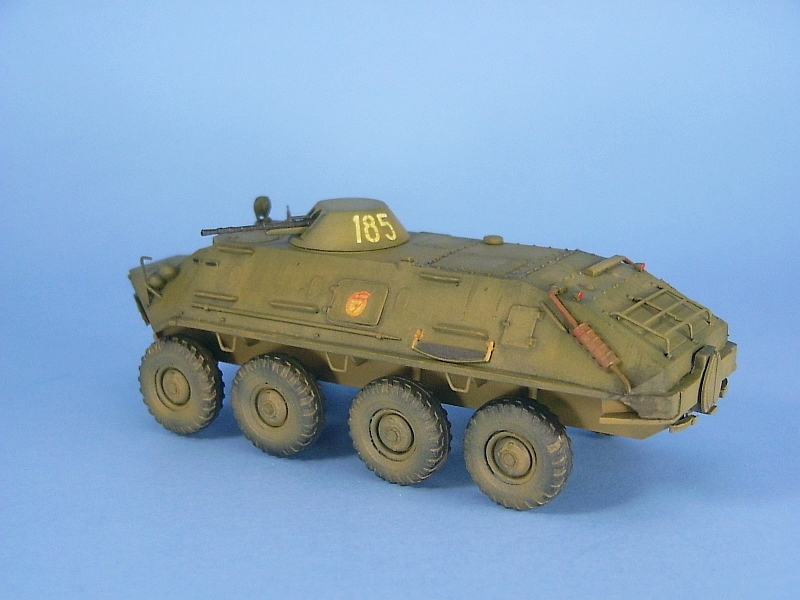
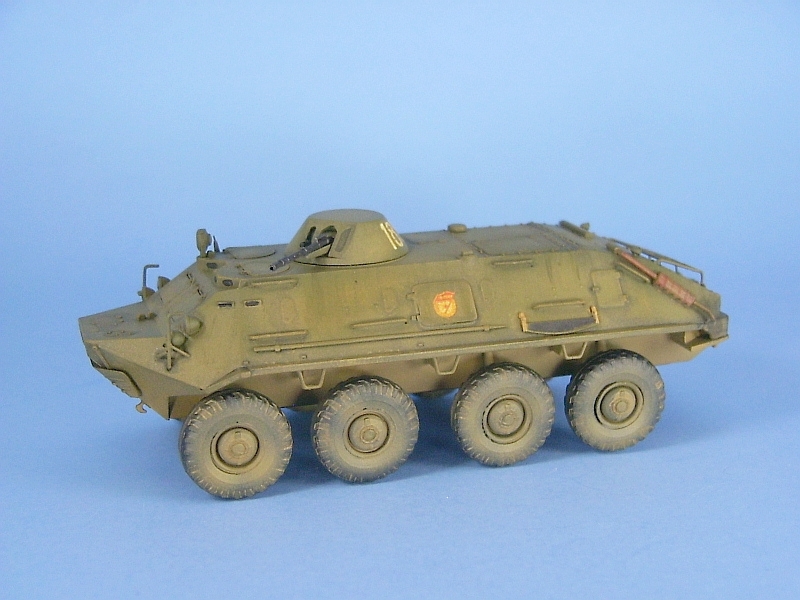
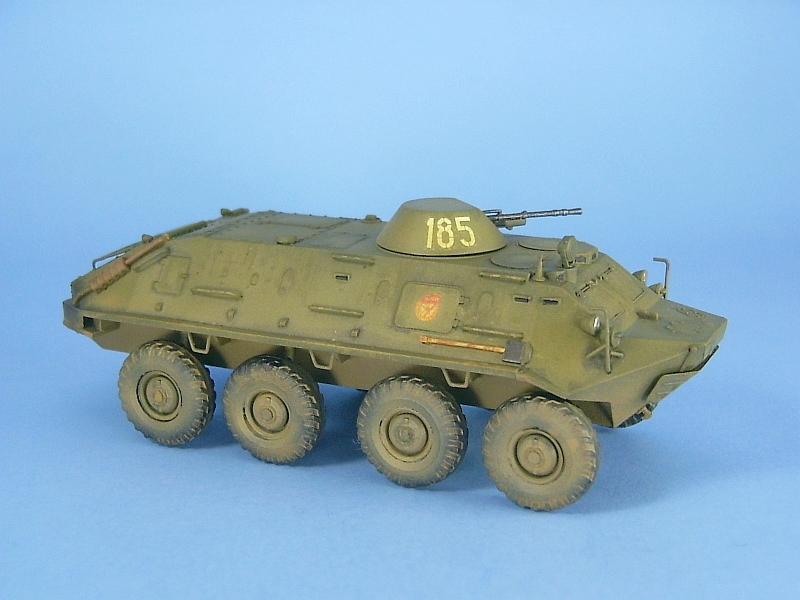
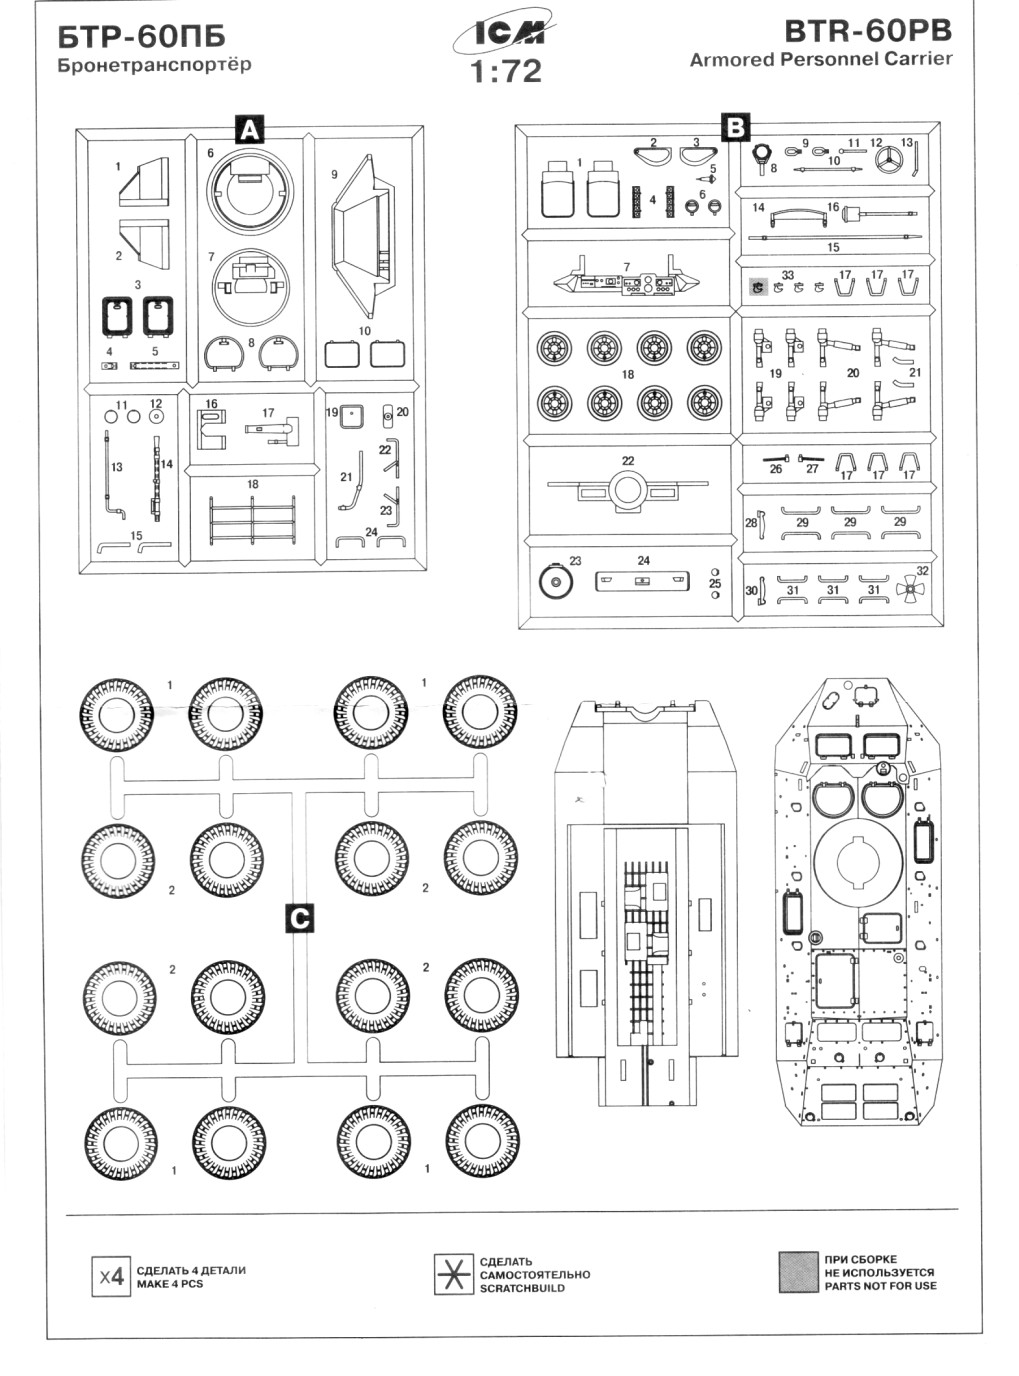
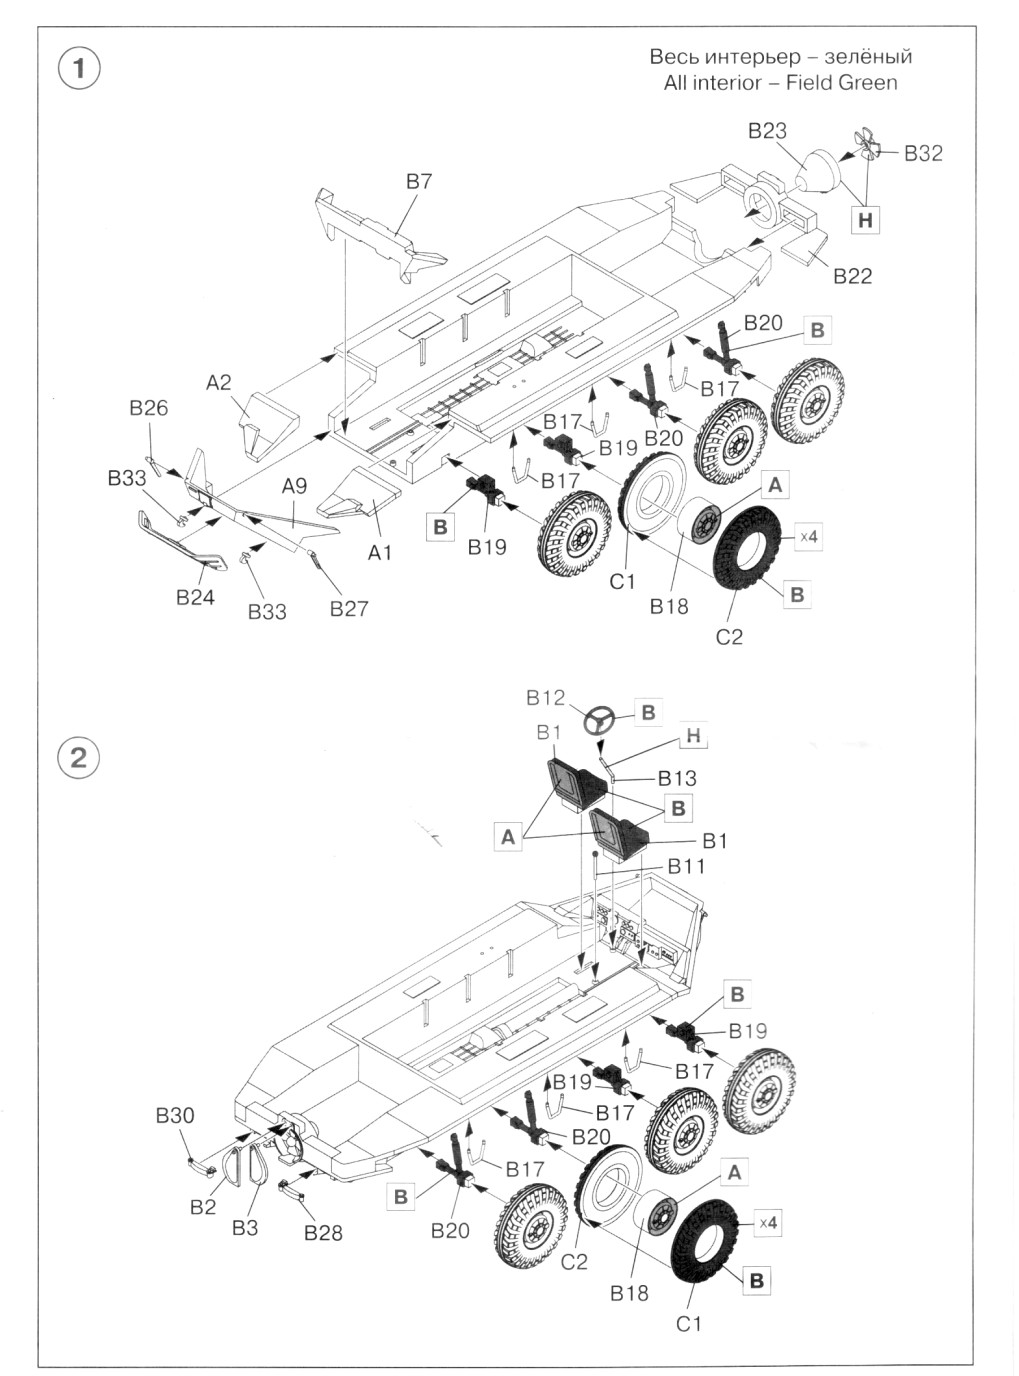
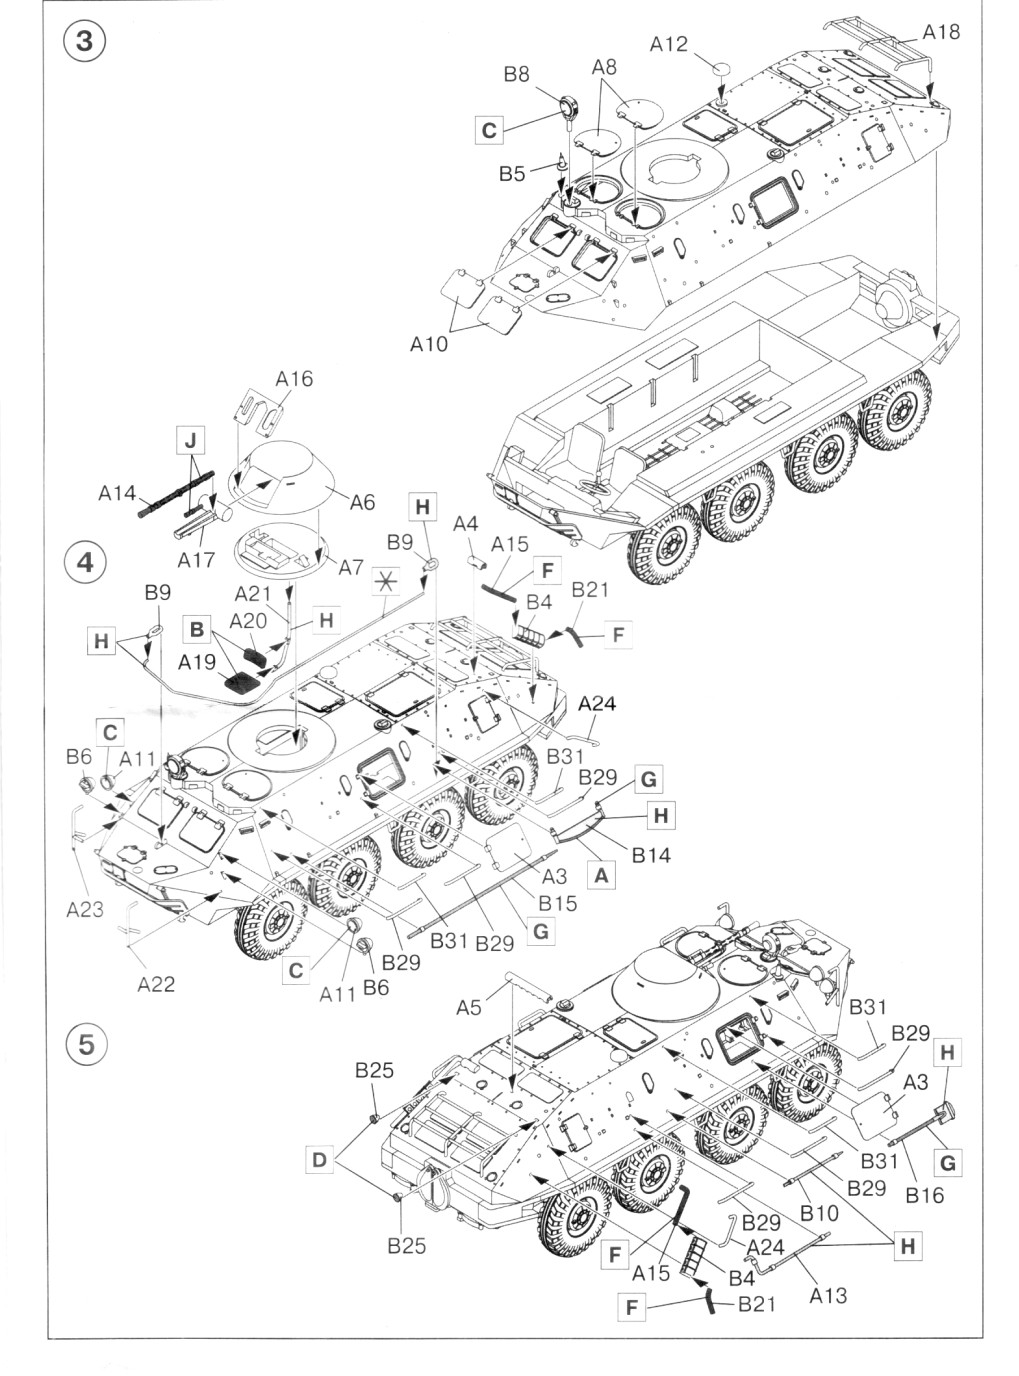
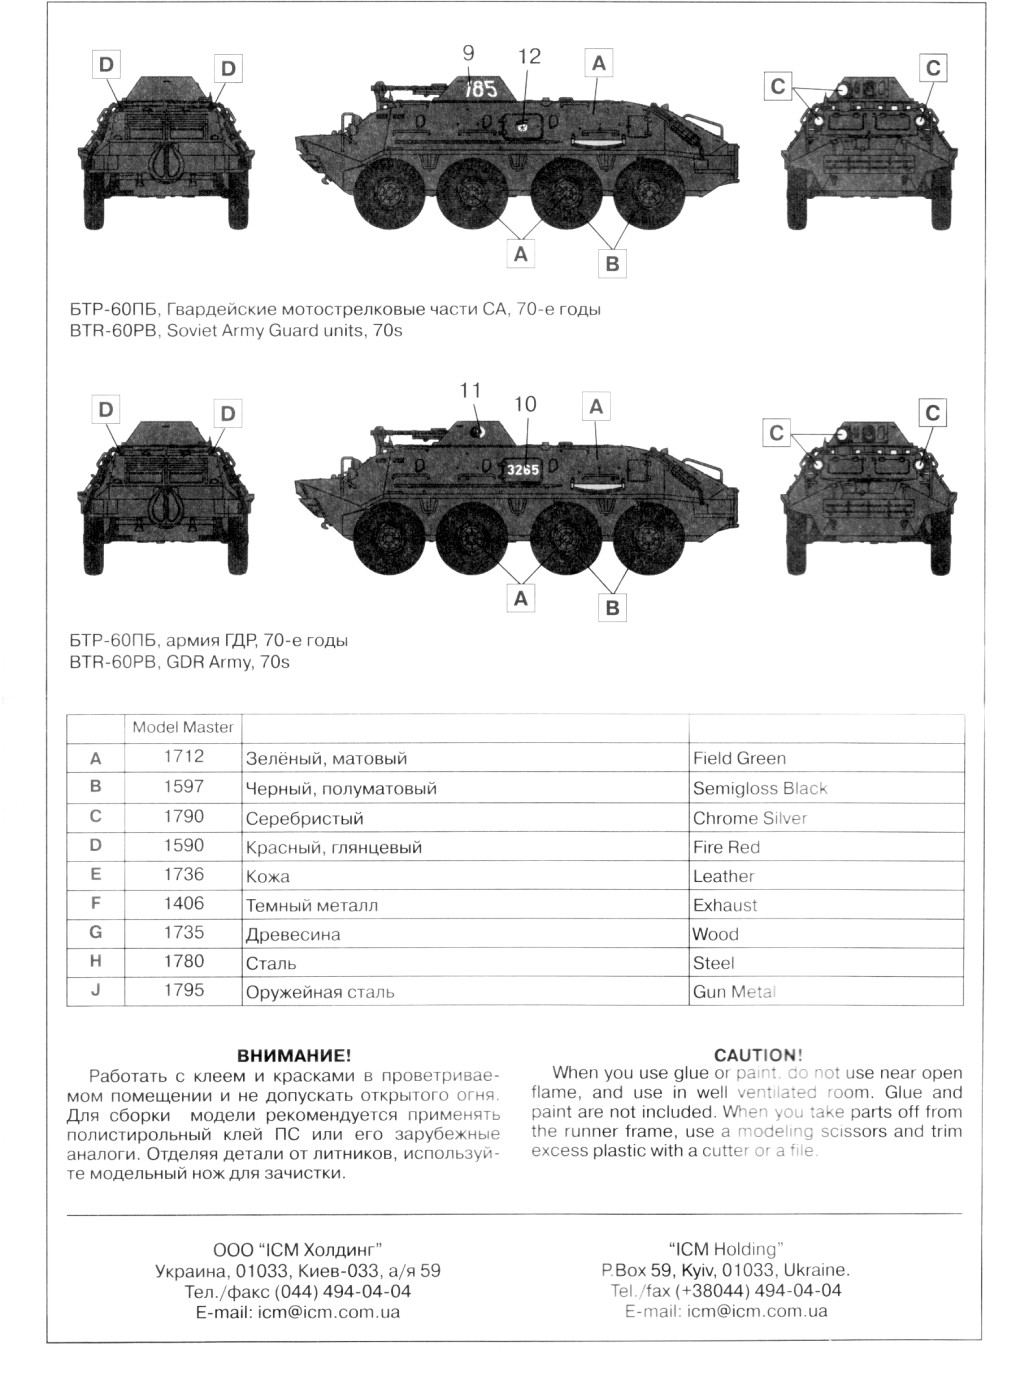
You get 102 parts in dark grey plastic and 16 wheel halves in black plastic, plus an instruction sheet and a decal sheet. This is a nice kit from ICM. I found that the kit went together quite well except for a few problem areas that may cause some frustration. The plastic is not too brittle but just enough to make things a bit tricky when it comes to removing the small parts from the tree. And there are lots of small and delicately molded parts. All of the grab handles, steps, pioneer tools and the rear stowage rack are very thin and nicely proportioned, but they are so fragile that you will probably snap most of them removing them from the tree, as happened to me. Many of the handles broke in half. Not wanting to try to make replacements with wire (I find it’s difficult to get them all the exact same shape and size) I resorted to gluing the broken handles on their respective spots, letting them set a few minutes and then pushing the broken ends together and gluing the join. Once dry a very delicate sanding with fine grade paper took care of the slight bump in the handle where the two parts meet. A bit more work than I was wanting but much less time consuming than trying to make replacements. The instructions are vague and bit busy so it’s easy to mount things in the wrong place. For example, I placed the front lights (part A11) a bit too low on the body. Placement of the suspension pieces is another area where the mount points are a bit vague. Some of the pioneer tools shattered into to many pieces and again I didn’t relish making replacements so they were not attached and I covered their mounting holes with bits of plastic to represent empty mounting straps. And I didn’t bother adding the tow cable. The cable portion is left up to the modeller to build from scratch. The cable is to attach to the hooks (part B9) which don’t have any sort of hole in which to insert the end of the cable. Again I didn’t feel like trying to route the cable onto the kit and potentially break some of the fragile grab handles that I had foolishly added first, so the tow cable also did not make it onto the model. Each tire is molded as two separate halves in black plastic with the wheel rims (part B18) being a separate piece that needs to be sandwiched between the halves. Unfortunately the holes in the tires are a fraction too small for the rim forcing you to open up the hole in each tire to allow the rims to be inserted. If the rims don’t go in easily, don’t try forcing them into the holes because it will cause the tire to split (trust me on this one). Opening up the holes is not too onerous a task, but if you’re not careful the centers may be slightly off (which happened to me on a few of the wheel assemblies), and you may encounter problems with getting all the wheels to touch the ground. What I did was test each wheel assembly and swapped them around to different axle positions to ensure that each would touch the ground before finally gluing them to the kit. I really disliked the black plastic for the tires. The dark colour made it difficult to see how well the rims seated to the tire sidewalls, so you’ll probably get a result similar to mine where the gap between the rim and the tire varies, being quite noticeable in places and non-existent in others. The mirror stalks (parts A22 & A23) are illustrated as being a tripod mount in the instructions but the actual part has only two legs, so the missing leg needs to be added from some stretched sprue or rod. You get a nice propeller (part B32), but if you follow the instructions and mount the covers (part B2 & B3) in the closed position the prop is covered completely. I didn’t bother putting the propeller on the model and it went into the parts box. The front window covers can be mounted in the open position but ICM does not supply clear window parts for the openings, leaving it up to the modeller to fashion these. I just glued the covers shut, as well as the other doors because there is no interior as such, other than a couple of seats, steering wheel and an instrument panel up front. These parts, along with the pieces for the gunner’s seat (A19, A20 & A21) went into the spares box. There are two marking options on the
decal sheet: The decals are excellent regarding register and colour density, but they are very fragile and break all too easily if you move them about the model too much, so be very, very careful when applying them. The number for the Russian unit is on the turret. This caused a few difficulties getting it to sit down properly because the numerals on the decal are printed in a straight line but the turret has quite a curve to it. Multiple soakings with Microsol and a few strategically places slices in the clear portion of the decal eventually got it to snug down nice and tight. When it came time to weather my paranoia about breaking those fragile parts forced me to limit my dry brushing and I did almost all of the weathering with an airbrush. This is one of those kits that is very
close to being excellent but falls down a bit in the execution mainly
due to the fragility of the small parts. It has been pointed out to
me that the suspension sits a fraction too high but other than that
it does make up into a reasonable representation of the real BTR-60.
Review sample purchased by the author. |
| Back to Manufacturer Kit List | Back to Construction Reviews |
Article Last Updated: 18 January 2009 |
Back to Home Page |