I
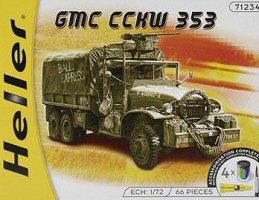
wanted to have a couple of US Army truck, so I bought some Heller
kits.
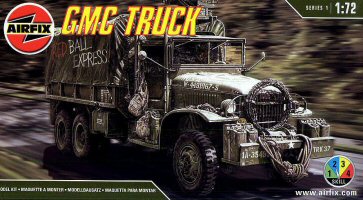
The moulds are the same used by Airfix box, so discussing one is like
looking at the other one. Three olive green moulds, a transparent
set, a decal set and the instructions make up the kit.
Everything
looks well done, although a lot of ejector pin marks need to be removed
by filling or by sanding. The parts are quite well depicted, but I’d
have preferred to have some details as separate parts. The surfaces
have the Airfix old kits fashion, which I sentimentally like. The
plastic is quite soft to work with and reacts very well to liquid
glue, requiring a bit more attention with the brush.
|
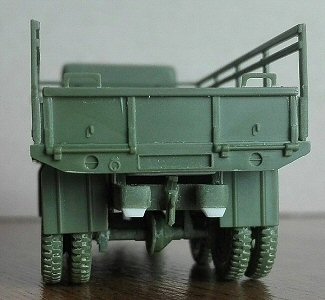
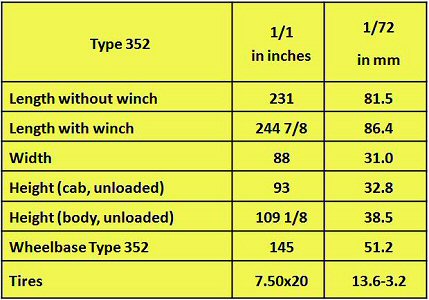
Dimensions
are quite correct,
only the wheelbase is about 1.5 mm too long. |
 |
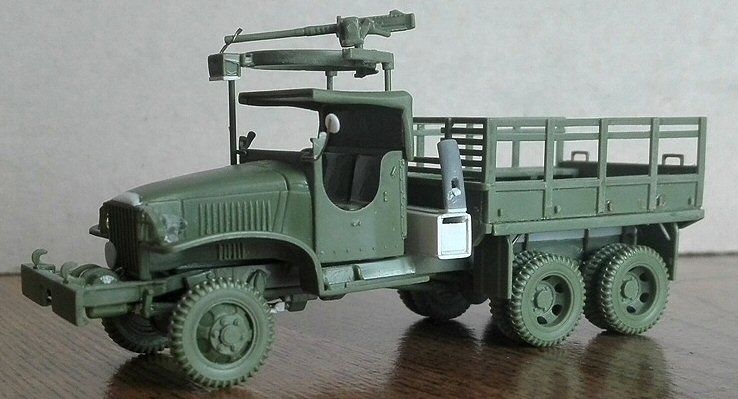
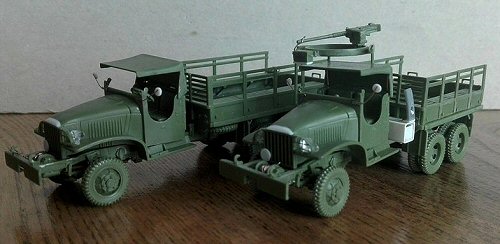
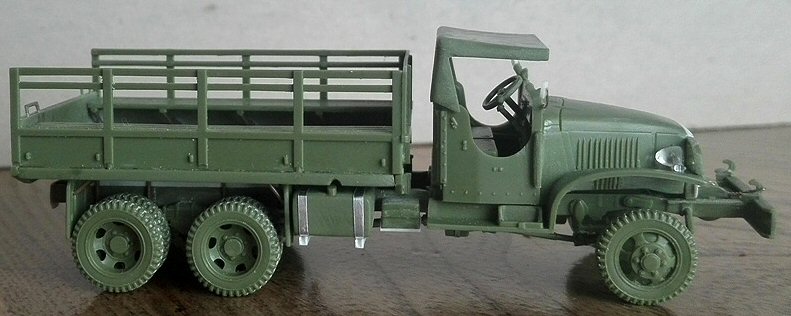
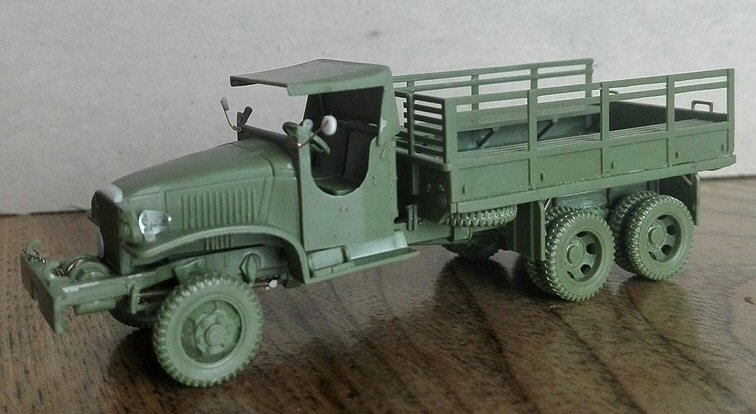
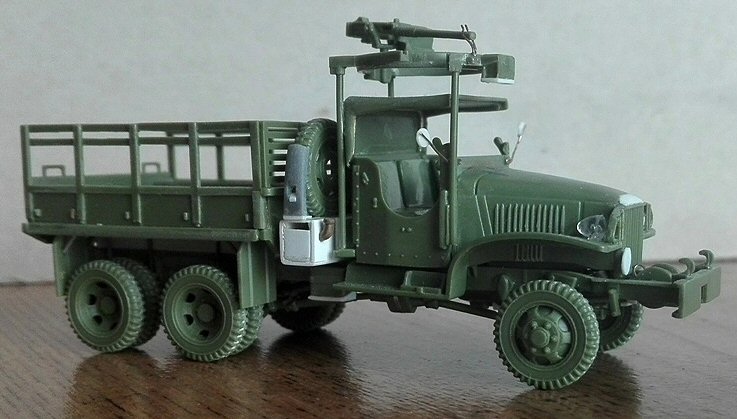
The variant proposed in this kit is the open cab truck with steel
body. The supply catalogue number for the truck 2 ½-ton, 6x6,
GMC CCKW was G508.
Two
types of chassis were used for the CCKW, the type 353 (used in this
kit), was the longer one. The shorter version, used for about the
10% of the CCKW production, was called type 352.
About the cab, the earlier production vehicles had the closed cabins
(1st, 2nd and the 3rd series). Starting from the 4th series, March
1943, the open cabin was adopted (there were also a 5th and a 6th
series).
The CCKW-353 proposed by the kit has the winch, used by both chassis
type (short and long) and on almost half of the production total.
The kit chassis has Timken split axle. It was also used the Chevrolet
banjo type, but the different axle type meant also a slightly different
layout of the drive shafts. You easily can get a range of different
variants with a little conversion work; the easiest could be swapping
the steel body to a wooden one taken from the Academy kit.
Good
info sources of information on the net can be found on dedicated sites
such as www.cckw.org or
www.gmccckw.nl , here
www.ww2cckw.org/jimmy_ancestry.htm,
you can find a very interesting article in ten parts and last but
not least, the technical manual TM 9-801 and TM 9-224 are full of
useful info too.
A very important thing when using photos of restored vehicles is to
remember that they could be subject to personal interpretation or
have a post war up grade (such as the shortened rod of the radiator
grill).
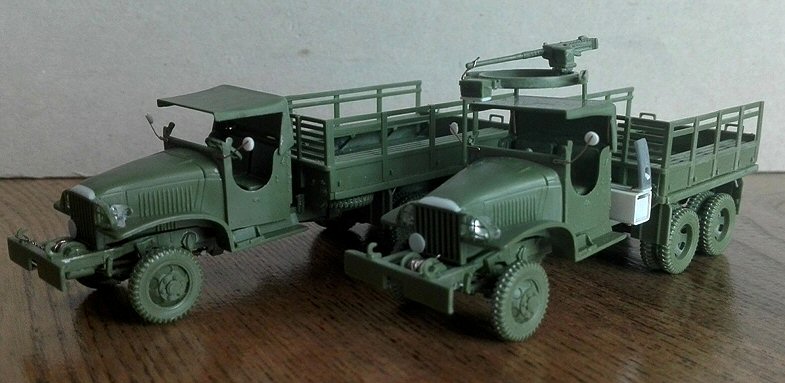
I made
the variant proposed by the kit, adding some improvements, as one
model and concerted a second one into a short wheelbase truck.
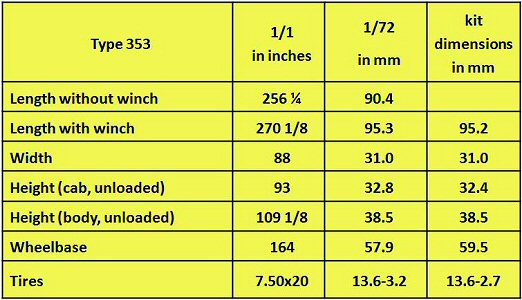
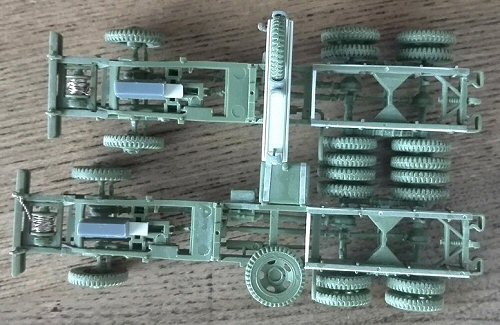
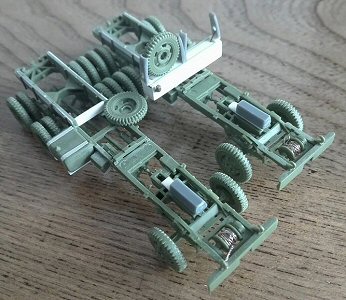
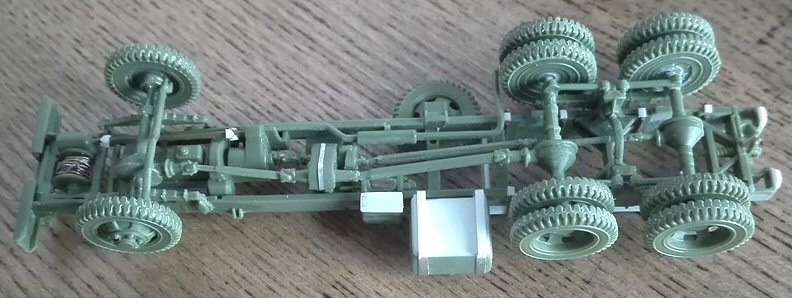
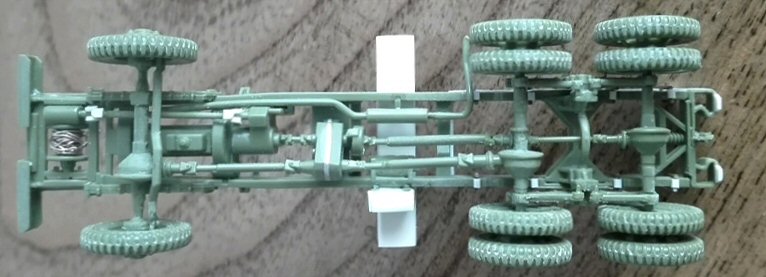
Chassis
|
- The
tank # 9 belly is open. I closed it with thin plastic sheet. The
metal belts of the tank were removed and replaced by thin metal
stripes while the tank supports were made by plastic rod which endings
were filed to depict its “U” section.
- A
metal wire was wrapped around the empty winch.
- Also
the battery box # 8 belly is open, after having closed in the same
way. I added its housing by thin plastic sheet.
- The
towing hook is shown up side down in the instructions.
- The
winch power shaft is missing. I made it by stretched sprue and little
plastic triangles for the gimbals.
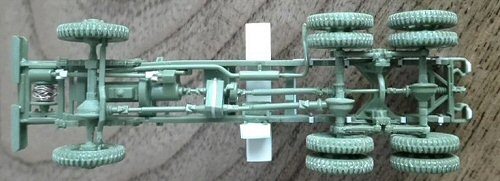
- A
careful job was needed to obtain the proper placement of the drive
shafts, correct for the split type axle.
|
 |
- To
avoid open spaces between the chassis and the bonnet, I shimmed
the engine top using plastic pieces.
- The
spare wheel has five holes. While this error on the front wheels
were been corrected by the mould maker, the spare wheel was forgotten.
Luckily, it's partially hidden and so I ignored it too.
|
 |
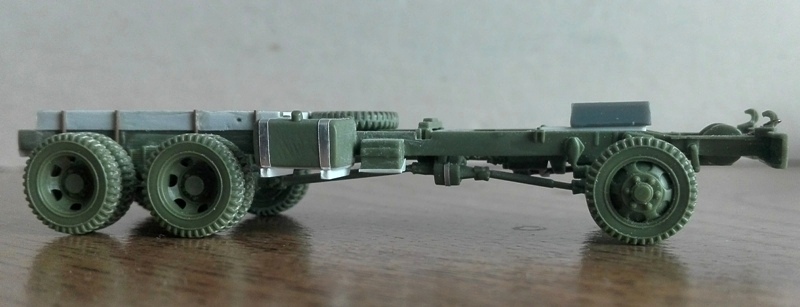
- The
7.50x 20 wheels in my kit are correct (all have six holes), the
diameter is depicted correctly but they are slightly thin. I kept
them as they are: the correction is almost impossible and I didn’t
want to look for a replacement (Armory has a resin set).
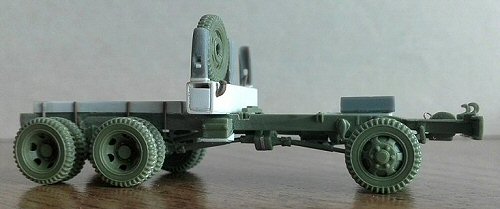
- The
chassis frame height was the same along all its length; the higher
section where the bed lies wasn’t solid, but formed by a second
frame fixed to the chassis. To depict this difference I glued two
very thin plastic stripes. Another stripe was used to close the
frame front. I also made the thin rods which kept these frame in
place using some stretched sprue and little plastic pieces.
|
 |
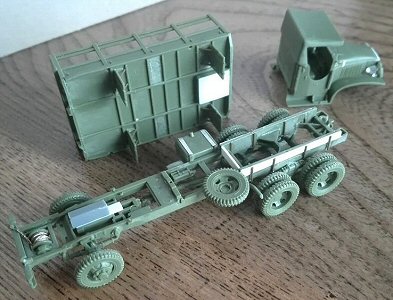
- I
increased the rear bumpers lower edge by plastic shaped in place
and I thinned its thickness from inside.
|
 |
|
Cabin
When
assembling the cabin, I didn't follow the instructions, attaching
it to the engine hood as a sub assembly. This made the painting job
a lot easier, but that's personal.
|
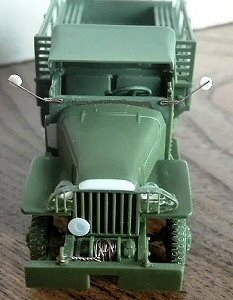
- The
brush guards are very thick and hide the lights. I removed the inner
rods (very thin on the vehicle) while the shaped edge, which forms
the outer frame, was thinned carefully. The new rods were made with
stretched sprue. There should be two horizontal rods, but I felt
the lights obscuring effect was too much so I added only one.
- The
lights are moulded in transparent plastic. I glued them in place;
they will be painted together with the cab.
- The
bonnet upper cover is a millimetre too short: it should cover the
grille thickness. I added plastic shaped in place, paying attention
to obtain the correct shape.
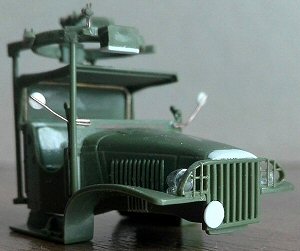
- The
mirror supports are much too thick and the mirrors small. I replaced
both by metal wire and plastic sheet.
|
 |
- I
reduced the oversized windshield hinges, while the dash board front
recesses were filled and flattened.
- The
rectangular holder for the support # 39 on the cab right side was
resized.
- To
give the steering wheel the correct alignment a little adjustment
of its interlock was needed.
- The
edges of the fabric cabin hood where thinned. I added the frame
which keeps the fabric in shape by metal wire. It was glued on using
the dry fitted windshield for a correct placement.
- The
technical manual shows the correct way to store it, rolled under
the windshield when that was folded down to prevent the glass breaking.
The windshield could also be opened up. In this case the external
frame remained vertical and only the interior frame folded up.
• Under the fenders, behind the wheels, there was another
louvre on each side; I made their vents with thin stretched sprue
segments.
|
 |
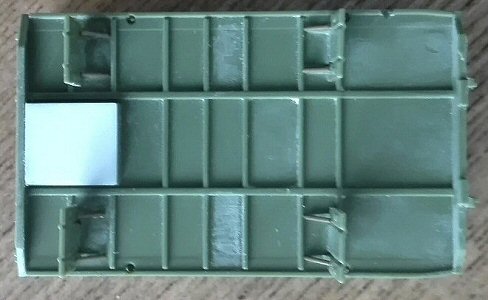
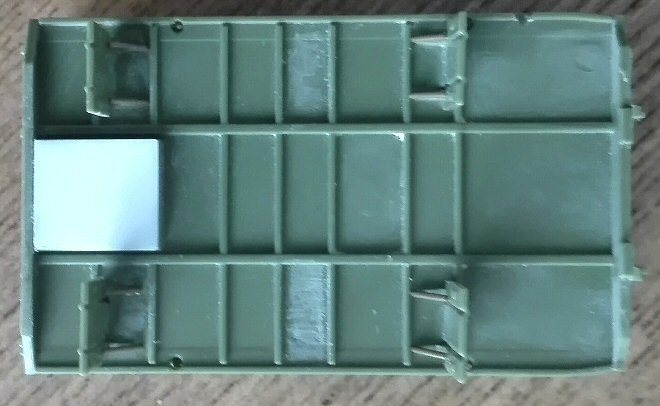
- Since
the seats were moulded solid to the cabin, the floor bottom has
a large hole which is their inner side. I closed the floor with
a plastic piece to restore the floor.
- The
grille has 9 thick rods (they should be 14) with the bridge class
plate moulded on. I removed the bridge class plate, which was replaced
by thin plastic sheet.
- The
kit also has a driver. The arms are separate, which is good, but
the soldier is undersized. You wouldn't see him in a closed cab
truck, but although this one is the open version, I'd choose to
send him to the spare part box.
|
 |
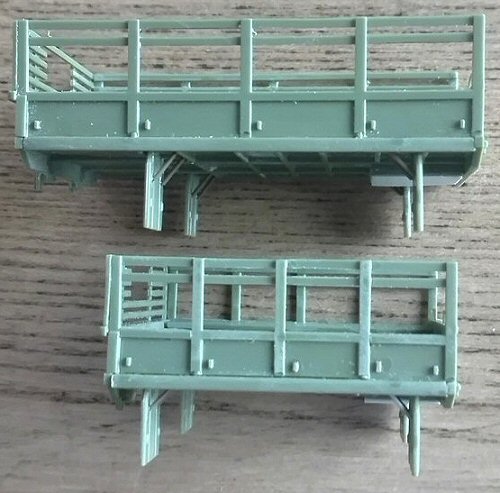
Flat
bed
- The
toolbox floor was added by plastic sheet.
- I
added the inclined benches position supports, made in stretched
sprue.
- The
opening on the right side, above the fuel tank cap, was missing.
Using a file, I made a small notch.
|
 |
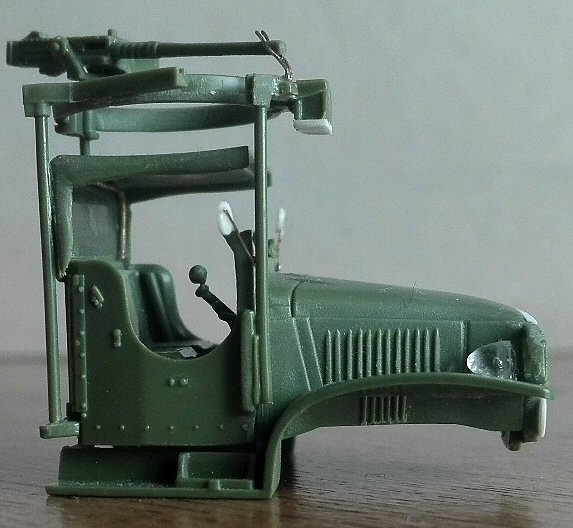
M36
mount
The standard
AA MG mount for the open cab was the M36 type (however exceptional
use of the M37 is photographically documented), but it wasn’t
always present. Although shown as optional in the tarpaulin instructions,
it could be used with or without the fabric hood depending on the
effect wished by the modeller.
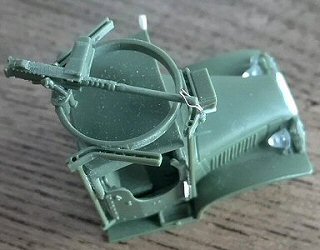
There
were two M36 mount variants, which differed in the horizontal arms.
The kit depicts the type with the “U” section straight
arms. The other type had “C” section triangular arms. |
- Compared
with the usual WW2 photos, the vertical supports look short: the
ring height can be adapted using a row of holes placed at regular
distances along the vertical rods. Since these rods also look much
too thick, I replaced them by stretched sprue.
- The
position suggested for the right supports are much too far from
the cab so I modified their position to get them closer. After having
repositioned the vertical supports, the interlocks references in
the horizontal arms were changed. I carefully cut off the rear arms
and, after having cleaned these and the ring, glued everything in
the correct place using the vertical supports as dry fitting references.
|
 |
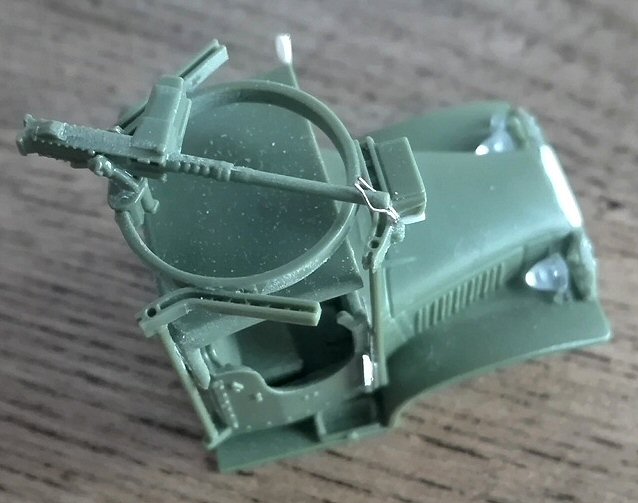
- The
48 inches ring section is much too thick. I kept the exterior diameter
and I thinned it from inside.
- The
MG fork is turned to point inside the ring. If you wish to point
the MG outwards, the fork must be cut from the sliding base and
glued inside out. I kept mine as it is to get the travelling position
(gluing the .50 in the correct position) adding its thin travel
locks made by thin metal wire.
|
 |
|
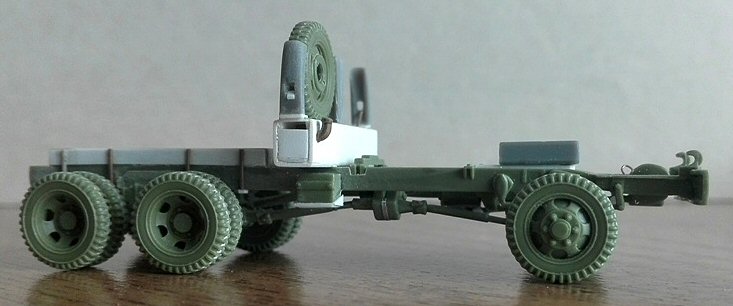
CCKW-352
Conversions
The
easiest way to convert a 353 variant is getting rid of the winch.
The front bumper can be scratchbuilt or taken from the Academy kit.
Another possible conversion way is swapping the steel body with an
Academy wooden body because this type was used as well. The use of
the Hasegawa tanker truck body or dump truck body is possible but
more complicated.
I preferred
the less complex conversion ("really simple" would be more
correct) to a short wheelbase CCKW-352, by modifying the chassis and
the flatbed body. I didn’t correct the 1.5 mm difference in
the wheelbase because the kit is shaped around this difference and
I though correcting it could give major problems.
|
 _____________ _____________ |
The
chassis
- I
shortened the chassis cutting it twice. The first cut just in front
of the raised section, filing backward to have a larger gluing surface,
shortening the overall length of 6.7 mm which is the wheelbase difference.
The chassis length difference is 8.8 mm and I made the second cut
forward of the rear bumper.
- The
shelf for the spare wheel was removed; on the opposite side I filed
the tank interlock.
- Above
the tank, I made the spare wheel housings by shaping four sprue
segments. The two external ones had also a squared hole in which
the travel locks went, made by stretched sprue and plastic sheet
chips. Having only one spare wheel I left the second housing empty.
|
 |
 ___________________ ___________________ |
- The
fuel tank was inside the transversal housing placed between the
cab and the body. This adaptation and the one below are the "hardest"
part of the conversion. Using a drawing to scale down the dimensions,
I started filing a thick sprue section to obtain a squared section.
Around this I glued plastic stripes to make the housing, leaving
a 0.5 mm space between the top of the tank and the top of the housing.
To this I added the curved filling pipe and its cap made by stretched
sprue.
|
 |
- The
drive shafts and the exhaust piping were shortened accordingly.
|
 |
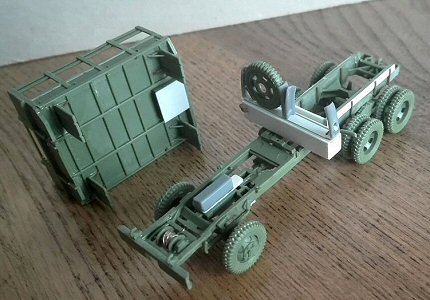
The
body
- The
CCKW 352 body was 39” shorter. I shortened the bed cutting
10.5 mm from the front and 2.5 mm from the rear.
- The
sides were shortened to 38 mm cutting them in five pieces, which
are the four panels with a rib (9.3 mm long) and a single rib. I
glued everything together on a glass plate to get a perfect flat
construction.
|
 |
- Next
the benches were consequently shortened. The ribs placed on the
bottom were cut off and placed using the side ribs as references.
|
 |
 _______ _______ |
Decals
I didn’t
find a single photo of the only truck offered in the decal set:
-
W-4491967-S, a truck of the 1st Army 3549th Transportation Corps.
Basing on the photos I’ve seen, I think the War Department
letter “W” was already discontinued at the time the
number 4491976 was allocated. Currently this registration number
is written on the bonnet of a restored CCKW 353 without winch, but
I don’t know if it is its original number or it is applied
fictionally.
|
Conclusions
There
is little choice for an open cab, but luckily nowadays this is a quite
good kit (earlier production kits had the wrong forward wheels shown
in the Stephen Brezinski
review). In this kit I think nothing is really wrong or irreparable
despite some details seriously need a bit of TLC, which could came
from an aftermarket set. A better brush guards is strongly wished.
With some work this kit can give us a good replica and with a bit
more work it can be converted in different variants.
I
think some items for the load or a crew to fill the body would be
a welcome improvement as well as a couple of options in a new decal
set.
Preview
sample purchased by the author.
This
model can be purchased from

|
 ________________


 ___________________
 _______