|
Before proceeding further with my abbreviated review I suggest the reader first read the preview of the wz.34
by Andy Lang & Jakub Jastrzebski here and the preview of the
wz.34 II by Michal Derela here. Both of these previews offer suggestions as to how to make improvements over the basic
kit.

 Construction
The above previews along with an
inspection of the kit convinced me that it would be best to explore adding some simple detail changes to make the kit more acceptable and avoid
going to the extreme to get the kit up to competition level. On the whole this is a decently detailed kit considering that it is basically a "quick build" offering,
but there were three areas needing work.
First was the rear wheels. These have too shallow a dish. The only acceptable fix is to rebuild the wheels, which isn't a trivial undertaking, so I didn't
bother fixing them.
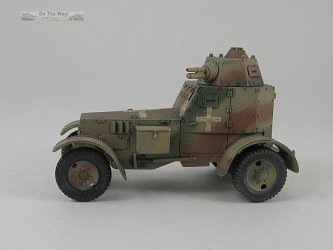
The next major issue concerned the fenders. These are overly thick, looking more akin to sections of inches thick armour plate. Their saving grace is
the exquisitely rendered ribbing on top of each fender. I decided to retain the kit fenders and see what could be done to improve them.
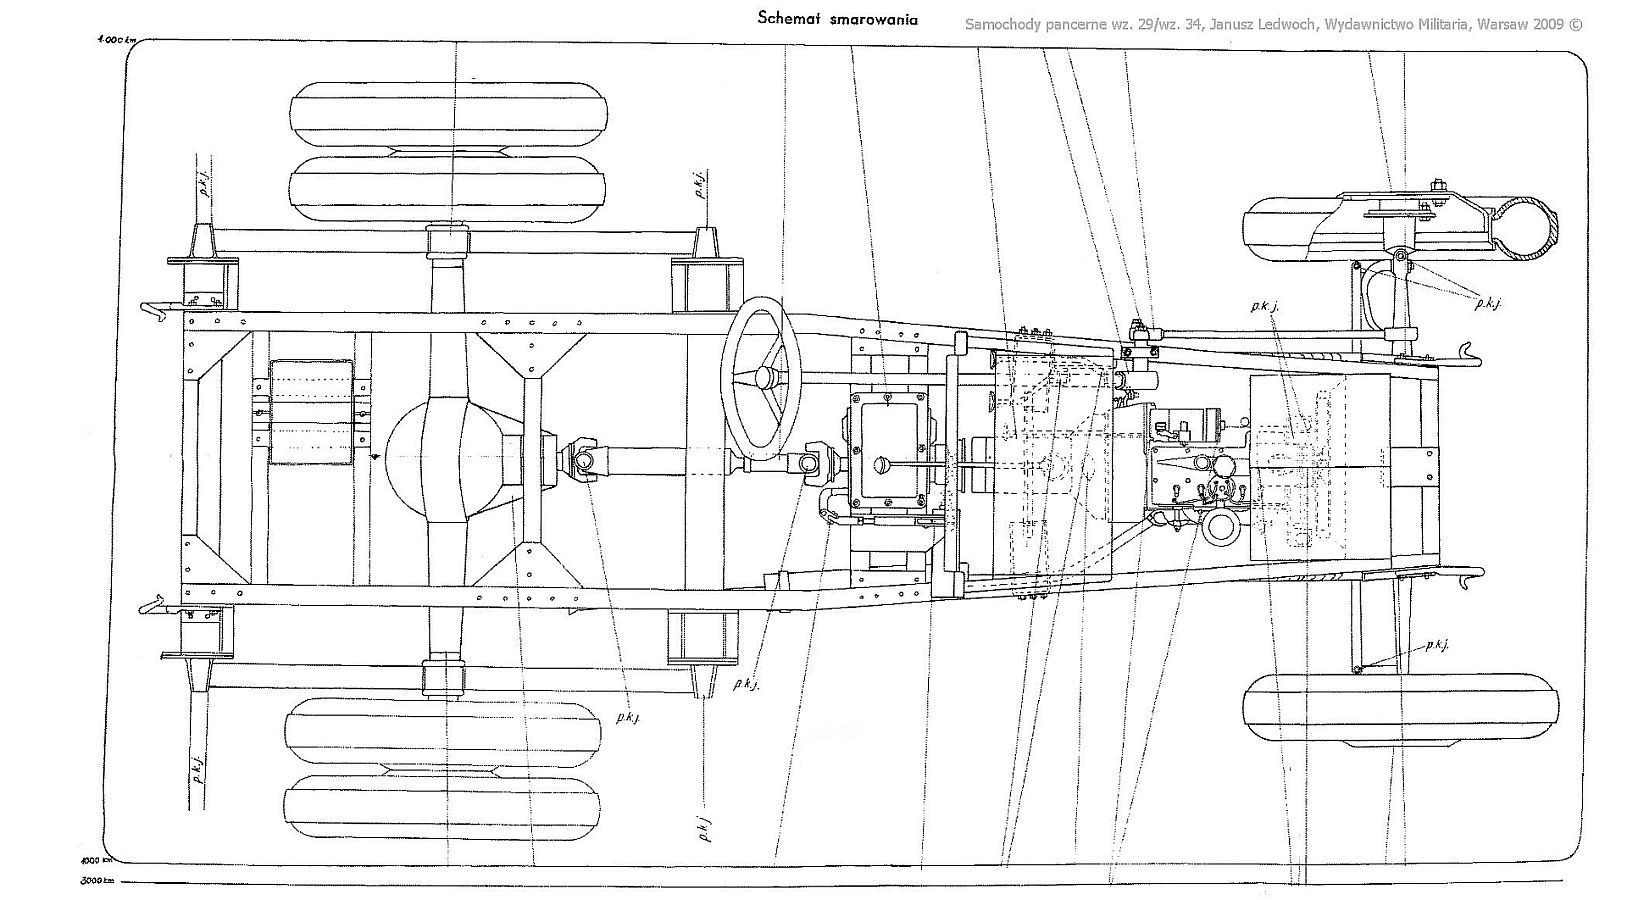
The last issue concerns the underside. This is pretty much devoid of detail only providing the most basic suspension and
some lumps to represent the engine oil pan and transmission case. A bare minimum improvement would be the addition of frame cross members, but
the biggest fault lies with the kit's flat floor, which covers the entire bottom of the model including the engine compartment. The underside of the engine compartment
should be open. The modeller would need to trim away the floor and add some sort of a representation of an engine placed under the hood plus a
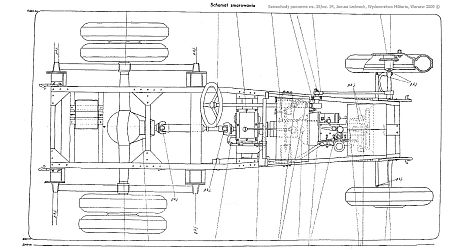
muffler. To completely detail the underside one could copy what was done for the AGA 1/35 scale kit as seen in
reference [4] but I'm not sure what it's based on. The schematic below gives an idea
of what the underside should really look like.
With the above in mind I decided to keep my changes simple and treat this build as a painting exercise.
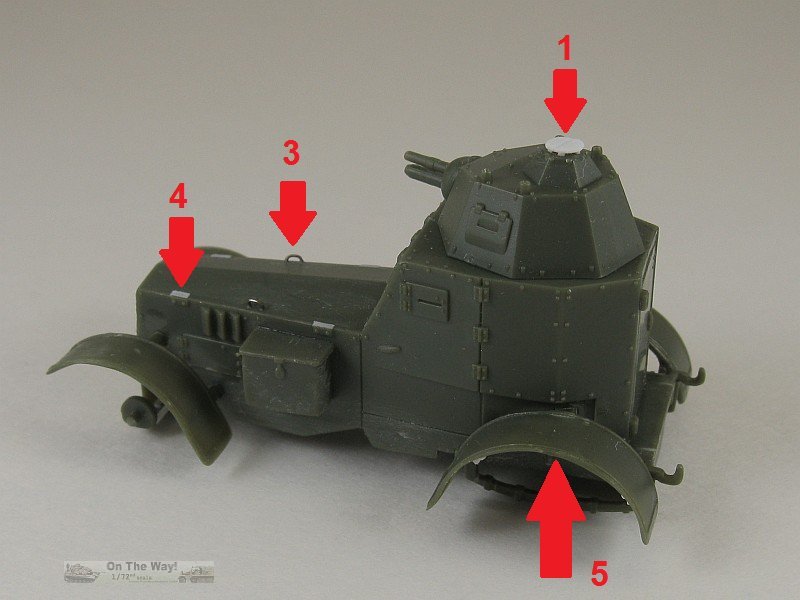
Below is the list of changes I made to the kit (please refer to the above in-progress photos).
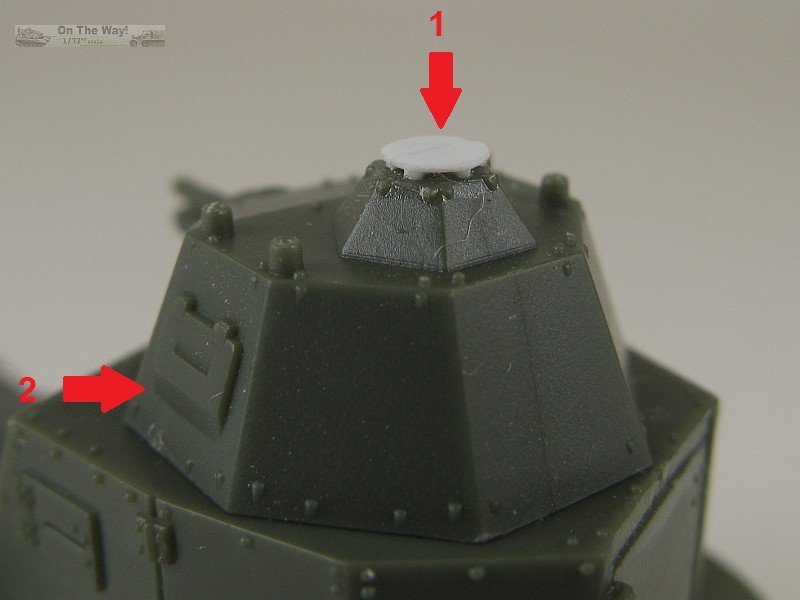
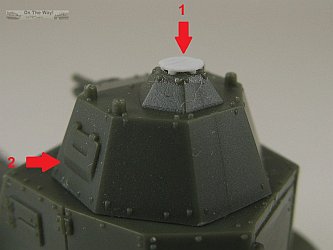
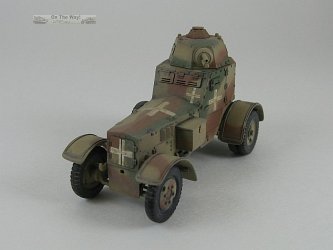
- (Red 1) First to Fight missed the small disc shaped ventilation cover atop the the commander's cupola. It should be supported on
small pegs at the corners of the pentagonal roof, with a side-to-side hinge line.
- (Red 2) The lower edge of both of the turret's side hatches are sloped: cut away the excess plastic.
- (Red 3) Handles were added to the engine hood.
- (Red 4) Small flanges were added to the top of the hinges on the engine hood.
- (Red 5) As mentioned above the fenders are obscenely thick though they do have excellent rib detail. Replacement fenders would likely
lose this ribbing unless one makes the
extra effort to add them again. I figured that some judicious scraping and sanding would thin the fenders to a more acceptable thickness without having to resort
to scratch
building. Although there's a lot of plastic to remove, it is soft enough that a sharp knife will shave it off quickly.
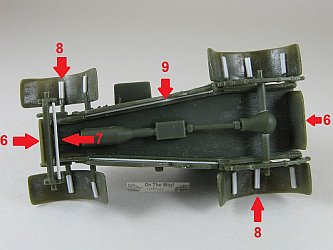
- (Red 6) Front & rear skirts were both were left in place and scraped and sanded to thin them to a more reasonable thickness.
- A small hole was drilled for the engine starter crank.
- (Red 7) A small section of plastic rod was added between the wheels to simulate a tie rod.
- (Red 8) Just for the fun of it, I tried adding fender supports to the underside of each fender. These are U-shaped channels made from scraping a groove down a thin
rectangular rod. They didn't turn out as well as I'd have liked but at least they're crudeness is mostly hidden by the wheels.
- (Red 9) There is a gap between the body and the frame which I filled with strips of plastic.
- The pioneer tools are molded directly to the hull and look flat. I sliced them off and removed their remnants from the hull with sandpaper. Replacements
were found in the spares box.
Some other changes that would be very easy to do but I decided to skip would be:
- An engine starter crank.
- A front bumper.
- Bracing struts for the front and rear fenders.
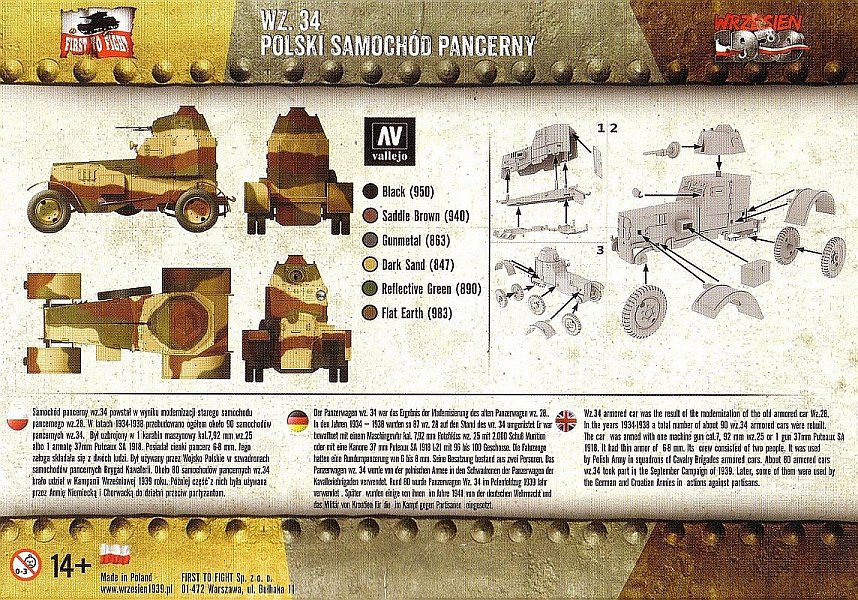
Markings
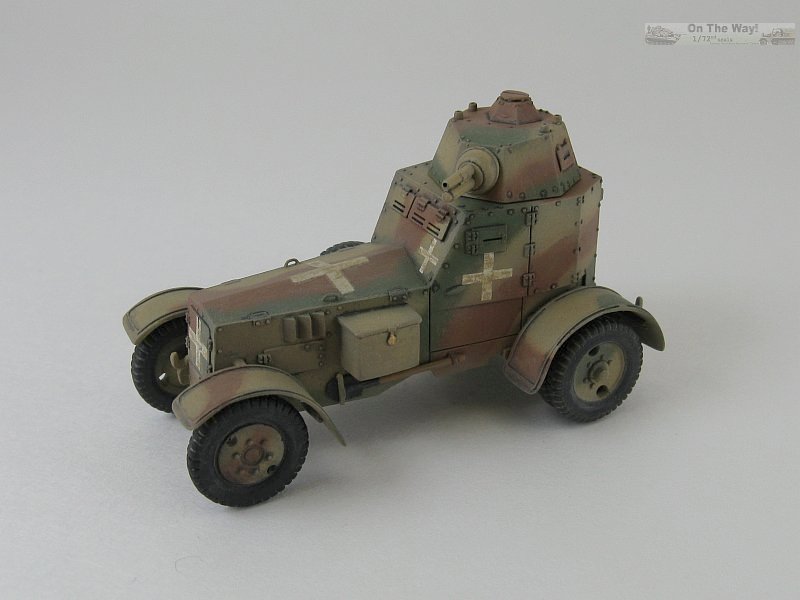
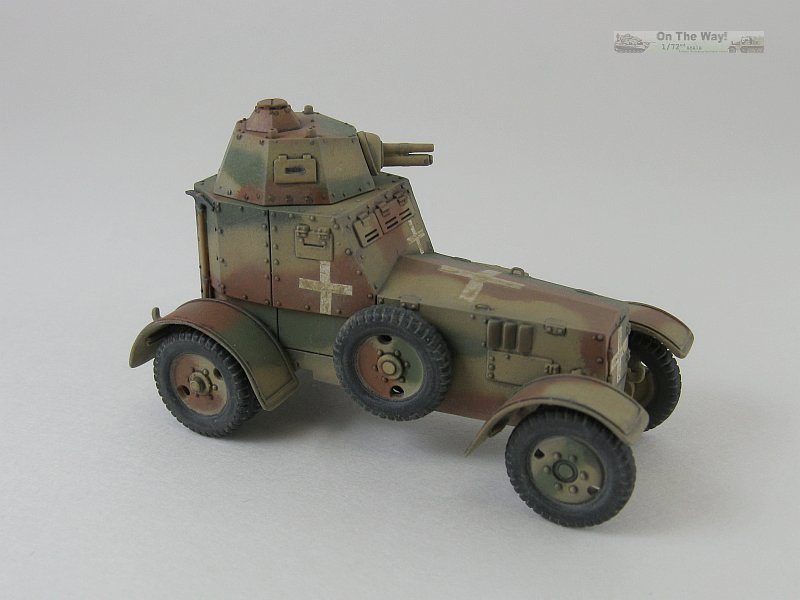
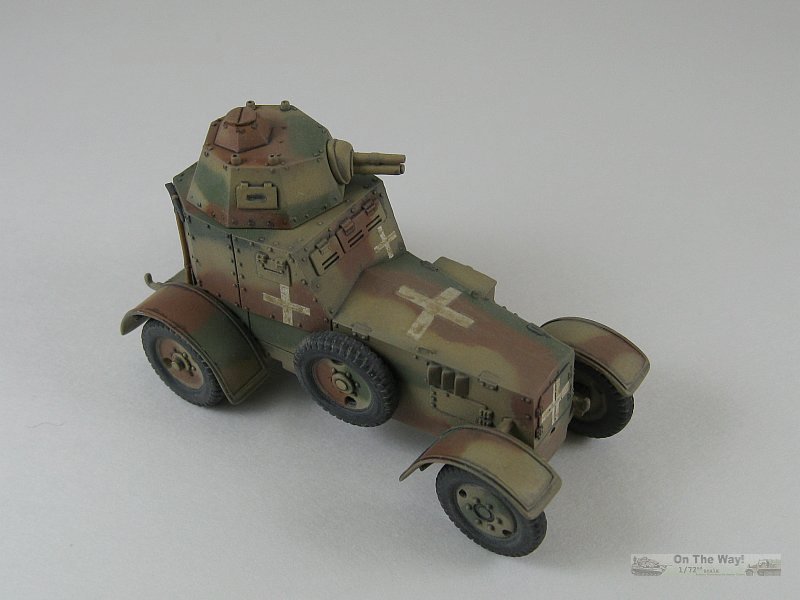
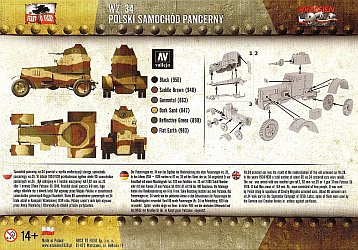
The painting guide is on the back panel of the box. It gives one representation of the camouflage, but if you look at the various period photos, this vehicle
was camouflages with large variances in direction and coverage of the green and brown patches. So almost anything goes as far as pattern for the three tone camouflage.
Unfortunately
there are no instructions as to how to paint the underside. I refered back to the instructions for the IBG Fiat 508/III "Lazik" and painted the suspension and drive
train black.
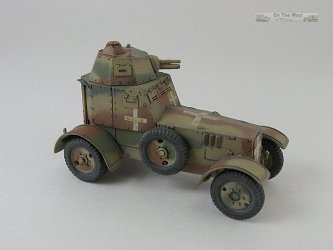
As for unit and national markings, almost all period photographs show these vehicles with absolutely no markings whatsoever. I wanted something a little less plain
and decided to add German Polish
campaign crosses for a beute vehicle. I was unable to find suitable crosses in my spares box nor from an aftermarket source so I resorted to jury rigging my markings
using slices of decals taken from an old set of Superscale Luftwaffe simplified white crosses sheet. I didn't bother making them too perfect since these were hasty
field applied and then I dirtied them up during my weathering process as well to replicate what I saw in numerous period photos.
Conclusion
This is a welcome release by First to Fight. Polish armoured vehicles are not well served in 1/72 scale. Unfortunately its simplicity makes it more suitable for the
wargamer or for placement in a diorama than as a display model. Those wishing to make a really good display model will need to up its detail significantly.
References
[1] Samochody pancerne wz. 29/wz. 34, Janusz Ledwoch, Wydawnictwo Militaria, Warsaw 2009 ISBN: 9788372193186
[2] beutepanzer.ru (Beutepanzer)
[3] PIBWL (Polish Armour of 1918-1939)
[4] www.modelwork.pl
Review sample purchased by the author.


|