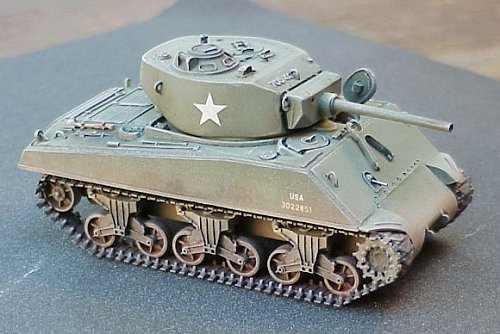
M4A3E2 "Jumbo" Sherman
Manufacturer: Fine Scale Factory (Kit #TL 020)
I remember a long time ago, a friend of mine was looking for resin Sherman tracks with the "duckbill" grousers. He needed them for a "Jumbo" Sherman conversion he had planned. I thought it was a good idea, but it sounded like an awful lot of work to me. Imagine my surprise to find out that this vehicle was now being marketed as a complete kit by Fine Scale Factory, and my excitement when they sent one to me to build as a review kit. I consider myself lucky that all the review kits I have received have been excellent models, so I have yet to be in the uncomfortable position of having to review a poor kit. This one is no exception; it is fantastic.
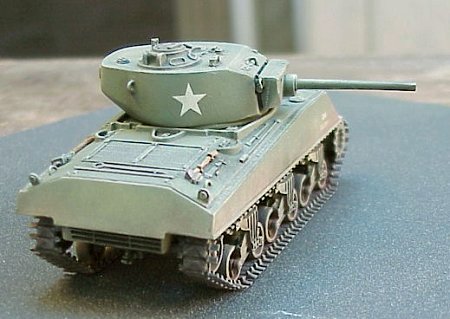
The basis of the kit was ESCI's old M4A3 Sherman, which itself, was a very nice model. FSFmade numerous modifications to the hull, the most obvious being the addition of the thick armor plating, which was the main distinguishing feature of this tank. They also modified the engine deck slightly, giving the engine grates a more "refined" look. The hull rear is heavily detailed with very distinct bolts. I only now realised that I failed to get a photograph of the rear of the model. Unfortunately, in using the ESCI kit as a base, FSF also copied that kit's primary weakness: it's length. Consequently, this kit is about 2mm too short, although the width, and all other details, are correct for 1/72nd scale.
Other improvements to the hull include better ventilator covers and better hatches (with periscopes added - inside and outside). The lower hull was molded as a single piece, with the hull sides, bottom, rear and front transmission housing all molded together. The road wheels are direct copies of the ESCI wheels, as are the sprocket and idler wheels too. The wheel suspension units are based on the ESCI parts, but have been greatly improved. Other details copied from the ESCI kit are the tow hook, the tail lights, and the pioneer tools.
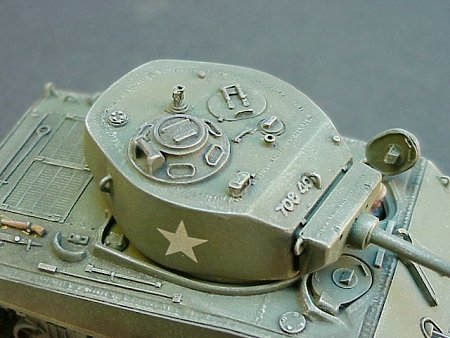
As far as I can tell, the turret is either completely new, or else a heavily modified turret from some other kit. It uses the commander's cupola and hatch from the Hasegawa Sherman (but with the hatch opening at the proper angle), but everything else, including the gun shield, are new and exceptionally well done. The tracks are copies of the ESCI tracks, with the duckbill grousers (extenders) added.
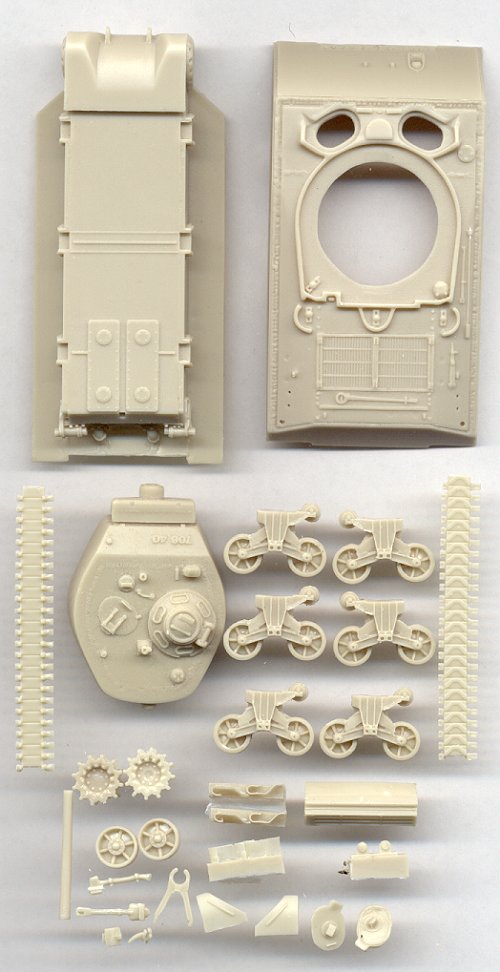
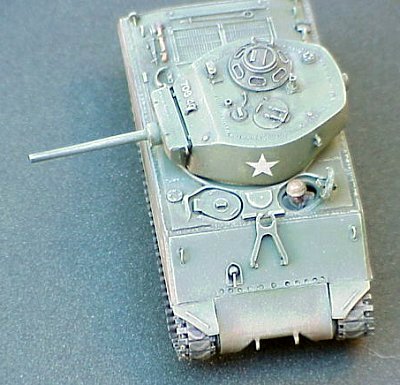
Overall, the detail on this kit is superb. The weld seams between the regular hull and the added armor are just distinct enough, without being overdone. All of the turret details are molded in excellent relief. The entire kit was molded very well, with almost no flaws in the resin; no air bubbles, no mold shifting, and almost no flash. The only molding flaw I noticed was the sprocket wheels: some of the recesses behind the sprocket teeth were plugged up. Very careful work with a Dremel and a fine drill bit, used as a router, would fix this up. Notice in the parts scan that my copy of this kit included only two right side wheel suspension units, and four left side units. I was in a hurry, so I ended up swapping one out of the FSF Composite hull Sherman kit, and when I build that kit, I'll steal one from an unneeded ESCI kit.
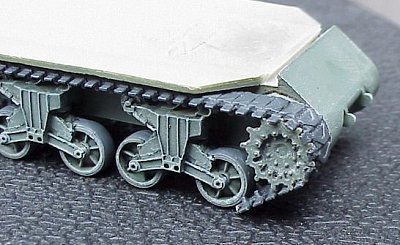
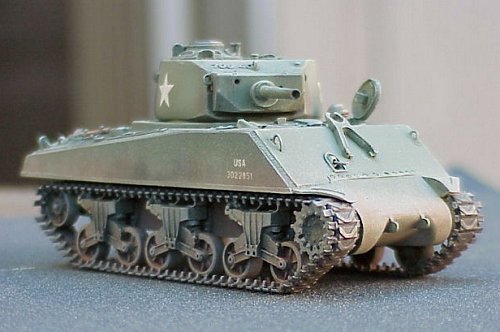
The tracks look exceptional when completed, but about gave me an ulcer when working with them. I understand that it is a common practice to heat resin track segments in hot water (or other heat source) and then bend them into shape. I have NEVER in my life been able to make that technique work. I have tried hot water; I have tried boiling water; I have left them soaking for a few minutes; and I have left them soaking for a long time. And yet I have never been able to get the tracks to bend without breaking. So I ended up simply breaking the track lengths into individual links for wrapping around the sprocket and idler wheels, which worked just fine. I had to snip off the track guide teeth on the links which wrapped around the sprocket wheel, because they interfered with the sprocket teeth. In the future, I will save myself a lot of frustration by not even trying to heat the tracks, and instead simply break them into individual links beforehand. In fact, I think it looks better like this anyway, because now each individual link is distinct, whereas if I had bent each segment of track, then the individual links would likely have looked bent themselves.
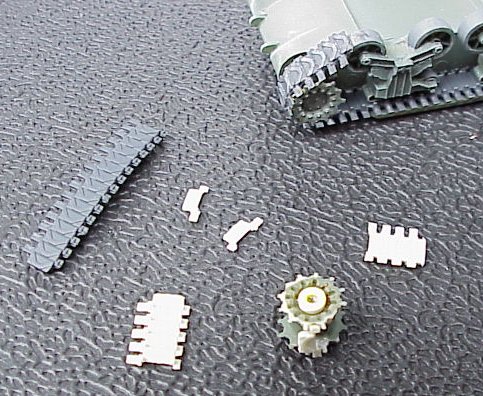
Also, the sprocket wheels have no mounting pegs, so the inside sprocket would glue directly onto the side of the hull. I added a small spacer from plastic tube, so that the wheels do not touch the hull side.
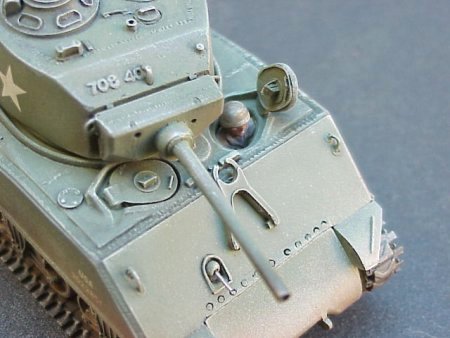
Once again, the only poor part to the kit were the instructions. Luckily, this kit was simple enough to not require much more than the simple drawing which is included, but there is a mistake on the drawing. The instructions indicate that the modeler has to provide his own headlights (I guess from an unused ESCI kit), but Jumbo Shermans did not have headlights attached. So don't add any. You do have to add a hull machinegun, however. I used a very thin piece of aluminum tubing for mine (I think produced by Minimeca?) And lift rings are also needed. There should be lift rings on the front hull face, on the rear hull corners, on the rear sides of the turret, and on the front of the turret, just behind the gun shield. Also add two small loops on the upper corners of the gun shield. It's important to note that there were very distinct welds around the bases of the lift rings, so a good blob of glue to attach the rings can replicate these welds very well.
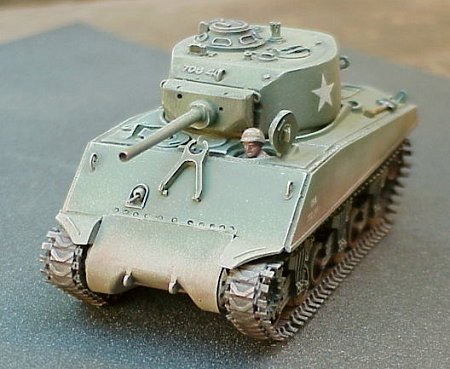
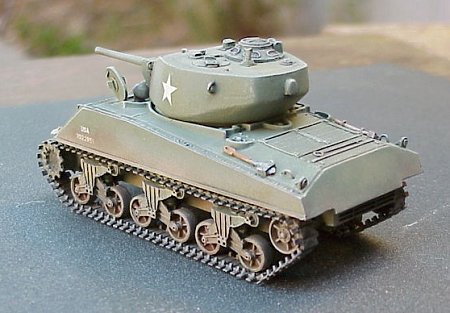
As seen in the photos, the two hull hatches are molded open. I took the opportunity to add a driver figure, but he was not included with the kit. All turret hatches and the engine access hatch are molded shut. There are a couple of other minor details which the modeler can add, such as the small searchlight on the turret, an AA machinegun on the turret, the fine wire frames which protect the periscopes, and of course, hull stowage items.
No decals are included; I used some from Microscale. The markings, although plain, indicate that this tank was with the 37th Tank Battalion of the 4th Armored Division, because this unit continued to use the white stars on the turret sides long after their use was discontinued by the rest of the US Army. I painted the model with Polly Scale acrylic US Green, and weathered it with a light dusting of tan, and liberal use of chalks.
This was a fantastic kit, and I'd like to thank Fine Scale Factory for providing the review sample.
References: Sherman - A History of the American Medium Tank, by R.P. Hunnicutt, and The Sherman at War (2), by S.J. Zaloga.
| Back to Kit Reviews | Back to The Sherman Story |
| Back to Fine Scale Factory Kit List | Back to Home Page |