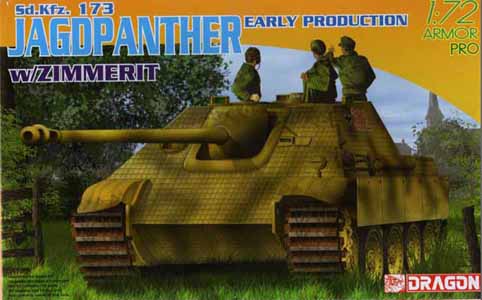
| Dragon Jagdpanther Early Production with Zimmerit | ||||
| Kit #7241 | Review
by Ian Cowley - cowleyi(at)internode(dot)on(dot)net | |||
| Dragon Jagdpanther Early Production with Zimmerit | ||||
| Kit #7241 | Review
by Ian Cowley - cowleyi(at)internode(dot)on(dot)net | |||
 |
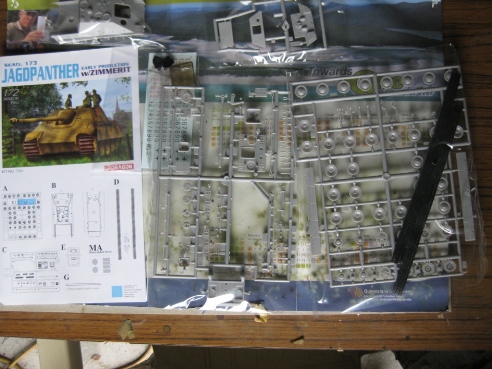
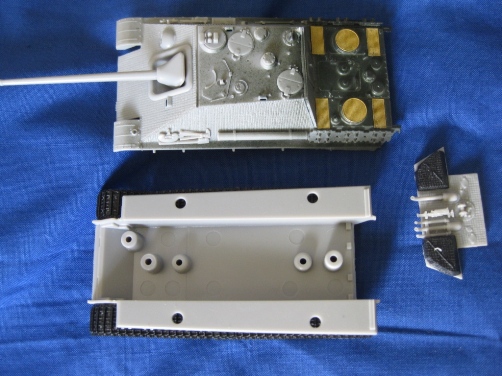
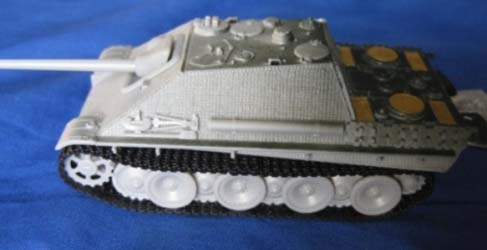
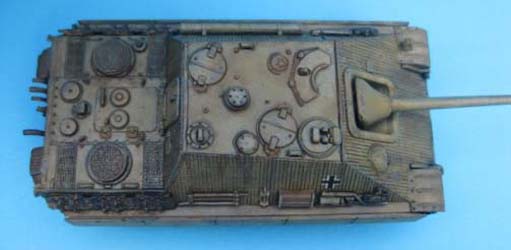
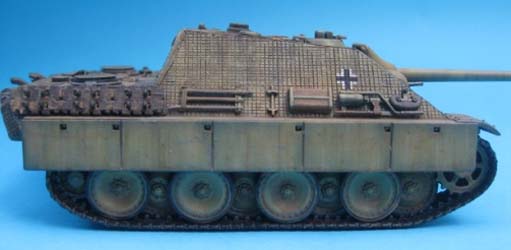
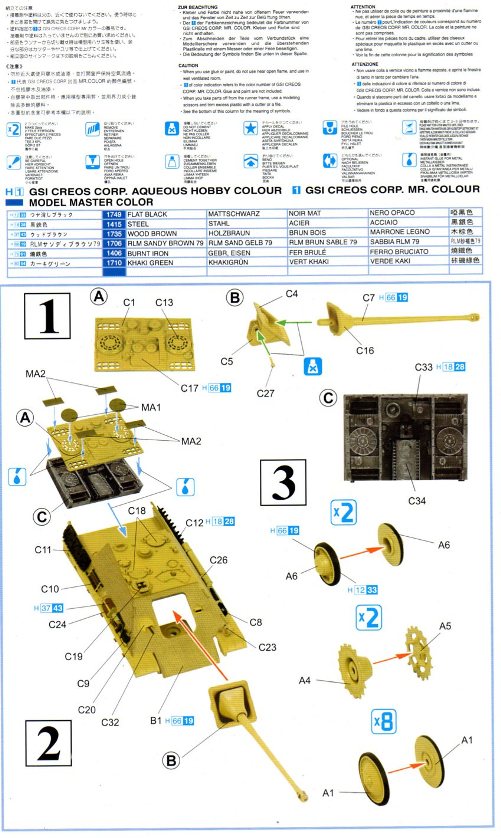
I have built one of these kits back in 2008. I was looking at getting back into braille scale armour again and it was suggested that the newer Dragon kits were excellent value and went together really well plus they had photoetch parts. Photoetch didn’t exist when I was growing up so here was a whole new field to explore. The first one built well and I was very happy with the result as it was a bit of a weathering test bed for the hairspray technique. After a year and a half it’s time to have another go at this particular kit. I always remember the 1/35 scale Jagdpanther a friend of mine, Daryl, had on a shelf in his room – it looked impressive! (Apart from the fact he is an excellent kitbuilder.) I’ll leave the history and specs of the Jagpanther to the real experts. Suffice to say that a lot of popular literature ranks the Jagdpanther as the number 1 tank destroyer of WW2. I think it’s one of the coolest looking tanks of WW2. With regard to scale dimensions, sorry, I don’t have scale plans so I can’t make a comment on the accuracy of its dimensions. So what’s in the box? Well, we have 3 sprues of light grey plastic plus the superstructure and the lower hull as well as a photo etch sheet and decals. The sprues are generally well moulded but there are some sink marks and extractor pin artefacts that are generally located on areas where they won’t create issues. A little tidying up is required. The tools and the spare track lack a little in detail and finesse. The moulded Zimmerit looks restrained and pretty good. The tracks are rubber and decals are plentiful in both red and black numbers from 0-9. There is also some wire for tow cables. Plenty for the spares box. Some of the parts on the sprue appear to be common with the Dragon Panther kit. Items such as exhausts have both early and late configurations. We will see if the appearance translates into an easy build. One thing I don’t particularly like is the instructions. It is in a photographic format with the parts assembled. I don’t like it and I’m sure that it would create issues for novices or those without a good knowledge of what the tank looks like. It seems just too easy to miss bits until it’s too late when you are left with spares on the sprue. Sorry Dragon, but that’s how I feel. After a few days away from the bench, back into it. I have started on the superstructure and I will work my way down. The rear superstructure needs care. Mine didn’t fit flush (I won’t blame dragon on this one) and so needed a little work to get a better fit. All the tools fit on well but the sprue gates that attach the part to the sprue are a little on the thick side and some parts have a slightly thickened spot where they attach. Be aware of this, as test fitting will reveal that the part may not fit flush. The two rear stowage boxes are made of a rubber compound similar to the tracks – yes that is correct, rubber, and will need super glue to fit them in place. I did read somewhere (sorry can’t remember where, so I can’t acknowledge the appropriate source) that it was done to assist in doing the Zimmerit stamping on the relatively small parts. I guess it was an engineering decision by Dragon. It might also be useful to give them a wash in a mild detergent and let them dry really well to assist with paint adhesion. Generally the fit is pretty good. The simple gun arrangement goes together well and dry fitting reveals an excellent fit to the hull. There is what appears to be a very large ejector pin in the mantlet. I’m not sure if this is to assist in keeping the gun from slumping or an artefact. I have left it in place as it is not really visible. To summarise, the superstructure and all of the tools should fit on well. Just make sure you test fit and clean up the small parts such as tools as they do have the occasional seam on them. Next session is the lower hull. Well, didn’t the lower hull reveal a number of weaknesses in my abilities! The central road wheels are all labelled 1 and in 2 halves that need to be glued together. So off I go, madly test fitting, cleaning up and gluing only to discover that both halves are not quite the same! I had rather blindly forgot to notice that there is a side with the hole to attach to the torsion bar and a side that does not. Hmmm not impressed, both at myself for such a silly error and at Dragon for not giving it a separate part number. That’s one to look out for. Closer inspection of the instruction sheet doesn’t really reveal the difference between the two part “ones” – ah well, pull apart and do it right. Everything else seems to go together OK. The tracks need to be glued with super glue and don’t appear to be their later DS tracks. Time to fit all the bits together, but before final assembly: a quick spray of the running gear with some Tamiya matt black out of a can (quick and convenient); most will be covered by the skirts anyway so it just adds a bit of depth. Test fitting reveals a bit of a gap between the rear hull and the top deck – some filling and sanding is needed and also the bottom of the rear hull and the belly needs the same treatment. The supports for the skirts were cut off as the skirts wouldn’t fit.
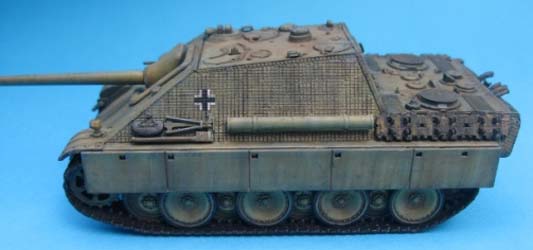
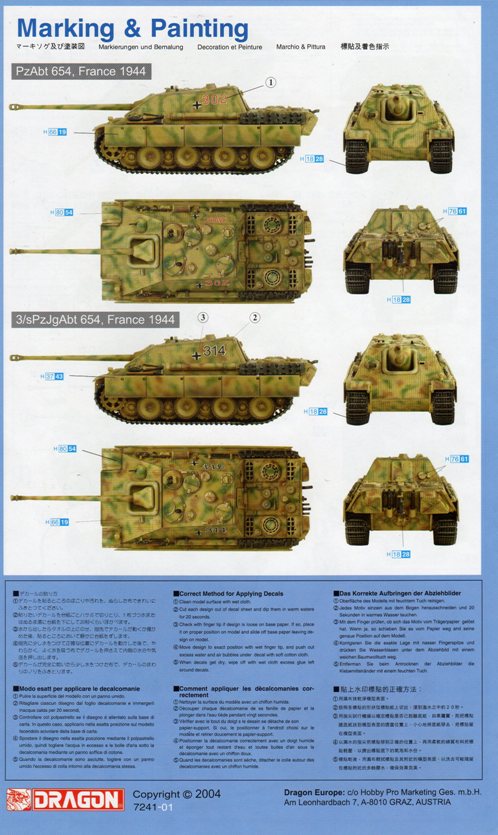
The paint seemed to have settled down but I think it might have been wise to give the rubber a wash in some detergent before painting – maybe that might have made a difference...press on regardless. The colour scheme is a bit boring really...overall dark yellow. Mix up a couple of shades and spray away. Then it’s the usual steps for me. My recipe follows very closely Roger Fabrocini’s work as noted on the Missing Lynx website. I have found this to be an excellent basis to work from. Thanks, Roger, for your inspiration and willingness to share your methods with the rest of us. The key here is letting each stage dry properly before moving on. As usual, disaster has struck. The left idler wheel has completely sheared off the pin it sits on. I guess it’s the tension of the tracks! Time for some surgery, I’ll try removing the skirt and then moving the track away so I can get access to the idler, then its time to fetch the super glue. I’ll let it dry overnight – if it doesn’t work it will need to be pinned into place. Well Doctor, surgery is not needed. The super glue has done its work well. The idler is fixed in place, the tracks are back on and no pinning required. After all that,
how do I feel about Dragon’s Jagdpanther? I’m not going
to say it is excellent as it does have some quirks – I don’t
like the instructions and the rubber tracks just make things so
much harder. To get the tracks to sit properly it’s a pretty
tight fit and I probably damaged the pin that holds the idlers in
place. Eventually the tension broke the idler pin. This doesn’t
mean that you should avoid the kit. Just be aware that I think that
there are some weaknesses. The simulated Zimmerit is great and really
adds so much to the kit. There are some spares for the box and generally
the kit goes together OK. Overall the kit is OK but I’m not
going to go nuts about it. However it builds into an impressive
looking vehicle. Happy modelling!
|
| Back to Dragon Kit List | Back to Home Page |
| Article Last Updated: 20 March 2010 | Back to Constructions Review Page |