 |
Corporal Overby's Motor Pool |
E-25 |
|||
Kit # MP052 |
Preview by Rob Haelterman - heman_148(at)hotmail.com | |||
|
|
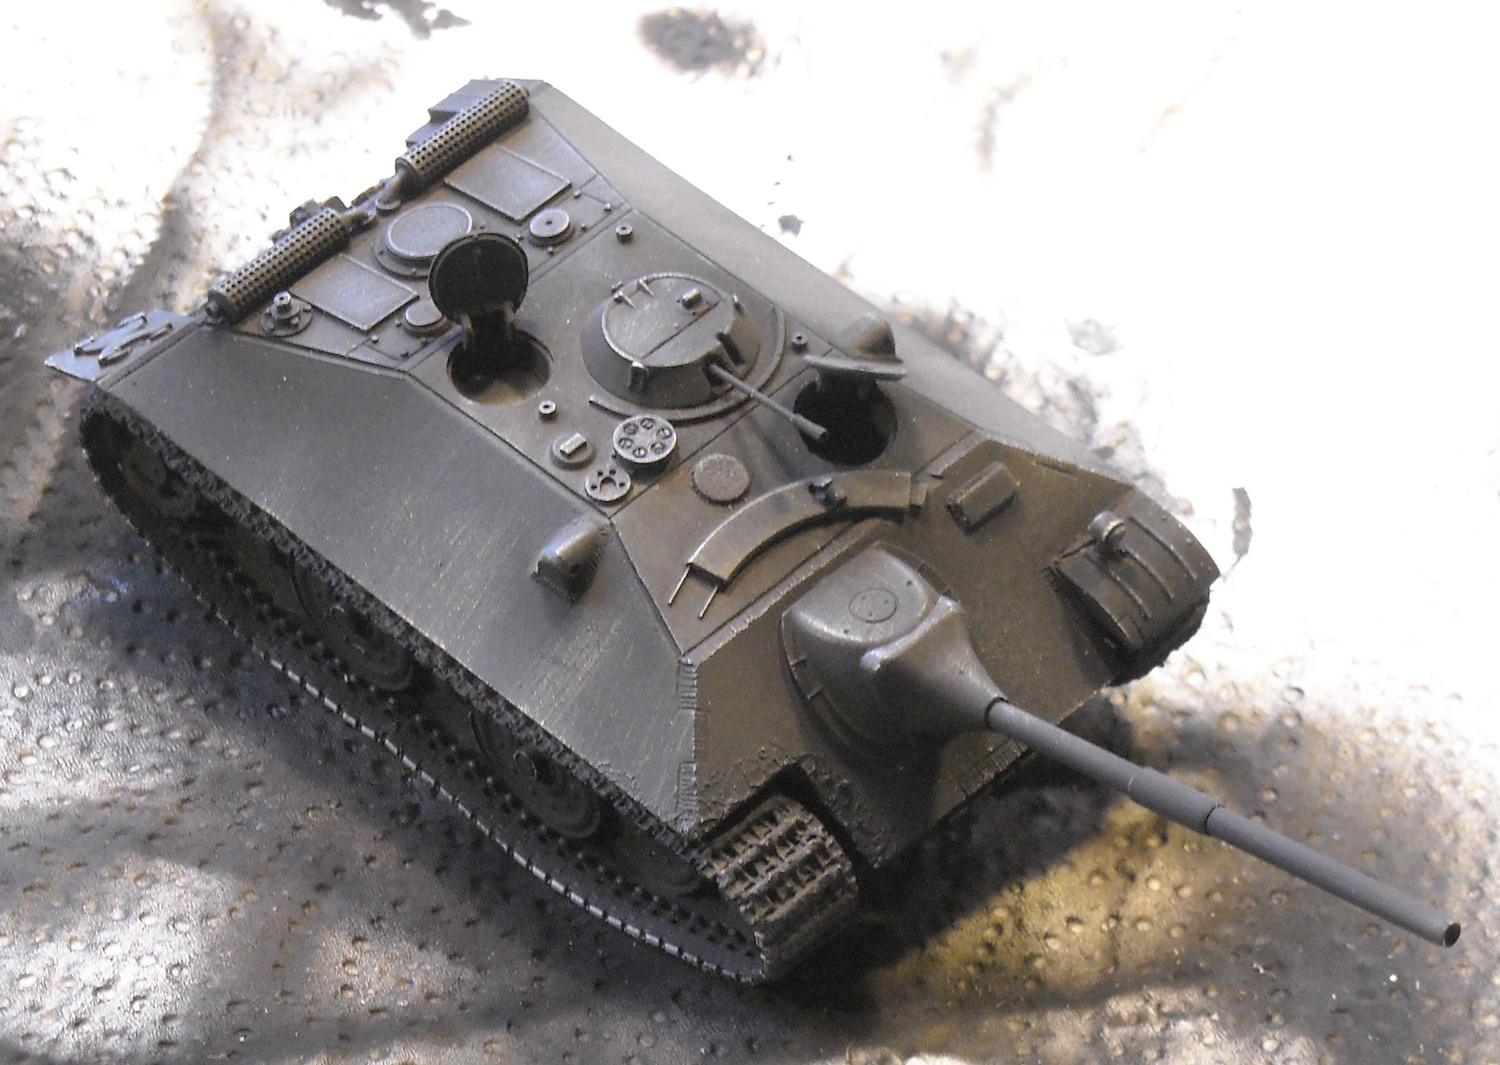
1. History Towards the end of the war the German Waffenprufamt 6 (WaPruAmt 6) headed by General H.E. Kniepkamp desperately tried to simplify their logistics by reducing the number of different types of tanks in service. These efforts crystallized in the E-series of tanks, in which the 25-ton vehicle was the E-25 Jagdpanzer, meant as a replacement for the Stug III, Stug IV and Japgdpanzer IV. It was a squat (in the eyes of some even ugly) vehicle. As far as I know it never left the drawing board, which gives us some margin for artistic licence. 2. Packaging The model comes in a sturdy, top opening cardboard box. 3. Parts
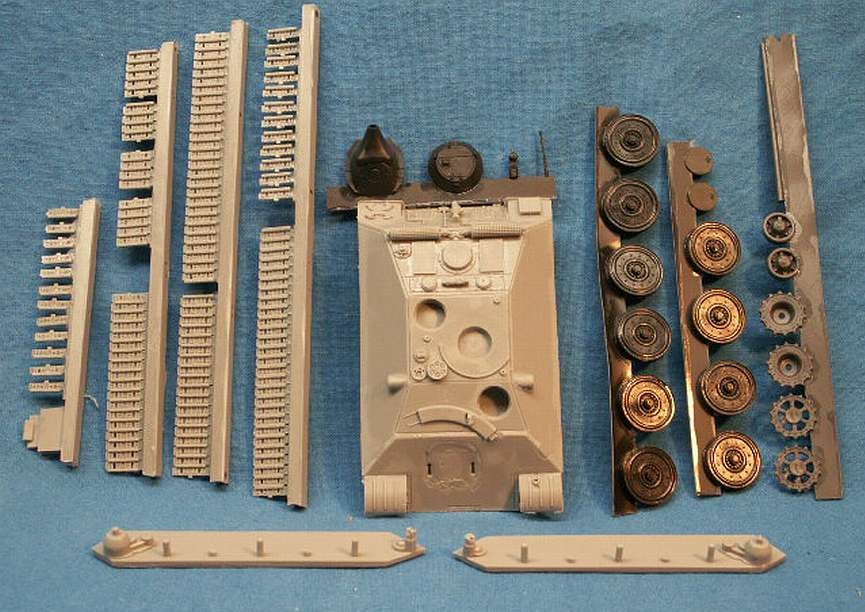
I believe the parts lay-out above speaks for itself. The hull is a single block, without notable imperfections and apart from the running gear there are very few parts. The tracks are resin L&L.
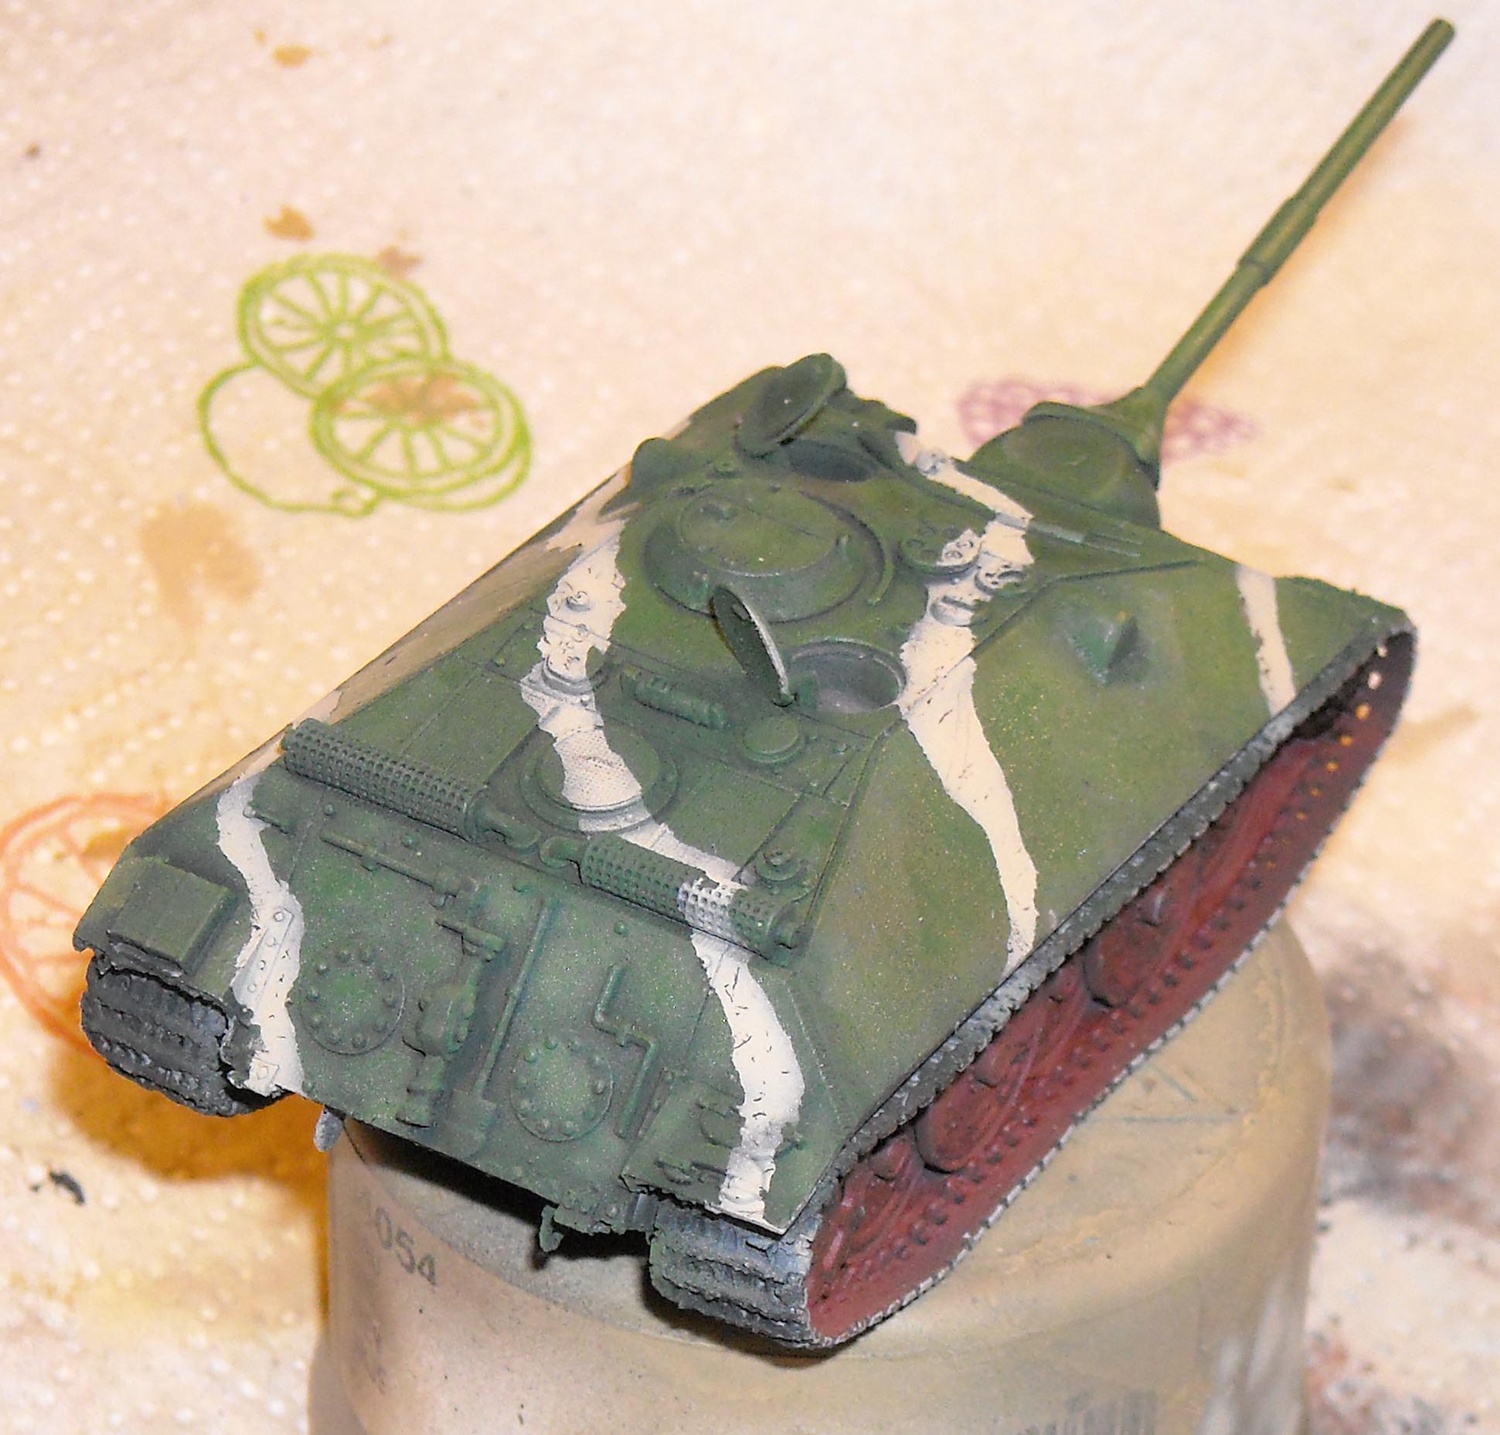
4. Building experience
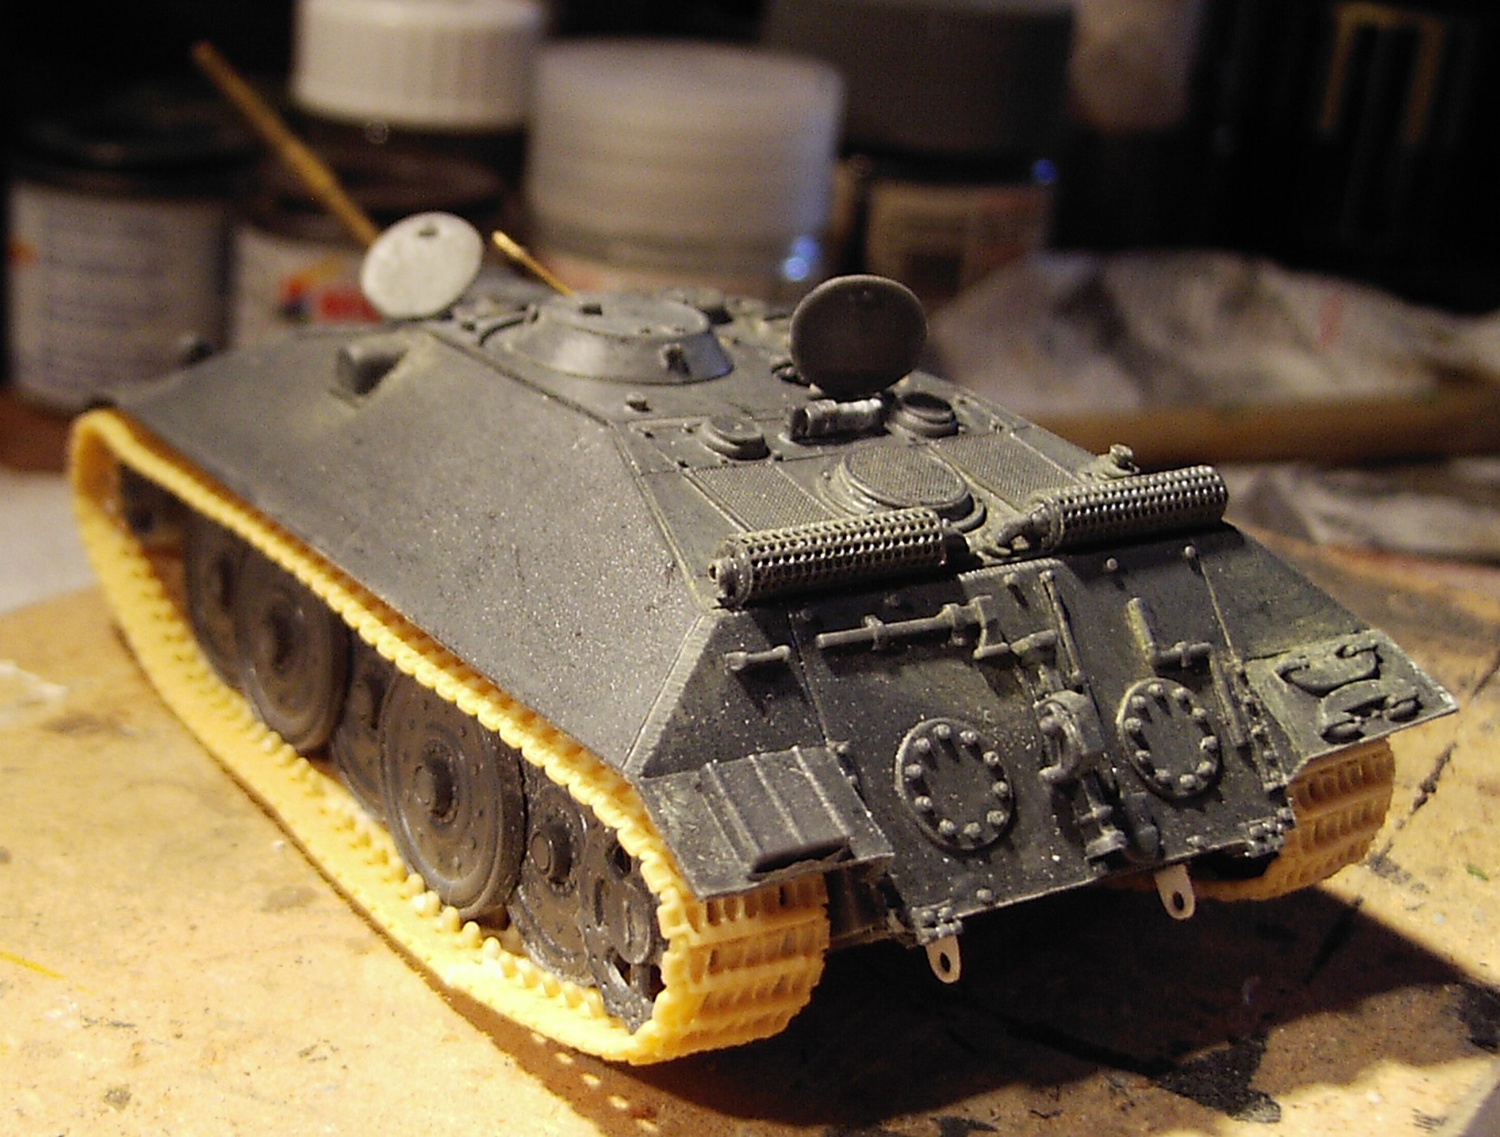
There is almost no assembly needed
for the hull apart from the small turret, gun mantlet and the hatches.
Something resembling an "ejector mark" or "sink mark"
was found just behind the sliding persicope cover, which didn't look
right to me, so I covered it with a circular plate. This might (in
my imagination) have been a cover for the Nahverteidigungswaffe that
was not fitted to this particular vehicle. Some kits (of other brands
and in other scales) of this vehicle show the ventilator in this location,
which in this kit is placed further backwards. Some kits also show
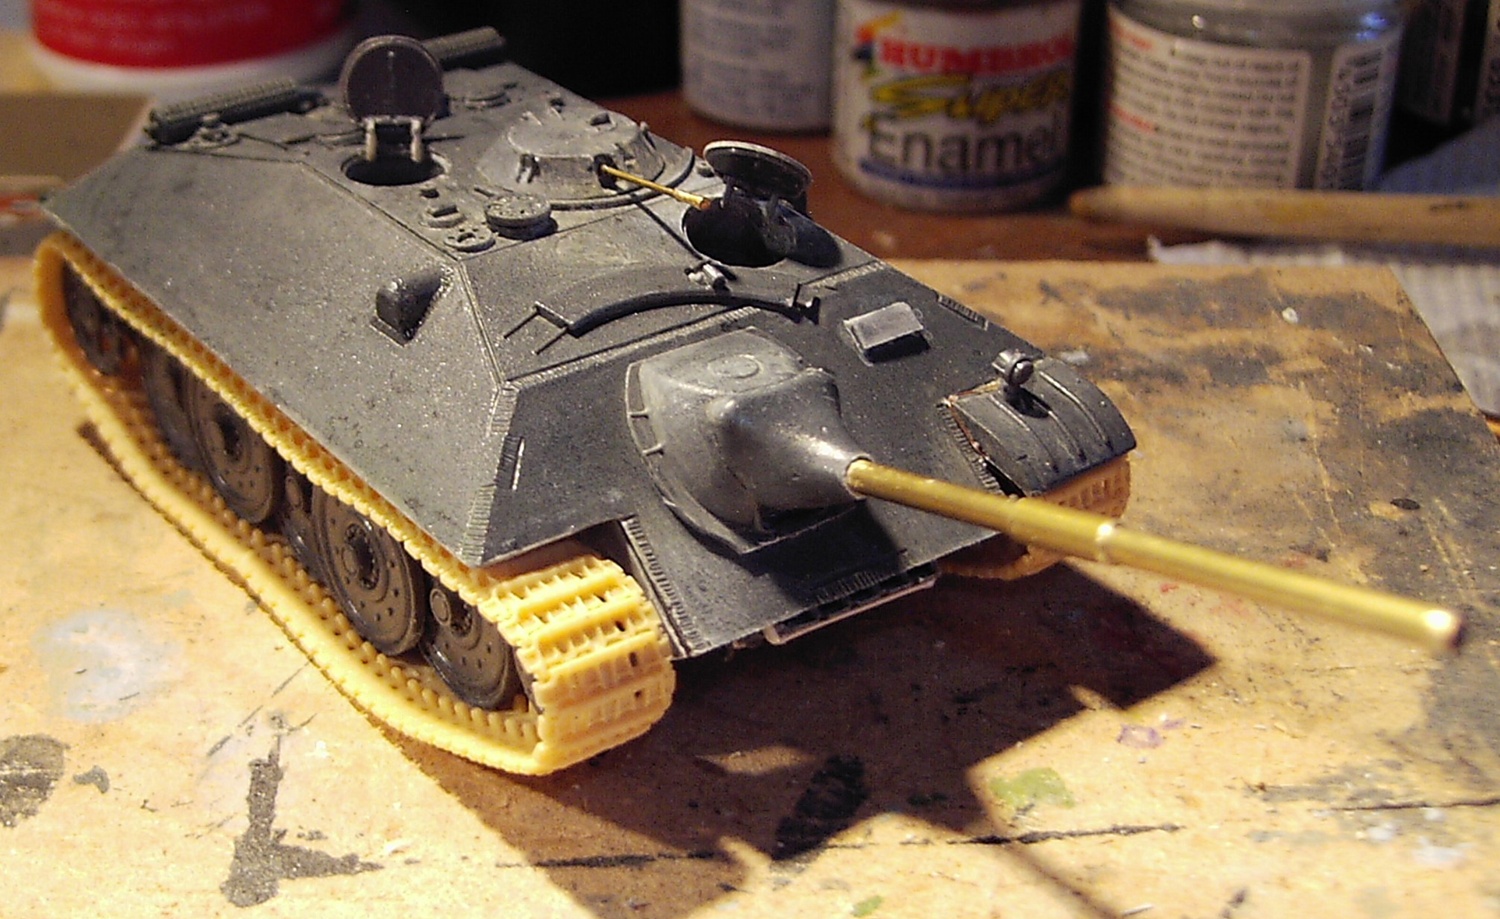
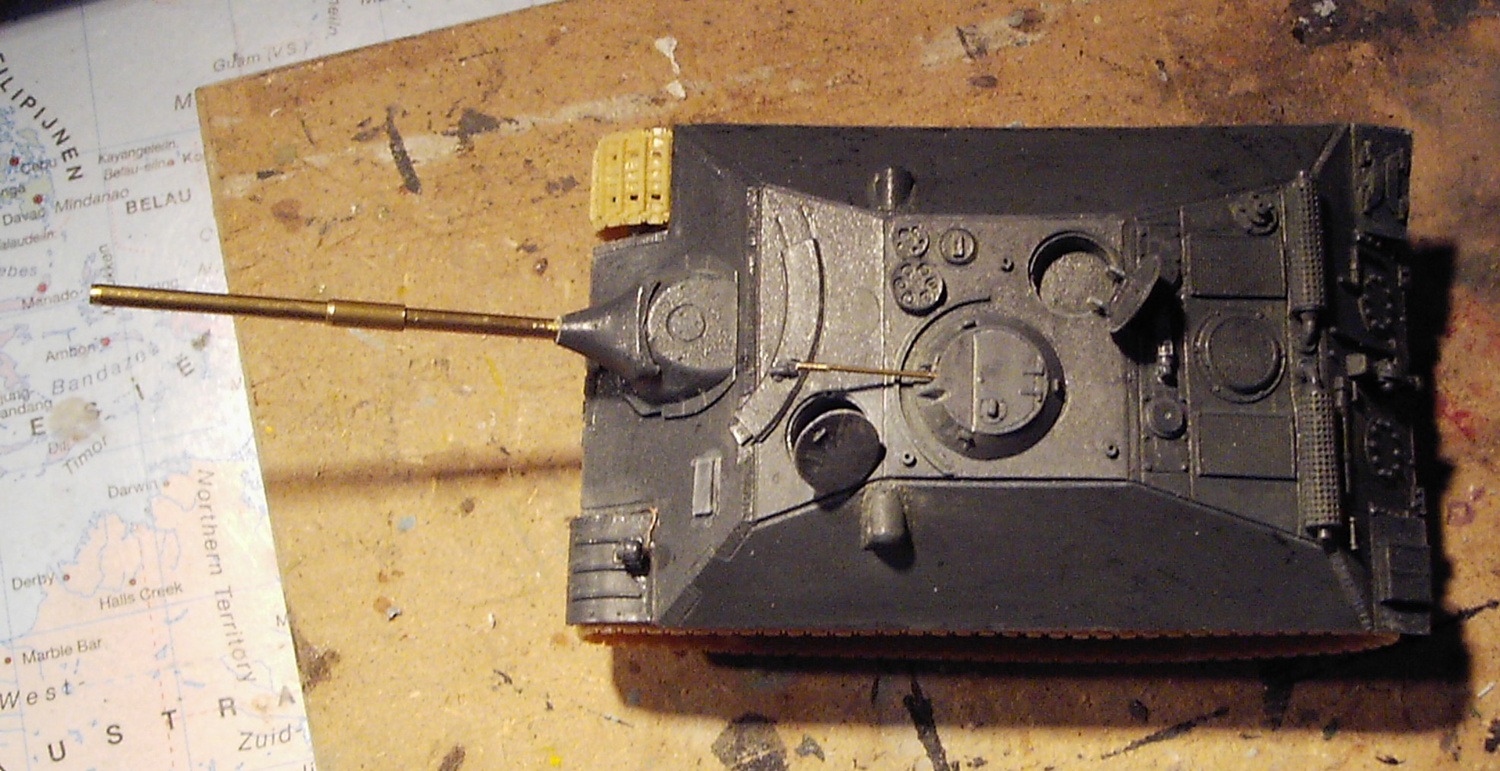
different styles of hatches and exhaust. In my specimen the main gun barrel
was deficient, so I made one from brass tubing. Don't ask me what
the "sleeve" half-way the barrel is supposed to represent.
It just looked cool. The big roadwheels were sanded down,
as they were rather thick and of uneven thickness and axles made from
plastic tubing. The whole was assembled on a rig, using the kit part
for the sides of the hull and then attached to the hull.
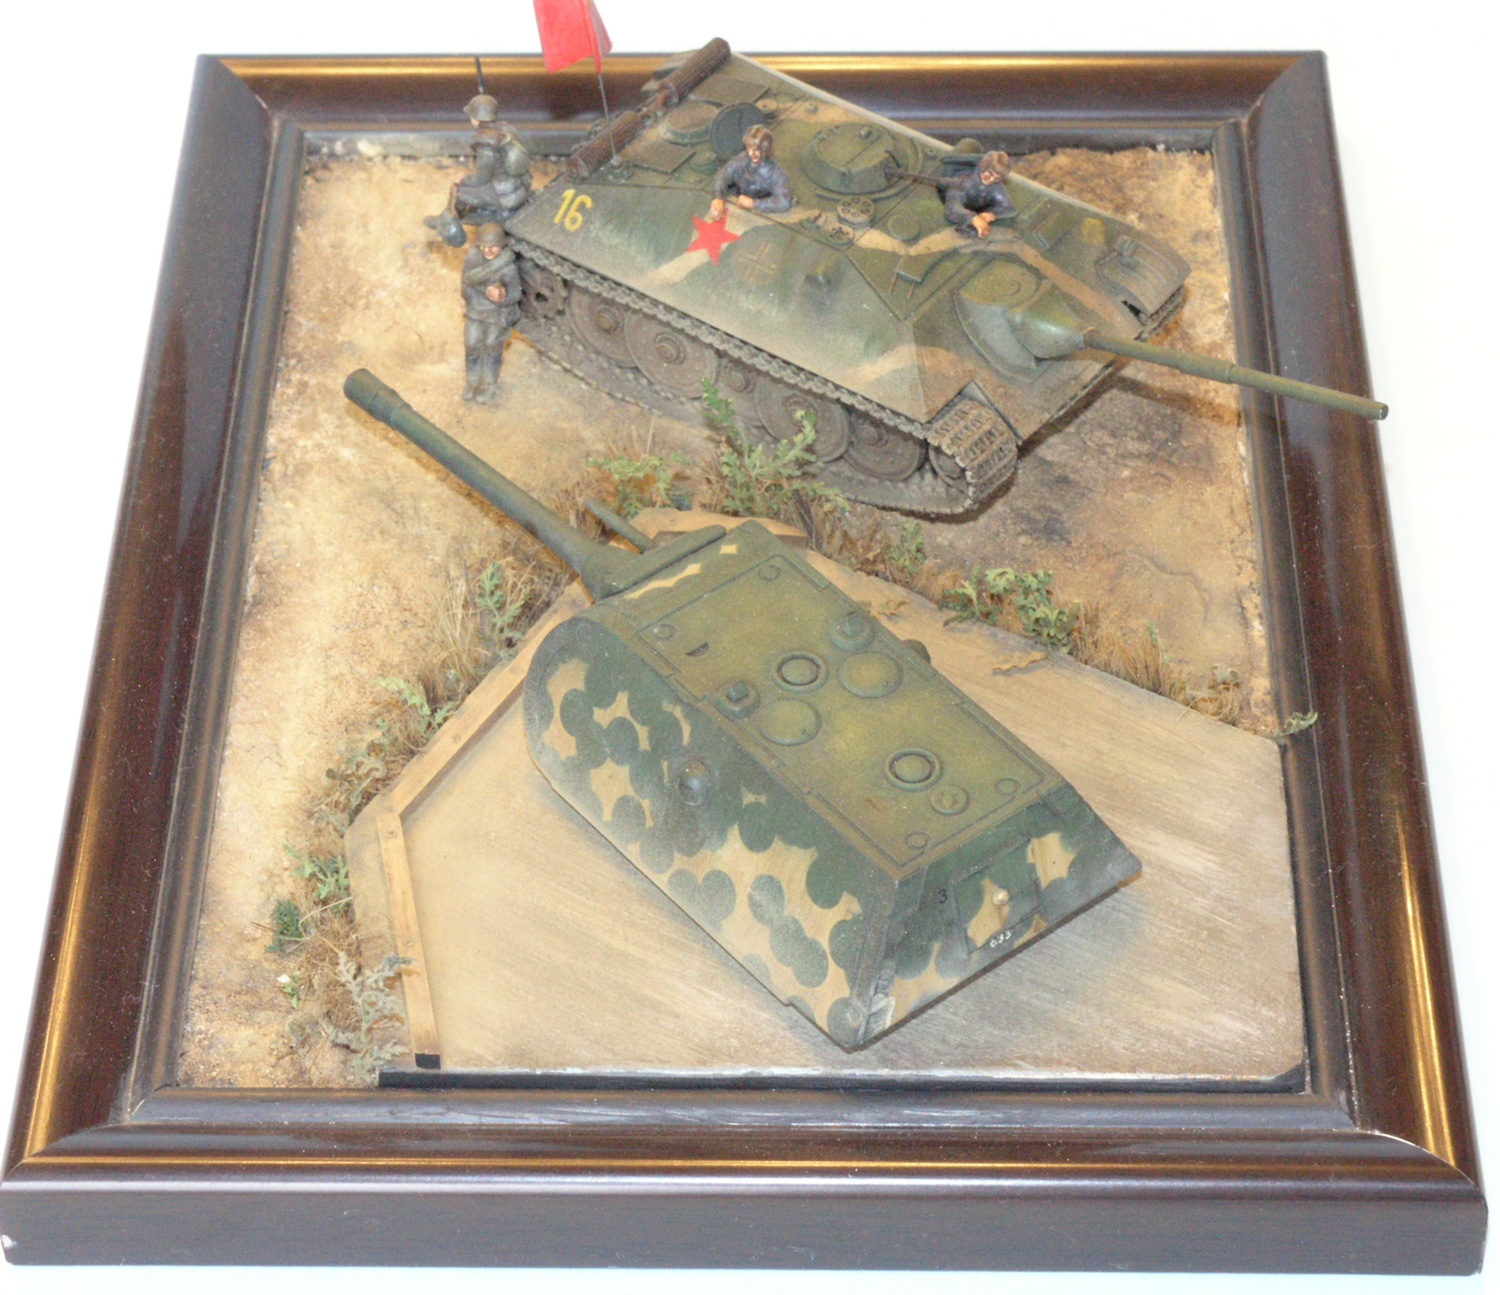
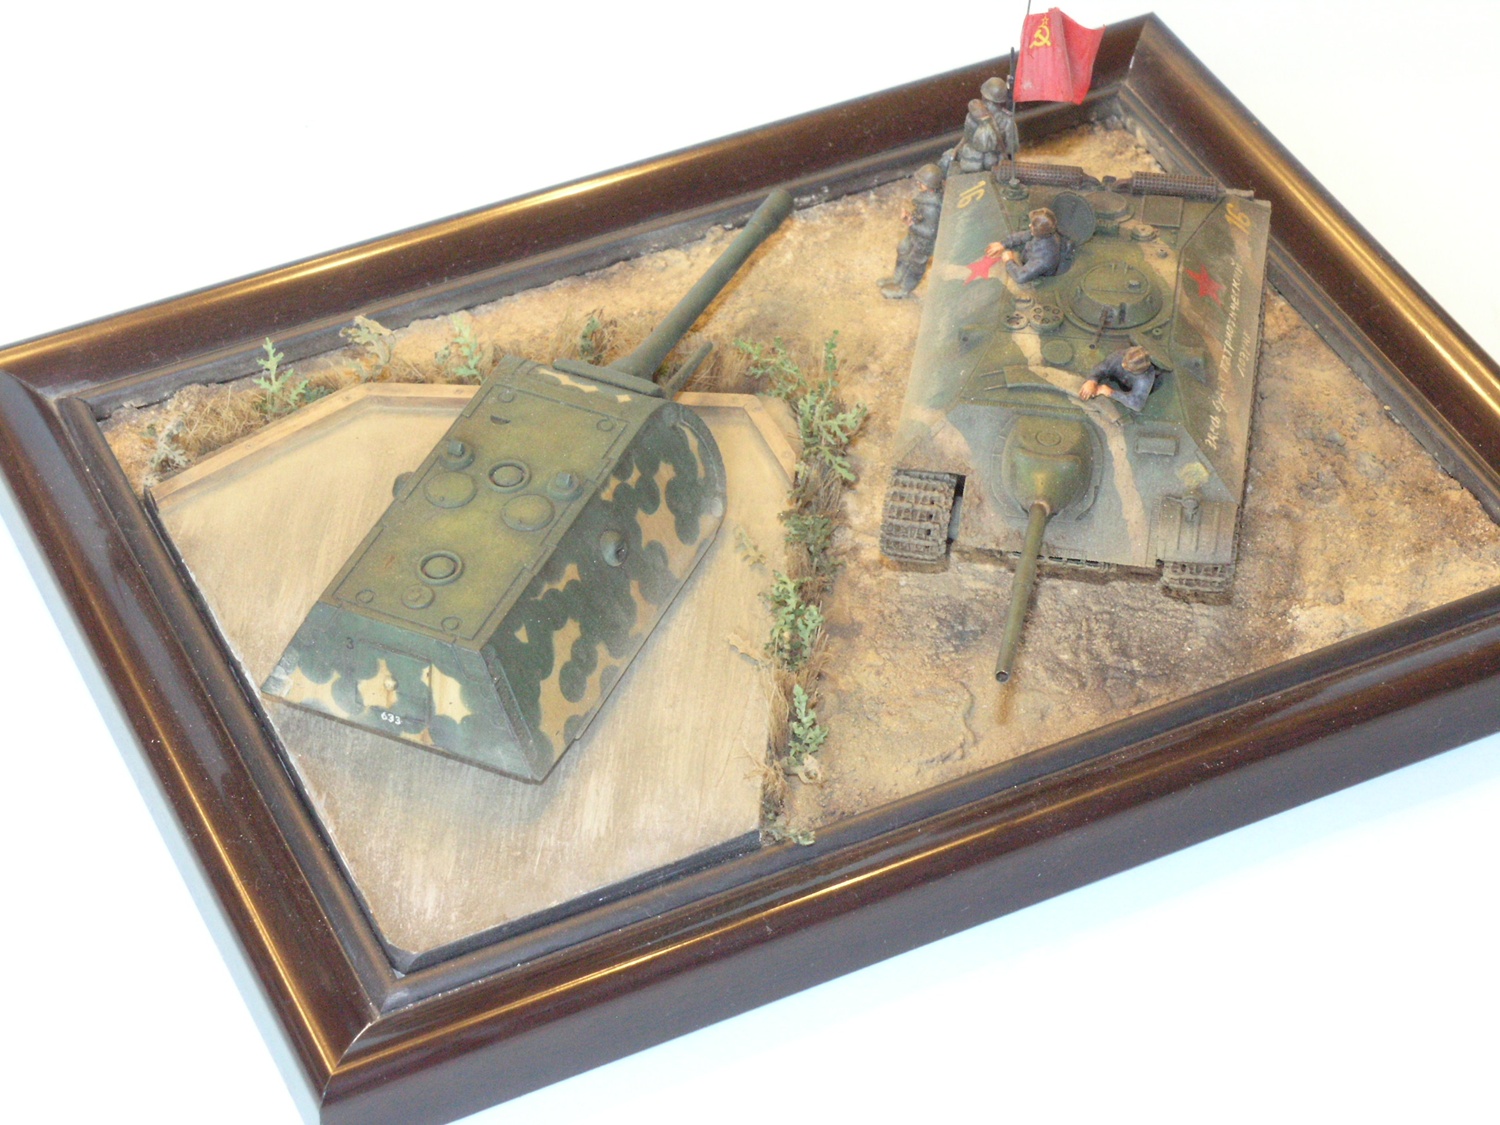
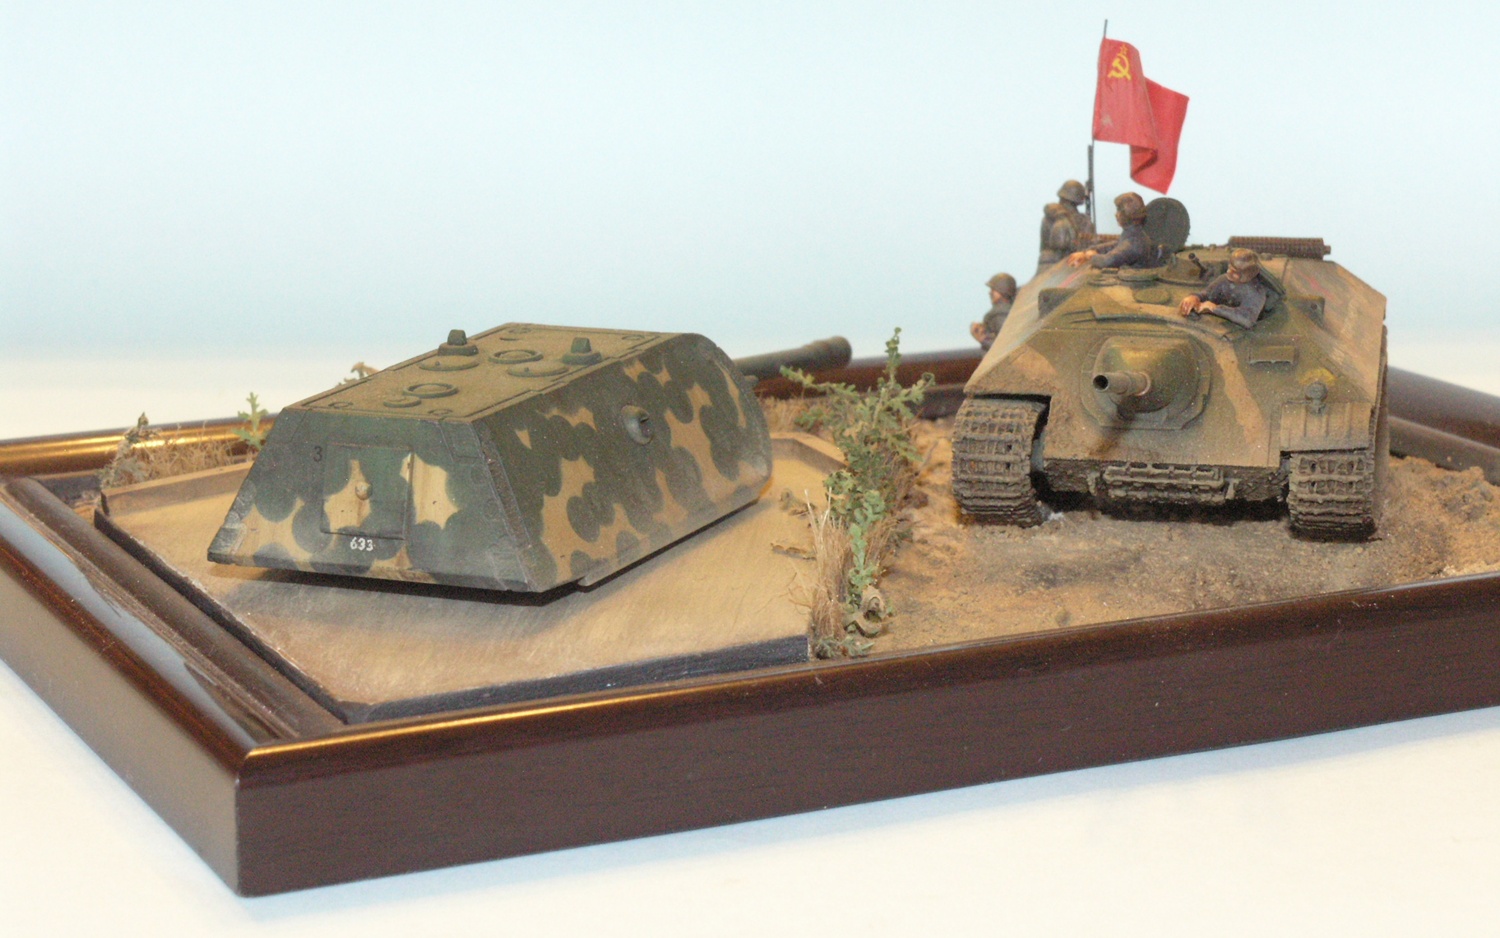
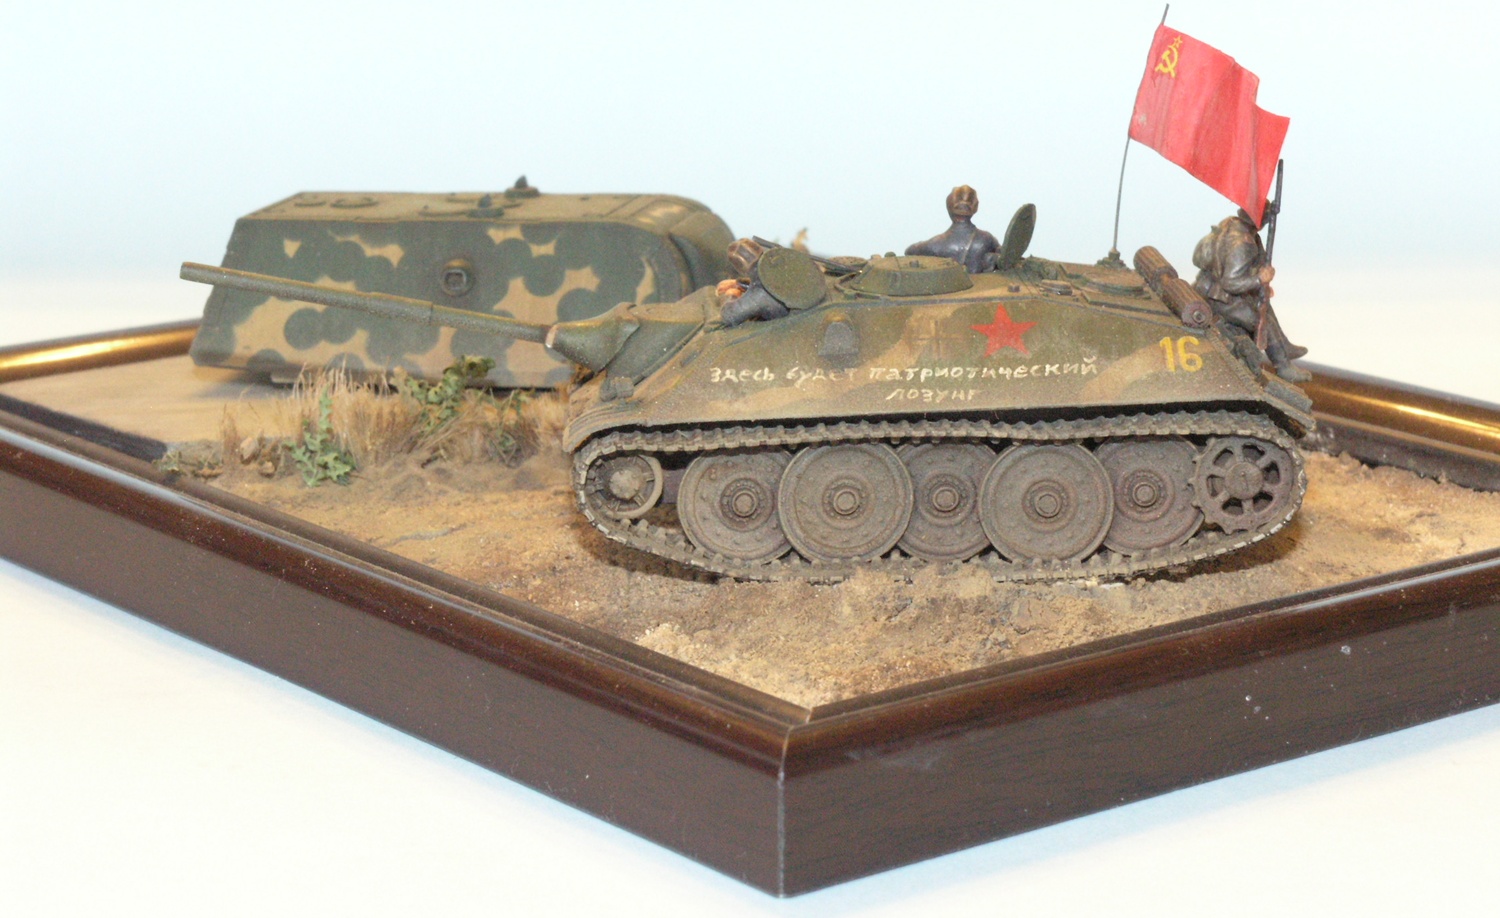
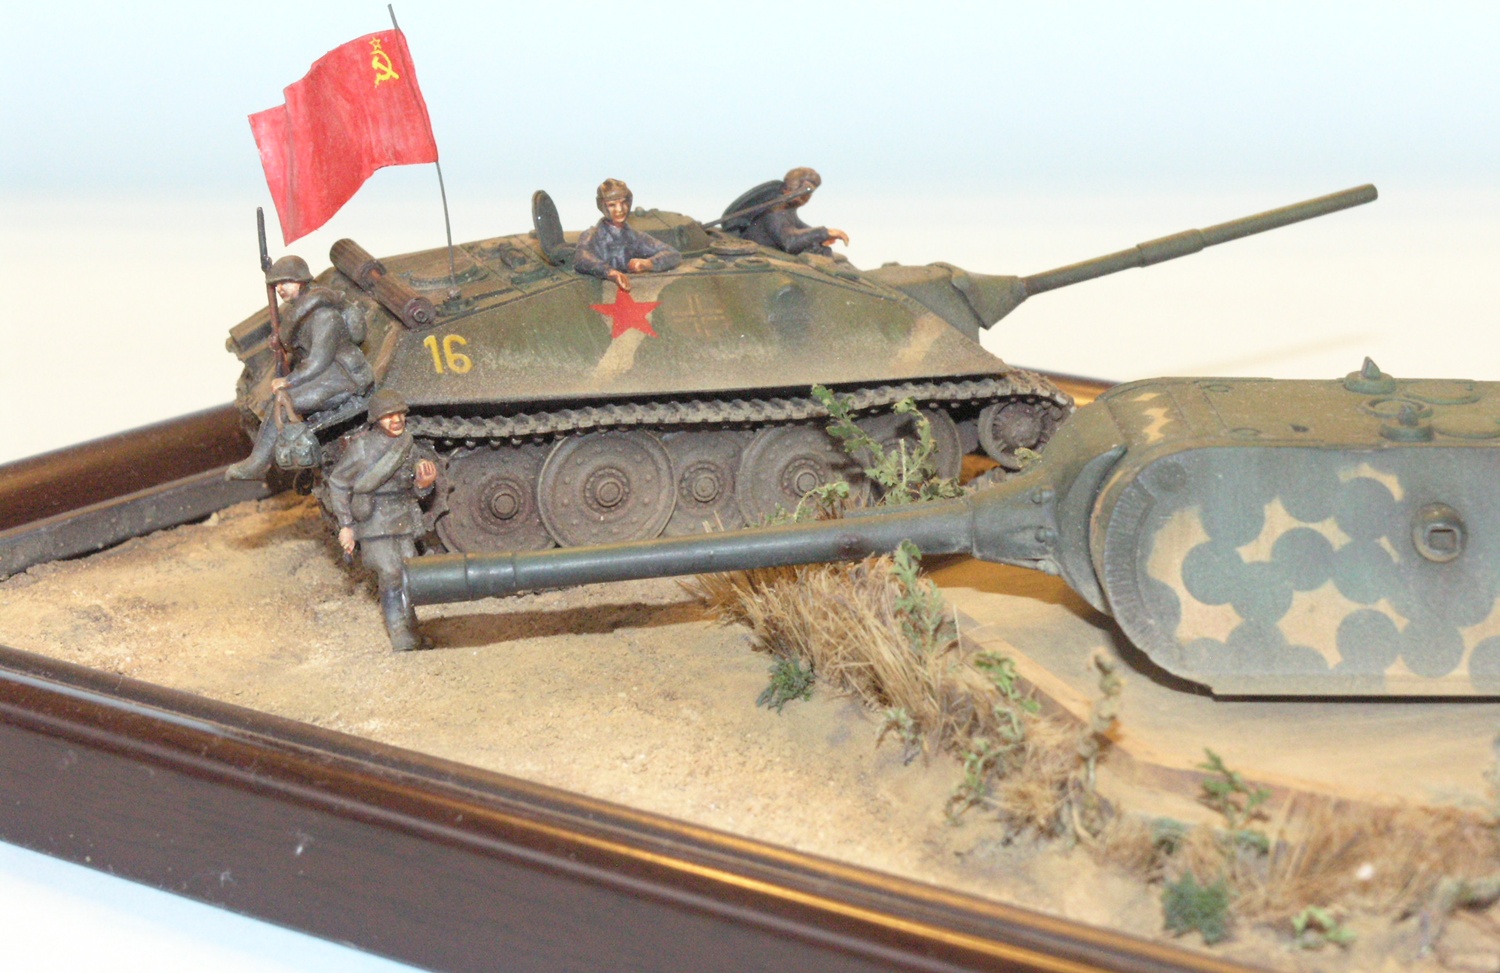
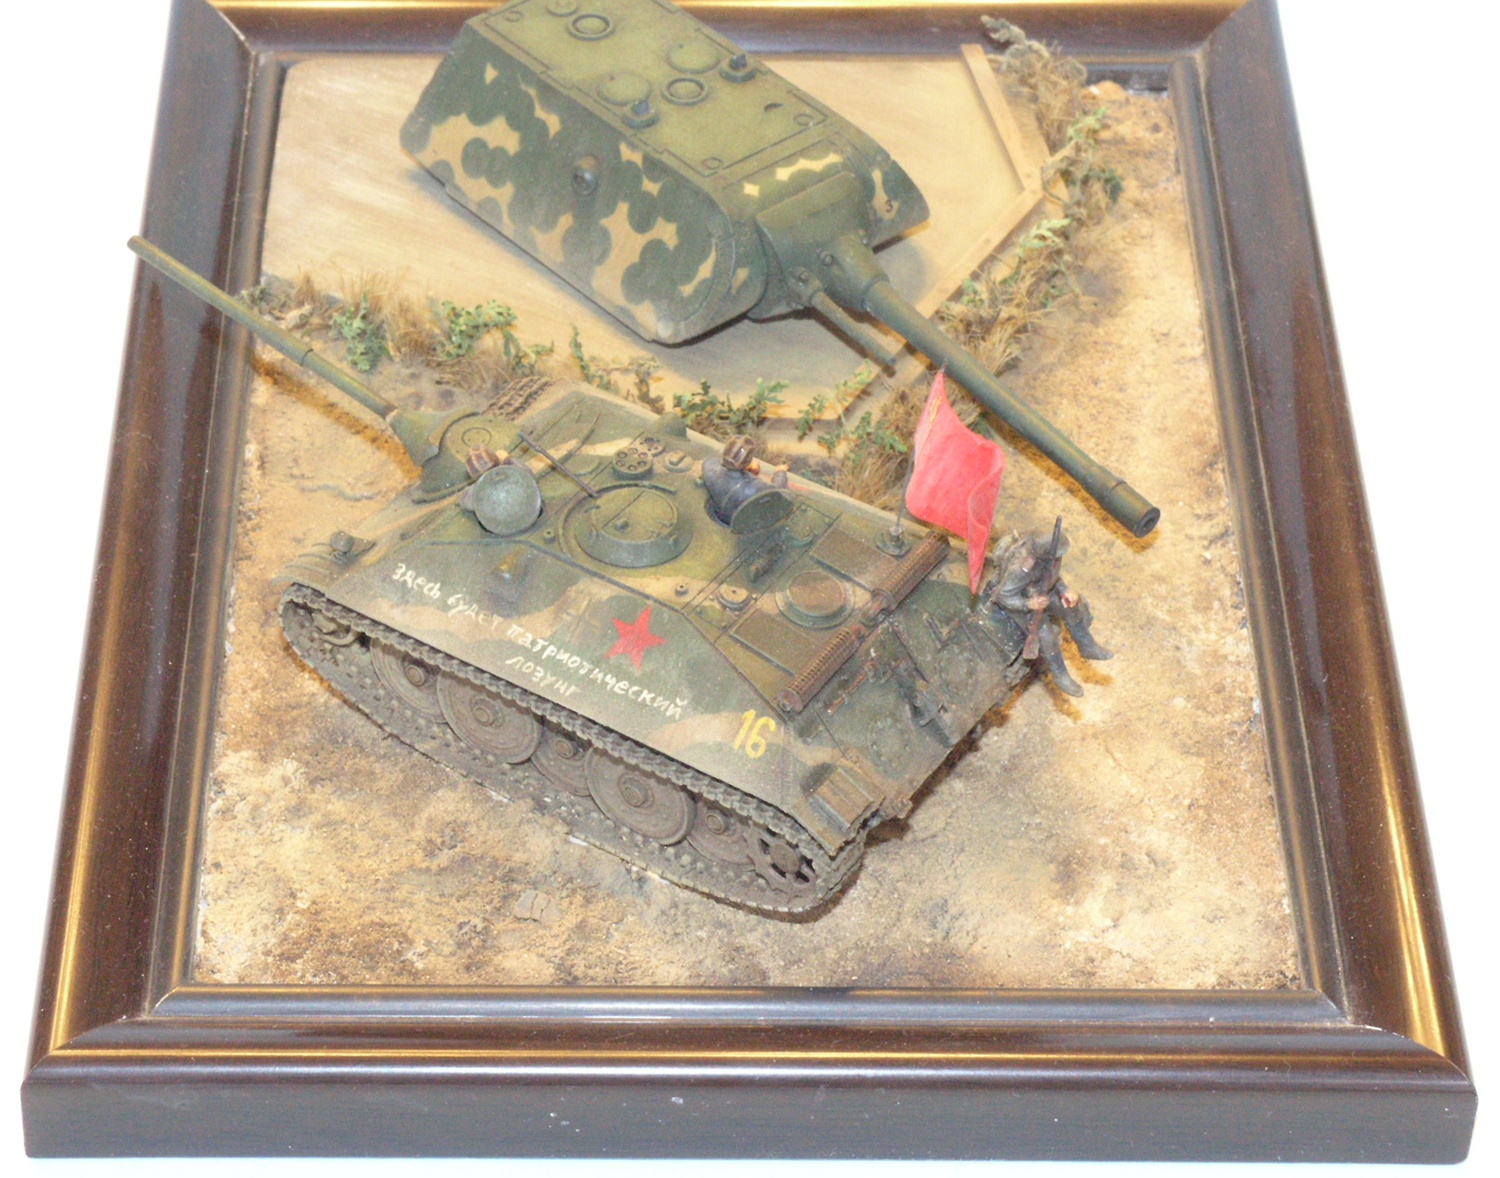
5. Marking options No marking options or decals are provided. Then again, the vehicle was never built, so let your imagination run wild. I went for a vehicle captured and used by Russian troops.
6. Painting
After priming the tank in automotive primer I added a dark brown enamel basecoat and aplied an acrylic green coat over it, which was countershaded. After masking with Maskol, the same was done with a dark yellow camo pattern. Streaks, scratching and weathering was applied and Balkenkreuze from Archer (dry transfers) applied (set AR72043). These were then painted over by hand, but with a thinned down paint to keep traces of the German markings visible. A gloss coat was then applied and left to dry, after which Russian stars and yellow numbers from the spares box were applied. The slogan was painted by hand. (There's a pun in the actual wording, which I'll leave up to the reader to figure out.) The flag is from Unicorn (set 72.878) and is a decal applied to a piece of thin foil (that comes with the decals). After installing the vehicle in the diorama, dust was applied by airbrush and with pastel chalks. While it looks realistic to me, it's a pity that it destroyed the weathering and highlighting effects to a large extent. Figures were assembled from various Preiser sets (72525 and 72526) and the Mausturm is a Dragon item that came as a gift from Tony Ivey.
|
| Back to Cpl Overby's Motor Pool Kit List | Back to Construction Reviews |
Article Last Updated: 05 November 2010 |
Back to Home Page |