|
Armory
|
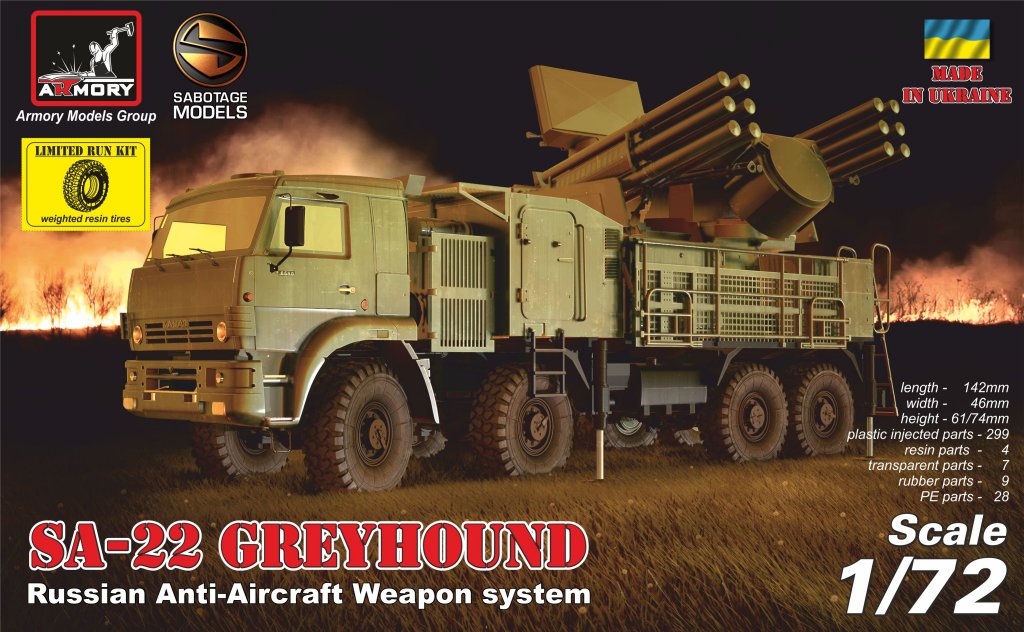
SA-22 Greyhound |
||||
| Kit #: AR72401 | Review by F. Giovagnorio | ||||
|
Armory
|
SA-22 Greyhound |
||||
| Kit #: AR72401 | Review by F. Giovagnorio | ||||
 |
I could easily imagine it was not going to be an easy task, and indeed it was not. First, the good news: the kit contains all (well, almost all) that is needed to build a fantastic reproduction of the real vehicle, one which will make a splendid figure on your shelf, will make you feel proud and will have nothing to envy to a larger scale model. Then, the bad news: you will have to work very hard to obtain it. To start with: there is no numbering on the sprues (and there are 7 !), so, for every piece, you must go back to the diagrams on the instructions, find the sketched sprue, then the piece, go back to the plastic sprue, rotate it so that it meets the sketched one on the instructions, find the piece and cut it (and there are 300+ pieces!). No numbering can be acceptable in kits with few pieces, not on a kit this big. Then, nowhere you will find a single peg entering the hole it was designed for. You will spend so much time in drilling or cutting pegs (which is never a good idea). Then, the instructions let you down sometimes, because some complex steps would require multi-view, zooming and coloring of parts (something like the Flyhawk or Dragon manuals). Instead, although well drawn, the instructions you find here must be carefully observed to figure how and where to glue that piece, just to find out with horror, much later, that you must detach entire sub-assemblies because you can not position what is meant to go on them, just because you misinterpreted the instructions or they were simply wrong. But modelling is fun, right ? So, up your hearts and go. |
||
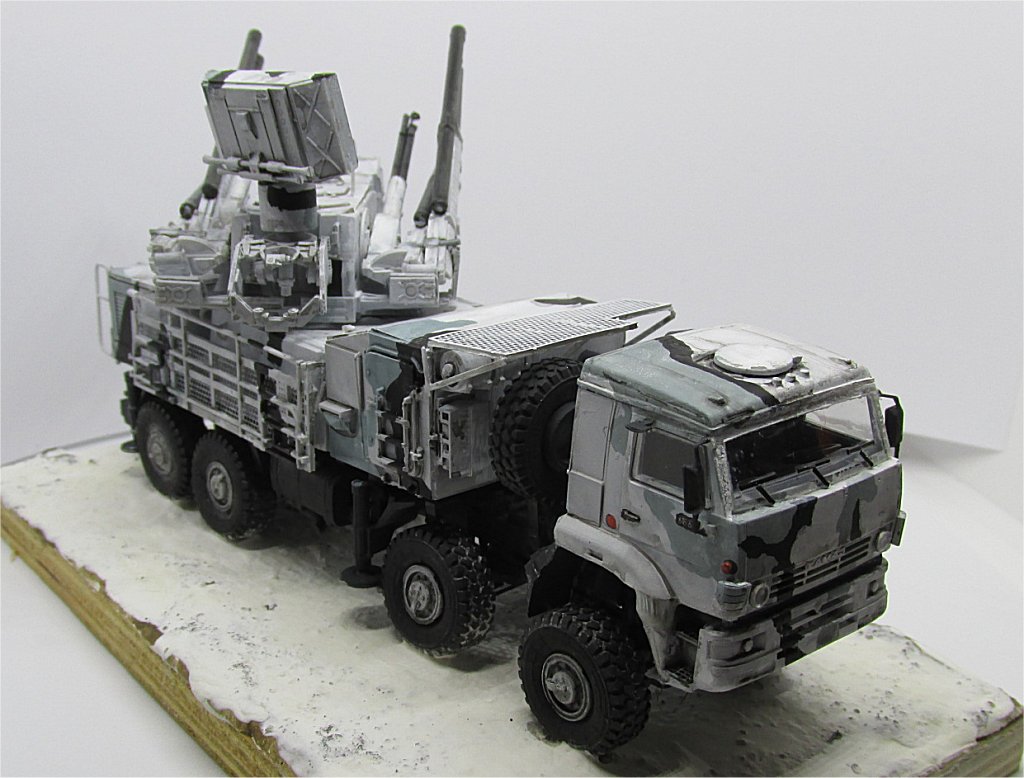
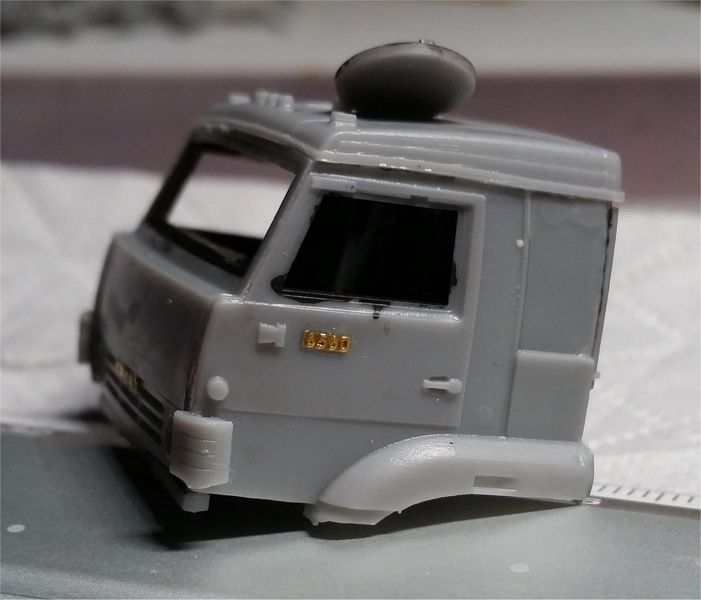
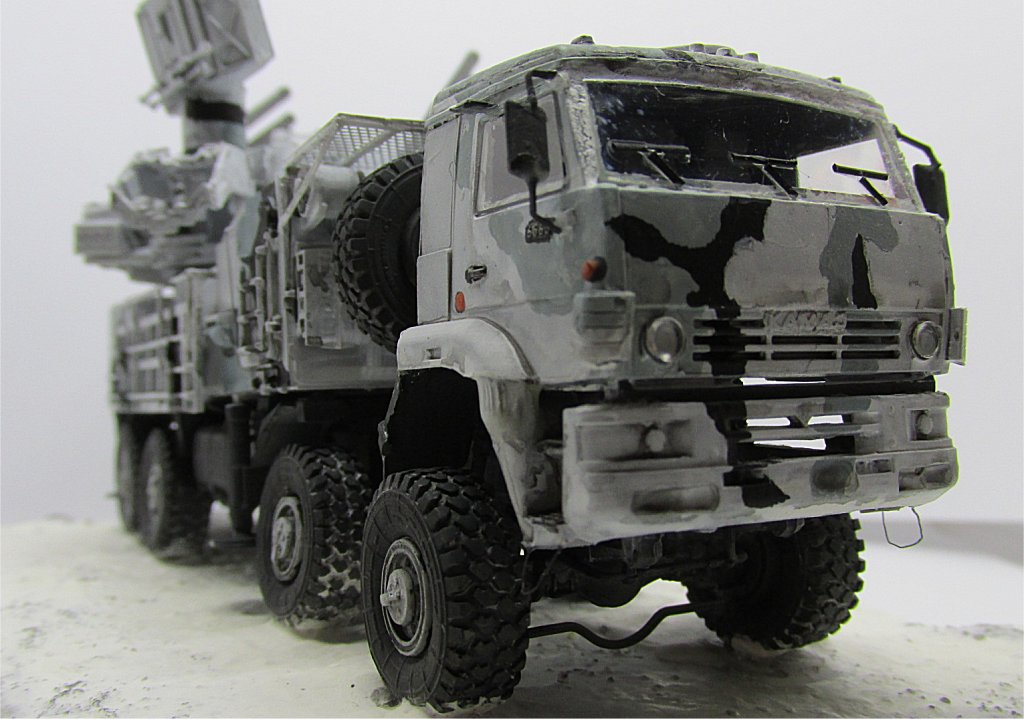
The cab (steps 1-4) No serious issues here. The interior detail is basic but quite acceptable; after all, it will not be much visible in the finished model (judging from pictures, interiors are painted dark grey). Doors are closed, with no detail inside; the roof hatch can be built opened if so desired. The rear mirrors lack the thin supports which must be scratched, as the instructions suggest: it is really the last thing you should do before calling the model finished. |
There are PE parts for the anterior plaque with the KAMAZ logo (you can choose the name in cyrillic or in latin characters) and the lateral numbers 6560 (both plaques should be painted black with the characters in silver). Windscreen and lateral glasses come in a small piece of acetate, ready to be cut and glued. Wipers come in PE too, but they look a bit too large and should be trimmed. | |
 |
|
|
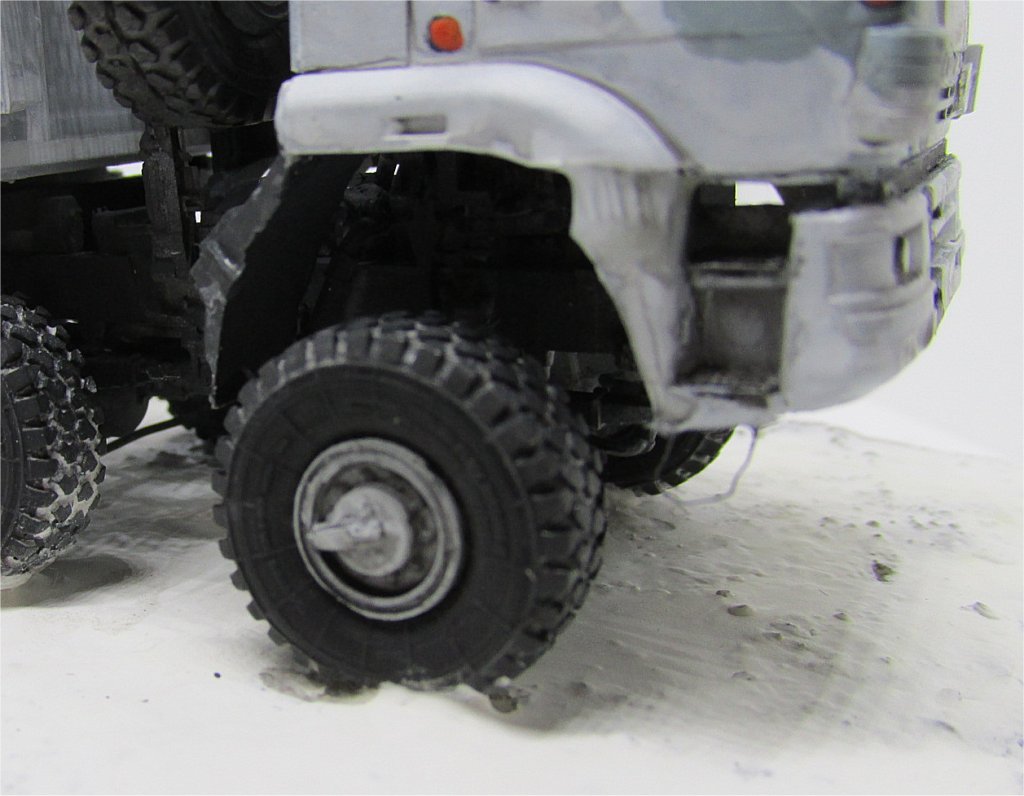
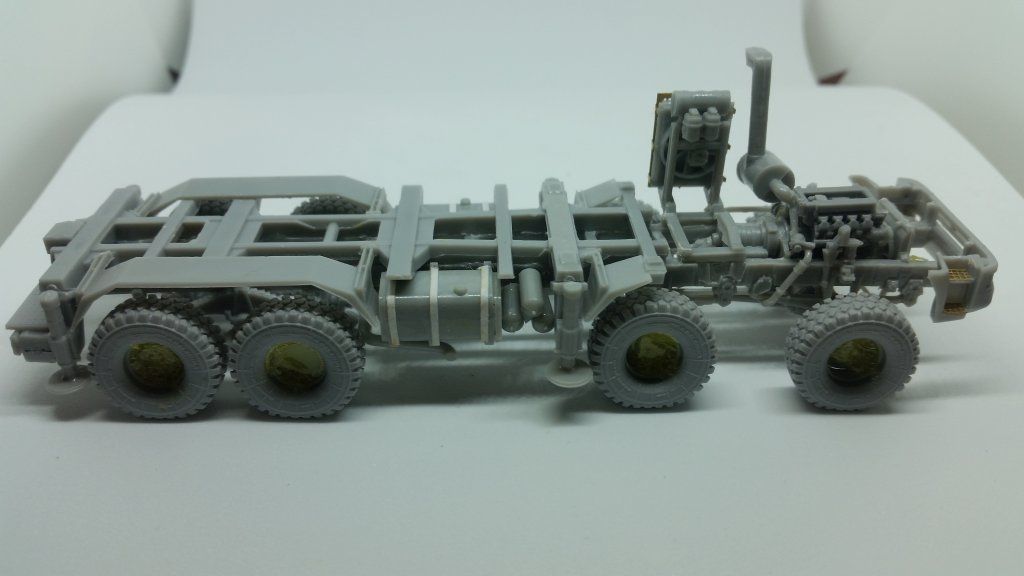
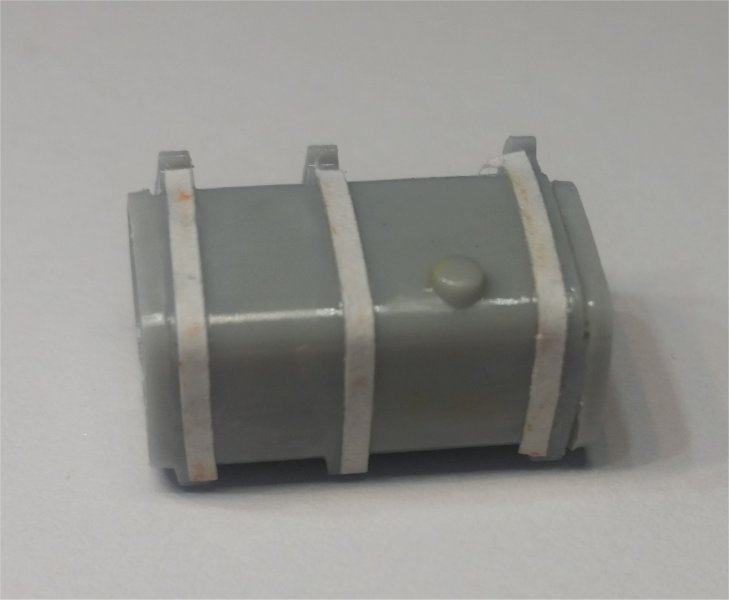
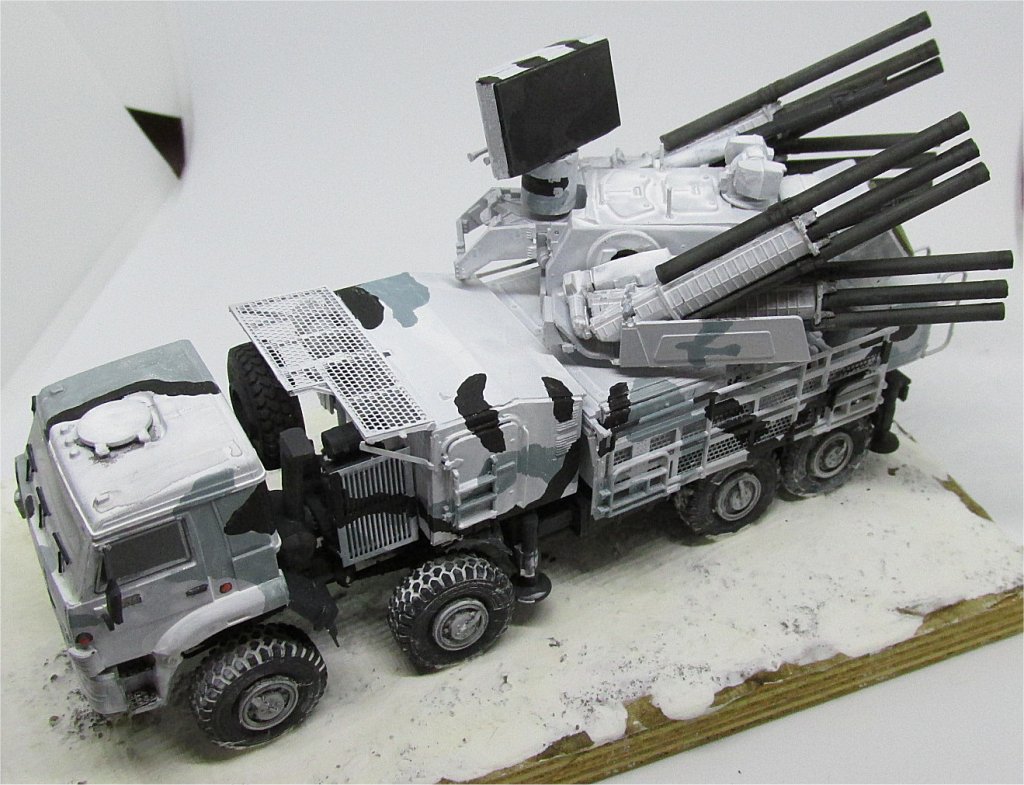
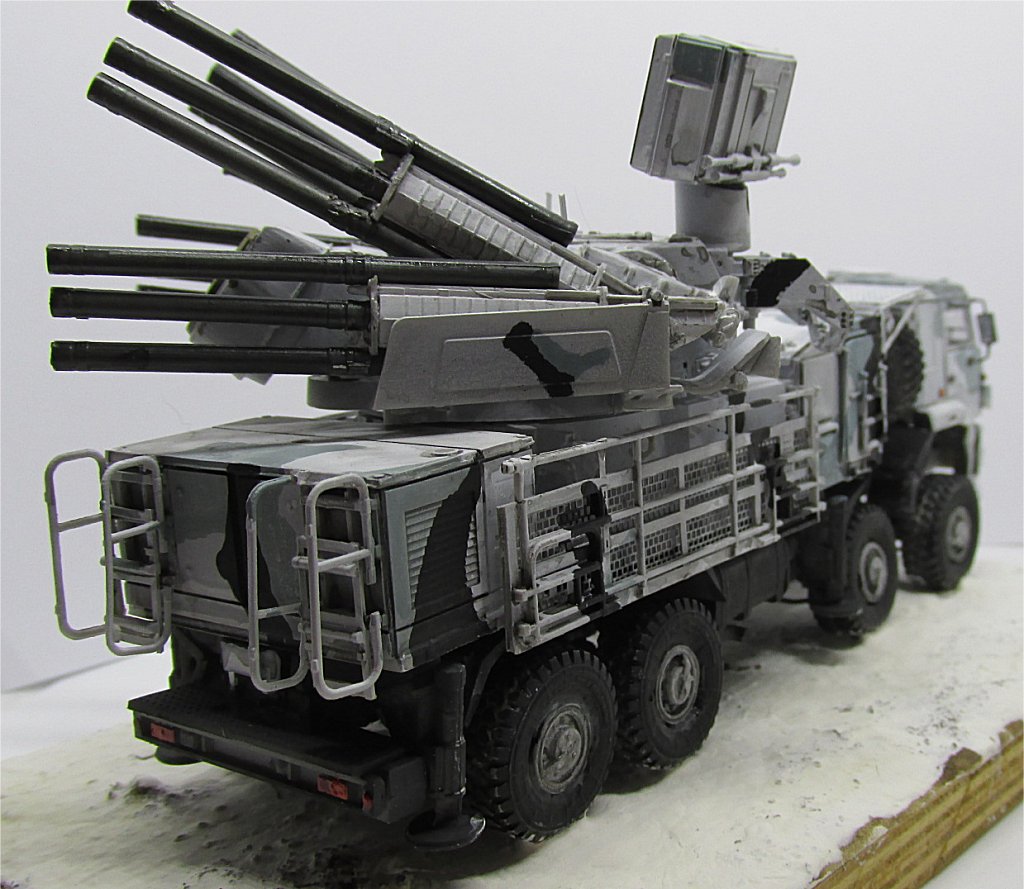
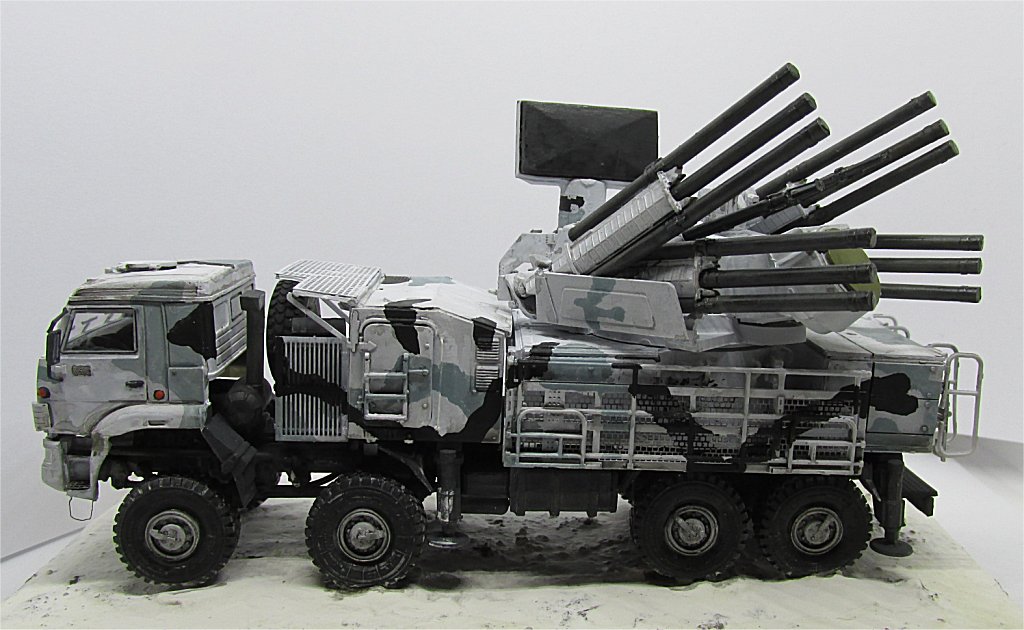
The lower half, with engine, transmission and suspension system (steps 5-27) Most of the work (and pieces) are concentrated here. As already said, study each step very carefully and be absolutely confident of your whole understanding before glueing the pieces. The engine (step 6) is resin, with some plastic parts to be added. Pictures of the real vehicle show it to be more complex-looking that it is here, so it would need a serious over-detailing to be exposed (in the real vehicle, the cab can be tilted anteriorly to access the engine. On assembling the rear suspensions (roughly step 8) I noticed too late that, if positioned exactly on the notches present on piece A24, the rear wheels sits too low, giving the whole truck an innatural look, so they should be repositioned a bit differently, but it is something you will notice only when the wheels are positioned. A good idea would be not to glue pieces B2 and B3, which sustain the whole assembly, on piece A24 until very late. Anyway, I would suggest positioning the wheels after step 15, not in step 49 as the instructions suggest you to do: if positioned early, you will be able to detect and correct misalignments before it is too late. About the wheels, the tyres are supplied in resin, well cast and with a realistic thread pattern; the hubs must be inserted, but, unless you work hard on them, they protrude a bit too much. I had to re-do them all because I did not notice this error (see 7th picture of the finished model below, which was takenbefore modification) Since correcting this mistake takes a lot of work, it would have been better to cast the wheels in resin complete with hubs. Each one of the lateral tanks (steps 19 and 23) is missing three external strips, which I added with thin paper. In steps 21 and 25, you are requested to glue a number of external bits you have already assemblied before in steps 18, 19,22 and 23. Since it is not clear the exact place where they should be glued, if you do not position them exactly where they should be you will have difficulties (like I did) in positioning the superior frame sustaining the upper compartments (step 27). I would suggest positioning the frame in step 27 BEFORE glueing sub-assemblies 18, 19,22 and 23. |
||
 |
|
|
 |
 |
|
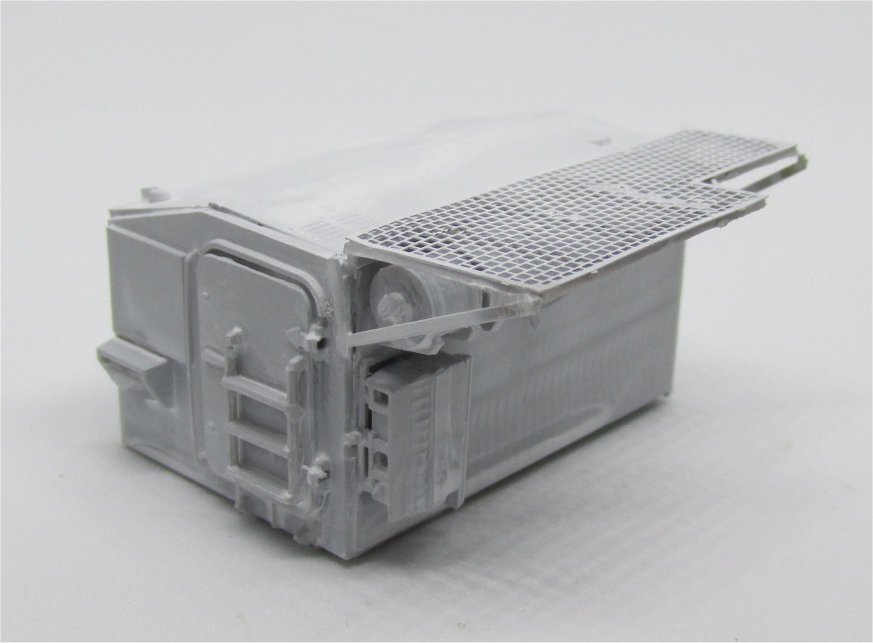
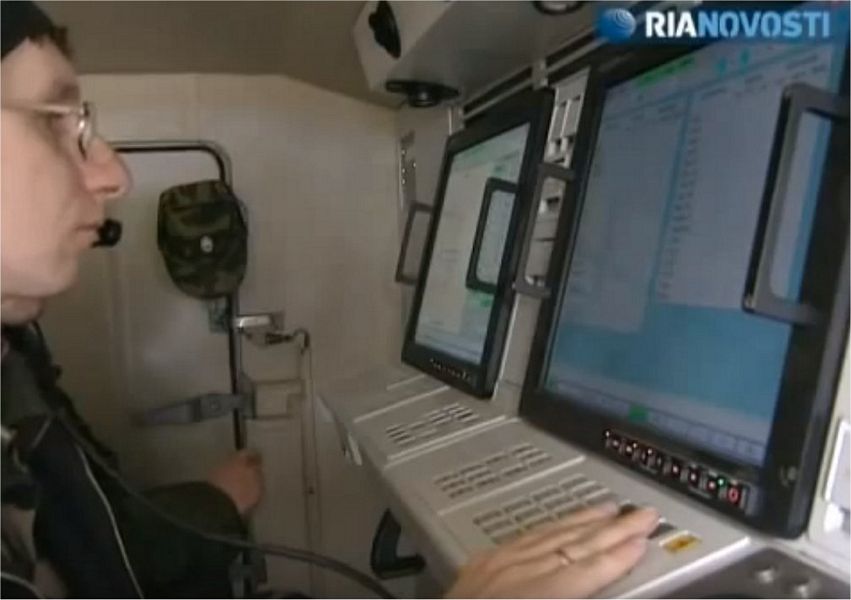
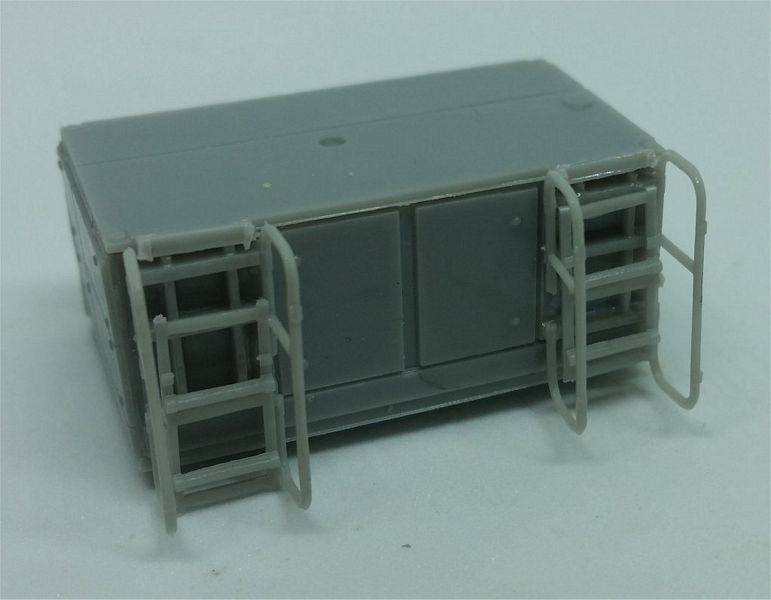
The control room You can choose two different patterns for the canopy (15a or 15b), while the PE supports 10, 11 and 12 look too long and must be cut and adapted. Basic interior details are provided, but many details are missing and you can spot them from pictures and videos you can find online. Hatches can be mounted open, but many internal details must be added if you wish to do so. I started detailing the interior before I decided to build a vehicle operating in the Arctic theatre, which forced me to shut everything and to assemble the external ladders (E16) in closed position. Remember to scratchbuild the long external handles (another thing you will want to postpone until very late, as they will surely fall during mishandling). |
||
 |
|
|
 |
 |
|
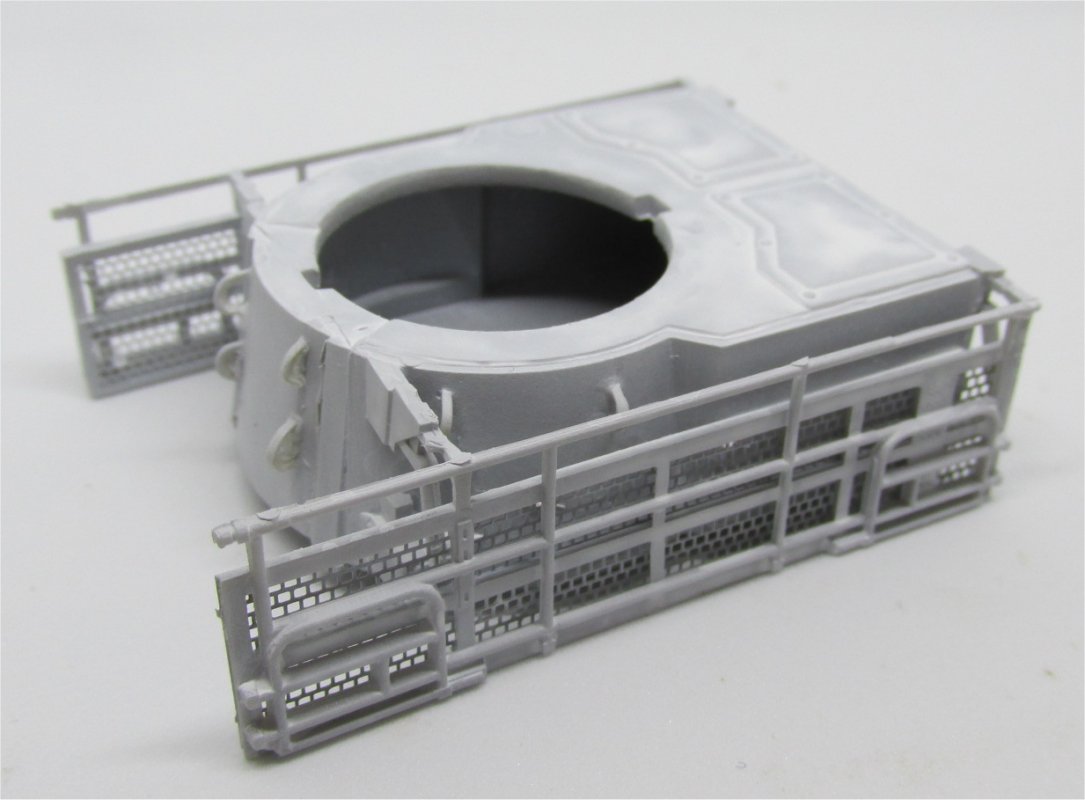
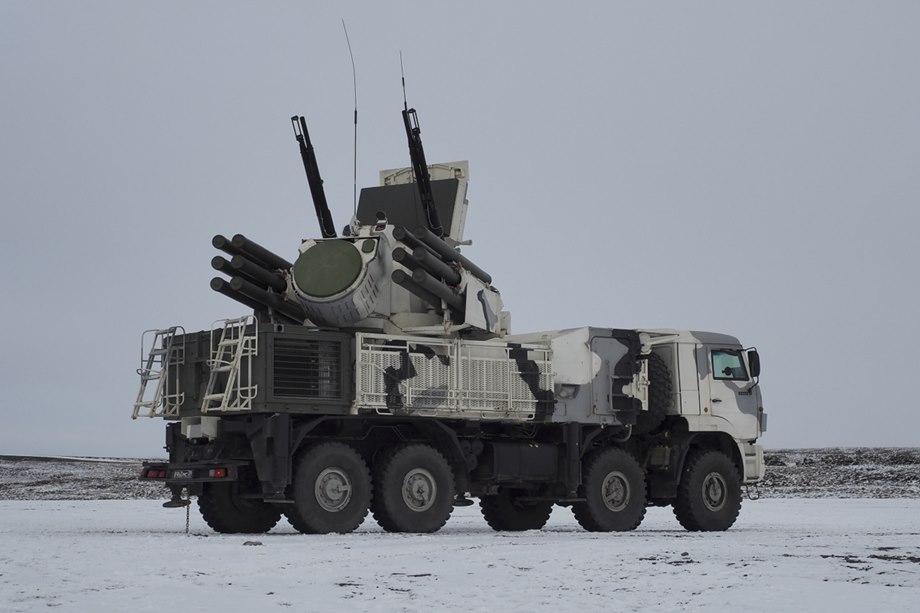
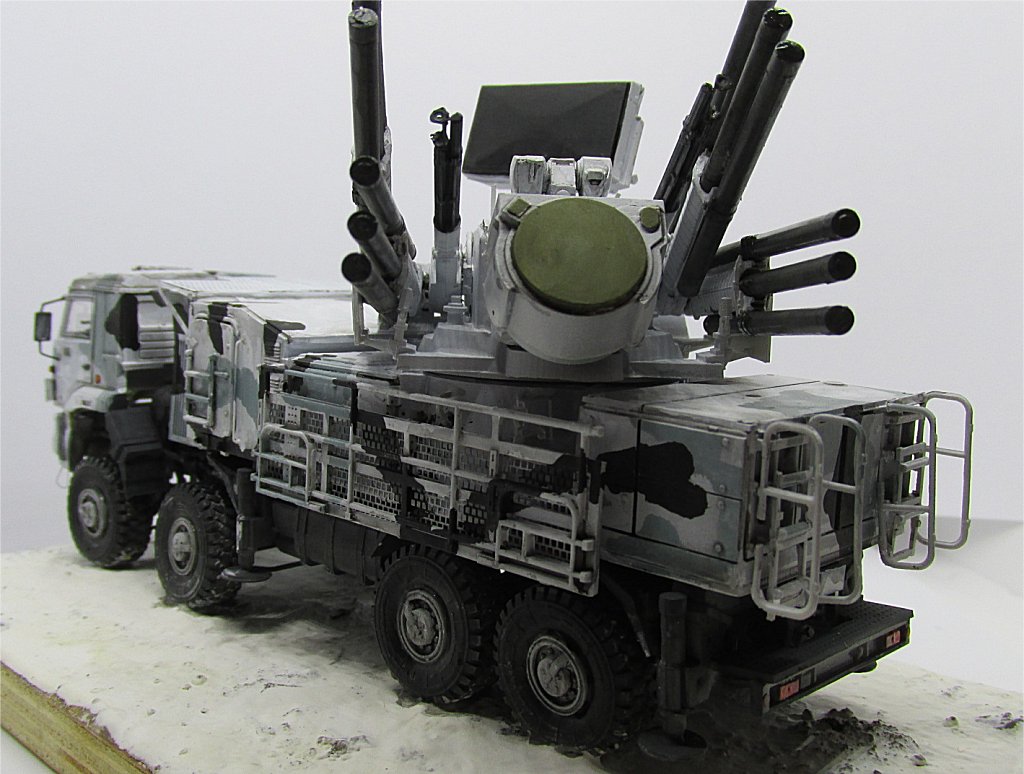
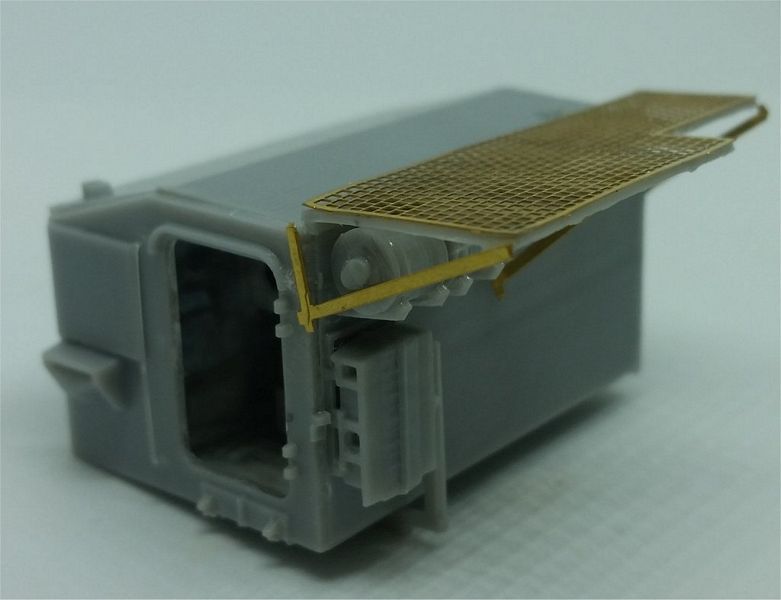
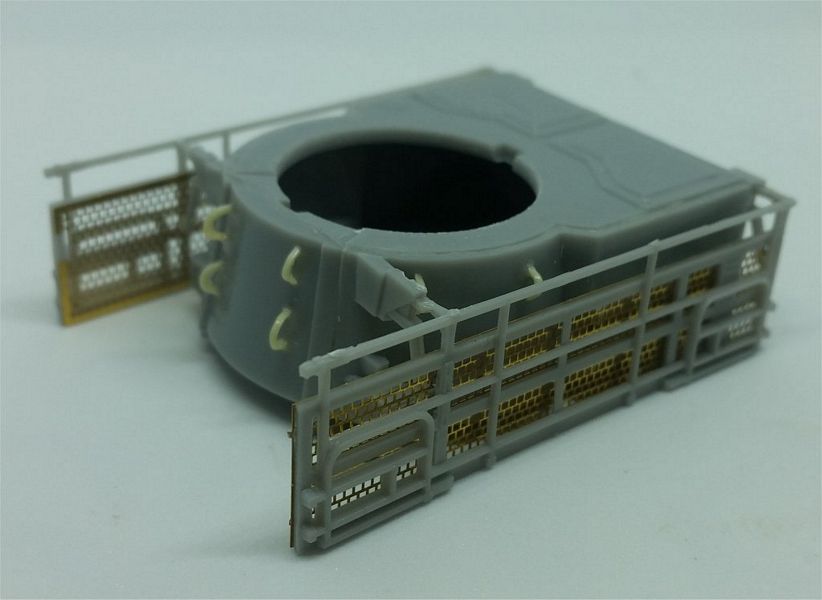
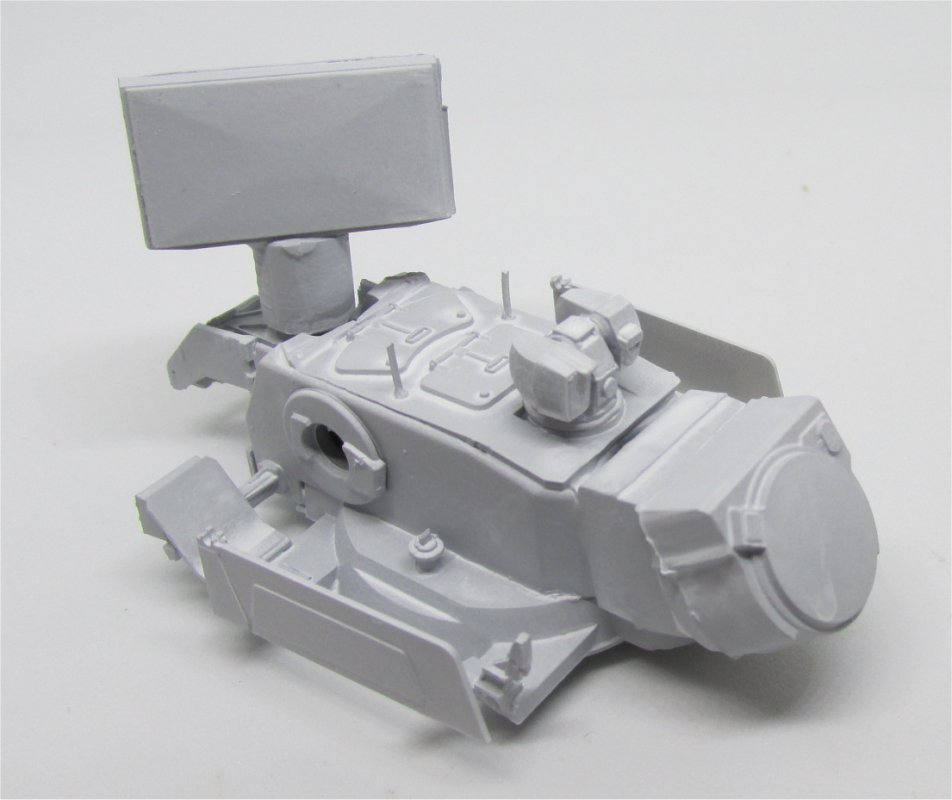
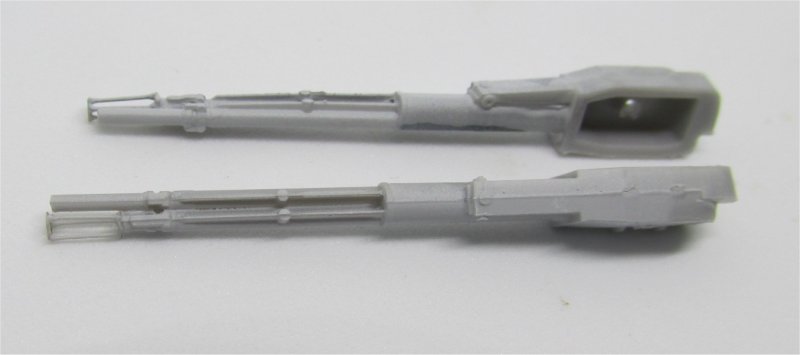
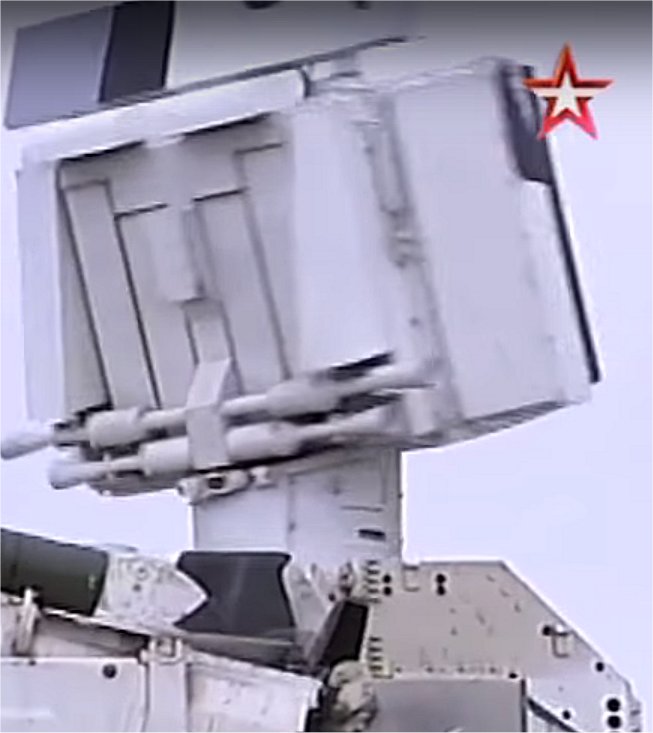
The radar and weapons station (steps 30-47) No big issues here during the first steps. In step 30, again you can choose between 2 different PE patterns (13a or b and 14a or b). On pieces F11, F12 and F13 the small holes are supposed to be the insertion points of 12 handles you should scratch, although this step is not documented anywhere in the instructions. Telescopic ladders G29 in the posterior compartment are almost always seen in closed position. The large read radar is reproduced in operational position, with the posterior travel support reclined: this version can be seen in some vehicles, while in others the radar looks slightly different, with a prominent rear frame and a superior lid opened. I can not say what these differences are based on. Also, the lids covering the sensors on sub-assembly 36 are closed, not typical of active operation. Assembling the two dual 30-mm guns is a real nightmare, which would have you find 6 rigid 4.6mm-long 0.25mm-wide pieces of wire, have them pass through 9 small holes per side in 3 extremely thin PE pieces per side and glue everything together on pieces G23. This is not something for the normal modeller, and it would be nice to supply some sort of a simpler alternative. Assembling the two six-tube groups on the turret is not hard, provided that you understand correctly the necessary steps, but the final effect is very convincing. |
||
 |
|
|
 |
 |
|
 |
 |
|
 |
 |
|
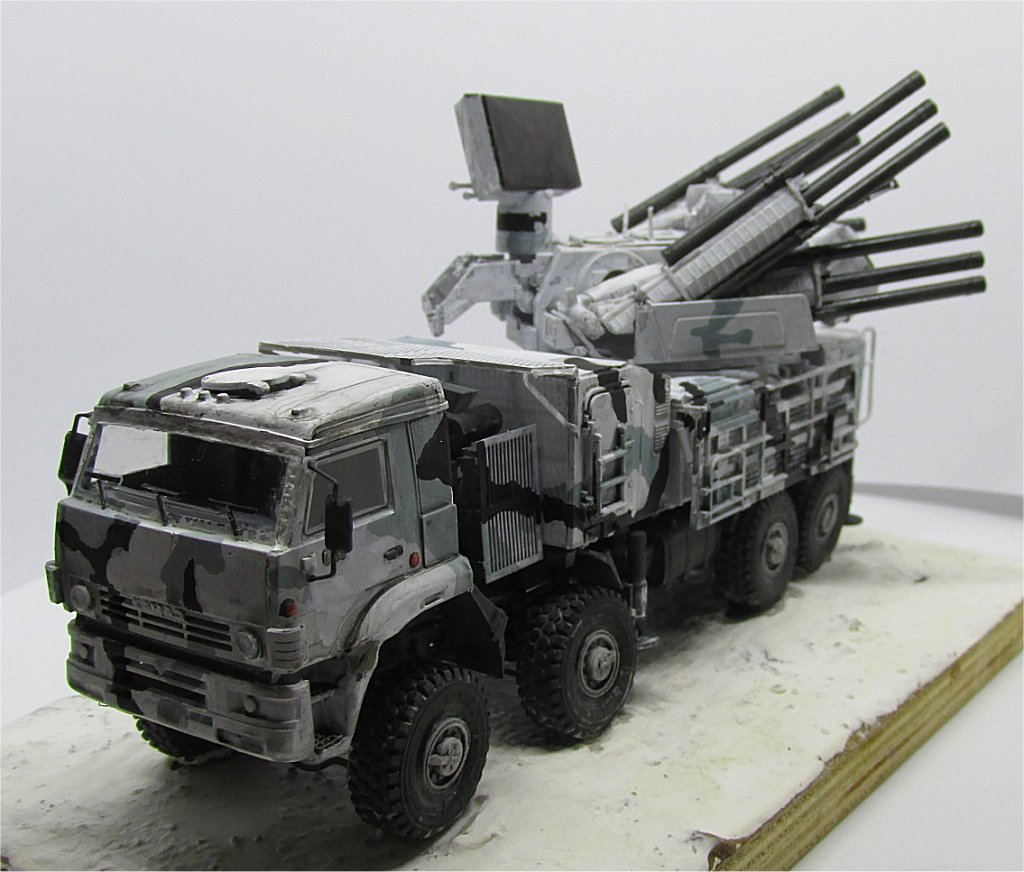
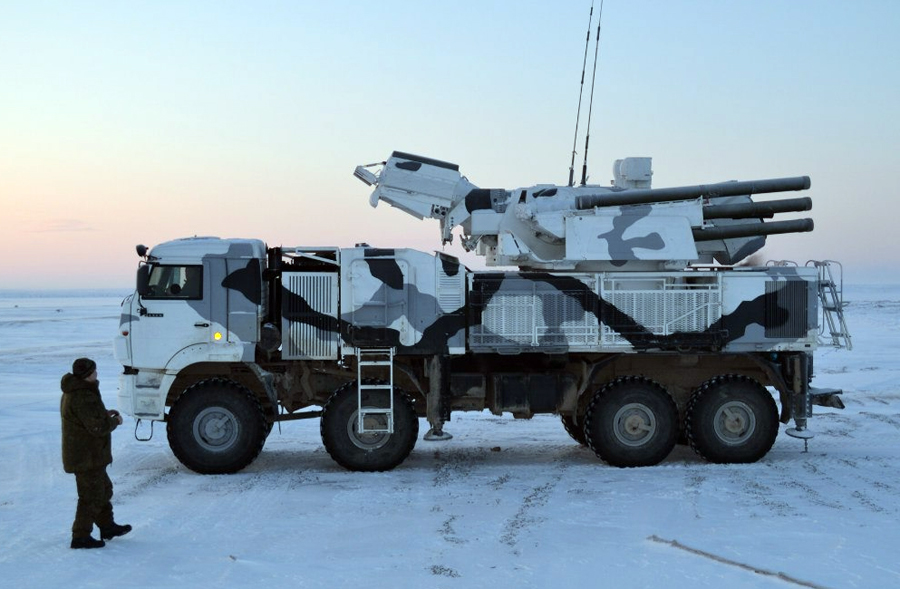
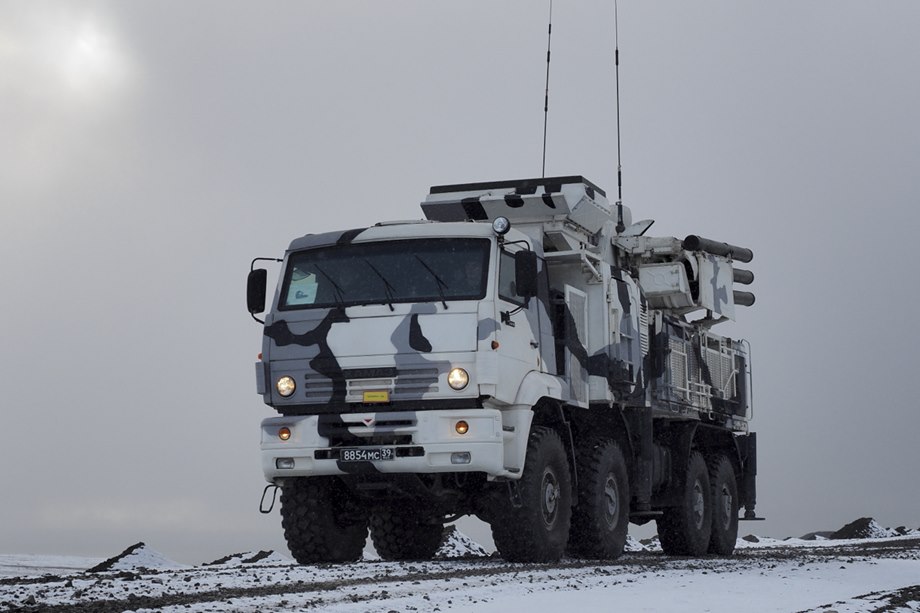
Finishing the model (steps 48-49), painting and decals Putting everything together will not be painless, because something will have to be adjusted, some holes enlarged and some edges trimmed, and you will probably end up with the final impression of something not sitting quite right (for example, I feel that the cab sits a bit too high on the front wheels). Anyway, the final model is certainly impressive. Painting the Pantsir may be fun, because there is a wide variety of schemes effectively applied, from plain green or plain sand to green/sand, green/white, grey/black/white. I chose the attractive Arctic scheme of white/gray/black (or dark grey). There is a generic decal sheet in the kit with white numbers and stars. Photos of real vehicles do not show any markings, although many vehicles have license plates, which unfortunately are not supplied. | ||
 |
|
|
 |
|
|
 |
|
|
 |
|
|
 |
|
|
 |
|
|
Conclusions Not a model for beginners, but one for the serious modeller interested in modern vehicles and determined to build a realistic model of one of the emerging russian war machines. This kit will make you use all the dirty tricks you have learnt in decades of modelling, but the final result is a very accurate representation of the real object. |
||
| Review sample provided by Armory |
||
Back to Armory Kit List |
Back to Construction Review Page |
Article Last Updated: 20 January 2018 |
Back to Home Page |