|
Armory
|
M41 A1/A2 Walker Bulldog |
||||
| Kit #: AR72412 | Preview by F. Giovagnorio | ||||
|
Armory
|
M41 A1/A2 Walker Bulldog |
||||
| Kit #: AR72412 | Preview by F. Giovagnorio | ||||
 |
| In building this kit, I followed my usual rules: never place any PE part until every plastic piece is safely glued (or the PE parts will fall and disappear forever when the model is manipulated, and there are absolutely no spares - why. oh why, no manufacturer ever provides some spares of the tiniest PE parts ?); never glue the fenders until the wheels and tracks are assembled. The instructions ask you to do the exact opposite of both rules and I suggest you not to obey. Another piece of advice, which would seem superfluous yet it is not - check the number of every single piece, because many pieces look identical but they are not.
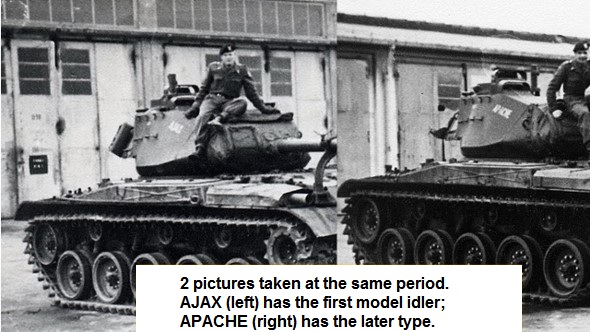
Lower hull, wheels and tracks Building the lower hull takes the first 3 steps, then you come back to it in steps 10-12. It is more logical to go immediately from step 3 to step 10 and finish the lower hull before moving on. No definite issues here - follow the instructions closely, check every single piece and you will be fine. The wheels, idlers, sprockets and return rollers are the less definite part of the kit: there is quite a bit of flash which needs to be trimmed, and when placing the tracks around the sprockets you will notice that the teeth do not fit the corresponding holes on the track links, so trimming the teeth is the only possible solution. Unfortunately, the idlers lack the characteristic eight double holes on both the inner and outer wheels, which is not surprising given the "limited run" look of the wheels. Drilling them was out of question, so I left the idlers as they are. Probably Armory could have solved the problem by casting them in resin, or with a "double material" approach (plastic hubs and PE, foldable rims).
I did not encounter serious difficulties with the L&L tracks, considering that the sections made from individual links do not look identical to the long sections of track provided, which is something easy to find in many kits (earlier ACE tanks come to mind).
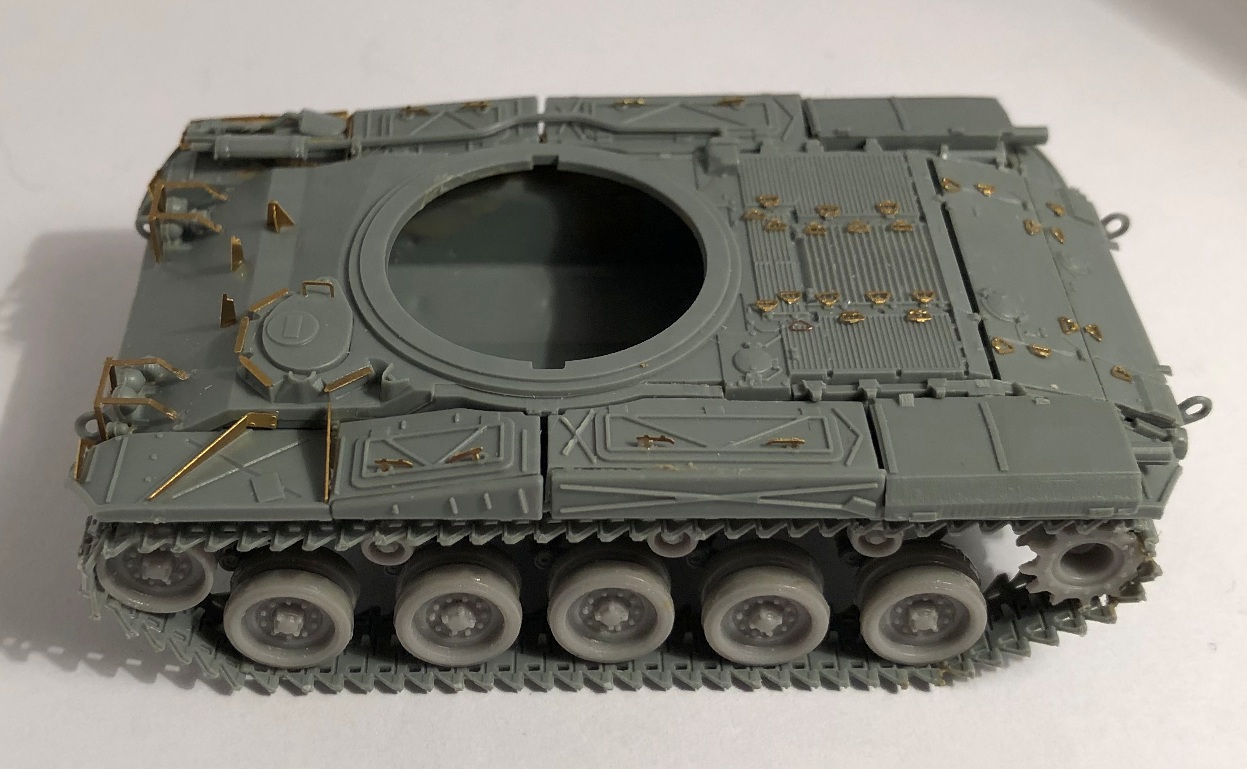
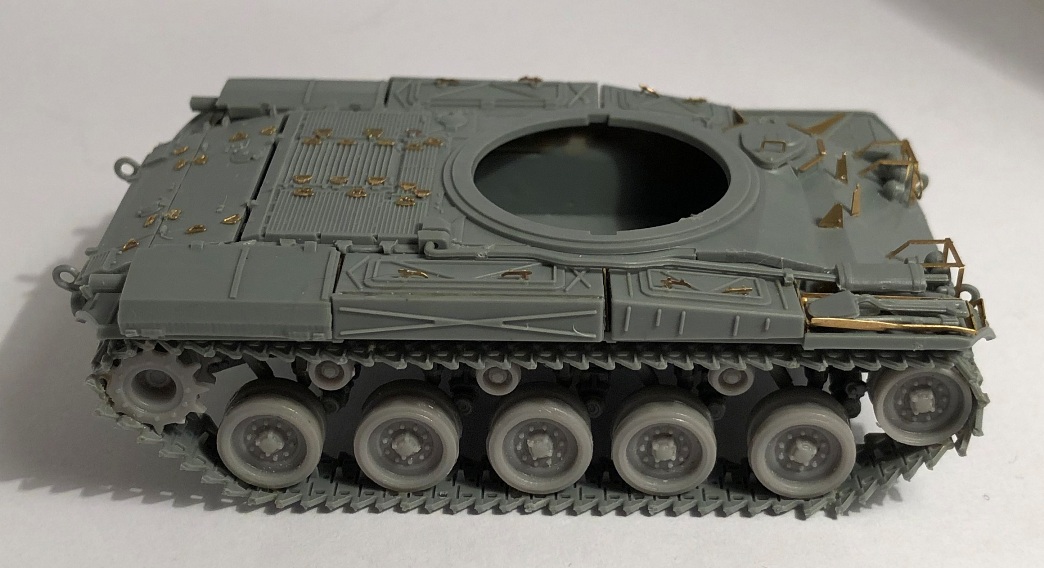
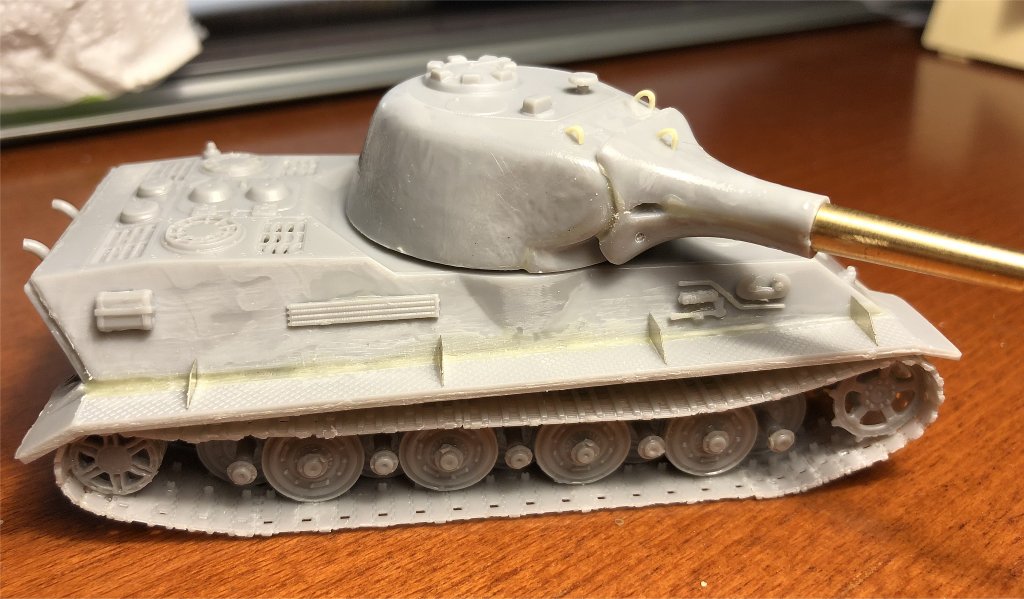
Upper hull and fenders Building the upper hull takes the most of the building (steps 4-9). Piece 14, which is part of the engine deck to be mounted in step 4, should have 2 vertical panel lines, which curiously are visible in the instructions but are not there: you can scribe them with a pin, using the 2 vertical lines in piece 21 as a guide (piece 21 is posterior, so the lines in piece 14 are in fact the upper continuation of those on piece 21). In doubt, check the following image:
There are many PE parts to place on the upper hull, so make a deal with the carpet monster beforehand because every piece flipping away will be lost forever and, as I said, there are no spares. The trickiest ones are the nearly 30 handles to glue on the engine deck of 3 different types (pieces 9, 31 and 33), the visors covers near the driver's hatch (4 copies of piece 18) and the locks of the boxes on the fenders (8 copies of piece 3). PE piece no. 1 has to be plied and shaped like a box because it will contain the tools. Bending it the way it should be is not easy without a dedicated PE bending tool. The M41 had a towing cable on the left side but it is not provided nor it is suggested to scratchbuild it; however, although there is nothing about it in the instructions, there are two non-mentioned pieces (no. 53) which look exactly like the eyelets of the towing cable, so I assume it was simply forgotten when drawing the instructions.
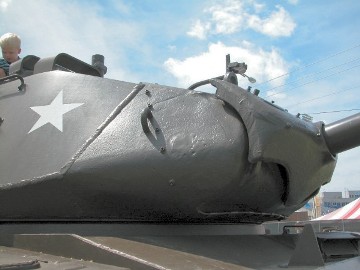
Turret The turret takes the last steps of the building (steps 13-17). The turret of the M41 was a combination of both welded and cast construction, which left a very visible oblique line separating the casted and welded parts of the turret. This characteristic sign of the M41 is strangely missing amd must be added with some thin stretched sprue.
Many M41s had a mantlet canvas cover, but it is not provided here. It can be scratchbuilt if so desired, but it would have been nice to have a choice between both mantlets - with cover and not. The open/close mechanism of the commander's hatch is faithfully reproduced and very nice, to the point that I believe it would be possible to have it working. However, the two horizontal rods securing the mechanism are not provided and must be added - an easy task.
A very appreciated touch is the choice between placing the two jerry cans which were carried on the rear part of the turret (with the possibility to have them look better with 2 PE parts for each, the handles and the cap) or using a foldable PE part to reproduce just the support for the can. In that case, the belt must be added with a paper strip. The Browning MG is supplied as a resin mini-kit with PE parts. Not a solution I liked very much, because the MG looks too thin and the parts made in PE look too flat.
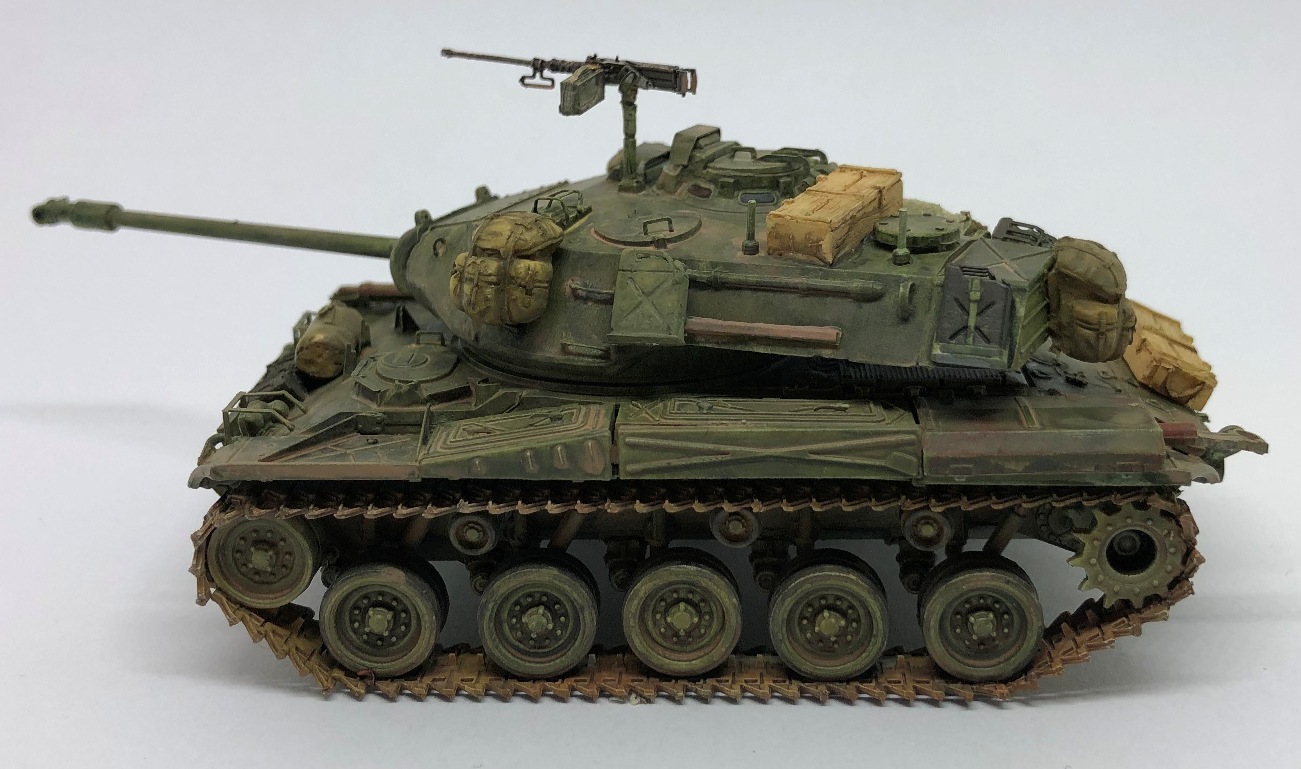
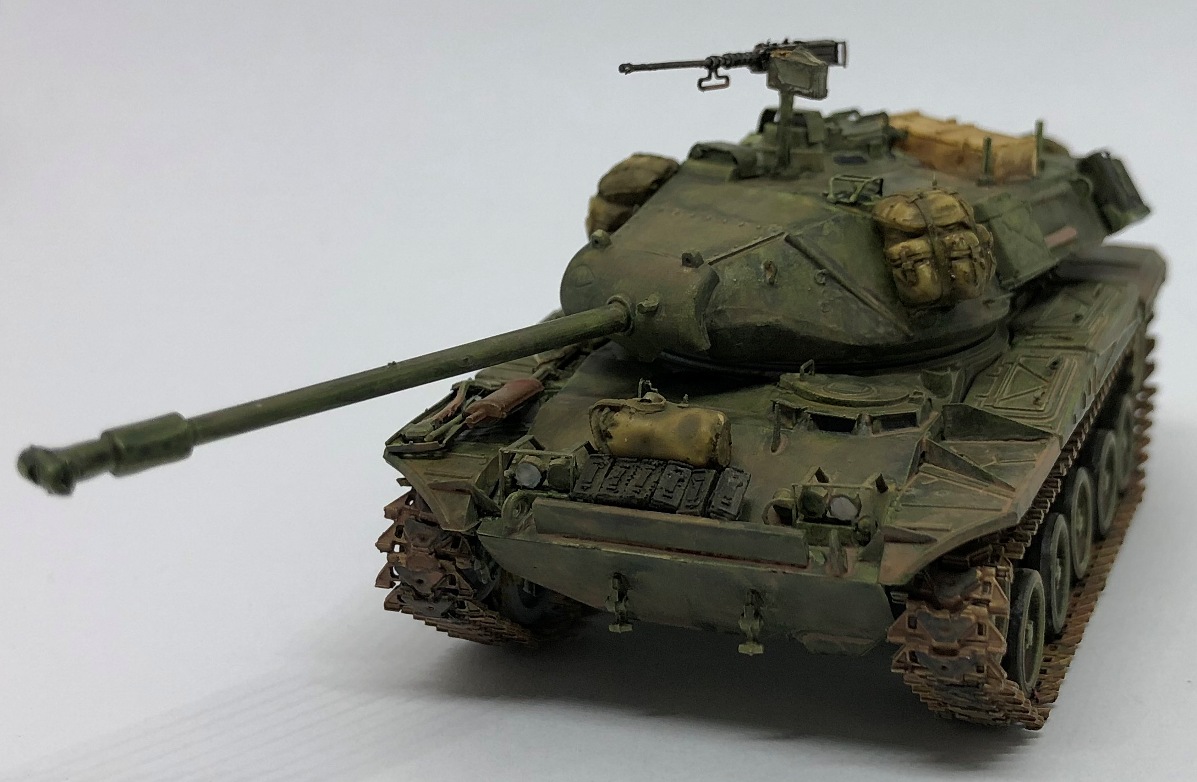
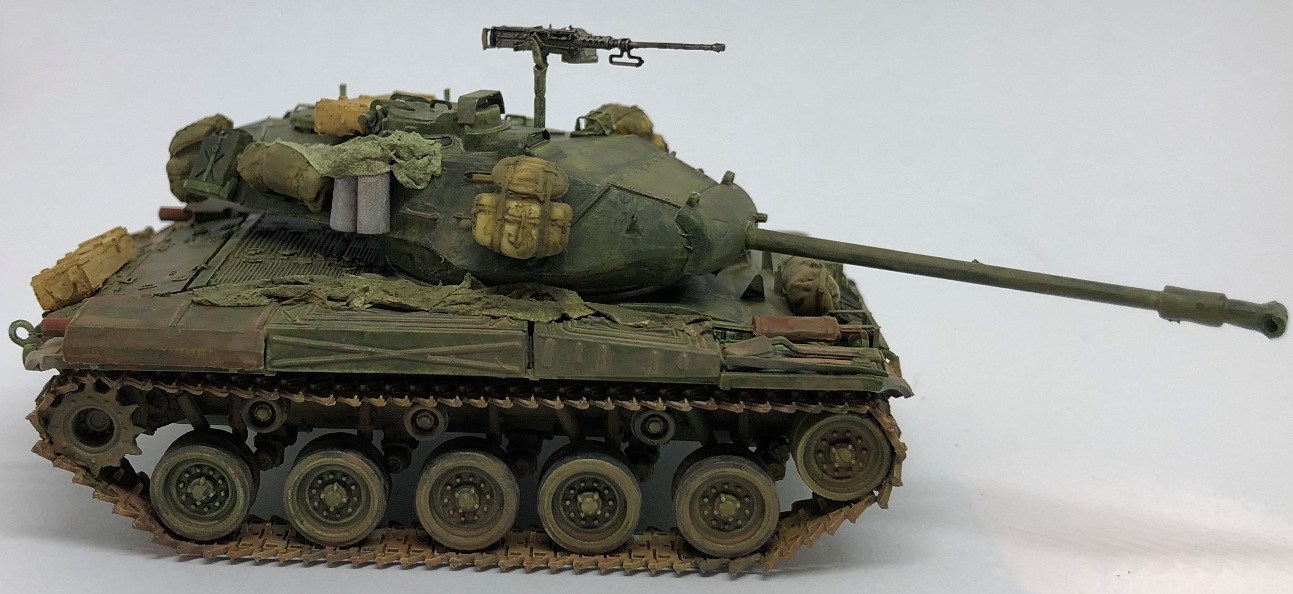
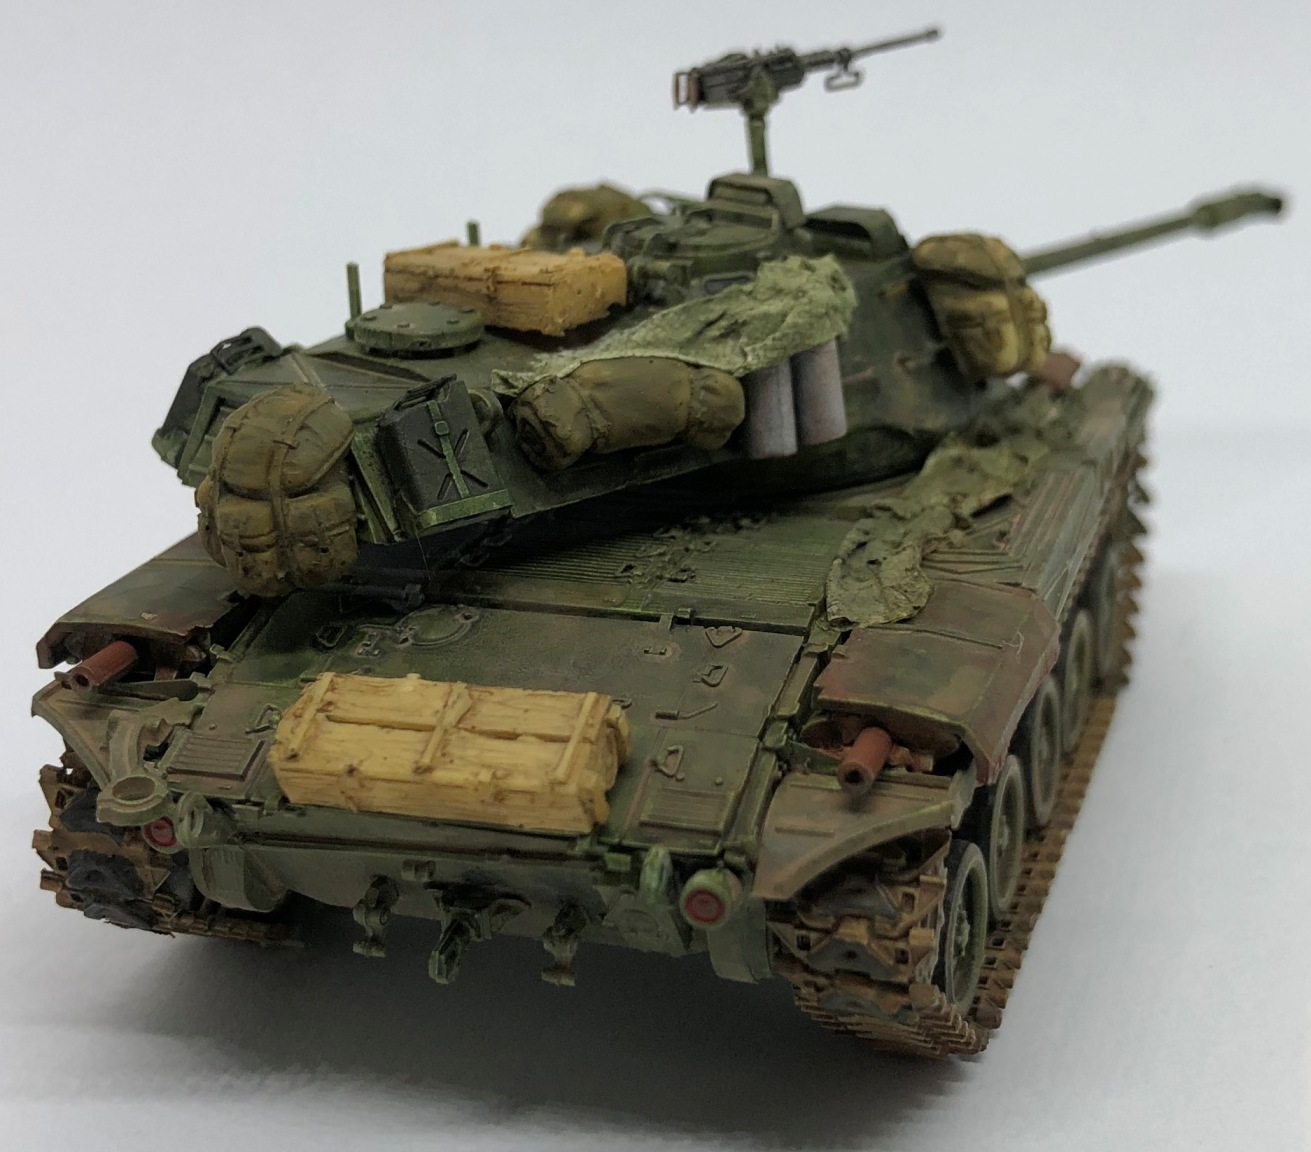
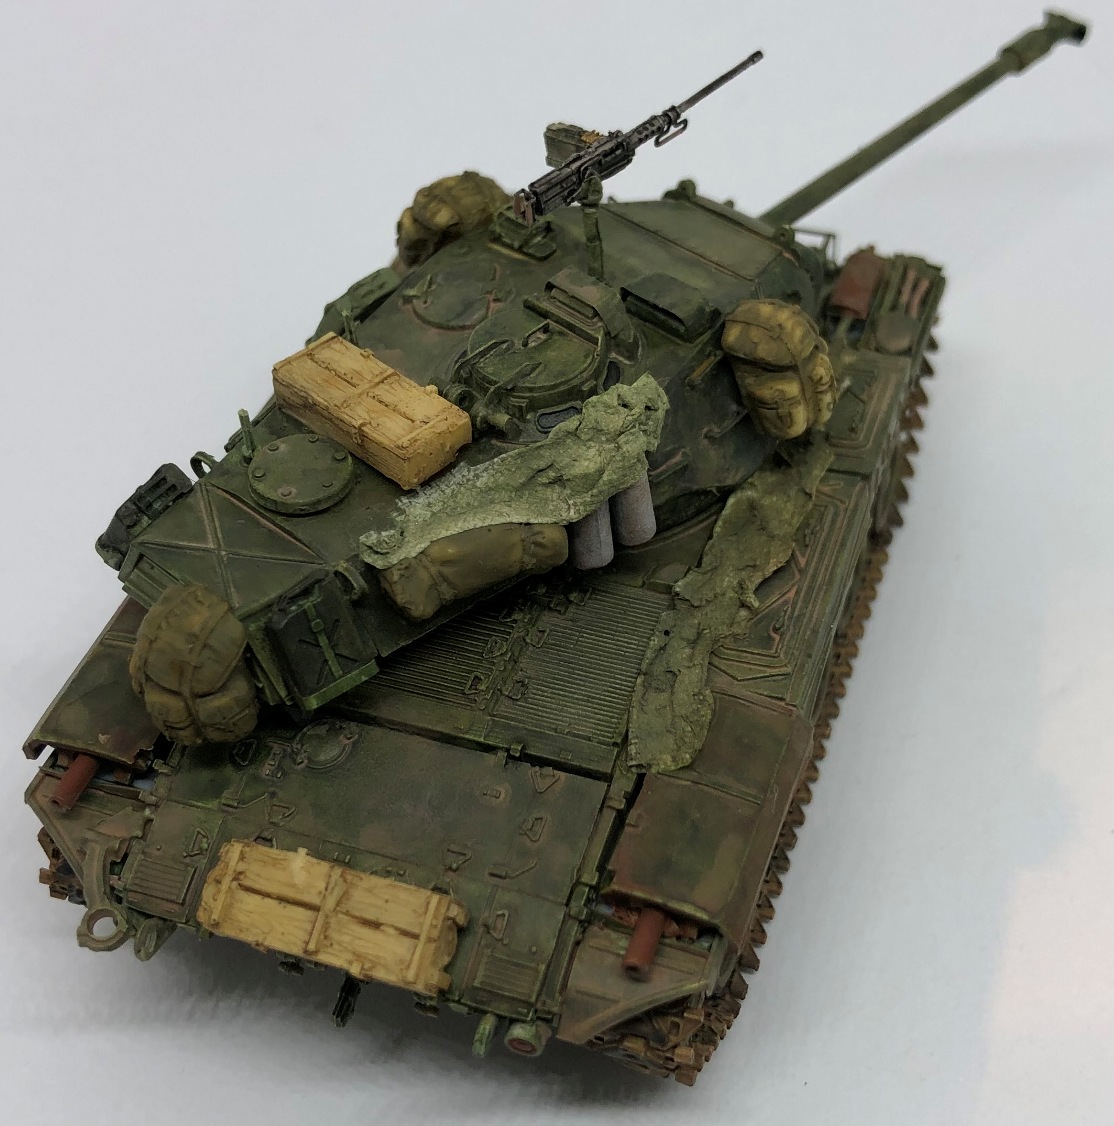
M41 Walker Bulldog in Vietnam, 1968 The M41 lived its better moments during the Vietnam War, because it was the main battle tank of the Army of the Republic of Vietnam (ARVN) and, as such, it was fundamental in some critical campaigns, such as Operation Lam Son 719 in Laos, where the M41s knocked out 22 NVA tanks, six T-54s and sixteen PT-76s. Later, M41s fought in every battle of the war until the end. ARVN M41s were of the A3 version, so this kit (which is labeled as A1/A2) would not be suitable to make an ARVN tank: however, given the fact that A3s where exteriorly undistinguishable from A2s, I decided to go on with the project. Decals are provided for an U.S. Army M41 in Vietnam from the Headquarters of the 3rd Cavalry Regiment: technically speaking, there were no U.S. Army M41s in Vietnam, while the 3rd Cavalry Regiment was stationed in Europe during the 60s. There is possibly a mistake with the 3d Armored Cavalry Squadron, which was an ARVN unit so it would not bear any U.S. Army insignia. In doubt, I would not use that scheme. The absence of an ARVN scheme is not a serious issue, as most M41s did not show any marking. ARVN vehicles were painted in the typical overall Olive Drab used by the U.S. Army during the 60s, very faded and covered with dirt and the ubiquitous reddish dust typical of Vietnam. Much external stowage was carried, particularly ammo boxes for the .50 MG.
| ||
Conclusions Not a kit for beginners, but it is well designed with many strong points and a single weak point which unfortutanely can not be amended by scratchbuilding, the idler wheels missing the holes on the rim. The final result is a very nice model of one of the most important tanks of the Cold War era. |
||
| Review sample provided by Armory |
||
Back to Armory Kit List |
Back to Construction Review Page |
Article Last Updated: 27 October 2019 |
Back to Home Page |


