|
Armory
|
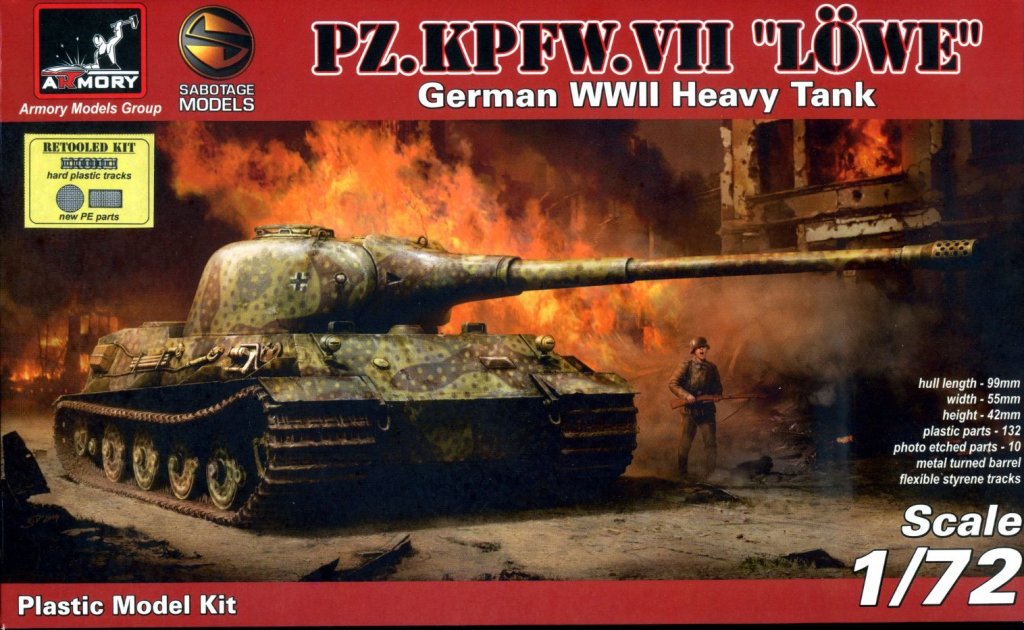
Pz.Kpfw.VII "Löwe" |
|||
| Kit #: AR72201 | Review by F. Giovagnorio | |||
|
Armory
|
Pz.Kpfw.VII "Löwe" |
|||
| Kit #: AR72201 | Review by F. Giovagnorio | |||
|
||||||||||||
|
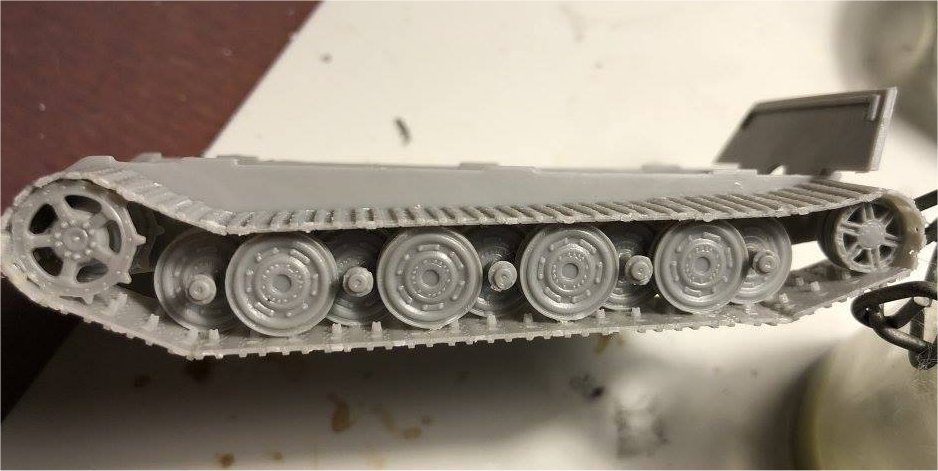
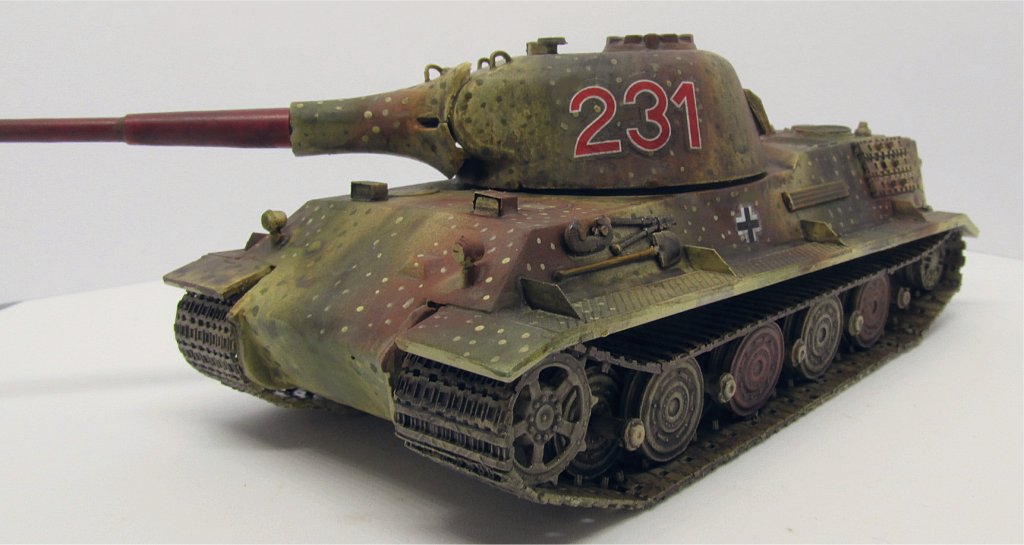
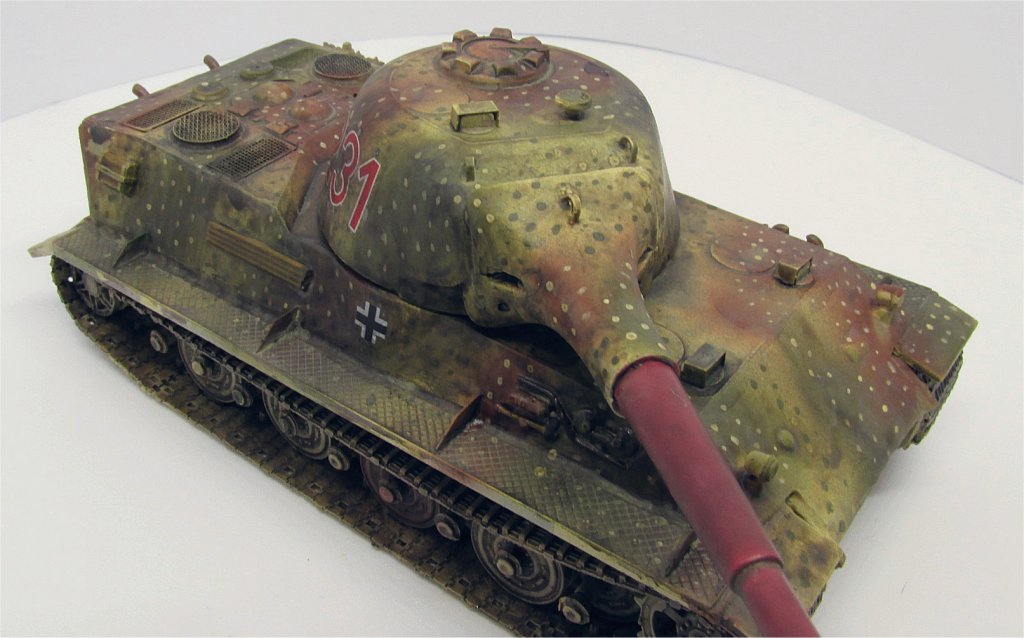
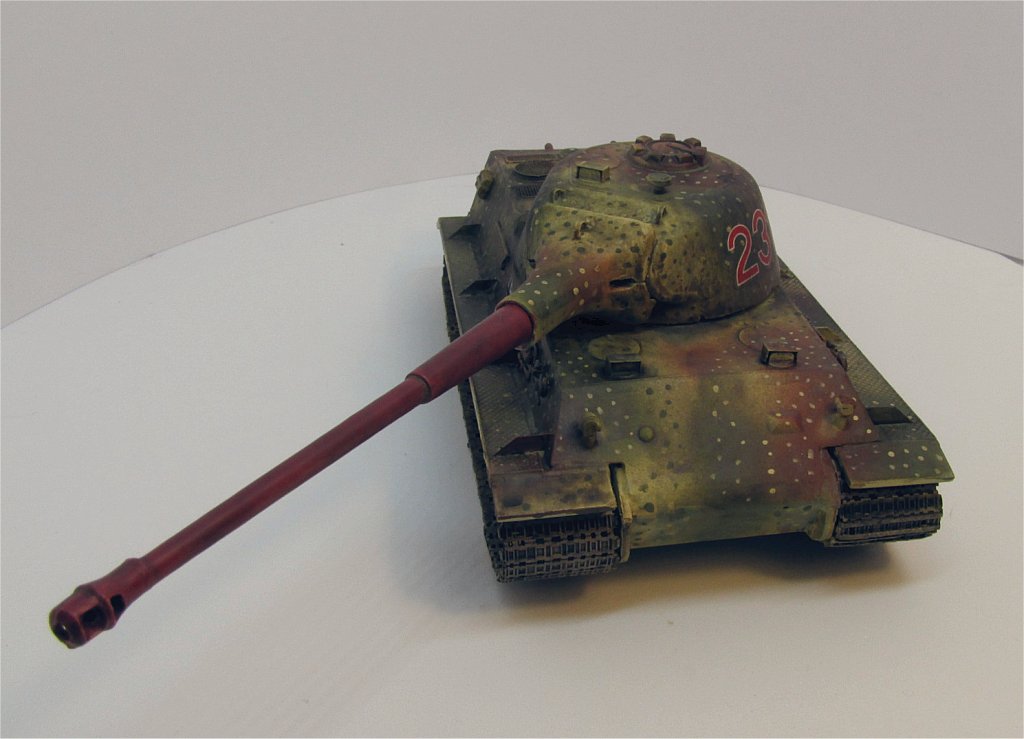
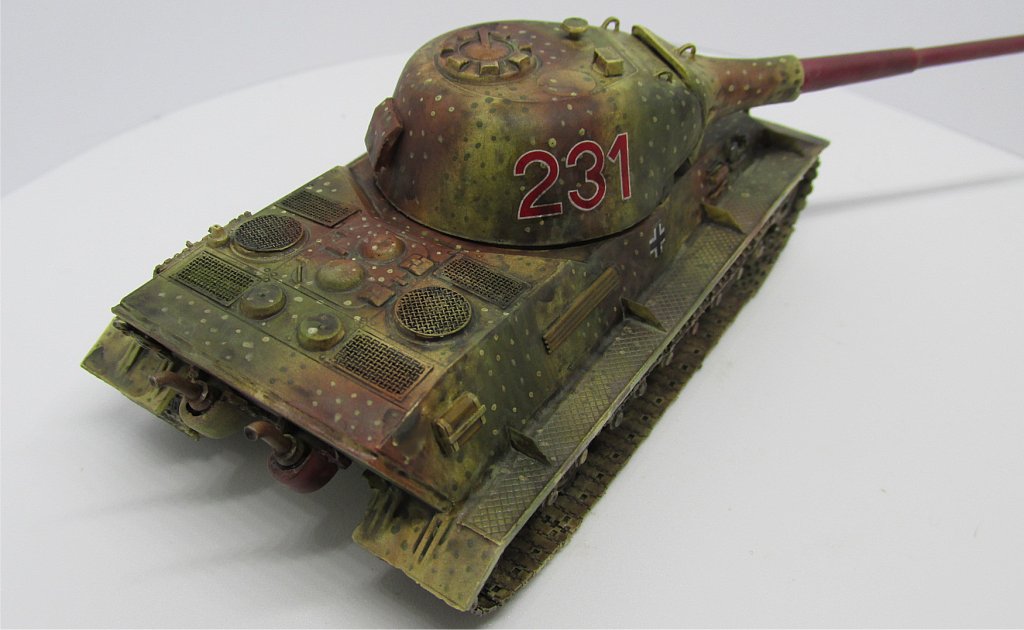
Building this kit was rather easy, since it reminded me of some old-style kits such as Esci or Hasegawa without, luckily, sharing the drawbacks that those manufacturers had. Only 7 steps are to be followed for the complete build: while some are rather straightforward, such as step 4 and 5, others will need some more time and attention. In step 1, there is no way to avoid a rather large gap in the nose, where the top half (piece 24) meets the lower half (piece 35) anteriorly, but filling it proved rather easy. The hubs for the roadwheels (pieces 33) are secured to the sprue in a way which makes it impossible to cut them away without either ruining their shape or leaving a small piece of plastic on the hub, as reported by Rob in his review of the VK 72.01 (K) (both kits share the same running gear). I did my best and I believe the hubs do not look as bad, provided that you do not look at them very closely. Apart from that, assembling the roadwheels is not difficult. The idler wheel is a strange 3-piece affair, which I advice to assemble while glueing track sections around it, so that you can use the track teeth to guess the gap you must leave between the 3 thirds of the idler. Track holes do not fit the sprocket teeth, so I ended cutting them away, which is something I always do when I have no other choice. I did not encounter serious difficulties with the L&L tracks, considering that the sections made from individual links do not look identical to the long sections of track provided, which is something easy to find in many kits (earlier ACE tanks come to mind).
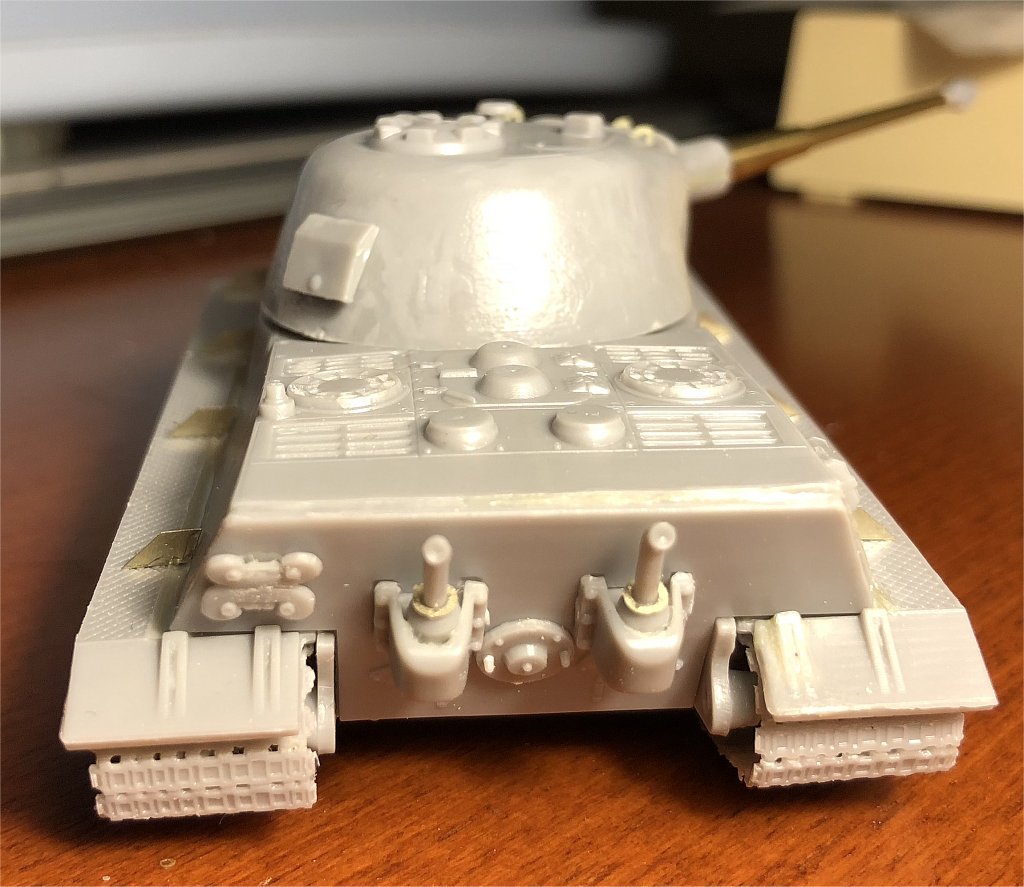
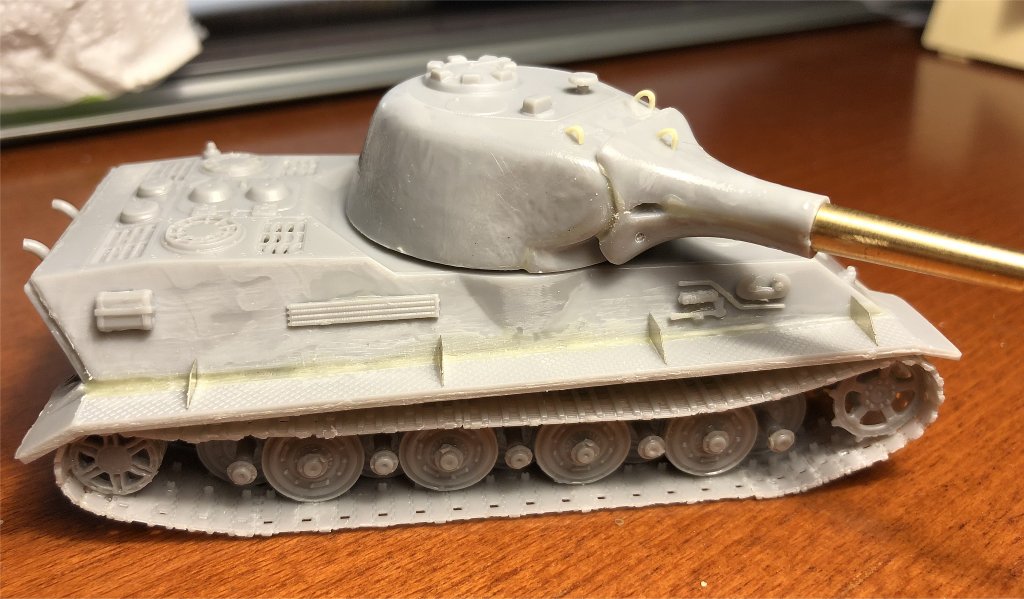
Steps 4 and 5 are straighforward (I chose the WW2 variant and not the WoT one); I decided not to mount the jack because it looks ridicolously thin for such a huge beast. Step 6 (turret) requires a good amount of liquid glue to put everything together, closing gaps and creating the rough fusion effect on the turret surface. The metal barrel is a welcome bonus, but it looks much too long in my opinion. One point of attention: you must scratch the 3 lifting rings, although it is not specified in the instructions (but 3 couples of very tiny circles can be seen, acting as guides for positioning of the rings). The construction is finished in step 7, where you add the PE grilles (nicely done and correctly going into place), the tools and eventually scratchbuild the towing cables: I decided not to do so, because no towing hooks are provided hence the cables would be useless; after all, no one could say whether the tank was going to be supplied with them or not. I chose the "dot ambush pattern" which I think is suggestive for a late war German tank. The tiny decal sheet contains some small crosses, so I used some spare decals for the numbering. | ||
Conclusions Frankly, I was expecting more difficulties in building this kit, which proved rather well designed instead. Make sure you get the "revised" version and not the original one, which, apart from some flaws, had no PE set. |
||
| Review sample provided by Armory |
||
Back to Armory Kit List |
Back to Construction Review Page |
Article Last Updated: 27 March 2018 |
Back to Home Page |