|
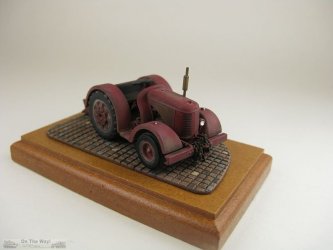
My review will deal with the David Brown VIG1 tractor contained in this set. You can see reviews of other items in this set:
the Bedford truck (MWC or MWD) here and the Standard Tilly here.
From [11]:
"1941 -1944 VlG1/100 and VIG1/462 Air Ministry Tractors
Fitted with a 37hp (27.6kW) gasoline unit and low-speed gearbox some of these tractors (painted in RAF blue) had a
conventional dry-plate clutch but others incorporated a fluid-drive torque converter. Designed for towing heavy aircraft, bomb carriers, etc. these tractors were fitted with a heavy-duty
winch and land anchor. A considerable number of these machines found their way into civilian hands after the war, and gave further useful service on recovery and haulage work. Some
were fitted with a front-mounted belt pulley and used as threshing tractors. Number manufactured: 2,400."
The kit
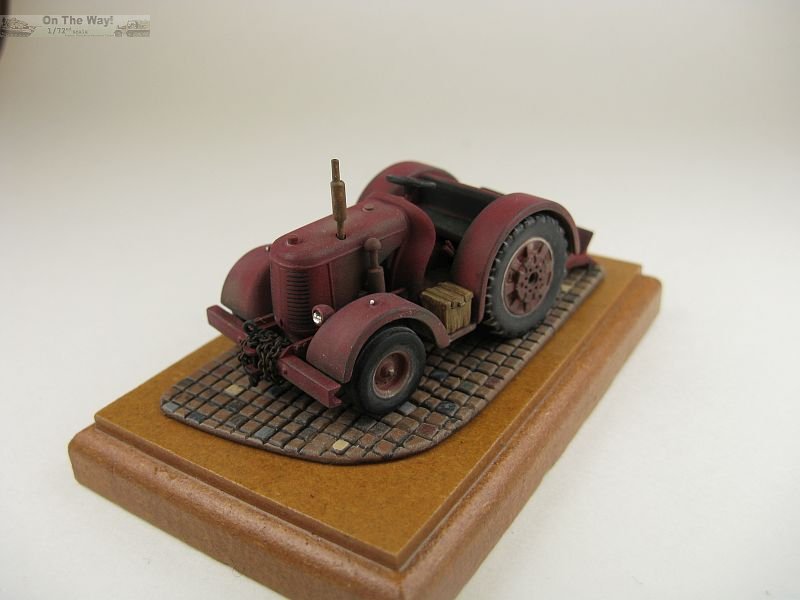
The VIG1 represents a typical tractor used as an aircraft tug on many RAF airfields. From my research the pulley mounted machines mentioned above were designated VTK1, also known as Thresherman.
The tractor consists of 19 light blue-grey styrene-like plastic parts. They are well molded with very little flash. Detail is very good. There are a few ejector pin marks that need to be
dealt with, especially on the underside of the body/chassis. I found the plastic soft, easily damaged and reacts VERY well, almost too well, to liquid glue.
The way the kit is designed makes construction as sub-assemblies, to facilitate painting, easy: hood, chassis, seat, body, wheels/tires & spade. Test fitting of the sub-assemblies
showed they would go together quite well. I found the slits in the grille a bit too shallow for my liking.
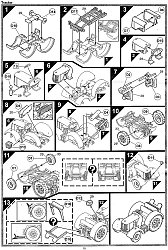
Instructions take up just a single page in the instructions. Steps are well thought out and easy to follow. I only used the decal for the instrument panel. It was well printed and opaque,
not allowing the underlying paint to show through or darken the images. Microsol snugged the decal down without any silvering. I expect that the other images will be just a good as
the instrument panel was.
Construction notes
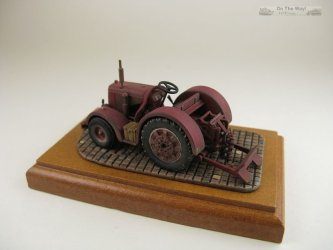
- Construction is very straight forward. Fit is excellent with most parts needing just a smidgen of sandpaper work to get a nice join. As mentioned above, detail is good, but like most kits
some extra work is needed for those wishing to enhance the model.
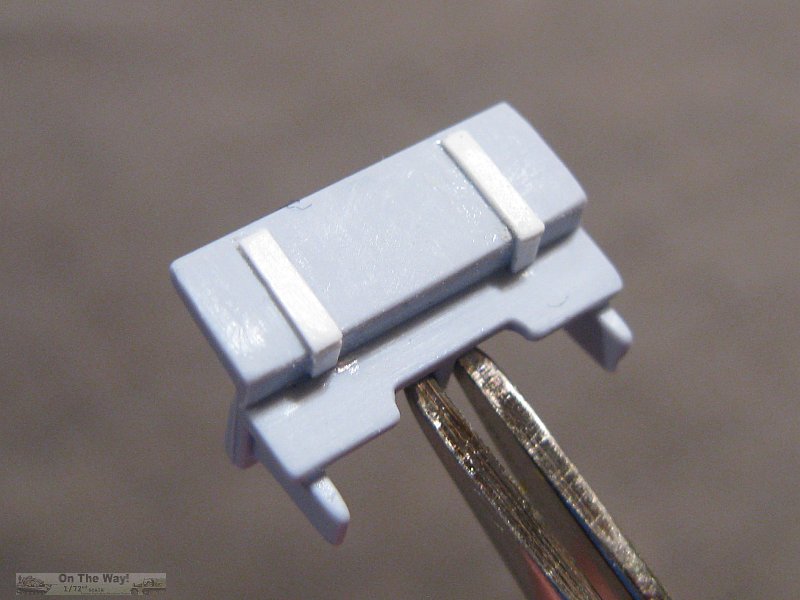
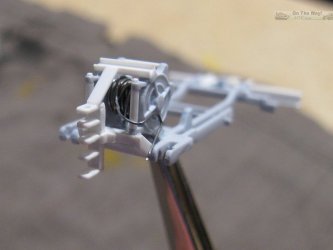
- On the real tractor the steering linkage has a connecting rod that runs from the transmission tunnel, through a slot in the firewall, to the front axle. Airfix provides the slot but
nothing more. This is an obvious feature and in my opinion should be added.
I made my own connecting rod using a piece of thin plastic rod. I scratchbuilt the linkage located on the side of the transmission cover. As there's no easy way to
attach the rod to the tie rod at the front so I just drilled a small hole to the top of the frame to accept a small post for the rod to attach to. In the process of working out how
everything will fit together I discovered that the air filter cleaner interferes with the rod's routing, so I cut off the bulge on the bottom of the cleaner to allow the connecting
to pass under the air cleaner unhindered. As far as I can tell this bulge is not a normal feature on a real VIG1.
- I added a missing support that runs between the rear fenders just behind the seat. This was fashioned from plastic angle rod.
- Braces were added to the back side of the seat. This requires the removal of a molded-on locating lug.
- The winch drum is devoid of any sort of towing rope. I wound a length of thin lead wire around the drum to replicate wire cable.
A towing eye was glued to the end of the lead wire using a drop of "Bondic" UV curing resin.
- The support running across the top of the winch was cut off and replaced with some u-channel
plastic.
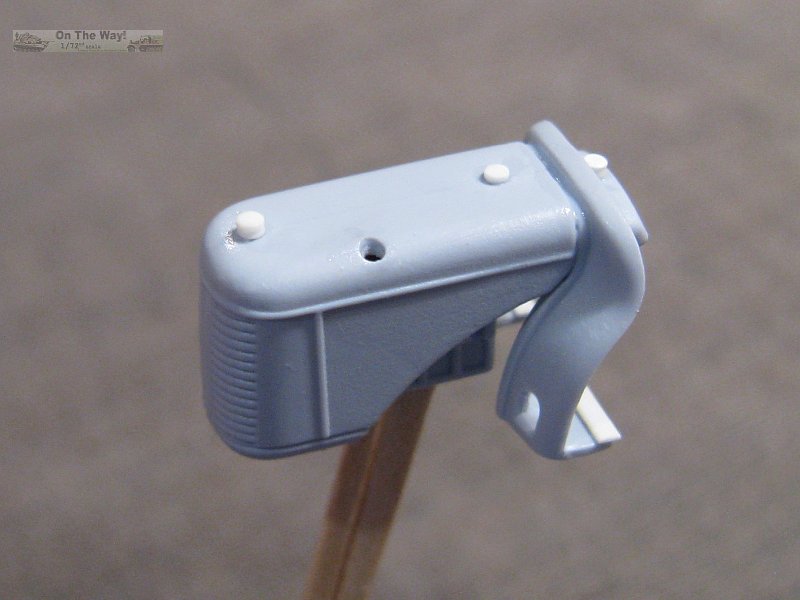
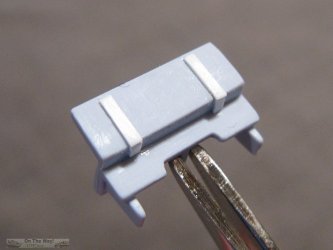
- The battery box (D13) is best left off to ease painting. I fastened a locating block on the fender to help center the box when it is glued into place later.
- Part D4 (air cylinder?) has a hollow bottom. I'm not even positive that this cylinder was ever found on a wartime tractor. In any case I tossed this part and fashioned a new brace.
- I sliced off the gas cap, oil filler cap and radiator cap and made new ones with punched discs.
- There was a minute gap between the hood and body sub-assemblies. I just covered it with plastic strip.
- The gear shift is a shapeless blob. A new one was made from guitar wire with a blob of "Bondic" for the knob. A set of pedal were added to the right floorboard.
- There are twin hand brakes located near the rear fenders. I scratch built these.
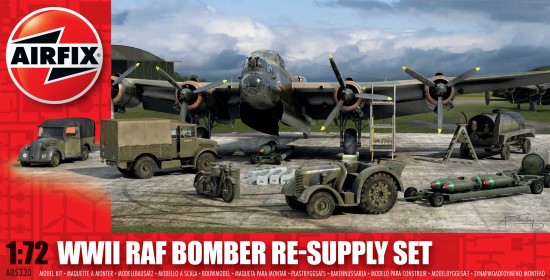
- The headlight housing was drilled out. A lens was fashioned from a small disk punched from a sequin, then a small drop of "Bondic" was added to the disk and cured with the UV light. This
worked so well it is going to now be my "go to" method for making head light lenses.
- I found a spare steering wheel because mine arrived crushed.
Civilian modifications
There is no exhaust pipe or muffler provided so adding one is left up to the builder. I drilled a small hole in the top of the hood to accept a scratch built exhaust pipe & muffler.
The towing hook was cut off as it interfered with my plan to run a brace across the rear of the frame.
A new multi-level towing point was manufactured and placed behind the winch. A pair of stabilizing braces run from it to the new brace which spans the rear of the frame.
A front bumper and its braces, plus a towing point were added to the font.
Rear towing pin was fashioned from plastic rod, a front towing pin came from the spare parts box.
A length of fine chain (A002) from Hawk Graphics was wound around the front bumper.
Conclusion
This a very nice kit from Airfix. Detailed enough to be made straight from the box, it can be made into a really detailed example with just a bit more work. Highly recommended.
References
[1] motorstown.com
[2] yorkshireairmuseum.org
[3] tractordata.co.uk
[4] i-bidder.com
[5] i-bidder.com
[6] i-bidder.com
[7] youtube.com
[8] bidspotter.eu
[9] britmodeller.com
[10] youtube.com
[11] tractors.wikia.com
[10] youtube.com
[10] youtube.com
[14]
David Brown Tractors: Inside Story, Allen Walker, The Lester F. Larsen Tractor Test Museum, University of Nebraska, January 1978 (pdf file)
Review sample purchased by the author.


Airfix products are available at

|